Advanced RTE Configurations - Custom CSS
In ExpressionEngine 7.2, Rich Text Editor fields can now be configured using JSON and custom CSS or JS files. This allows site admins more control over how the field and its content look and what editors are allowed to do. It also allows quicker configuration of these fields over the drag and drop toolbar interface if you have a standard toolset you use on most of your sites.
Custom CSS
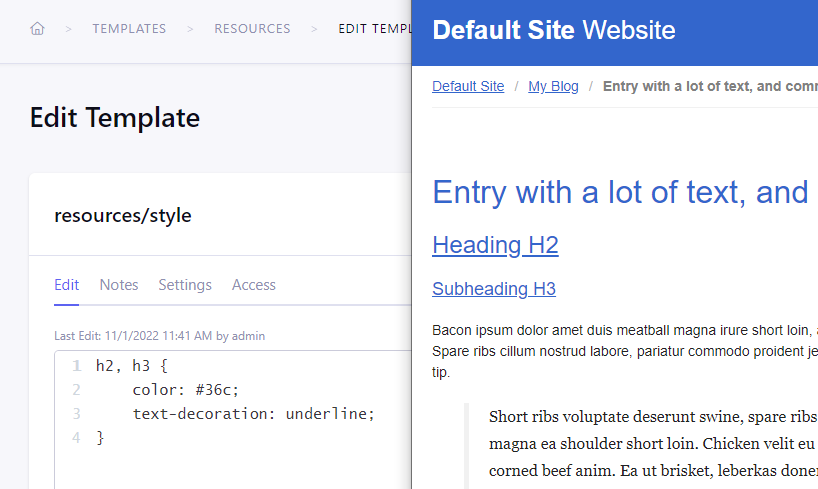
In our first example, we want to allow content editors to format text as headers but only use H2 and H3 tags. We also want the headers to look just like on the frontend of the site (in our example that will be blue text-color and underlined).
Create The CSS Template
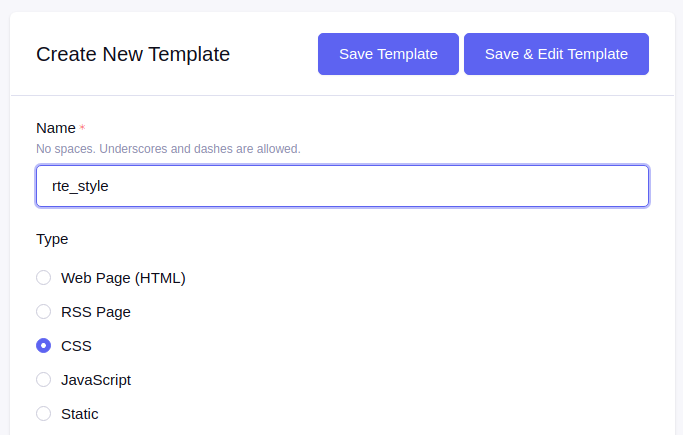
First, we will create a CSS template for the styles that we need. We do this by creating a new template in the Template Editor and selecting “CSS” as the type.
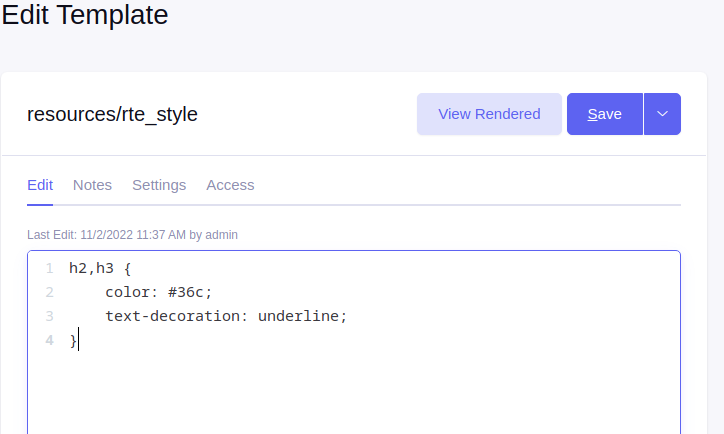
In our template, we will add some simple CSS. Again, our goal is to have H2 and H3 headers appear blue and underlined simply. For this example, we’ll use the following snippet:
h2,h3 {
    color: #36c;
    text-decoration: underline;
}
Configure RTE
Now that we have our custom stylesheet, we will edit the toolset configuration used by our RTE field and select the CSS template with our styles.
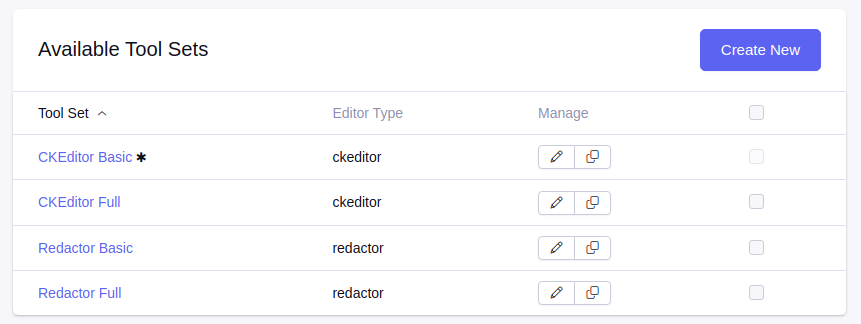
To do this, select the RTE configuration you would like to edit by navigating to the Rich Text Editor add-on, then selecting the configuration you want to edit from the “Available Tool Sets” section.
Next, we will select our stylesheet under “Custom Stylesheet” and toggle on “Advanced configuration.” Activating the advanced configuration will reveal the “Configuration JSON” field, which is being pre-populated with JSON config based on the currently saved configuration.

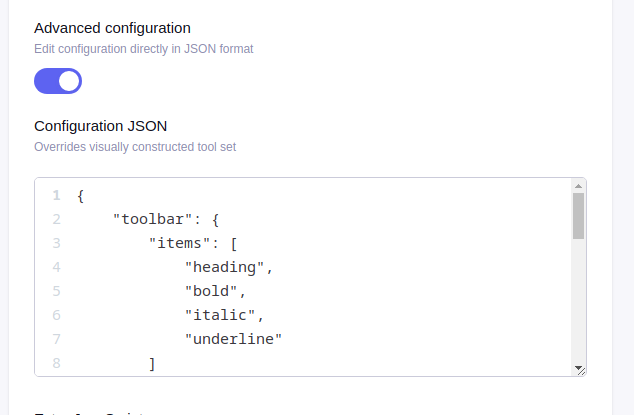
We will edit it by removing the options that we don’t need and end up with the following:
{
    "toolbar": {
        "items": [
            "heading",
            "bold",
            "italic",
            "underline"
        ]
    },
    "heading": {
        "options": [
            {
                "model": "paragraph",
                "title": "Paragraph"
            },
            {
                "model": "heading2",
                "view": "h2",
                "title": "Header",
                "class": "ck-heading_heading2"
            },
            {
                "model": "heading3",
                "view": "h3",
                "title": "Subheader",
                "class": "ck-heading_heading3"
            }
        ]
    }
}
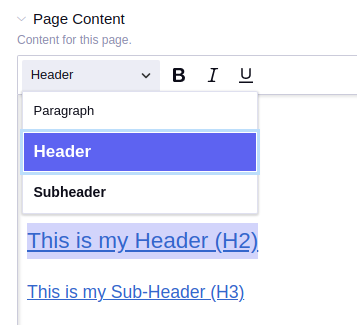
The settings will only allow content editors to use the heading, bold, italic, and underline tools. The heading options will only be paragraph, Header (which will be an H2 using our custom styles), and Subheader (which will be an H3 using our custom styles).
Then Save the updated configuration.
Learn more about editing CKEditor configurations
Learn more about editing Redactor configurations
Using Your Configuration
Now that your custom styles and toolset are saved, content editors will only see the available options with their respective styles when editing your field in an entry.
Comments 0
Be the first to comment!