Final Touches - Contact Form, SEO Metadata, Error Handling & Performance Optimization
What a journey it’s been! We’ve gone through the entire process of planning and building a Portfolio Website, but we’re not quite done - there are a few more things worth including in this introduction to building in ExpressionEngine. These are things you probably need in any production site, so let’s finish strong.
In This Article:
- Step 1: Adding a Contact Form
- Step 2: Add SEO Metadata
- Step 3: Error Handling
- Step 4: Performance Enhancements
Step 1: Adding a Contact Form
Our contact page at example.com/contact is nice, but it’s not very interactive. Let’s add an interactive
Contact form so users can send a message directly from the site rather than having to use their native email client.
For this, we’ll use the Email Contact Form
which is part of EE’s included Email
Add-on
- In the CP, go to
Developer > Add-onsor use the Jump Menu and type "view add" to get to the Add-ons screen, then scroll down in the list to find "Email" under the ‘Uninstalled’ heading and clickInstall: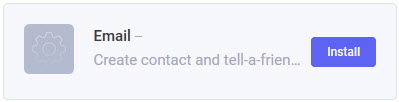
-
Open up your
contact/indextemplate, and let’s rearrange what we had set up earlier.
-
Put the form where the map was and put the map underneath - move the
{map_embed}code underneath the closing </div> that closes the ‘row,’ then copy & paste the example straight from the docs inside our right column (i.e., the second "col-md-6" div).
-
Update the
recipientsparameter to your email for testing and anything else you’d like to update - I’ve replaced thevalueparameters on the form fields withplaceholdersinstead and added a class to the button, so my updatedcontact/indextemplate now looks like this:{layout="layouts/_wrapper"} {exp:channel:entries channel="contact" limit="1"} <h1>{if page_heading}{page_heading}{if:else}{title}{/if}</h1> {page_intro} <div class="row align-items-center"> <div class="col-md-6"> {address} <h2>Address</h2> <p> {address:line_1} {if address:line_2}<br />{address:line_2}{/if} <br />{address:city}, {address:state} {address:zip_code} </p> {/address} {departments} {if departments:count == 1}<h2>Departments</h2>{/if} <p> <strong>{departments:name}</strong> <a href="tel:+1-{departments:phone}">{departments:phone}</a> <a href="mailto:{departments:email}">{departments:email}</a> </p> {/departments} </div> <div class="col-md-6"> {exp:email:contact_form user_recipients="no" recipients="[email protected]" charset="utf-8"} <h2>Send Us A Message</h2> <p> <label for="from">Your Email:</label><br /> <input type="text" id="from" name="from" size="40" maxlength="35" placeholder="Enter your email..." /> </p> <p> <label for="subject">Subject:</label><br /> <input type="text" id="subject" name="subject" size="40" placeholder="Enter a subject..." /> </p> <p> <label for="message">Message:</label><br /> <textarea id="message" name="message" rows="6" cols="40" placeholder="Enter your message..."></textarea> </p> <p> <input class="button" name="submit" type='submit' value='Submit Form' /> </p> {/exp:email:contact_form} </div> </div> {map_embed_code} {/exp:channel:entries}NOTE: If you’re working locally, it’s unlikely emails will send directly from your test site without jumping through a whole bunch of hoops. In most hosted environments, though, this works just fine because the default setting is to use PHP mail as the sending protocol. If you’d prefer, you can use Sendmail or SMTP by changing the settings in
Settings > Outgoing Emailor using the Jump Menu to find ‘Outgoing Mail.’Make sure to read through the documentation for Email Contact Forms, paying close attention to the multiple warnings there if you plan to use this in production. This is a very basic example, and you’ll probably want to build this out a little differently, add Captcha or perhaps even use a third-party Add-on such as Forms or Freeform.
Step 2: Add SEO Metadata
Right now, all of our pages use the same <title> tag because that’s hard-coded in our
site/_wrapper template. This is awful for SEO, and we should update our code so at the very least, the
Entry’s Entry Title is used as the <title> tag. Even better, we can give content editors the ability
to overwrite the default to customize the SEO Page Title, and while we’re at it, we can let them update other
metadata like the SEO ‘description’, ‘keywords,’ etc. If you’re not sure what I mean by ‘metadata’, it’s worth
researching that, but for our purposes, I’ll be including two:
- SEO Page Title, which if populated, will override the default Entry Title as the page’s <title> tag
- SEO Description - for our Work channel, we already have an Excerpt field, so we’ll use that by default but override it if the SEO Description is populated
All of our Channels have content with unique URLs, so each one needs the same functionality. If you had any Channel-based content that didn’t have unique URLs (think maybe testimonials or team members that output all on one page), those Channels wouldn’t need these.
The high-level plan here is to create these two fields, get them assigned to each of our Channels, and then update the templates to utilize them. Remember that Fields can be shared across Channels and even assigned to a Field Group, which is perfect for this scenario.
-
In the CP, use the Jump Menu to create a new Field Group (or go to
Developer > Fieldsand use the blue button). Don’t assign any existing fields because we need to create new ones.
-
Once created, click on "SEO" in the left ‘Field Groups’ sidebar, then click the blue
New Fieldbutton. Selecting the "SEO" group first means the new fields we add will automatically be assigned to this group.
-
Add two fields, making sure to first click the "SEO" group before adding each one:
- SEO Page Title (Text Input, add Instructions: "Overwrites the default Entry Title as the page’s Title tag.", Include in search, Max characters = 60)
- SEO Description (Text Input, add Instructions: "Sets the SEO Meta Description - for Work entries this replaces the default Excerpt as the Description.", Include in search, Max characters = 160)
-
Go to
Developer > Channels(or use the Jump Menu typing in "edit chan," then selectEdit Channel titled [channel]then choose a channel to edit) and for each Channel:- Edit the Channel by clicking the Channel name
- Go to the Fields tab and check to select the "SEO" Field Group
- Save & Close the Channel
-
Tidy up the Publish Layout for each Channel by:
-
Either:
a) Go to
Developer > Channelsthen click the ‘Layouts’ icon to the far-right of each Channel name b) Use the Jump Menu, type "view pub", selectView Publish Layouts for [channel], then select a channel - Edit the existing layout or create a new one if you haven’t already
- Add a new Tab called "SEO"
-
Drag the two SEO fields from the Publish tab into the new SEO tab, order them how you want then and
save the Publish Layout
NOTE: When dragging fields to other tabs here, make sure you see the blue line under the new tab’s name before you let go:

-
Either:
a) Go to
-
In your text editor, open up the
site/indextemplate where we area going to define Layout Variables to pass up to ourlayouts/_wrappertemplate. Just inside the ‘homepage’{exp:channel:entries}loop before our{hero_carousel}variable pair, add these layout variables:{layout:set name='seo_title'}{if seo_page_title}{seo_page_title}{if:else}{title}{/if}{/layout:set} {layout:set name='seo_description'}{seo_meta_description}{/layout:set} -
Now open the
layouts/_wrappertemplate:-
Replace our hard-coded content in our <title> tag to be:
<title>{layout:seo_title}</title>Or if you wanted to, you could have consistent, hard-coded appended text like:
<title>{layout:seo_title} | Example Company</title> -
Below the new dynamic <title> tag, add:
<meta name="description" content="{layout:seo_description}">
-
Replace our hard-coded content in our <title> tag to be:
-
In your browser, go to
example.comto view the Homepage and note the <title> tag has updated and is now dynamic, but note there’s no Meta Description if you look at the source
-
Go back to the CP, edit the Homepage using the Jump Menu or
Entries > Homepage, switch to the SEO tab, add text to both fields, save the entry, and refresh your browser to see it’s updated
-
Next, let’s create a Template Partial so we can re-use the Layout Variables since all our channels use the
same ones:
- In the CP, use
CTRL/CMD + Jthen in the Jump Menu type "part" then chooseView Template Partialsand click theCreate Newbutton and add the name "par_page_seo_variables" - Cut and paste the two lines we just added to our
site/indextemplate into the Content field and save the Template Partial - Where those lines used to be in the
site/indextemplate, add our partial tag:{par_page_seo_variables} - Test the Homepage again to make sure it’s all still working
- In the CP, use
-
Now, we can reuse this simply by adding that partial tag to each of our Single Entry templates, each time
just inside the opening
{exp:channel:entries}opening tag:-
about/index -
contact/index -
services/index -
work/index- this time the partial would be added just inside the{exp:channel:entries}tag that we’re using for the Work Entry detail pages, ie:{!-- Work Entry detail page --} {exp:channel:entries channel="work" limit="1" url_title="{segment_2}"} {par_page_seo_variables} ...NOTE: You can set Layout Variables from anywhere within a template - so in this case, we’re doing in here because our partial looks for fields that are only available from inside the
{exp:channel:entries}tag and are unique to each of our Work entries.
-
-
Now let’s update our partial so it can set the
{excerpt}to be the description by default for our Work Entries. Open up the_partials/par_page_seo_variablestemplate and update theseo_descriptionLayout Variable to:{layout:set name='seo_description'}{if seo_meta_description}{seo_meta_description}{if:elseif excerpt}{excerpt}{/if}{/layout:set}
For the work/index template, we’re able to use these SEO fields for the individual detail pages like we
just added above, but our main Work landing page, and the versions where Categories are selected, aren’t actually
editable… but we can still use Layout Variables to manually set these in the template - we just only want to do
that if it’s not an individual Entry detail page:
-
For when a category is selected, in the
work/indextemplate, find where we’re using the Category Heading tag to dynamically set the page heading - we can set our Layout Variables there and use the selected category’s name and description:{exp:channel:category_heading channel="work"} {layout:set name='seo_title'}{category_name} Portfolio{/layout:set} {layout:set name='seo_description'}{category_description}{/layout:set} <h1>Our Portfolio: {category_name}</h1> ...It’s possible the Category Description might not exist - you could also use a conditional here, so if it didn’t exist, you added some kind of fallback. You could even set up that fallback as a Template Variable, so it was editable via the CP.
-
For when a category isn’t selected, i.e.
example.com/work, we’ll use the final section of the first conditional in the template to set our Layout Variables because this part gets rendered if there’s no second segment:... {if:else} <h1>Our Portfolio</h1> {layout:set name='seo_title'}Our Portfolio{/layout:set} {layout:set name='seo_description'}Our amazing portfolio is sure to impress!{/layout:set} {/if}Again, you could set up a Template Variable to hold this Work landing page SEO Description if you wanted to.
That should take care of the SEO Metadata - every page on our site is now either editable via the SEO tab when editing the Entries - or set up in the templates - and wherever possible, we’re setting default values such as the Entry Title and the Work Channel Excerpt. Of course, you could extend this, add fields, use specific fields for specific Channels, etc. in a real project.
Step 3: Error Handling
Everything we’ve covered so far has been looking at how to handle legitimate requests for URLs that actually exist, but it’s important to cater for ones that don’t and handle the errors appropriately. Similarly, we also want to consider the possibility that the content could change, so what once did return content no longer does and handle that too.
ExpressionEngine’s 404 Page
If a requested URL doesn’t exist or doesn’t have any content, we want to serve a 404 page, which tells the user (and search engines) that that URL doesn’t actually have any content. EE has a built-in way to handle this that uses a dedicated template, so we first need to create a 404 template, assign that as the 404 template, then go through our templates to utilize it:
-
Create a new file in the filesystem named
404.htmlin thesite.groupdirectory. You could also go toDeveloper > Templatesor use the Jump Menu to get toCreate Template in [group]then choose thesitegroup.
-
In our
site/404template, add the following and save the template:{layout="layouts/_wrapper"} <h1 class="text-center">Page Not Found</h1> <p class="text-center">Sorry, but the page you requeste cannot be found or has no content.</p> <p class="text-center"><a href="{site_url}" class="button">Go to the Homepage</a></p> -
In the CP, go to
Settings > Template Settingsor use the Jump Menu to get to Template Settings, then under 404 page, select thesite/404template and save.
-
In your browser, go to
example.com/abcdefgand our 404 page is served
This works, but it only works automatically if there’s only one segment. Remember the way template routing works; if
only one segment is present, the rendering engine looks for a Template Group with that name, and if it can’t be
found, it loads the index template, and if it can’t be found, it throws an error. So by default, EE
handles an erroneous single segment so long as we’ve set up our 404 template.
However, if there are two segments and the first is an existing Template Group, but the second (or
any others beyond it) are erroneous, then it’s up to us to handle this because from the second segment on, there are
all kinds of things you could do with segments. For example, try going to example.com/work/abcdefg in
your browser - in this case, the template work/index template is correctly being loaded and has content
in it that’s legitimate, but our {exp:channel:entries} loop that’s looking for a specific Entry based
that matches the second segment just isn’t returning anything… because there’s no entry that matches.
EE gives us two powerful tools to handle this:
- The
{if no_results}conditional. We can use this inside any Channel Entries Tag to decide what happens if no results are returned instead of just doing nothing. What you do will depend on the scenario, e.g., if you’re outputting a list of events, you might just output a heading that says "No Upcoming Events" or some other content - or - you might choose to redirect the user. - The
{redirect}Global Variable. This tag lets you redirect a user and can be really handy, but it’s important to be careful you don’t end up creating an endless redirect loop. You can use this to setup redirects with various status codes, but the most common use is the 404 redirect:{redirect="404"}
Combining these two, we can show a 404 for content that doesn’t exist in our our templates:
-
In our
work/indextemplate, inside the Work Entry detail page{exp:channel:entries}tag, add{if no_results}{redirect="404"}{/if}as the first line within the tag:{!-- Work Entry detail page --} {exp:channel:entries channel="work" limit="1" url_title="{segment_2}"} {if no_results}{redirect="404"}{/if} {par_page_seo_variables} ...Now try
example.com/work/abcdefgagain
-
Do this same thing for all of our single-entry
{exp:channel:entries}tags - i.e., wherever we have thelimit="1"parameter - in the rest of our templates:about/indexcontact/indexservices/index
NOTE: We don’t need to do it in our
site/indextemplate because EE handles the error for a single segment not matching a Template Group automatically, but there’s no harm adding it there if you just want to get into the habit of doing this on any single-entry template.
This takes care of the single-segment URLs in the scenario that there’s nothing returned within the Channel Entries
Tag, but what about if we have extra segments? Try going to example.com/about/abcdefg in your
browser - notice we still get the About page loading. EE has a way to handle this too - the
require_entry="yes" parameter - but it only works in the typical 2-segment
template_group/template scenario because what it’s doing is telling the Channel Entries tag that a
valid Entry ID or URL Title must be found in the second segment. In the case of
example.com/about, we don’t want to use this because we deliberately don’t want a second segment. So we
only will add this if a second segment exists:
-
In the
about/indextemplate, add therequire_entry="yes"parameter to the Channel Entries Tag, but only if a second segment exists:{exp:channel:entries channel="about" limit="1" {if segment_2}require_entry="yes"{/if}} {if no_results}{redirect="404"}{/if} ... -
Do the same thing for the
contact/indexandservices/indextemplates as these templates also are designed to output a single Entry.
-
In our
work/indextemplate, we can add the same parameter to the Work Entry detail Channel Entries Tag, but we don’t need the conditional because the whole thing is already only showing if we have the second segment:{if segment_2 && segment_2 !="category" && !(segment_2 ~ "/^P\d+/")} {!-- Work Entry detail page --} {exp:channel:entries channel="work" limit="1" url_title="{segment_2}" require_entry="yes"} ...
So now we’ve handled errors for 2-segment URLs where the 2nd segment is looking for a matching Entry but can’t find
one, but we also need to consider there could be 3-segment URLs where the first two segments do match a single
Entry, but where we have extra segments. In the Services and Work sections, for example, we do have
legitimate 2-segment pages, and above, we added dynamic Channel Entries tags that are requiring the 2nd segment to
be a valid entry… but try going to example.com/services/graphic-design/abcdefg and
example.com/work/a-real-work-entry-you-added-to-your-site/abcdefg - both examples will load, so it’s
possible to load the same content at multiple unique URLs. Our site structure only ever uses a third segment in the
Work section where we’re filtering by category (e.g., example.com/work/category/graphic-design), so
outside of that specific scenario, we want to force a 404 if there’s ever a third segment:
-
In the
services/indextemplate, add a 404 redirect if a third segment is present:{layout="layouts/_wrapper"} {if segment_3}{redirect="404"}{/if} {exp:channel:entries channel="services" limit="1" {if segment_2}require_entry="yes"{/if} {if !segment_2}status="Default Page"{/if}} ... -
In the
work/indextemplate, find the conditional where we’re checking if a second segment exists, but it’s not "category" and do the same:{if segment_2 && segment_2 !="category" && !(segment_2 ~ "/^P\d+/")} {if segment_3}{redirect="404"}{/if} ...
The final place to consider using a 404 is in the Work landing page when using category filtering and either:
- there’s ever a 4th segment that’s not controlling pagination - or -
- the category in segment 3 doesn’t exist
E.g., try example.com/work/category/graphic-design/abcdefg and also
example.com/work/category/abcdefg - both of these scenarios we want to redirect to a 404. Remember that
pagination also uses a segment, so if a category is selected and there’s pagination, we do need
that 4th segment to work, e.g.: example.com/work/category/web-development/P3, but we can cater for this
using the regular expression condition we used earlier, i.e. !(segment_4 ~ "/^P\d+/").
-
In the
work/indextemplate, add a 404 redirect at the very top of the template if there’s ever a 4th segment that doesn’t match the pagination regular expression:{layout="layouts/_wrapper"} {if segment_4 && !(segment_4 ~ "/^P\d+/")}{redirect="404"}{/if} ... -
Then we can use Category Heading Tag we’re already using to make sure that the category in segment 3 is an
existing category again using the
{if no_results}conditional:{if segment_2 == "category" && segment_3} {exp:channel:category_heading channel="work"} {if no_results}{redirect="404"}{/if} ...
And that should take care of all of our 404 redirects!
No Results In ‘Visiting Content’ Output
Now that we’ve considered all the possible erroneous URL errors and handled them with the 404 page, we should also cater for the few places in our site where we’re pulling through content within a page in the scenario that no results are returned for whatever reason. The places we need to consider in this site are:
- The Homepage where we pull in the 3 ‘Latest Projects’
- The main Work landing page (unlikely to not ever have any entries, but we’ll be thorough)
- A specific category on the Work landing page (above, we catered for categories that don’t exist, but it’s still possible to have a category with no active entries)
-
In the Homepage template (
site/index), find where we’re outputting the ‘Latest Projects’. To handle there being no results, you could either:-
Add an
{if no_results}conditional inside the Channel Entries:{exp:channel:entries channel="work" limit="3" dynamic="no" orderby="date" sort="desc"} {if no_results}<p>There are no entries to display</p>{/if} ... -
Or perhaps more appropriate, pull the surrounding <h2> and <div class="row">
HTML to be inside the loop and use the
{count}and{total_results}variables in conditionals to maintain their positions. This way, if no entries are returned at all, that whole section doesn’t display:{exp:channel:entries channel="work" limit="3" dynamic="no" orderby="date" sort="desc"} {if count == 1} <h2>Latest Projects</h2> <div class="row"> {/if} <div class="col-4"> ... </div> {if count == total_results} </div> {/if} {/exp:channel:entries}
-
Add an
-
For the Work landing page, we will use the
{if no_results}conditional, but we can kill two birds with one stone because the same Channel Entries Tag outputs the Entries regardless of if a category is selected, but we’ll cater for that with a conditional inside our text:{!-- Work landing/listing page --} {exp:channel:entries channel="work" limit="3" paginate="both" orderby="date" sort="desc"} {if no_results}<p>There are no Projects {if segment_2 == "category"}in this category{/if} to display at this time.</p>{/if} ...
Step 4: Performance Enhancements
You can (and should) do a few things right from the beginning when learning to build in EE to optimize performance. The ultimate goal is to get your site’s pages to load as quickly as possible for the end-user, and there are two parts to that: server-side and client-side. The server-side part happens first, and essentially is the time it takes for the CMS to build up and serve the final HTML page and send it to the browser. Then the client-side involves all the things that the browser does once it receives the HTML for the requested page - usually the majority of the time is spent loading assets (images, CSS, JavaScript files, etc.) and executing any of the client-side scripts. This section will focus exclusively on the server-side part - things we can do in EE to make serving the HTML files faster - and this isn’t intended to be an extensive performance workshop, but rather give you the basics you should start doing right from the start.
Debugging
Before we dive into specific things to do to optimize performance, it’s worth knowing how to test it. EE comes with
built-in debugging, which you can enable at Settings > Debugging & Output > Enable Debugging.
Enabling this toggle adds additional information to the bottom of the template output, but only for SuperAdmin
members, with really useful information like ‘Memory usage’, ‘Database execution time’, and ‘Total execution time.’
There’s also a ‘Variables’ tab showing the values of various variables (most of them specific to the logged-in user)
and a way to view all of the individual database queries. For the most part, you can use the ‘Total execution time’
as a benchmark while testing and seeing how much of a difference implementing certain changes make, but it’s
definitely work knowing about this in case you find yourself needing to investigate a troublesome page.
- In the CP, go to
Settings > Debugging & Output, enable Debugging, save, then go toexample.com,example.com/about, andexample.com/workand compare the debugging info between templates.
NOTE: Your server environment, specifically the load at the exact moment you make a request, could well be playing a big part in this, so if you’re really digging into this, try refreshing the same page several times to try and identify any outliers.
Looping and Embedding
We’ve only briefly mentioned this and haven’t actually used it in this tutorial, but it’s possible to ‘Embed’ templates within other templates. This can be really useful, particularly given you can pass ‘Embed Variables’ from one template to the one you’re embedding into it, and in some cases can be necessary to allow the rendering engine to access and render certain things in a certain order. The rendering order is a more advanced topic I deliberately am not covering - if you want to dive deeper or encounter a scenario where something’s not rendering where you want it, read up on the Rendering Order of the Template Engine.
But what I will do is point out you need to be very careful when embedding templates into other templates. Embeds aren’t that expensive from a performance perspective in their own right, but what you do with them absolutely can be! If at all possible, avoid embeds within any kind of loop, especially if the embed contains a Channel Entries Tag.
The Channel Entries Tag is one of the heaviest tags you’ll use in EE in terms of performance - it typically does the most work, so if you have an outer loop with 20 iterations where within that loop, you embed another template that has a Channel Entries Tag that has 20 iterations, your page runs the Channel Entries Tag 20 times and loads 400 entries! So be careful and do your best to build in the most efficient way possible.
Granted, it’s a pretty simple site, but all of our code in this tutorial is pretty efficient - we don’t have any loops within loops, nor are we embedding any templates anywhere.
Channel Entries ‘disable’ Parameter
We just mentioned the Channel Entries Tag is one of the heaviest tags you’ll use, but it has an important
parameter available to it that allows you to disable things you don’t need in order to speed things up. Think about
it in terms of database queries - the less information that needs to be included in the requests from the database,
the faster it’ll be. Including unused information in many cases doesn’t add that much extra time, but
remember this tag often loops through multiple results, so anything we can save is worthwhile. So always use the disable parameter
on Channel Entries Tags, disabling anything you’re not explicitly using within the tag. As with other parameters
that accept multiple values, use a | (pipe) character to add multiple values. Here is an example with
all of the available options - you can remove the ones you do
need before adding to the {exp:channel:entries} tag:
disable="categories|category_fields|custom_fields|member_data|pagination"
NOTE:
category_fieldsare custom category fields - you can still access the default fields of a category likecategory_name,category_url_title,category_descriptionandcategory_imagewith thedisable="category_fields"set. Also, disablingcategoriesautomatically also disablescategory_fields. Even if you need categories, chances are you want to still disablecategory_fieldsunless you need a specific custom category field in the tag output.
-
Add appropriate
disableparameters to all of our Channel Entries Tags:-
site/index-disable="categories|member_data|pagination"for the Homepage Channel Entries Tagdisable="categories|member_data|pagination"for the Work Channel Entries Tag
-
about/index-disable="categories|member_data|pagination" -
contact/index- `disable="categories|member_data|pagination" -
services/index- `disable="categories|member_data|pagination" -
work/index--
disable="category_fields|member_data|pagination"for the Work Entry detail page Channel Entries Tag -
disable="categories|member_data"for the Work landing page Channel Entries TagNOTE: Disabling categories affects information returned for each item inside the loop, not filtering the loop itself - so even with
categoriesdisabled here,example.com/work/category/graphic-designstill renders what we want
-
-
Caching
It’s absolutely worth reading EE’s documentation on Data Caching & Performance for full details if you want to really optimize performance. The main takeaway is we can (and should) add caching to our EE builds for any template output that returns the same data for every visitor. Now, if you have data specific to the logged-in member, you have to start being careful with this, but in this tutorial, we can implement caching on pretty much everything.
Tag Caching
The first type of caching is Tag Caching where we
can cache and {exp:xxxxx} tag for a set amount of time using cache and
refresh parameters, For example, on a Channel Entries Tag, you might add:
{exp:channel:entries ... cache="yes" refresh="60"}
The number here is the time in minutes, so the above would cache the output of the entire tag for 60 minutes.
The general consensus is if any {exp:xxxxx} tag you use is the same for each visitor, add
caching to it.
- Add the
cache="yes"andrefresh="60"parameters to every{exp:xxxxx}tag in all of our templates, with the exception of the{exp:email:contact}tag incontact/index- that one we don’t want to cache to avoid any possible crossed wires. Make sure to include the{exp:channel:category_heading}and{exp:channel:categories}tags inwork/indexthough.
To see how effective the disable, cache, and refresh parameters are, choose a
template and remove all these parameters, then load the page and note the ‘Total Execution Time’ in the debugging
info. Then put them back and refresh that same page again twice - the first time you reload after re-adding the
parameters is the rendering engine’s first time loading the entry where it actually creates the cache, so it won’t
be much different to the performance without the tags… but the second time, where the tags are loading from cache
should be a significant difference.
On my Homepage, I went from 0.1964 seconds to 0.0357 seconds!
Template Caching
The second type of caching is Template Caching, which literally caches the entire template, not just the tags inside of it. With this option, you can’t pick and choose which tags to cache, but it can save a little bit more time. You only want to use this where the entire template’s output would be the same for each visitor - in other words, if you’re caching all the individual tags inside the template, you should go ahead and enable this at the template level.
-
In the CP, use the Jump Menu to get to
View Templates(or go toDeveloper > Templates), then click the little ‘settings cog’ icon next to thesite/indextemplate, then turn on the Enable Caching? toggle and set the Refresh Interval to 60, then refresh your homepage a couple more times and note the ‘Total Execution Time.’This dropped my Homepage to 0.0304 seconds - it’s not a huge difference, but our goal is to the best we can, so this helps!
-
Repeat this process the following templates:
about/indexservices/indexwork/index
NOTE: We’re not doing this on
contact/indexbecause we don’t want to cache our{exp:email:contact_form}tag.
Advanced Performance Tuning
If you want to get more advanced with performance optimization, take a look at TJ Draper’s "Tuning For Performance" presentation from the EE Conference (both 2017 and 2018). You can watch the video here and follow along with the slides and resources here.
Comments 0
Be the first to comment!