
Add commenting to your articles
Summary
Adding a comment section to your articles and posts gives your reader a chance to add value to what you’ve written – or draw your attention to a necessary correction or update. If you’ve struggled with integrating comments to your site content, we’re here to help!
This tutorial assumes that you already have a basic site set up, with both single-entry article pages and some sort of index page that lists all of your articles. If you run into trouble with this tutorial, the Expression Engine documentation is likely a great resource.
Enable the Comments Module
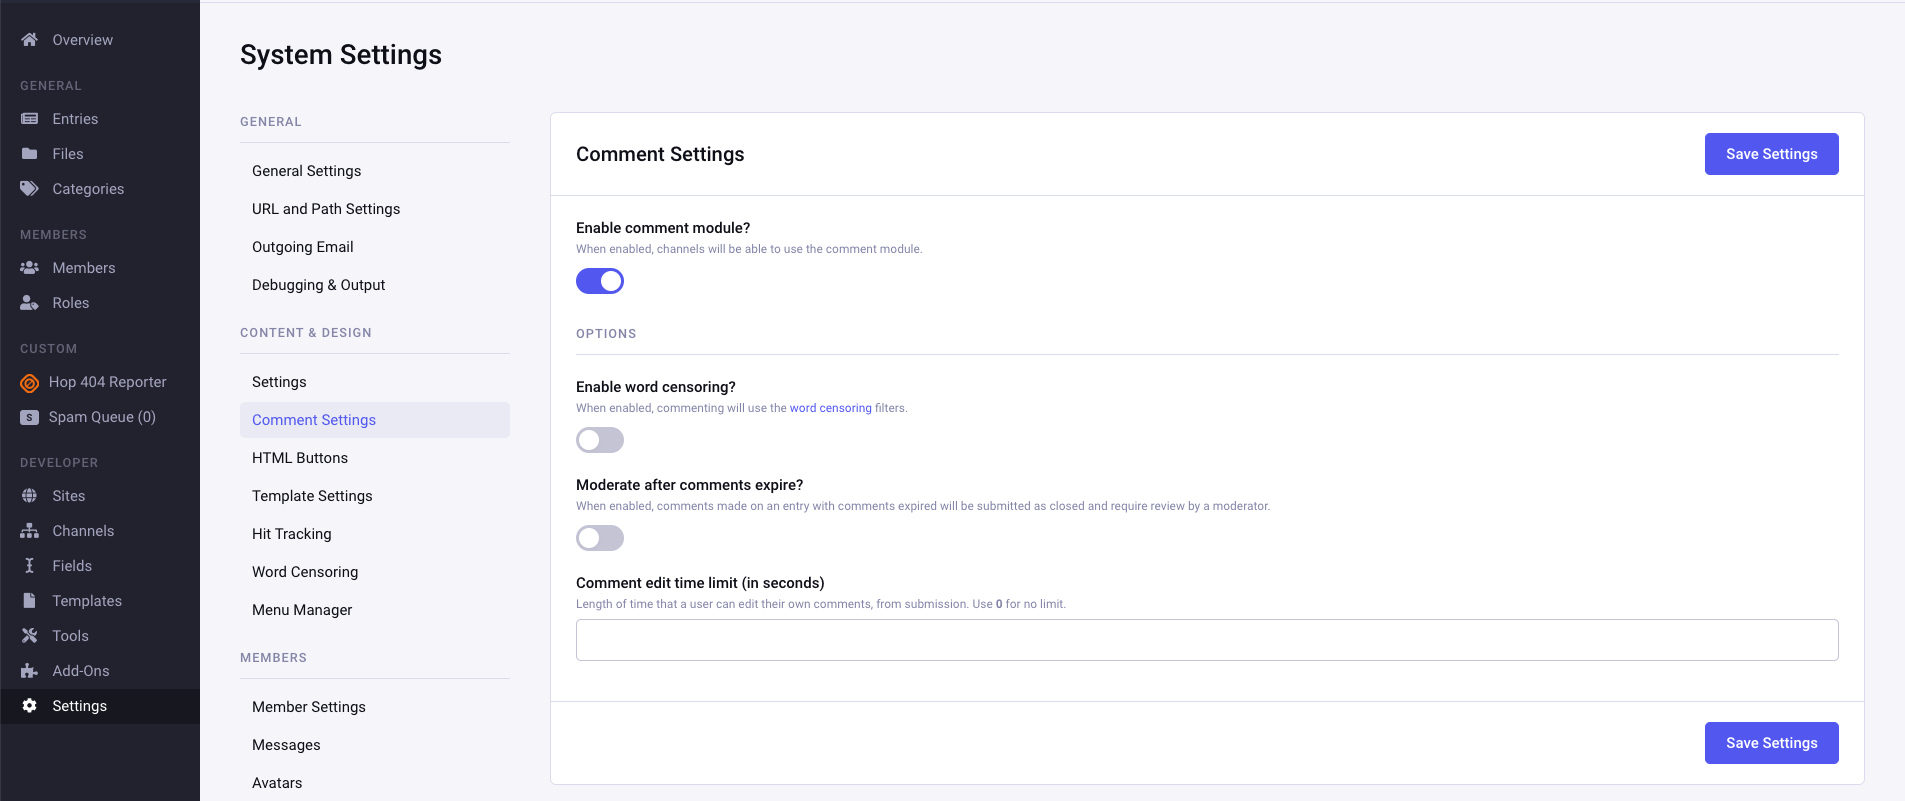
The first thing you need to do is enable the Comments module; it’s not with the other add-ons where you think it might be.
Head to the Expression Engine system settings page, and click on Comment Settings, at the following URL:
/admin.php/cp/settings/comments
Flip the “Enable comment module?” toggle to on and hit save.
Enable Commenting on the Channel
Next, you’ll need to enable commenting for the specific Channel you want to have comments on. Head to the Channel Manager (/admin.php?/cp/channels).
Inside the Channel Manager, click on the Settings tab for the Channel where you wish to allow commenting, and look for the Commenting section shown in the screenshot below. You’ll find it way down near the bottom of the page.
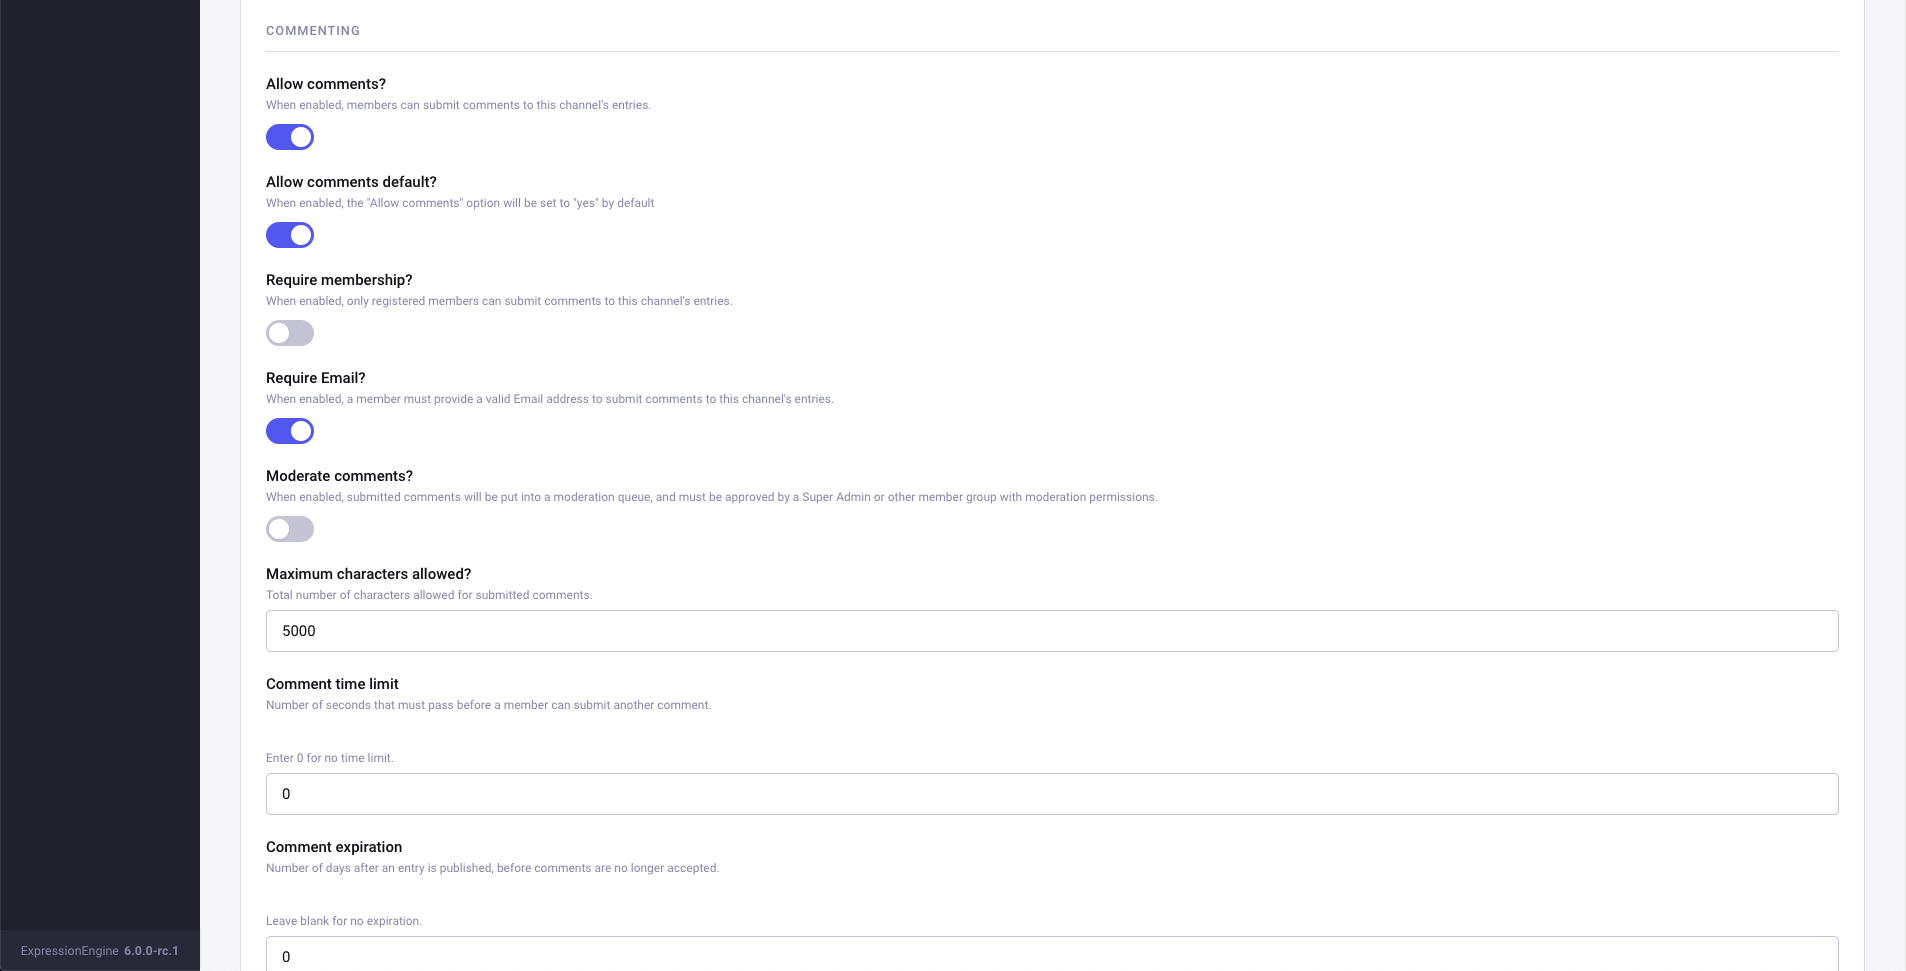
Flip “Allow Comments?” to the “On” position, and keep in mind that you’ll need to do this for every Channel for which you want comments enabled.
There are a few other helpful settings here which we’ll go over, but if you just want the basics you can skip to the next section.
Other Channel Commenting Settings
Allow comments default - Each individual entry can have comments turned on or off. This option determines if new entries in this channel will have commenting turned on.
Require Email - This does what it sounds like. If enabled, anyone submitting a comment must be either logged in or provide an email address. Important note: If this is turned on, you must have an email field in your comment submission form!
Require Membership - A stricter version of Require Email. With this option, users must be registered members of the site to comment.
Render URLs and Email addresses as links? - When members submit comments with URLs or email addresses, this setting controls if those appear as clickable links. You may wish to disable this, depending on your particular usability requirements.
Enable Commenting by Member Roles
Next up, check to ensure you’ve given appropriate member roles permission to comment. Super Admins automatically have all permissions, so testing is sometimes confusing. It’s a good idea to create a test user for yourself in a standard Member or Editor role to verify your permissions are working correctly.
Member Roles can be found by clicking on the Members menu item and the Member Groups submenu, or at this URL:
/admin.php?/cp/members/roles.
EE5 Note:
If you’re following this guide for Expression Engine v5, you will follow essentially the same steps, but the permission is found under the Member Groups settings, rather than Member Roles.
The control panel URL you will want for EE5 is:
/admin.php?/cp/members/groups.
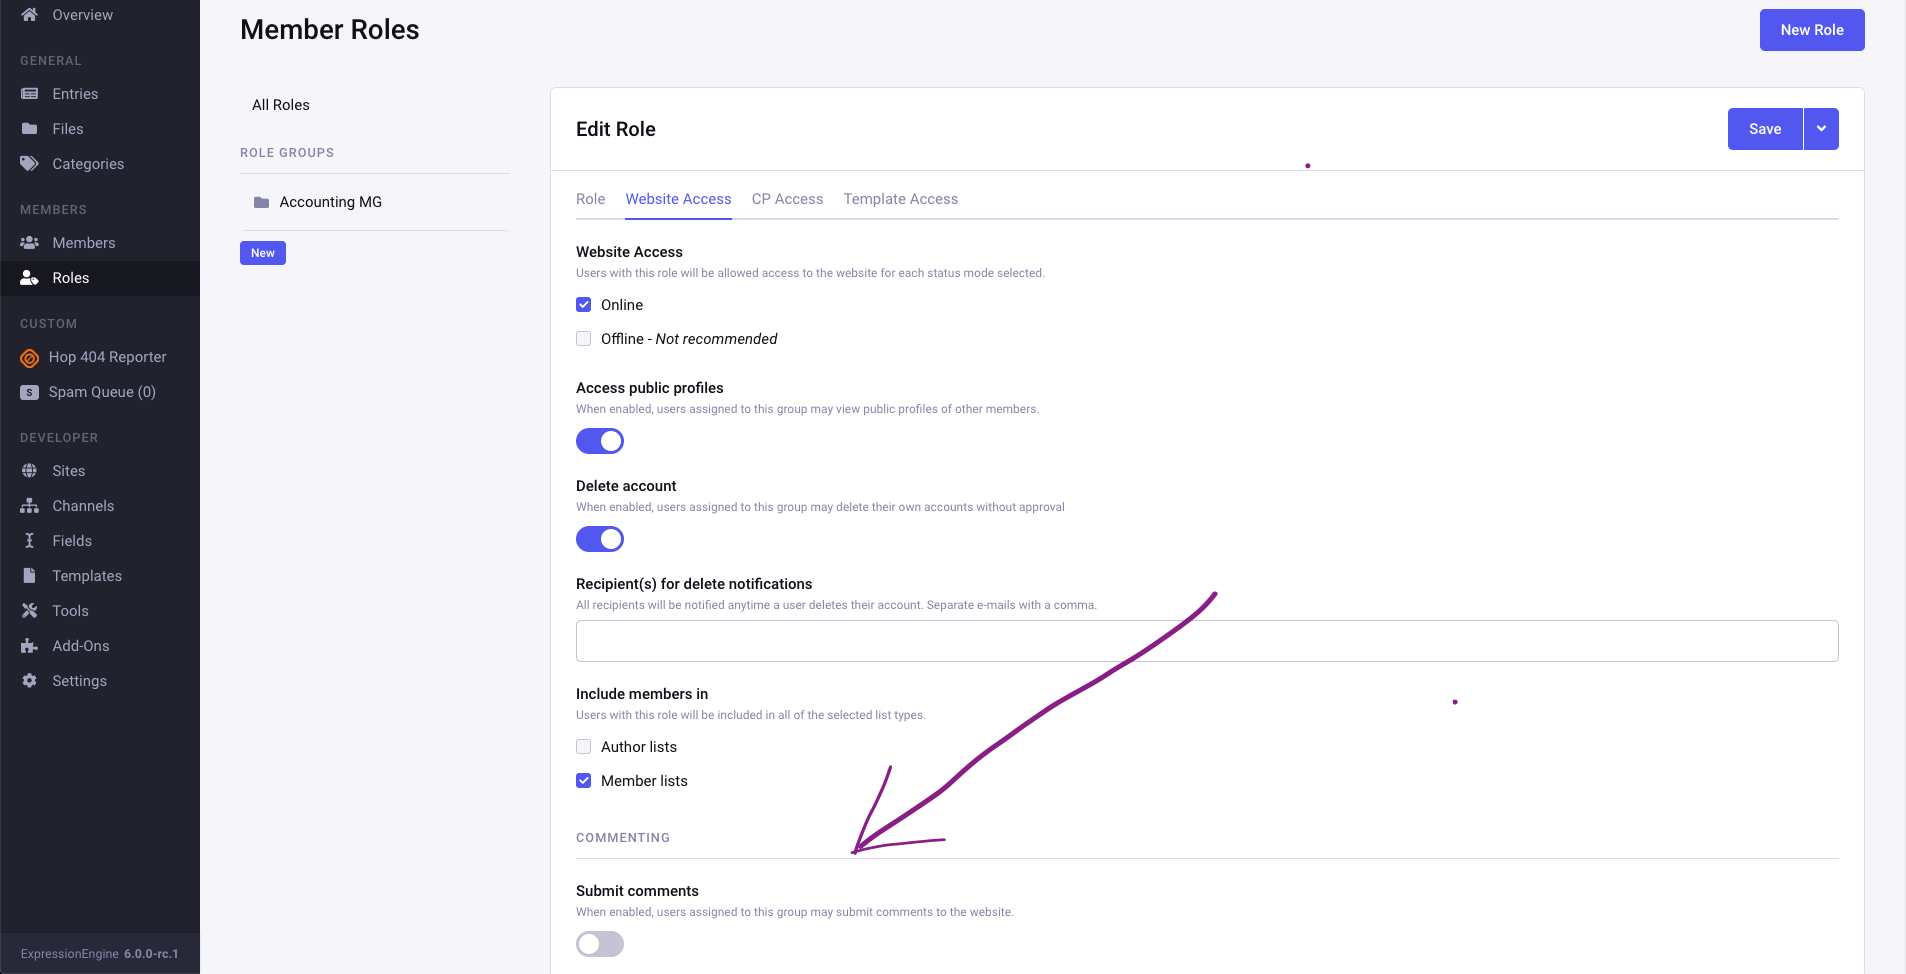
For each Member Role that you want commenting enabled, look for the Commenting section under the Website Access tab. Flip the toggle on for Submit Comments.
If you want Guests (users who are not logged in) to be able to comment, be sure to enable this for the Guest member role – that’s the default anyway.
If you have a special Member Role who should be immune to comment moderation, you can give them the “Bypass moderation” permission. This is also where you can allow specific Member Roles to edit or delete their own comments, or the comments of others if you wish.
Important note: Enabling the “Edit comments by others” setting doesn’t automatically make the interface to allow this appear on the front end – this is just granting permissions.
CAPTCHA or no CAPTCHA?
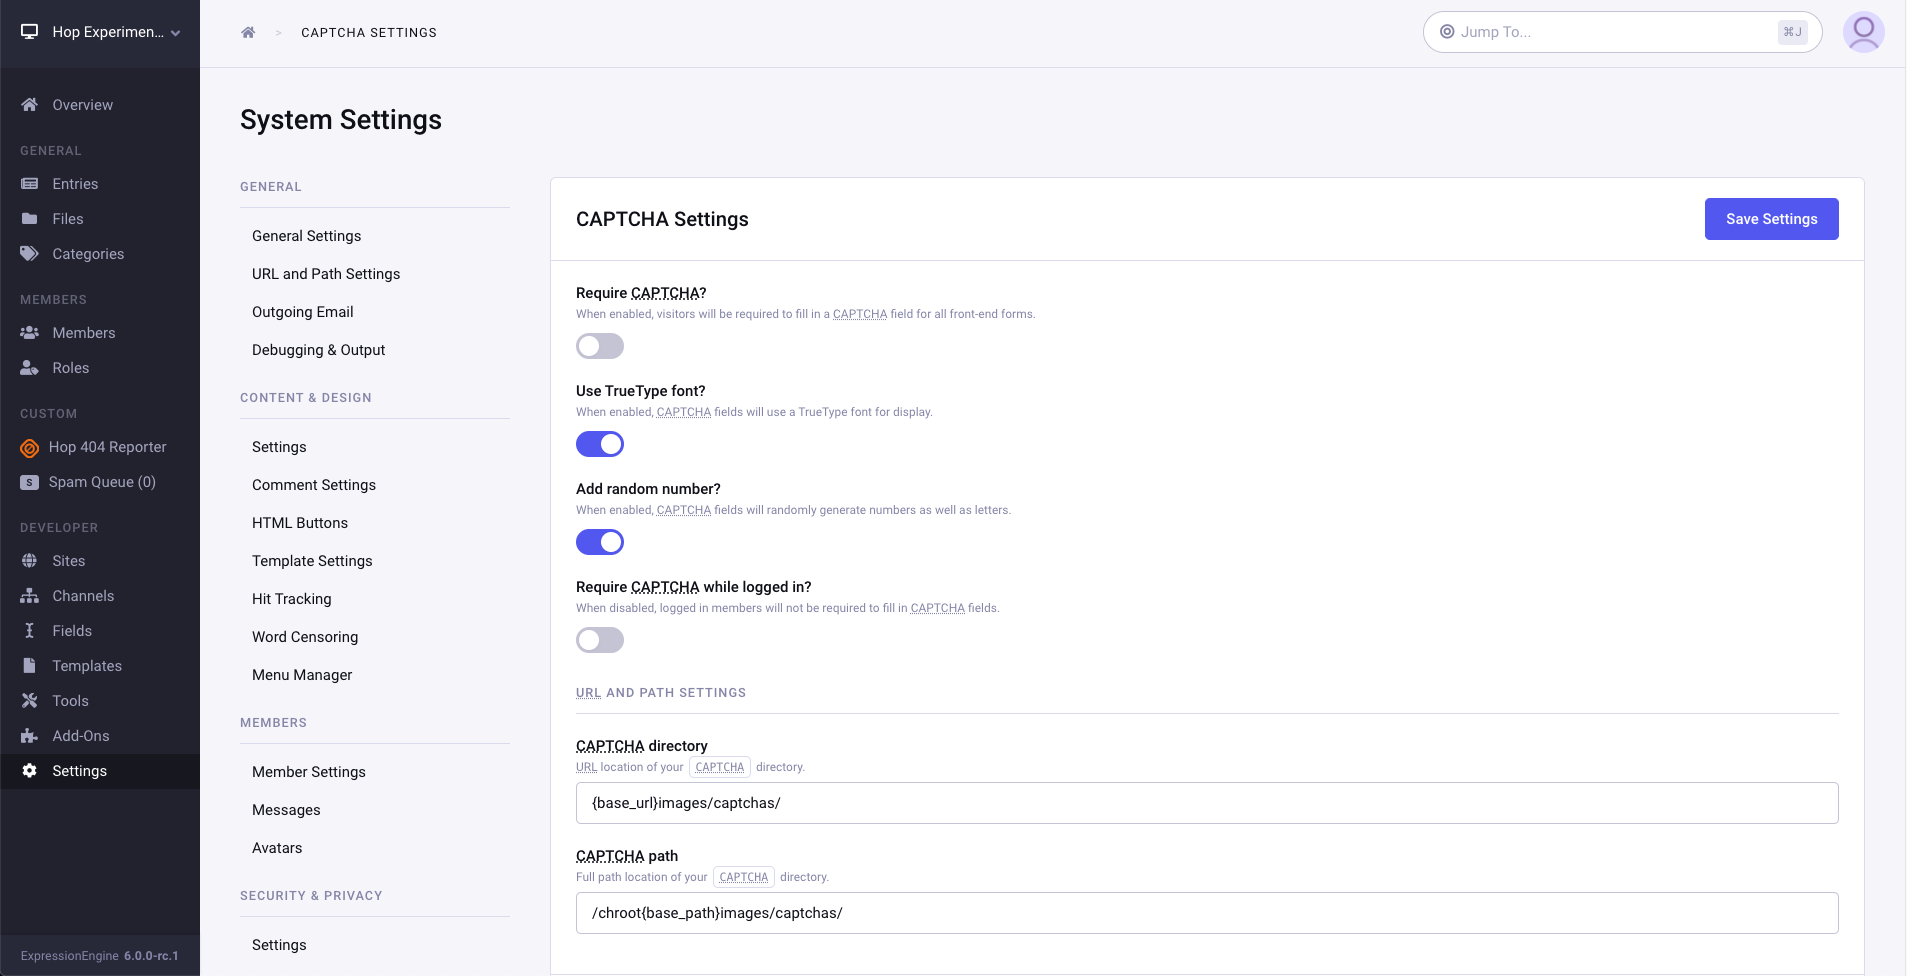
Another comment-related setting you can optionally enable is CAPTCHA, the test to try and make sure someone is a human and not a spambot.
The settings for CAPTCHA can be found on the System Settings page, under the CAPTCHA submenu at this URL:
/admin.php?/cp/settings/captcha.
Keep in mind that enabling CAPTCHA here will enable it for all front-end forms, not just for comments. I like to enable it, but then I disable “Require CAPTCHA while logged in.” We assume that registered members can be trusted at least at this level, and this way only Guests will face the CAPTCHA.
Display Comments with an Article
That’s it for the set up work! Stretch your fingers, grab a tea, and now we can move on to the template work!
In the template for your single-entry article page, you’ll need to enter template code to display comments. This tag pair is dynamic by nature, and by default will fetch the correct entry automatically based on the current URL.
Important note: This code must be placed OUTSIDE of any exp:channel:entries loop, because it uses some of the same variables, including {count}. If you do need to put it inside the loop, you must use an embed.
At its most basic, the comment entries loop looks like this:
{exp:comment:entries sort="asc" limit="20"}
  {comment}
  <p>By {author} on {comment_date format="%Y %m %d"}</p>
{/exp:comment:entries}
We won’t go into a full description of the ways you can output and format comments – it’s quite robust.
The Comment Submission Form
The most important piece of the puzzle is the submission form. After all, there’s no point in displaying comments if no one can submit them.
Place the following code directly beneath the comment:entries loop we posted above.
{exp:comment:form channel="news"}

  {if logged_out}
    <label for="name">Name:</label> <input type="text" name="name" value="{name}" size="50" /><br />
    <label for="email">Email:</label> <input type="text" name="email" value="{email}" size="50" /><br />
  {/if}

  <label for="comment">Comment:</label><br />
  <textarea name="comment" cols="70" rows="10">{comment}</textarea>

  {if captcha}
    <label for="captcha">Please enter the word you see in the image below:</label><br />
    <p>{captcha}<br />
    <input type="text" name="captcha" value="{captcha_word}" maxlength="20" /></p>
  {/if}

  <input type="submit" name="submit" value="Submit" />

{/exp:comment:form}
There are a few specific things to watch for in the comment submission code.
First, be sure to change the channel parameter to the name of your Channel.
Second, notice that we are asking for an Email address if the user is not logged in, but skipping it if they are. This is linked back to the earlier point about the “Require Email” and “Require Membership” options found under Channel Settings.
The third thing to notice here is the {if captcha} line. If CAPTCHA is turned on, and the user is not exempt from CAPTCHA, a standard CAPTCHA will appear in this area of the form. You can find out more about how to customize CAPTCHA in the Expression Engine documentation.
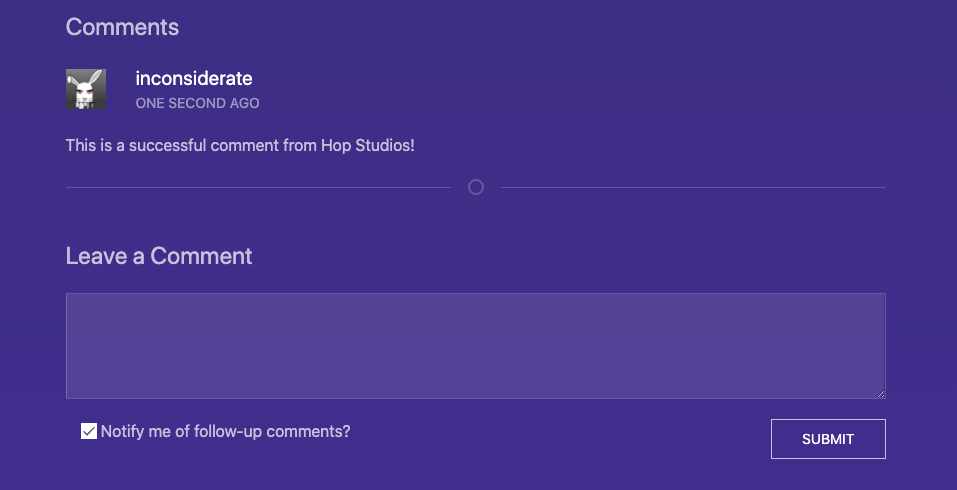
Once this is in place, you should see your comment form on the front end, and be able to submit new comments. Hurray!
Lastly, if for any reason the person viewing the page does not have commenting permission (either because of member, entry, or channel settings), the form will simply not display. You can use {if comments_disabled} to display alternate instructions if there will be some entries in each status.
The display of existing comments is possible whether comments are enabled or not – once an entry has comments, disabling comments will only disable the form, not the comments you’ve already collected.
Editing Comments
ExpressionEngine does a decent job of trying to let you edit existing comments via Javascript. We recommend following the instructions in the documentation. However, because each site is unique, it may require some tweaking to their JavaScript. The important thing to note is that before you spend too much time digging into the javascript and templates, save yourself some time and check to make sure your permissions are set properly.
Comments 2
Hop Studios
I couldn’t miss the chance to be the first to comment on a tutorial about adding commenting to your site. 😊
Erick Flatcher
Hello!
It is necessary to add a positive / negative choice to the comments. The form for adding a comment must require the mandatory selection of one of the two options (I am implementing the Radio Button switch). And, accordingly, display the selected value in the published comments. No sorting is needed.
Any ideas? It shouldn’t be difficult at all. Maybe some standard field can be adapted?
Thanks!