Building an E-commerce Website With ExpressionEngine, Part 2
- 1 - Building an E-commerce Website With ExpressionEngine, Part 1
- 2 - Building an E-commerce Website With ExpressionEngine, Part 2
- 3 - Building an E-commerce Website With ExpressionEngine, Part 3
- 4 - Building an E-commerce Website With ExpressionEngine, Part 4
- 5 - Building an E-commerce Website With ExpressionEngine, Part 5
Part 2: Channel installation and Discounts
2a) Orders/Discount Channel Installation
Back in the ExpressionEngine backend, go to the CartThrob add-on, and then the “Installation” tab. (We’re not going to Orders Tab which would be the logical next step)
Of these available installation options, we actually skip most of them because we’re starting with pretty basic templates that we’ve created. Our store is not really complicated enough for Packages or Discounts channels. Instead, we will only choose Store - Orders and then Store - Coupon Codes channels. (Remember, our FakeBowling.shop ExpressionEngine site already had a Products channel) If you’re curious, Store - Purchased items would be used to if you want to show “Customers Also Bought..” on a product page, which is a cool feature.
We are not installing any templates, as we already have those completed.
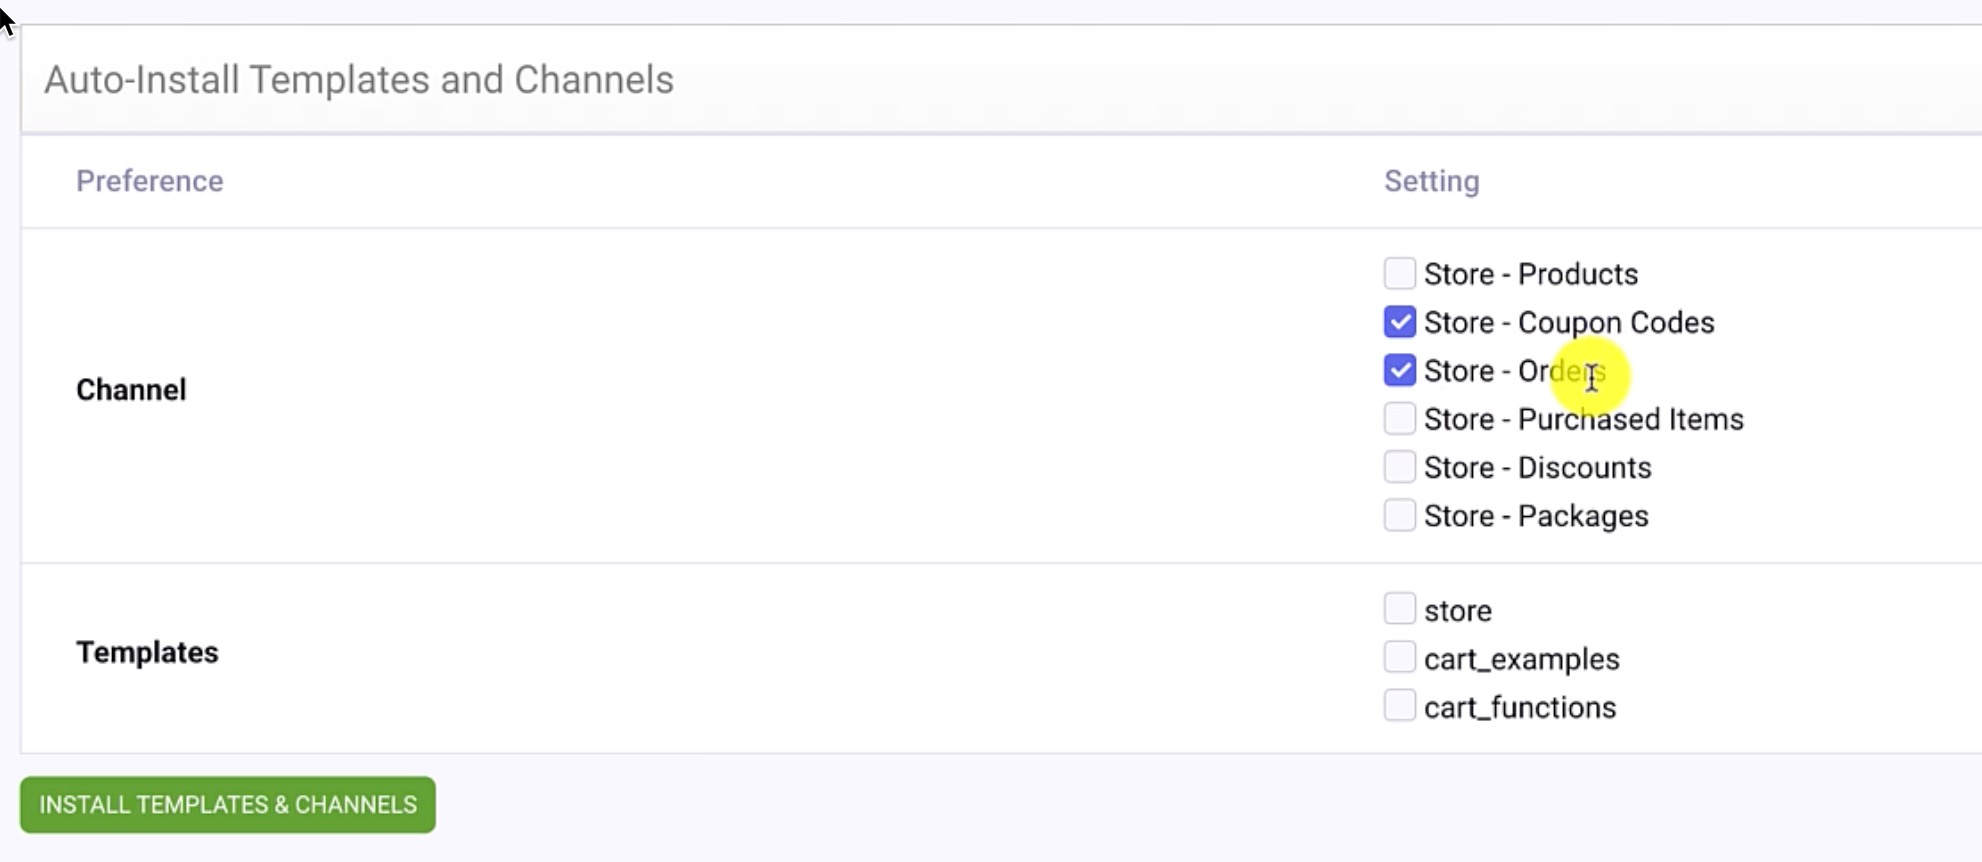
Click Install Templates & Channels.
Navigate to the Channels menu, and you’ll hopefully see that the two new channels were created.
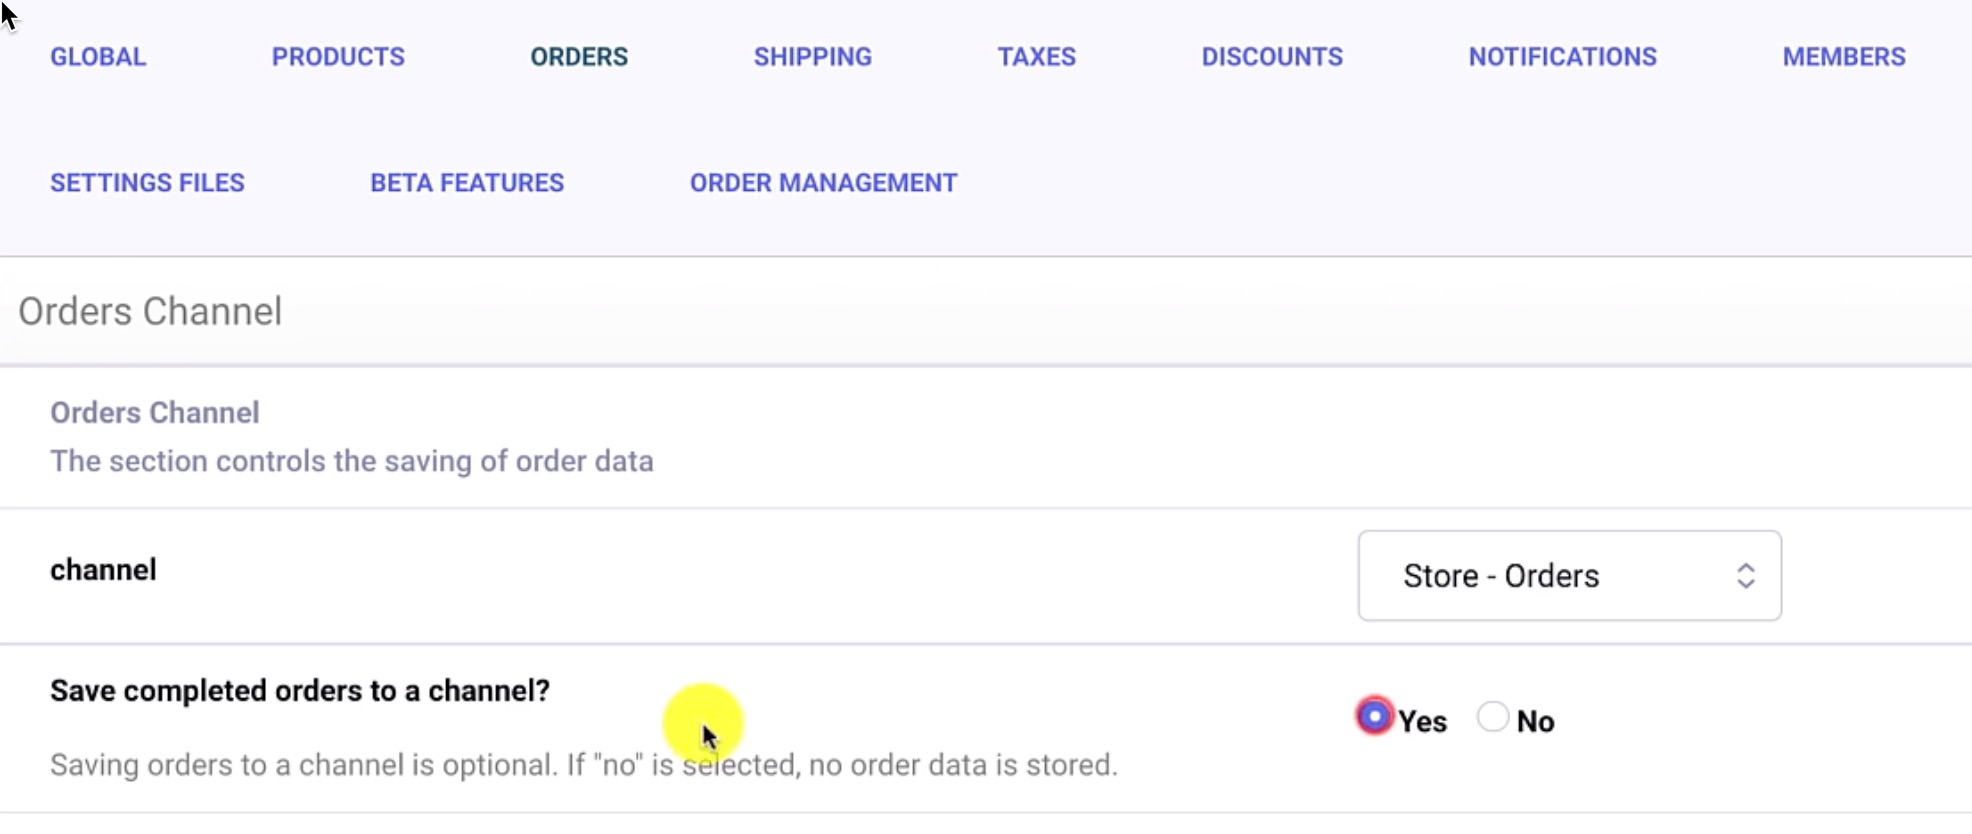
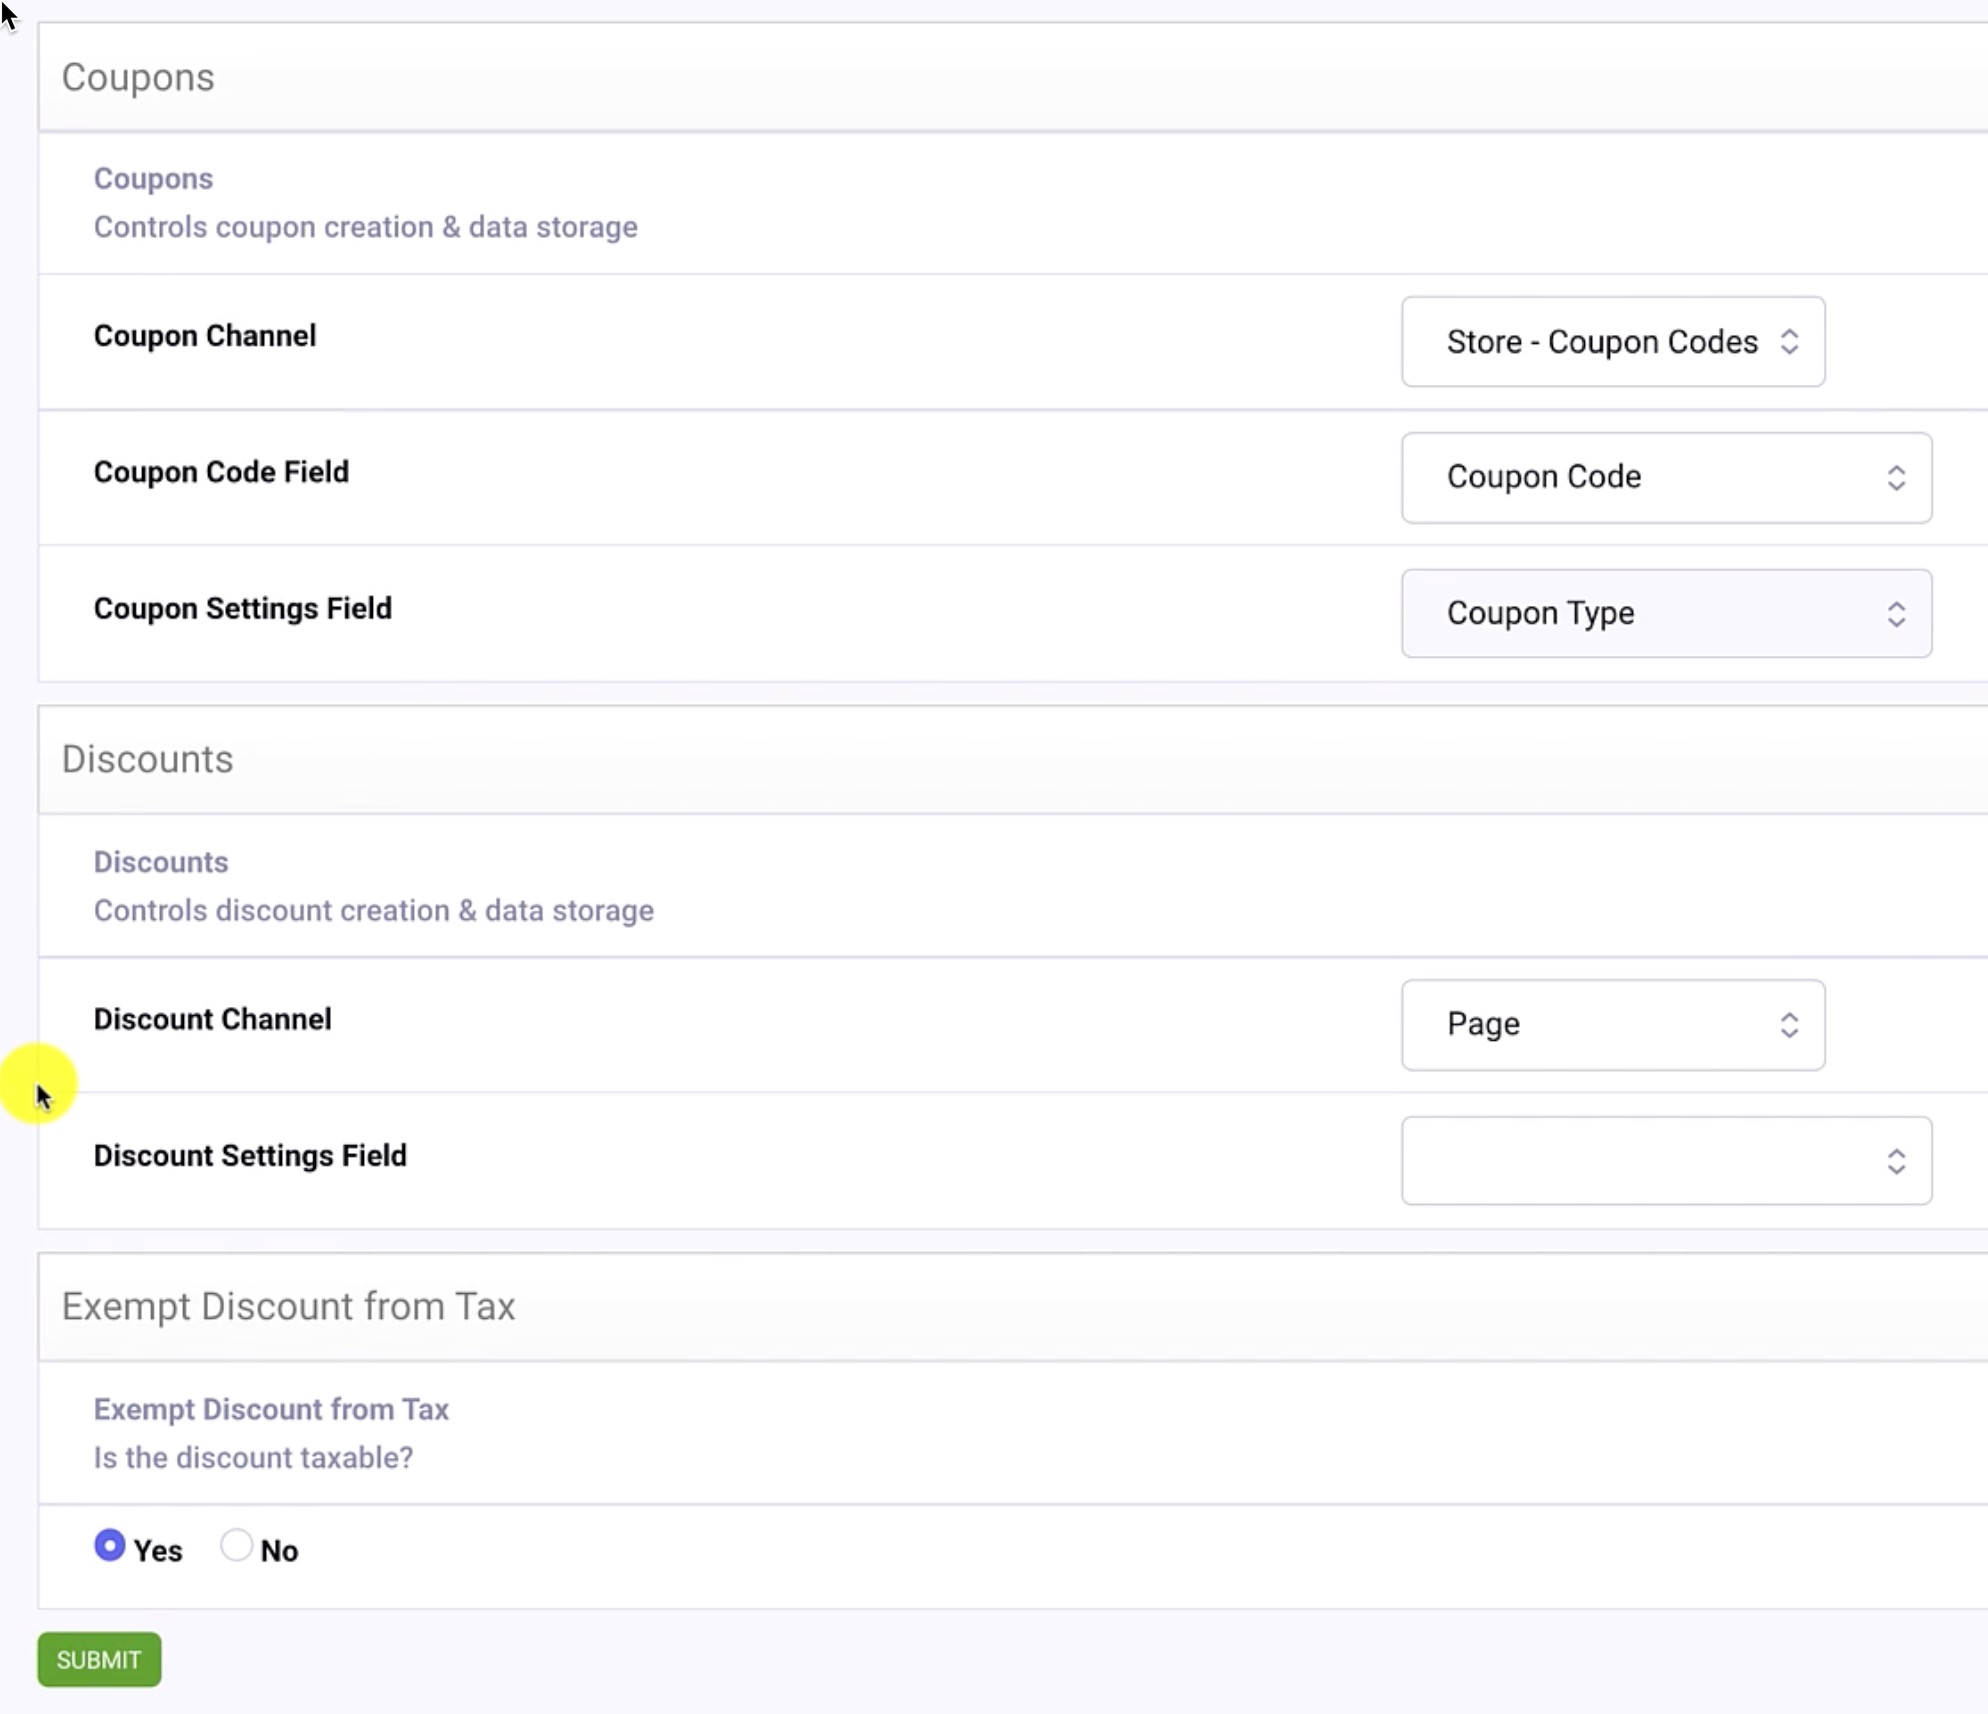
Now, head back to CartThrob, navigate to the Orders tab, and this one’s sort of settle. You have to first click your order channel, Store - Orders, and then be sure to select “Yes” for “Save completed orders to a channel?”
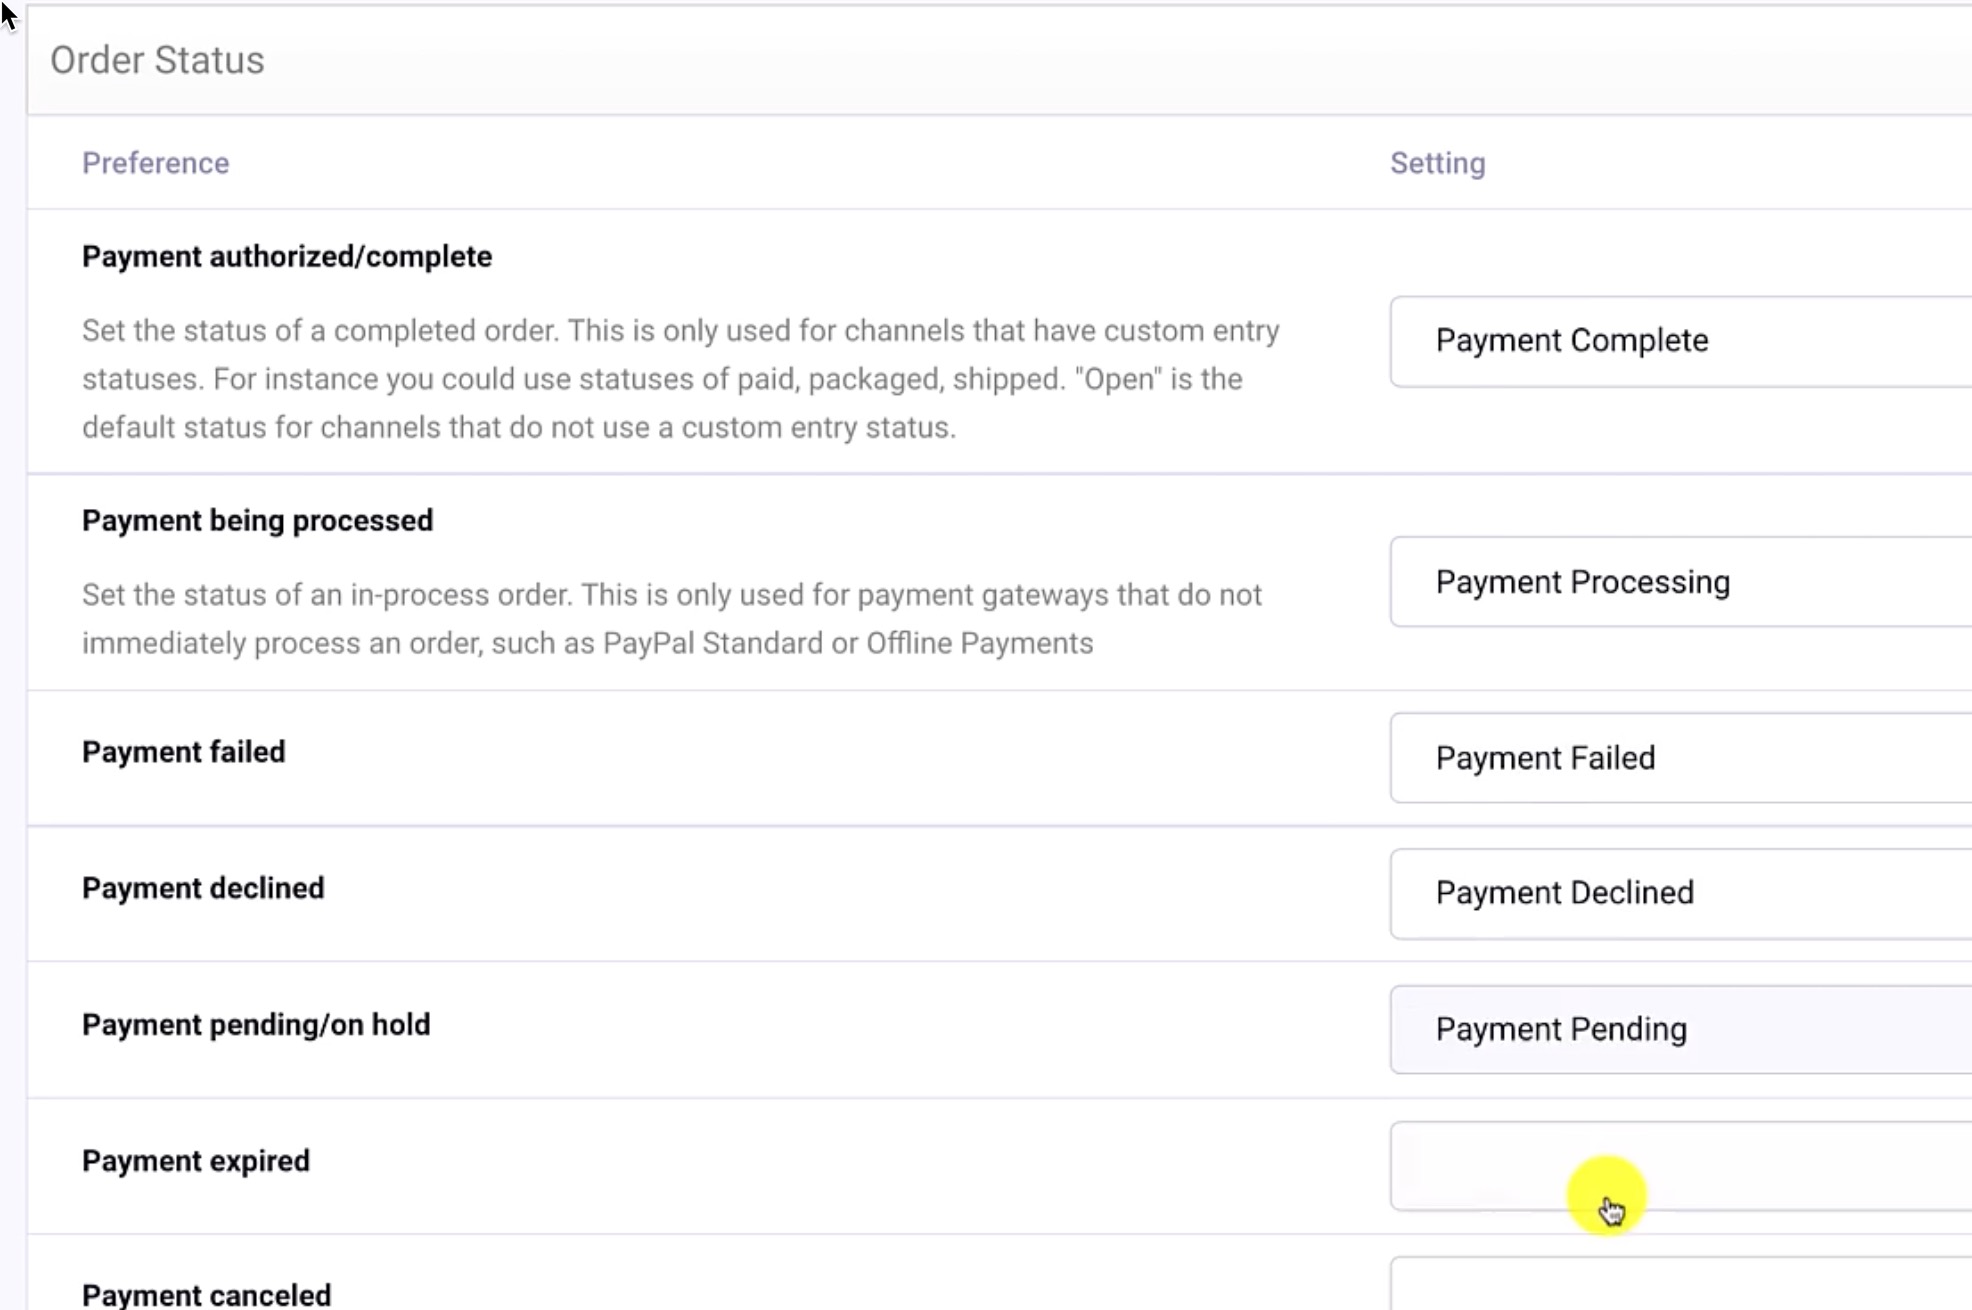
Upon submitting these changes, we should see statuses that need to be assigned. Scroll down to the Order Status section and map each status accordingly.
We’ll follow suit with Order Data Fields. (this one takes a while!)
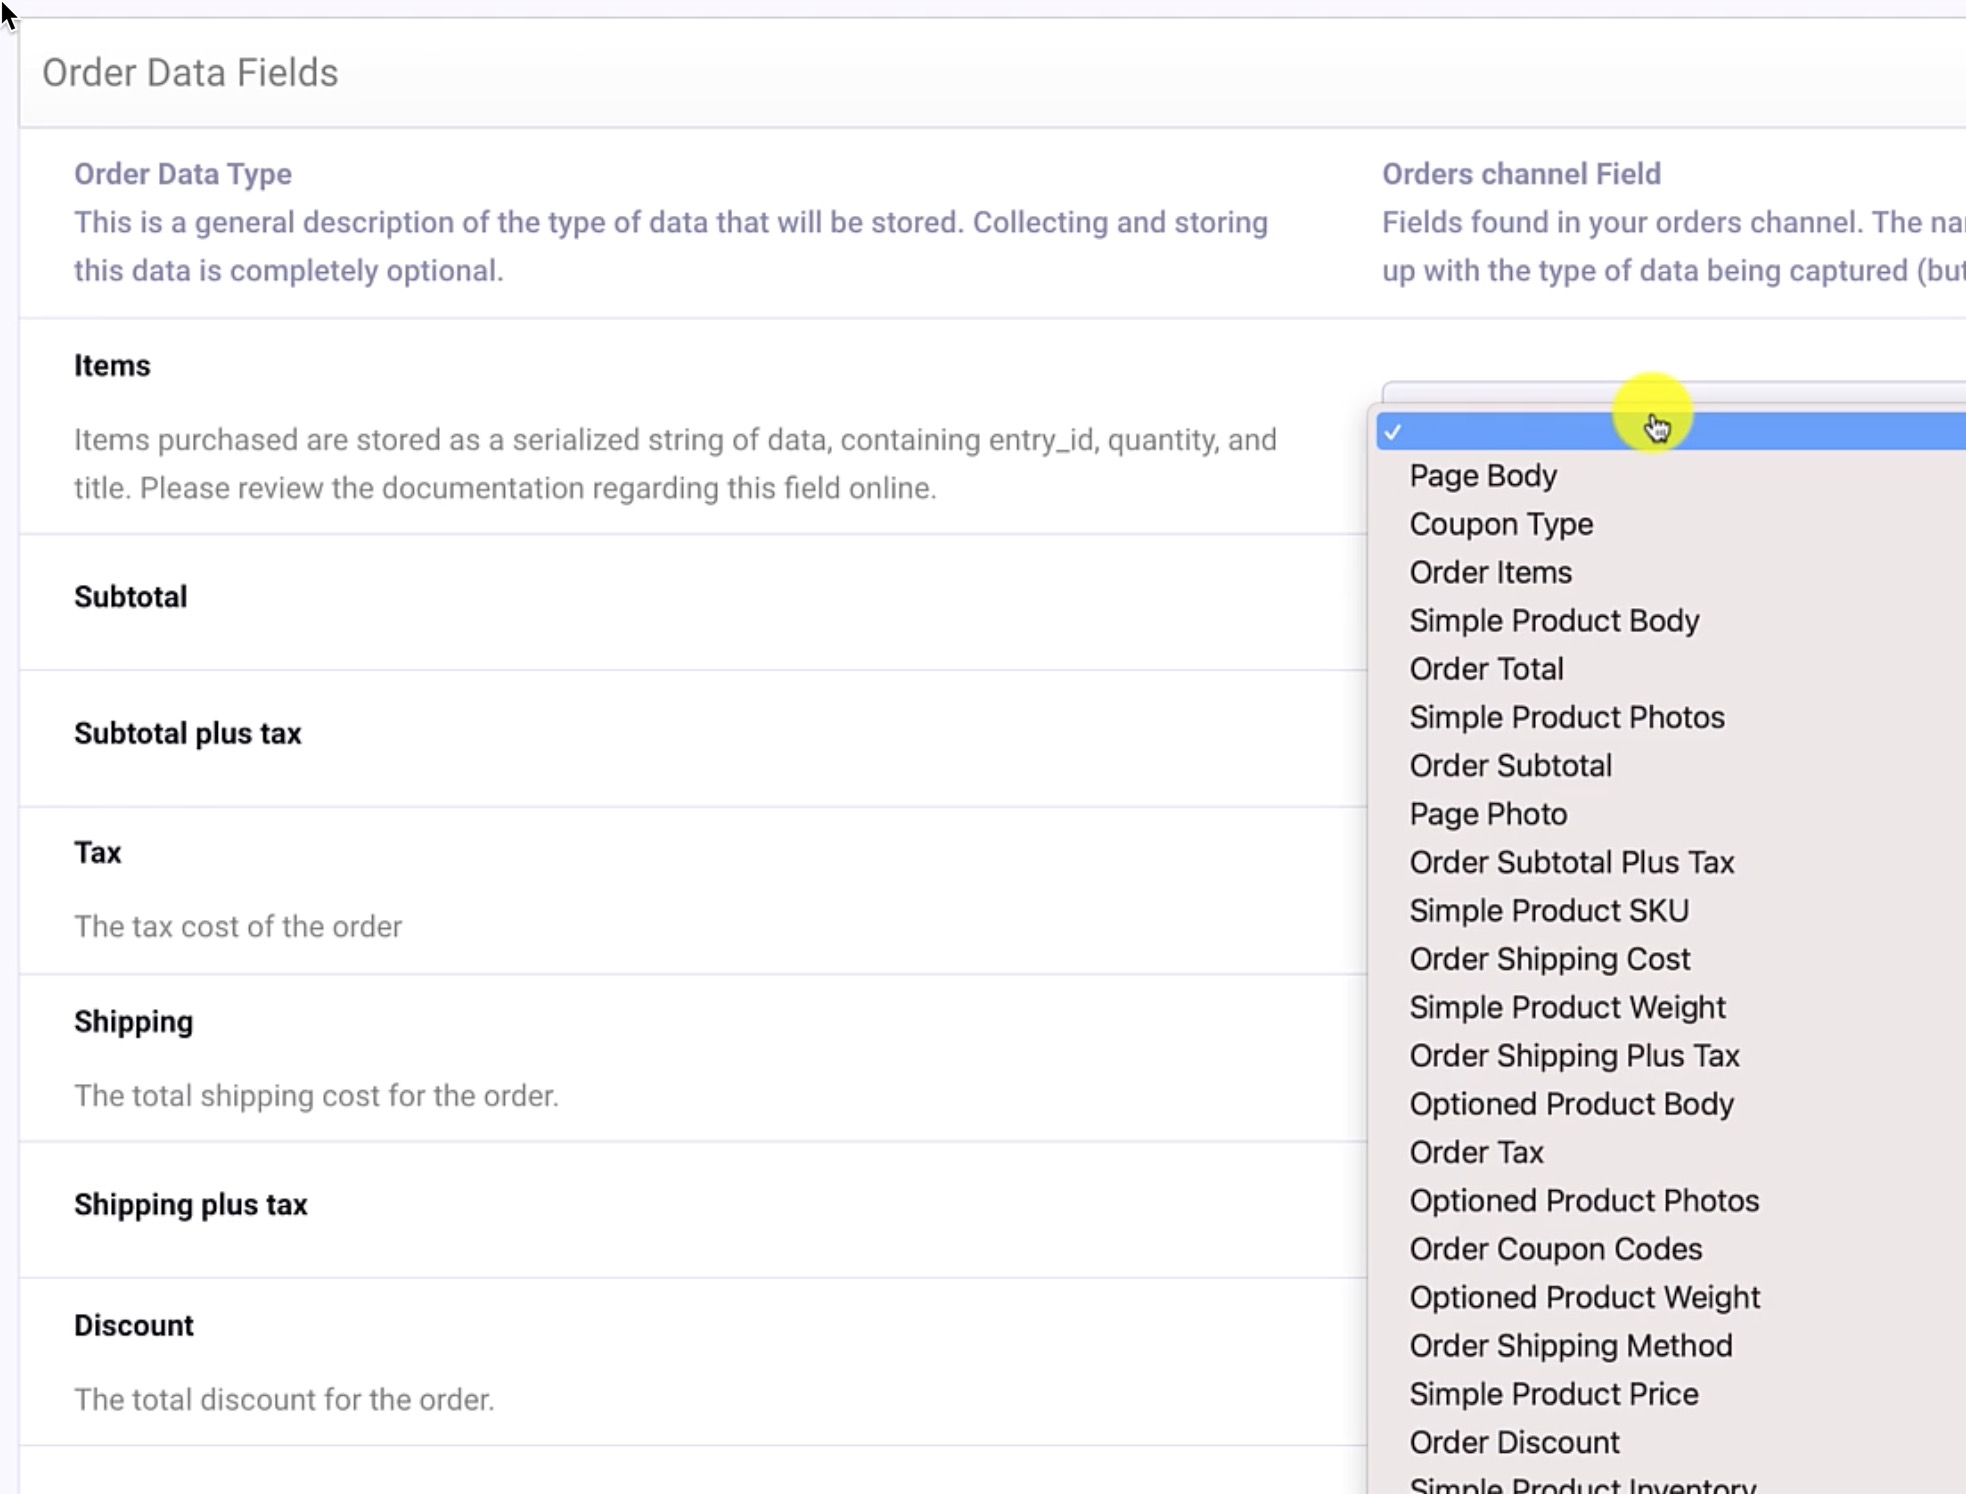
Now CartThrob knows about our Orders channel and its Status and Data fields.
2b) Coupon Code (Discounts)
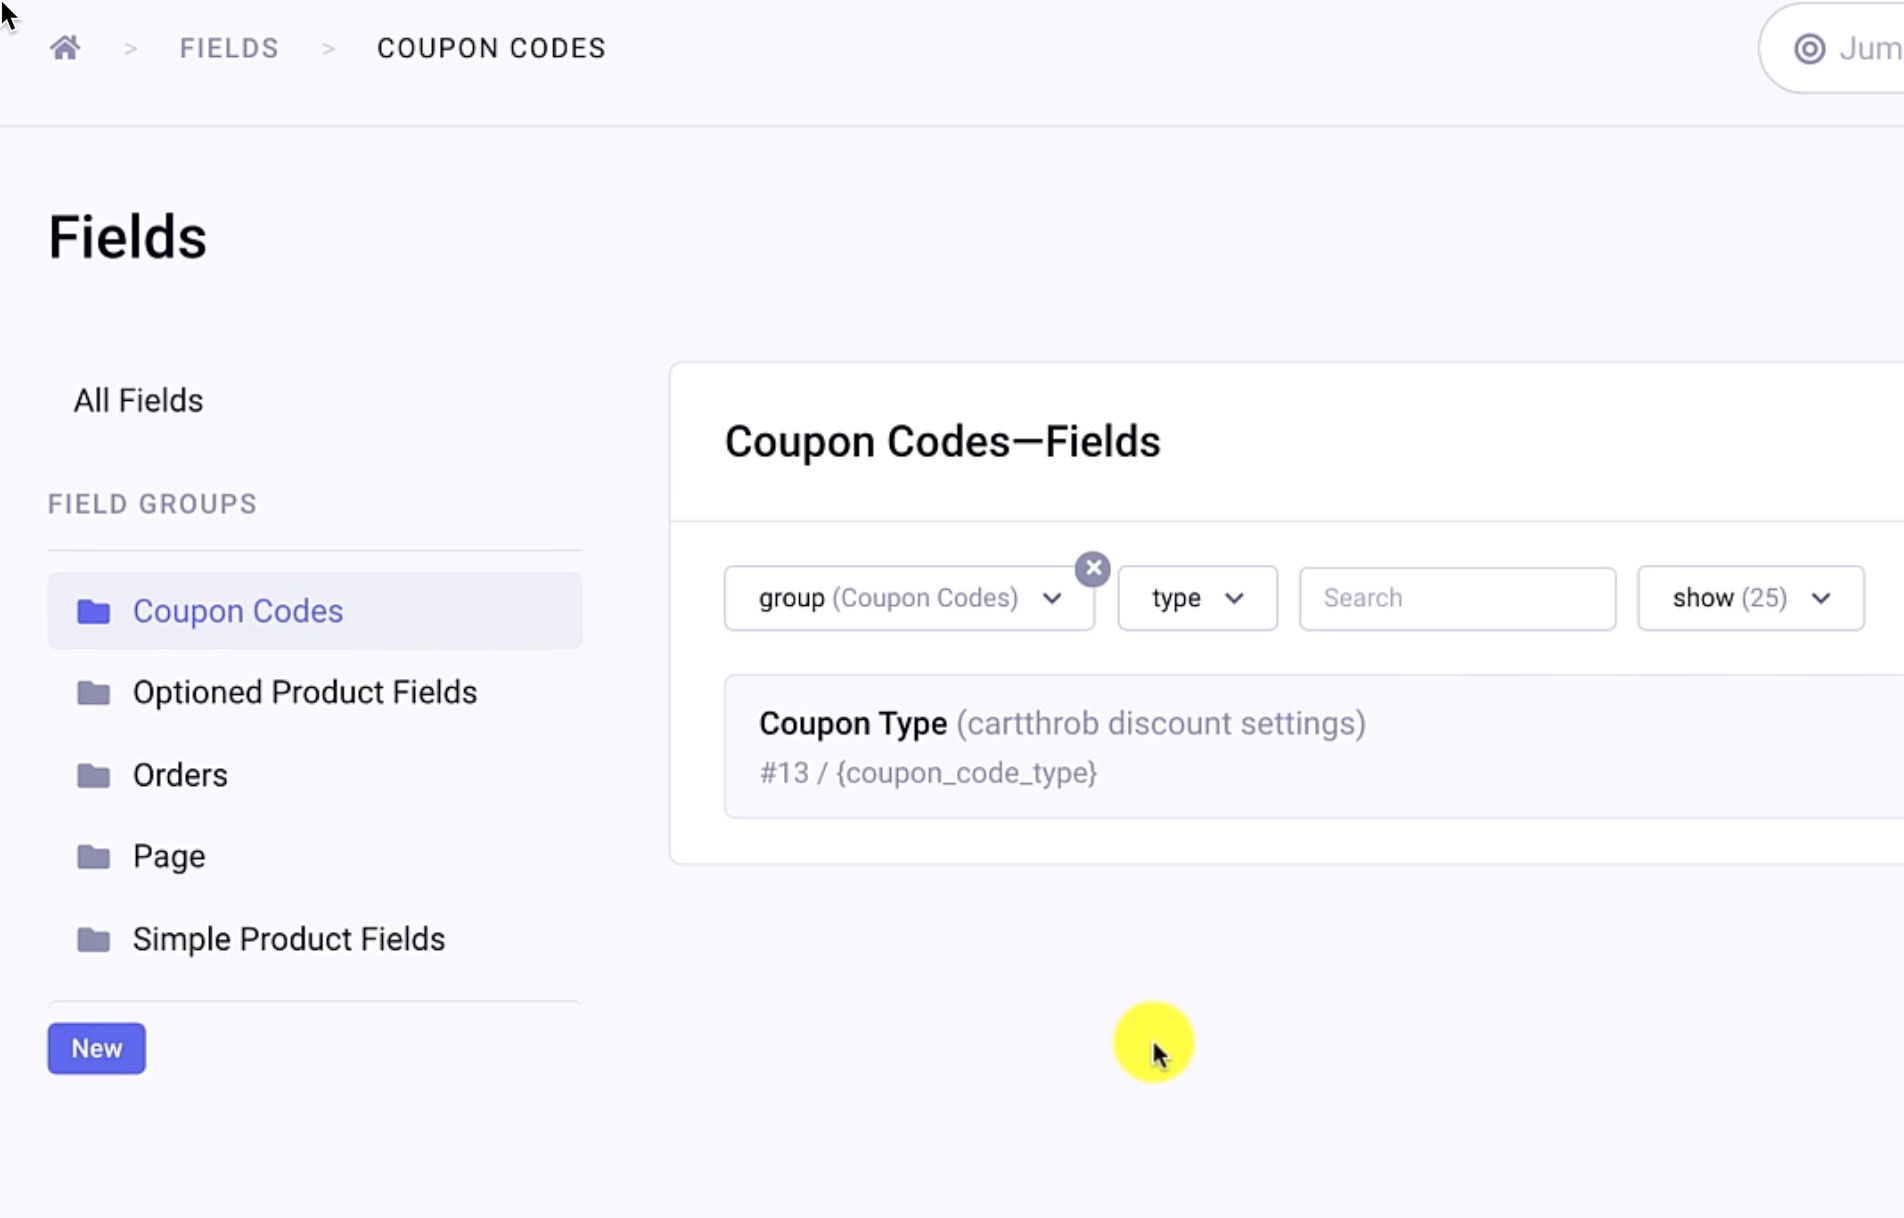
Next, we’re going to make some fields to store coupon codes. In the Fields menu, there’s now a field group called Coupon Codes with a default field {coupon_code_type}. We’re going to supplement this with two more fields of our own.
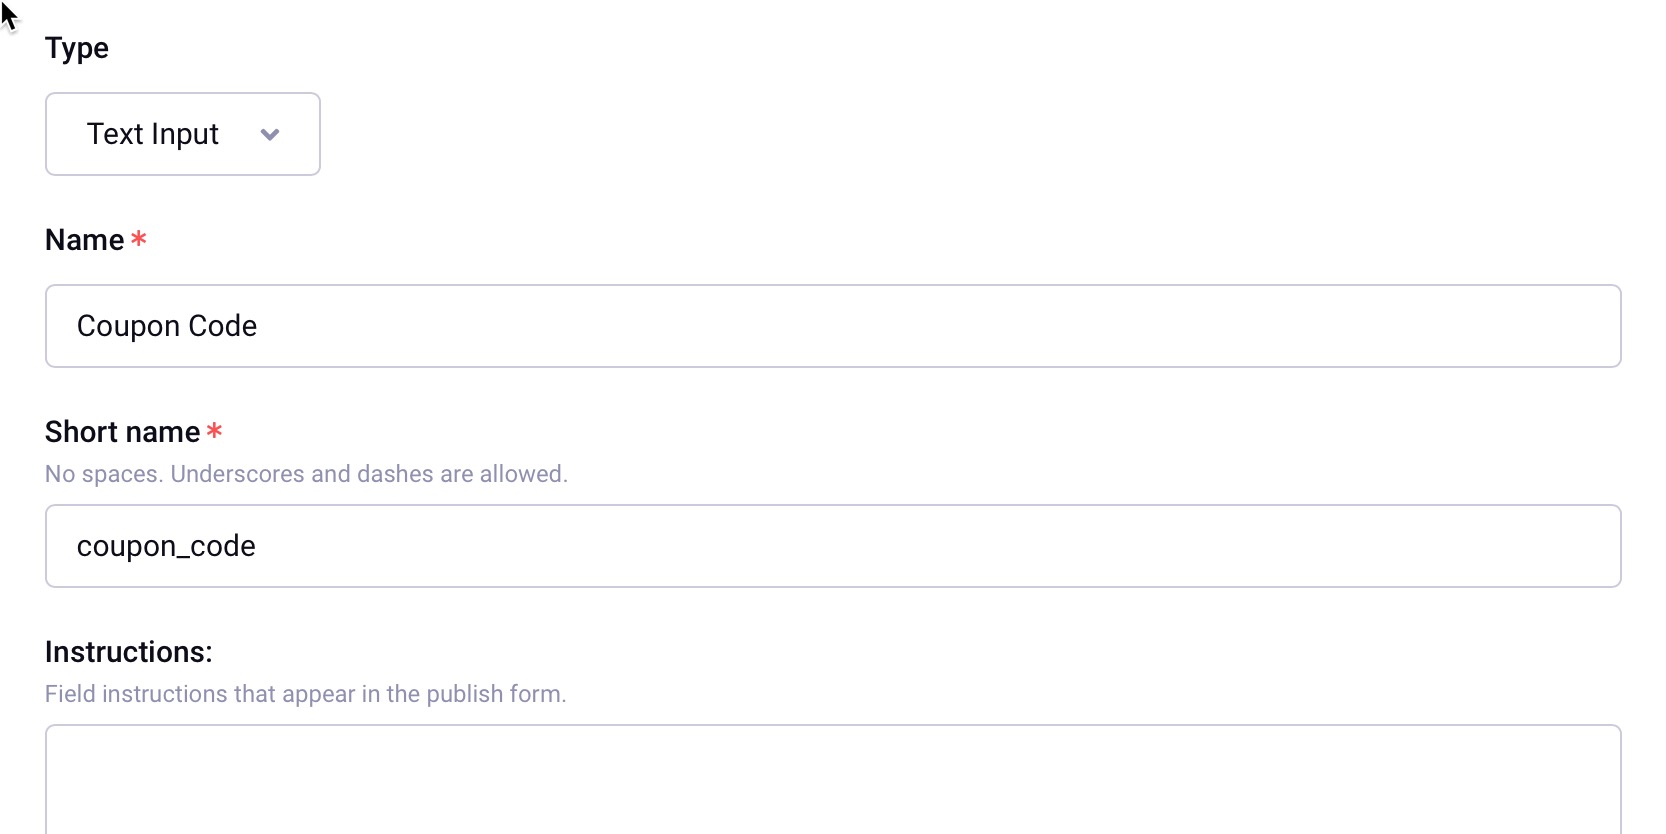
Add a text input field, we’ll call it just “Coupon Code”, shortname {coupon_code}. This will be the field that we put the actual code the customer would type in on the cart page, e.g. “Black Friday” coupon.
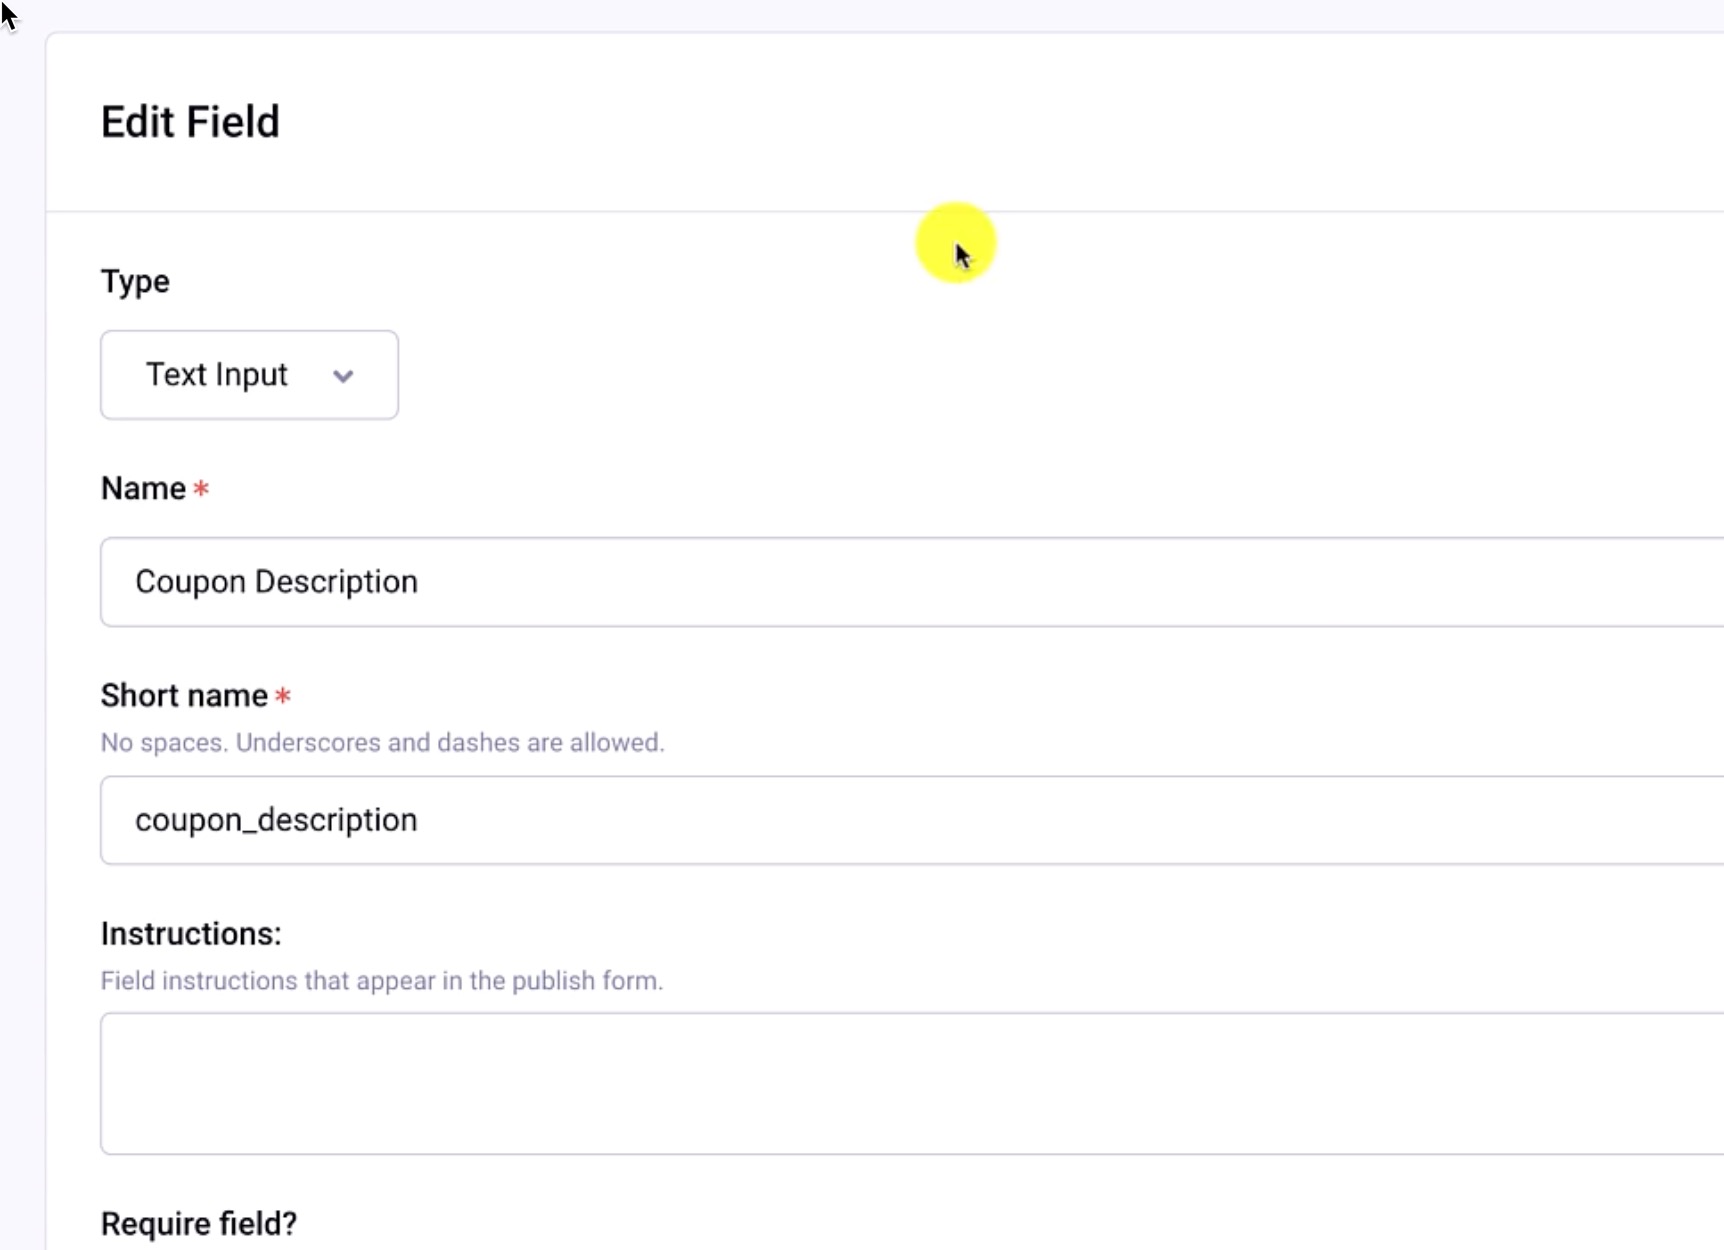
Follow up by creating another text field as the {coupon_description}. This field would be for a frontend display, such as, “You now have a 10% off your order” to display in the cart.
With the discount fields created, it’s back CartThrob settings and then the Discounts tab. Our fields haven’t yet been assigned to the new channel, so we’ll add that setting and click Submit.
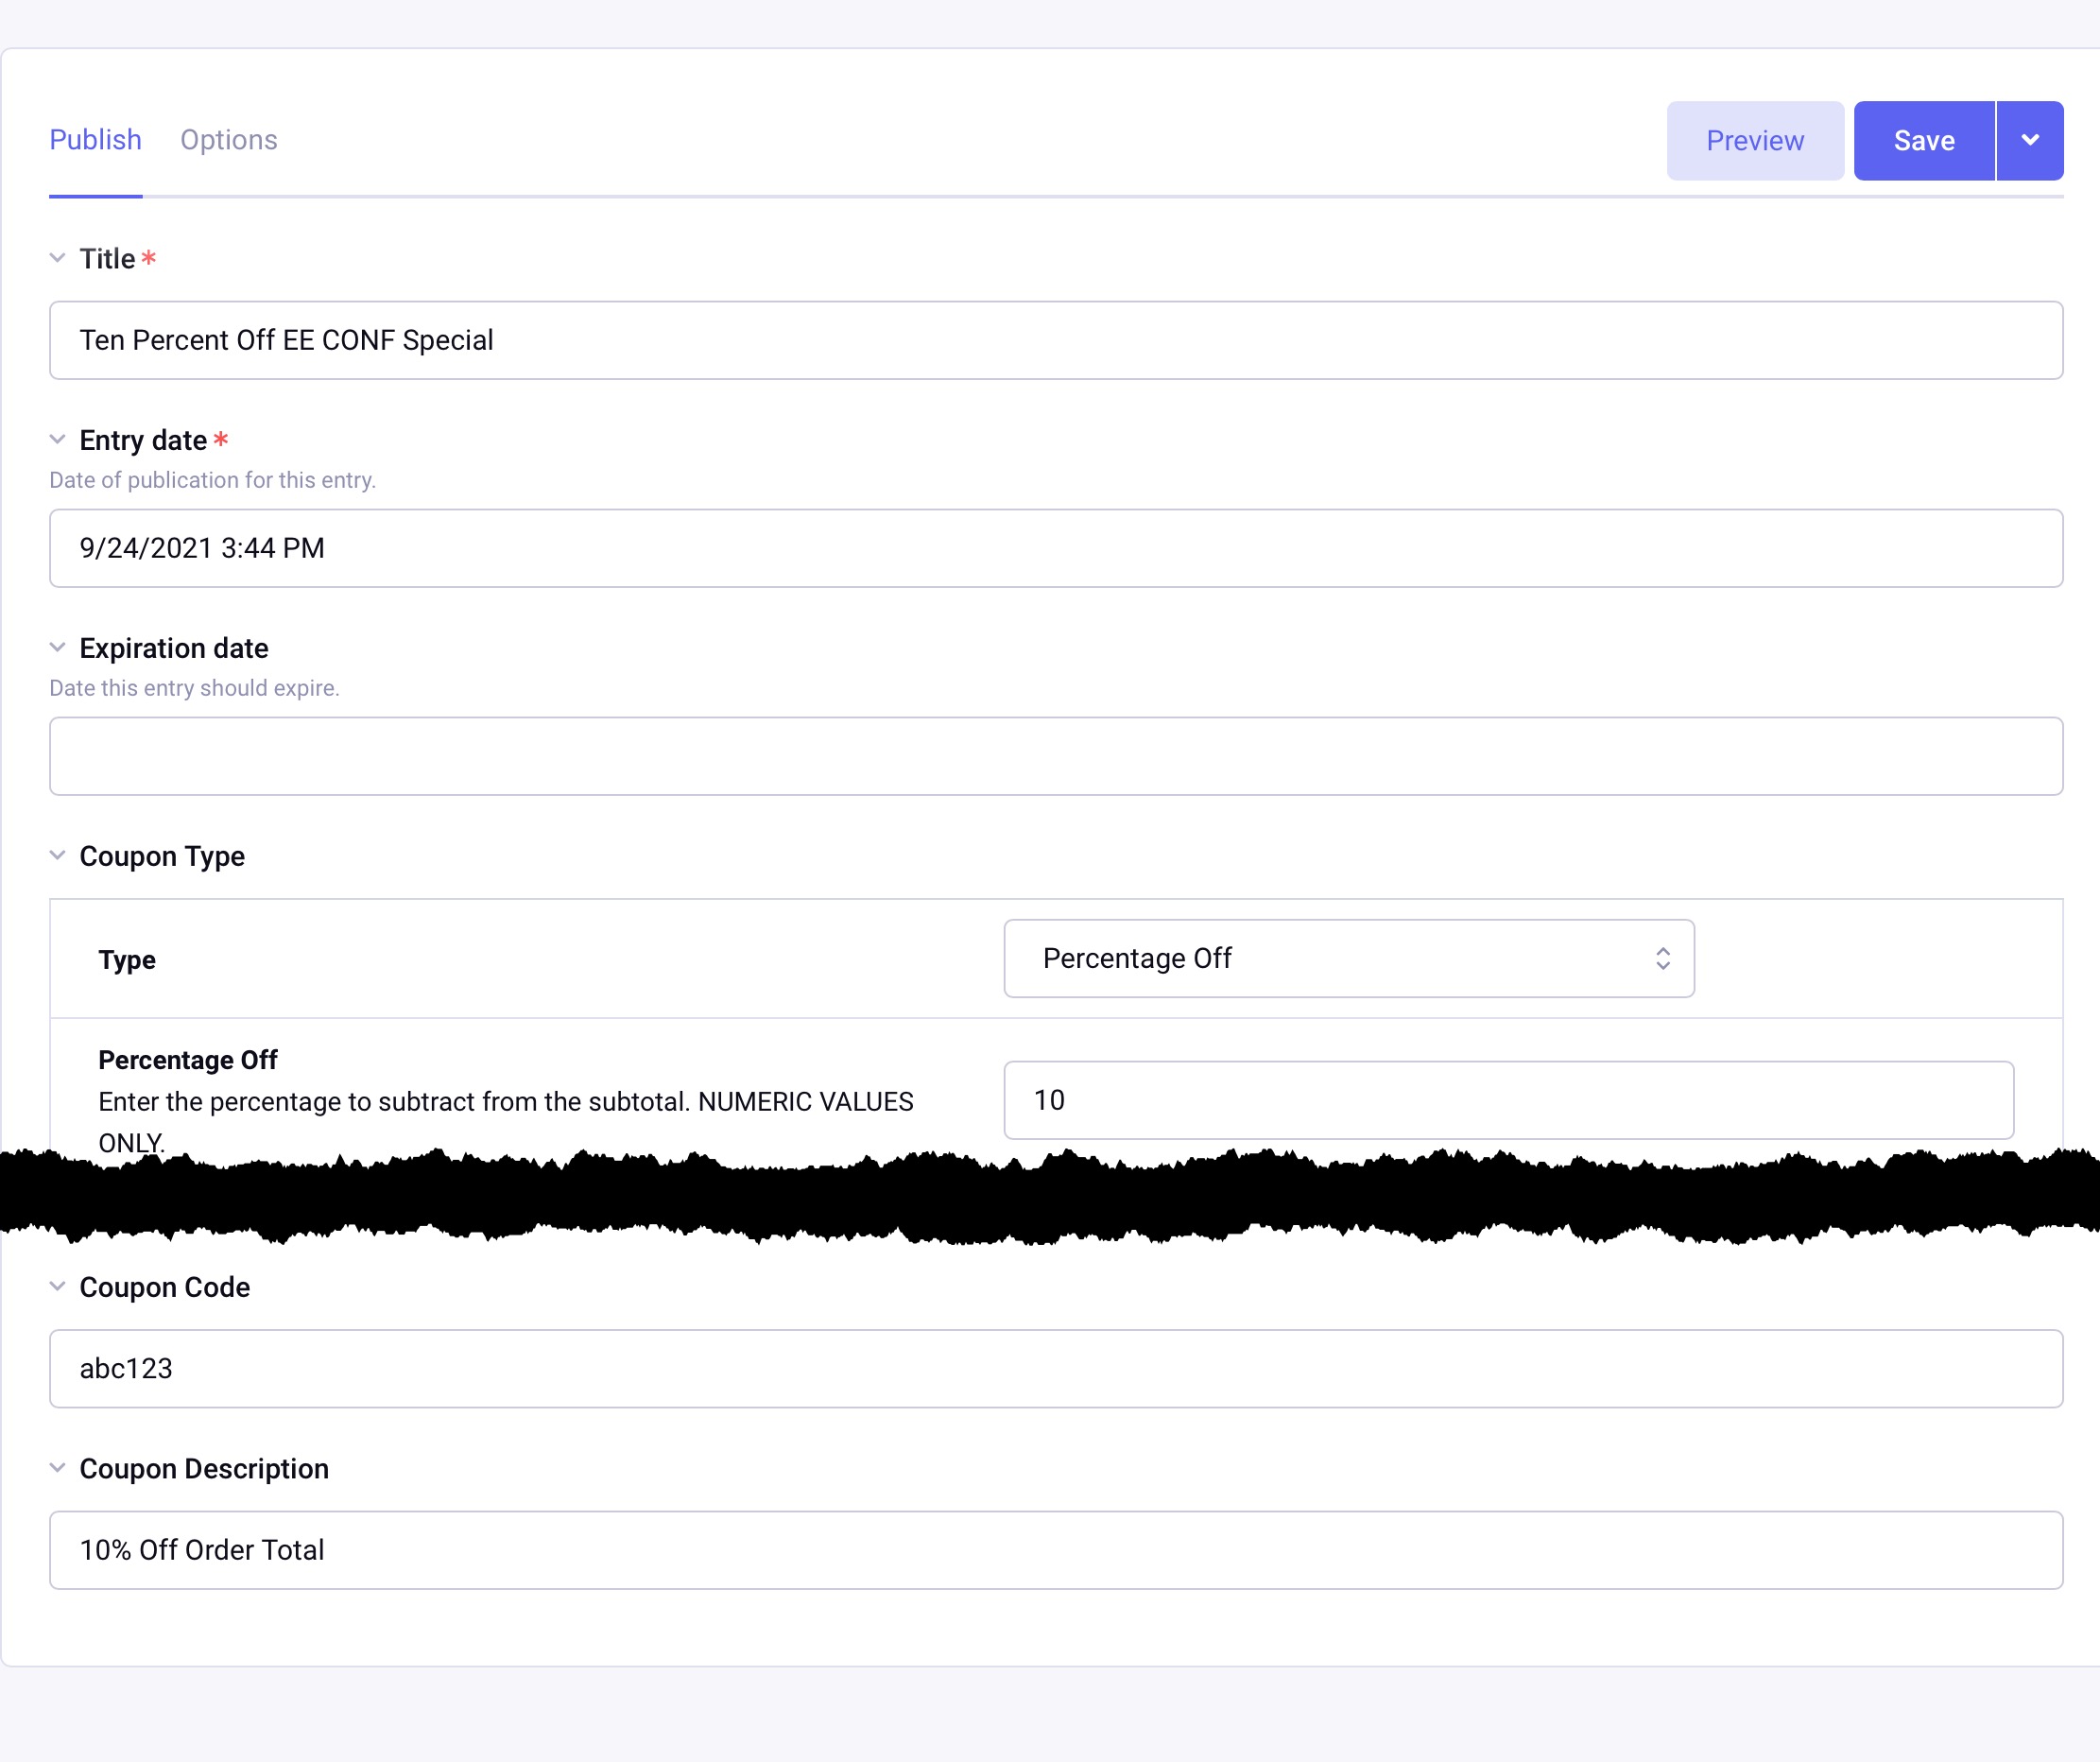
Now we are ready to make a coupon code entry within the Store - Coupon Codes channel. Our title is “Ten Percent Off EE CONF Special,” a Type of “Percentage Off,” and Percentage Off value of 10. And finally, a Coupon Code of “abc123” and a Coupon Description.
We’re done! These coupon codes can be tested on the frontend.
Have questions or comments about this course? Be sure to join the discussion and post in the ExpressionEngine Forums!