
Building an E-commerce Website With ExpressionEngine, Part 3
- 1 - Building an E-commerce Website With ExpressionEngine, Part 1
- 2 - Building an E-commerce Website With ExpressionEngine, Part 2
- 3 - Building an E-commerce Website With ExpressionEngine, Part 3
- 4 - Building an E-commerce Website With ExpressionEngine, Part 4
- 5 - Building an E-commerce Website With ExpressionEngine, Part 5
Part 3: Shipping / Tax / Payments
3a) Shipping
Within CartThrob, navigate to Shipping. There’s several plugins to choose from; for this example I’m using By weight - Threshold. The settings are self-explanatory. The shipping plugin uses a tiered system so any order weight total of up to 5 lbs will match the first row, resulting in a shipping charge of $8, and so on.
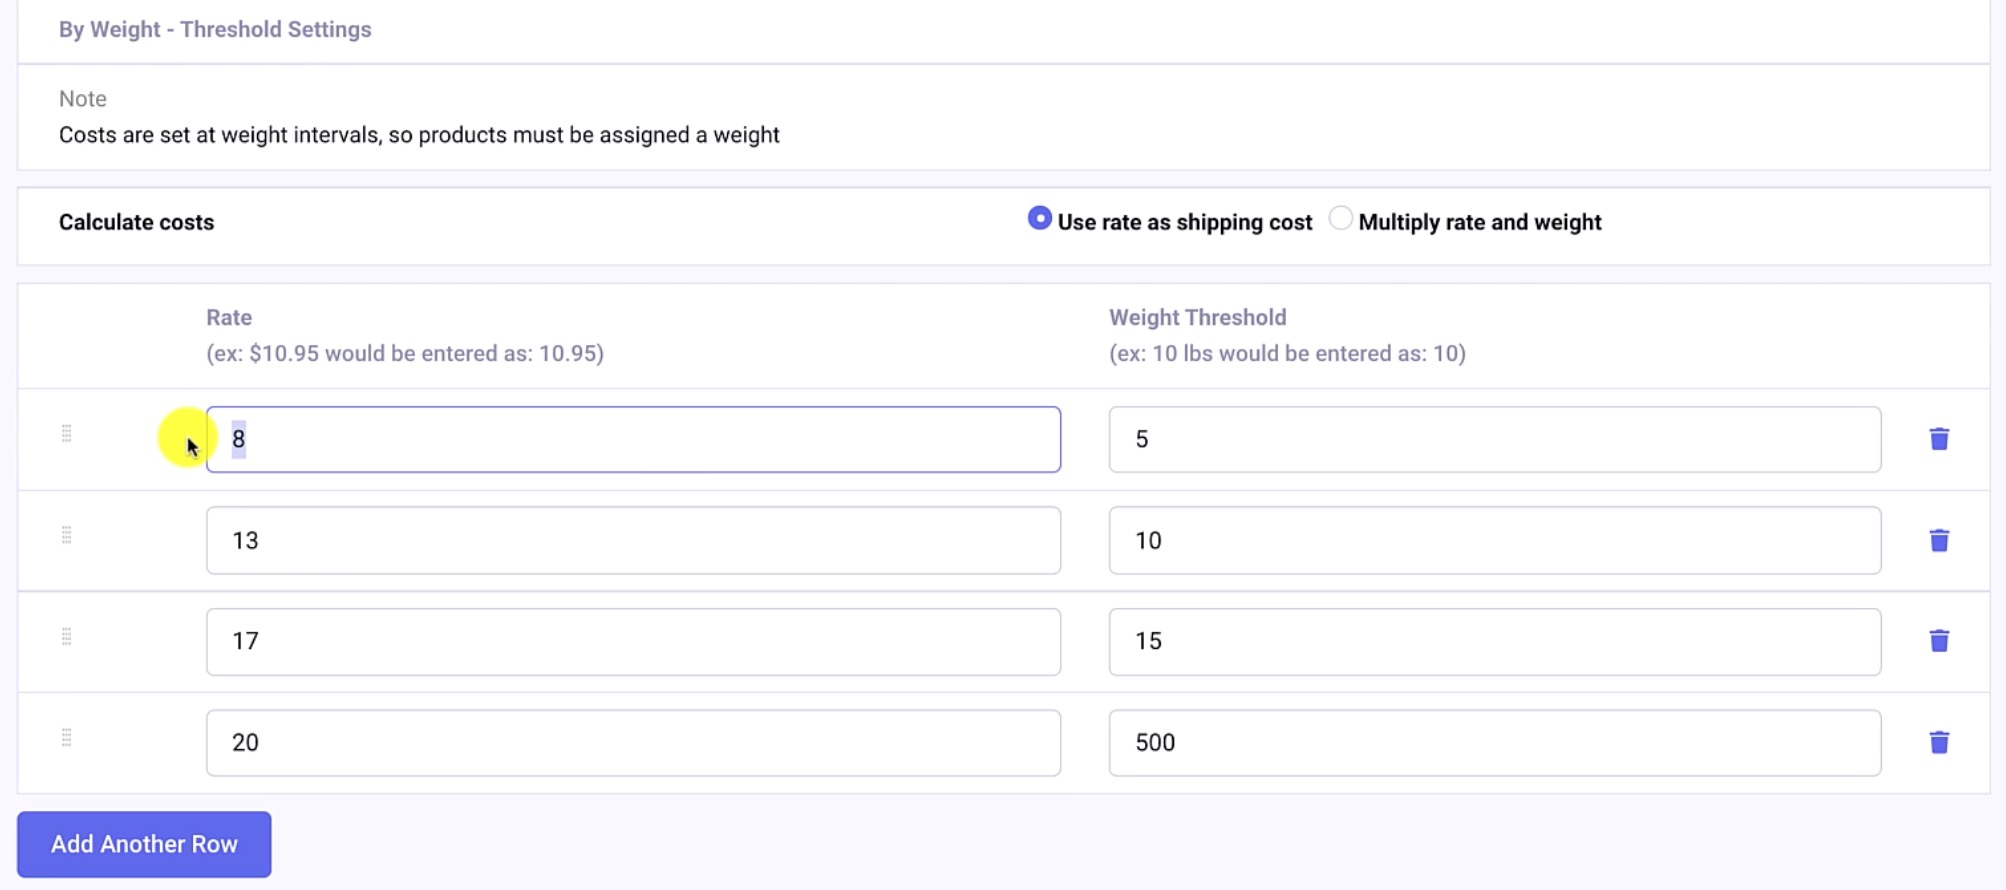
For the last row I have a really high threshold of 500, so anything after 15 lbs will just cost $500.
Click Submit to save the plugin selection and its values.
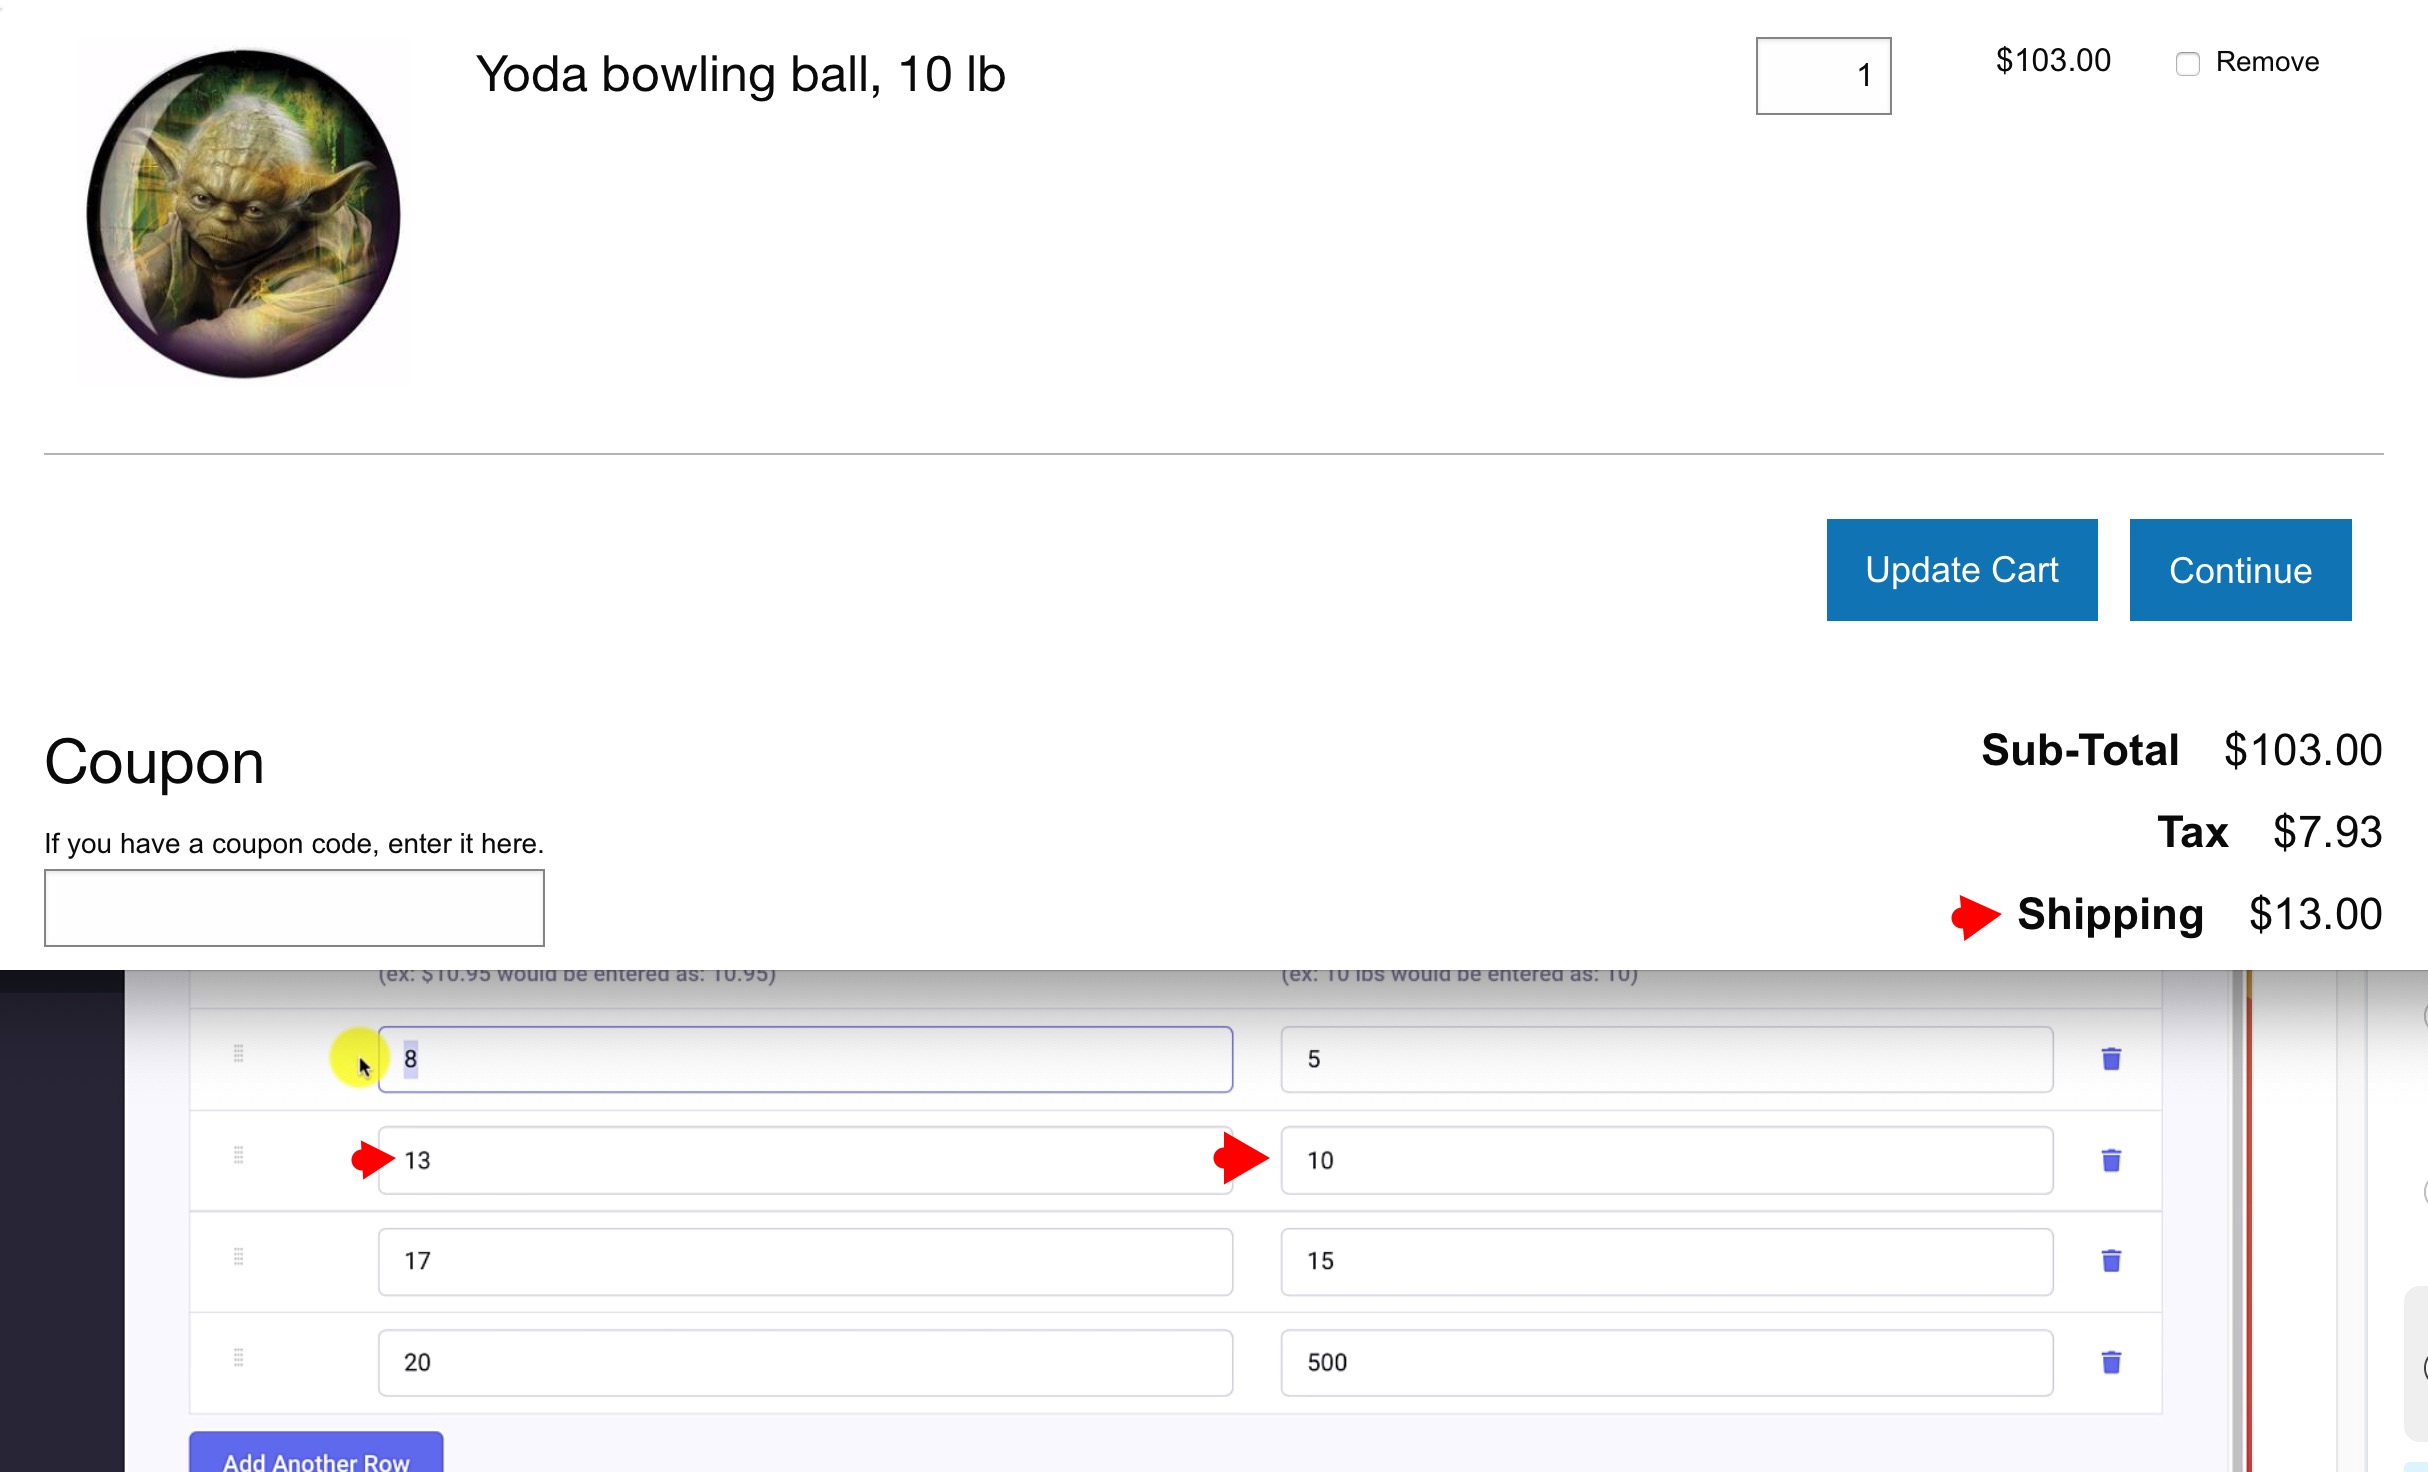
On the frontend we’ll test the Yoda Bowling Ball. The cart tallies shipping as $13, because the By Weight - Threshold plugin matches the order total of 10 lbs. (Totals up to and matching 10 lbs will match the $13 calculation.)
3b) Taxes
Within CartThrob, navigate to Taxes. I’ll leave “Calculate taxes using shipping address” as No, since I want to calculate by billing address.
For the Tax Plugin, we’ll use “Tax by Location - Percentage”. Each row represents a tax rate, region, and zip. CartThrob will use these values to match to the customer’s billing address to tally the proper tax rate. For this example, I’ll use 7.7%.
Like shipping, I added a second row with a high value to catch all other situations. Anything that doesn’t match the first row would be match by this global rule which is 20%. We could put in more rows and more zip codes and regions, but we’ll leave this simple for now!

Click Submit. Taxes are done! Add an item to your cart on the frontend and give it a try!
3c) Payments
Now that our shipping and tax are behaving, I’ll look at the payment gateways. Within CartThrob, navigate to Payments, and focus on the first menu, Choose your primary payment gateway. I’m using the Stripe plugin developer mode. (Stripe and Authorize are the gateways I use the most. I prefer Stripe because it’s just easier to test compared to Authorize or Paypal)
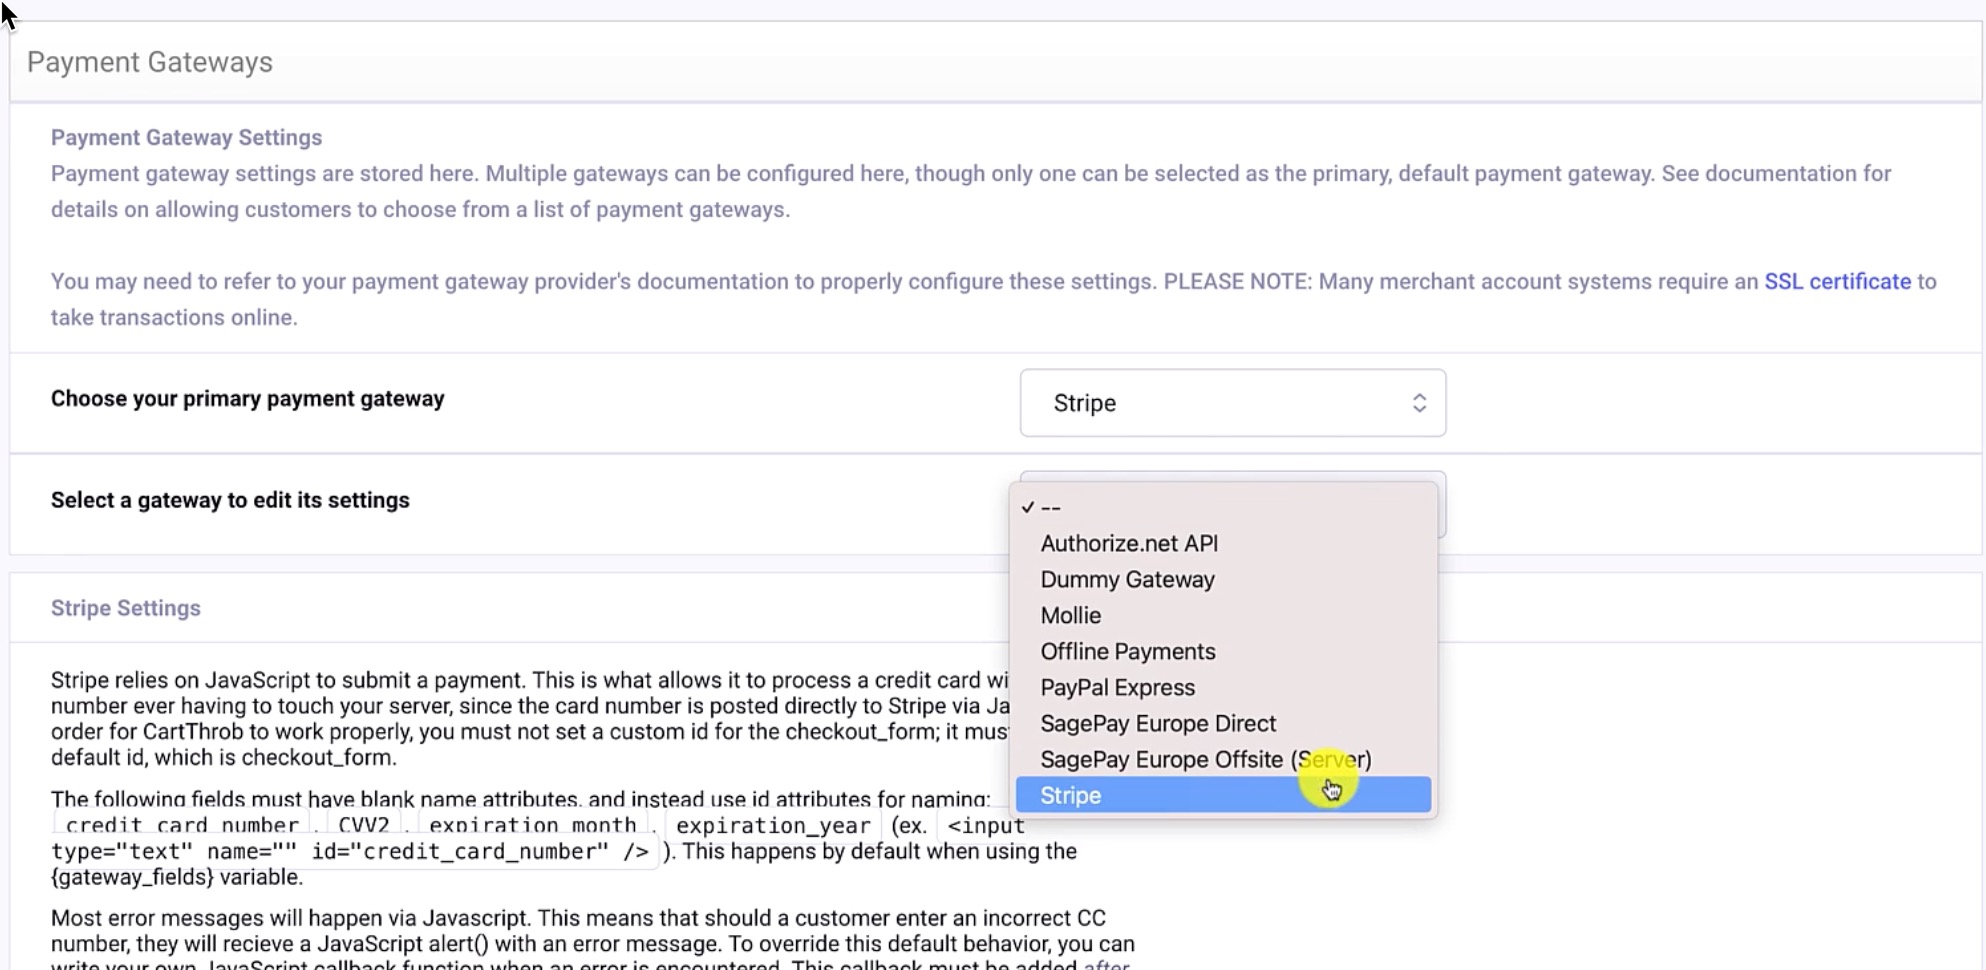
You can choose the various gateways that CartThrob has available. The first select menu is showing you what gateway is chosen, the second is giving you the chance to edit that gateway’s settings. (the settings will appear below, without a page reload, upon making this selection)
Below is where I have my test modes selected, and I have my Test Mode API key (secret), and Test Mode API key (publishable) that I configured within my Stripe account.
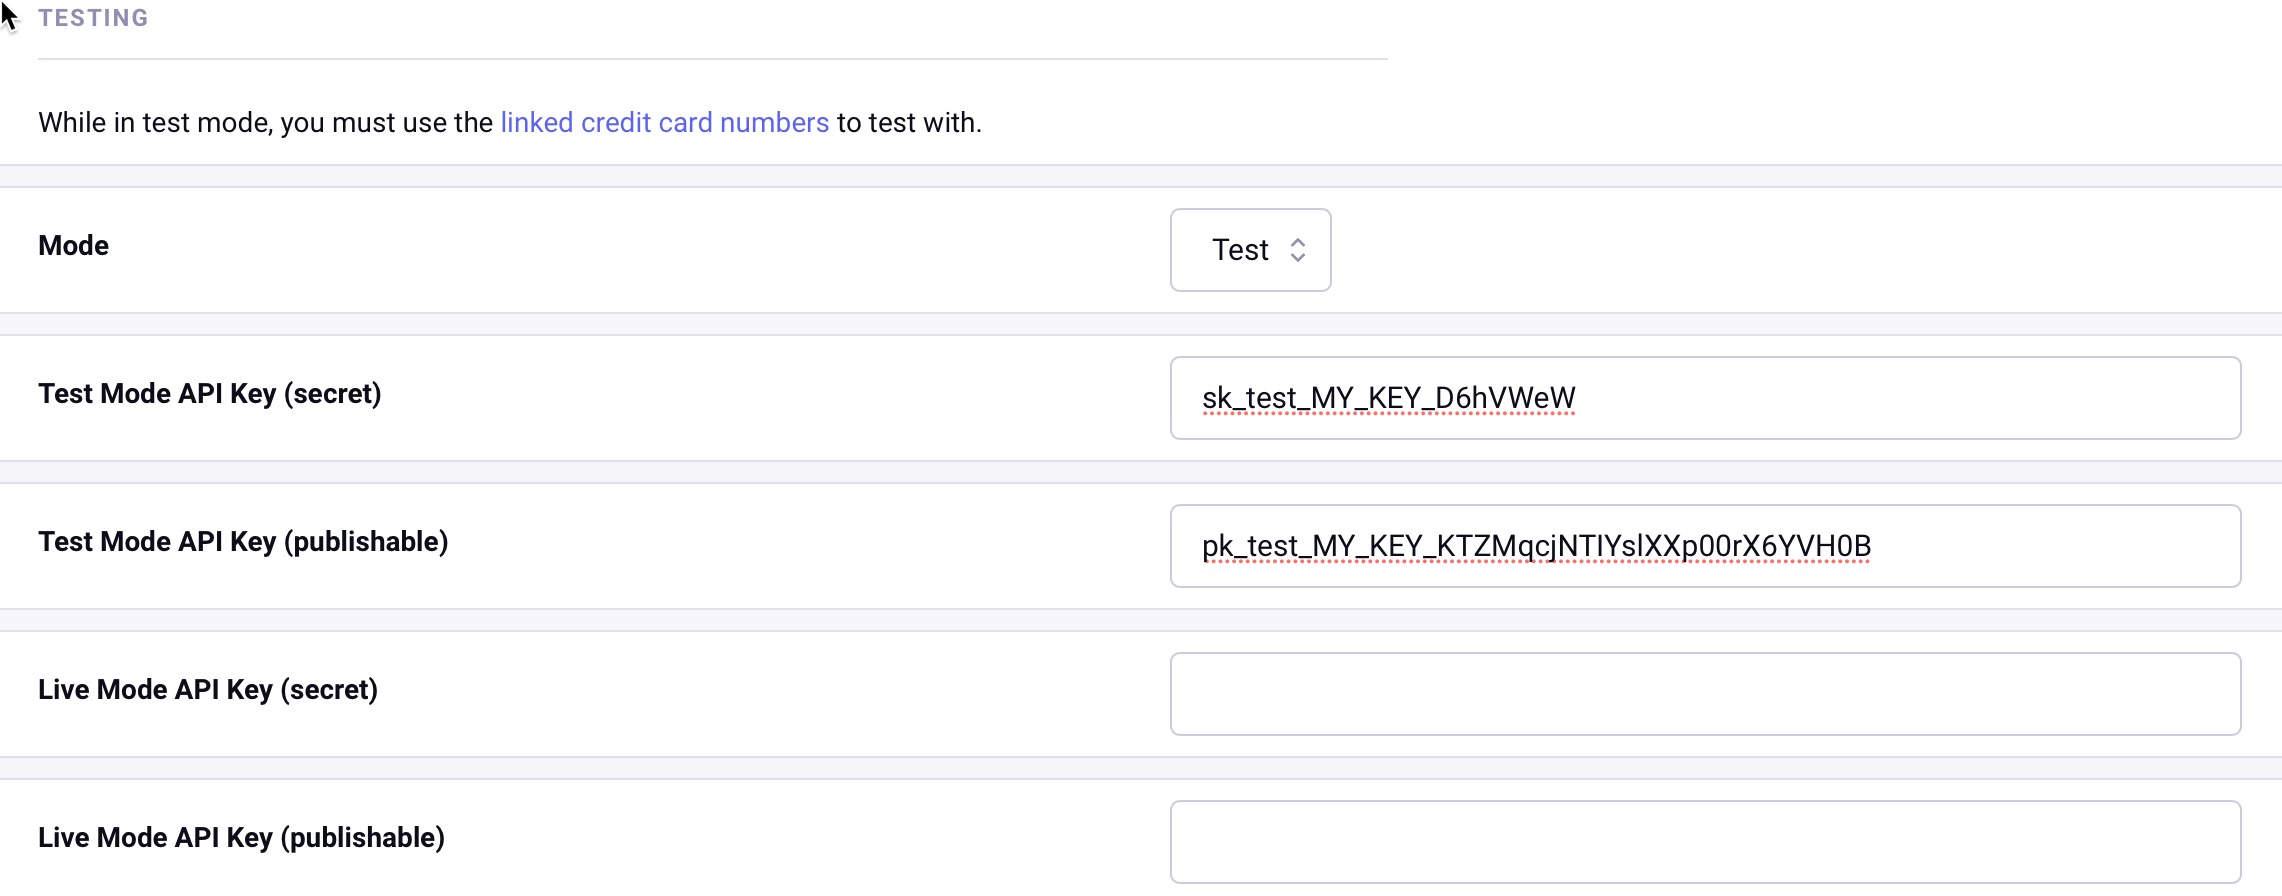
Everything else I can leave as-is. Click Submit to save the changes.
3d) Submit an order on the frontend
Now we can actually complete an order! At the bottom of my checkout page, I’m using the default Stripe test number, 4242 4242 4242 4242, providing any CVV code and a valid expiration date.
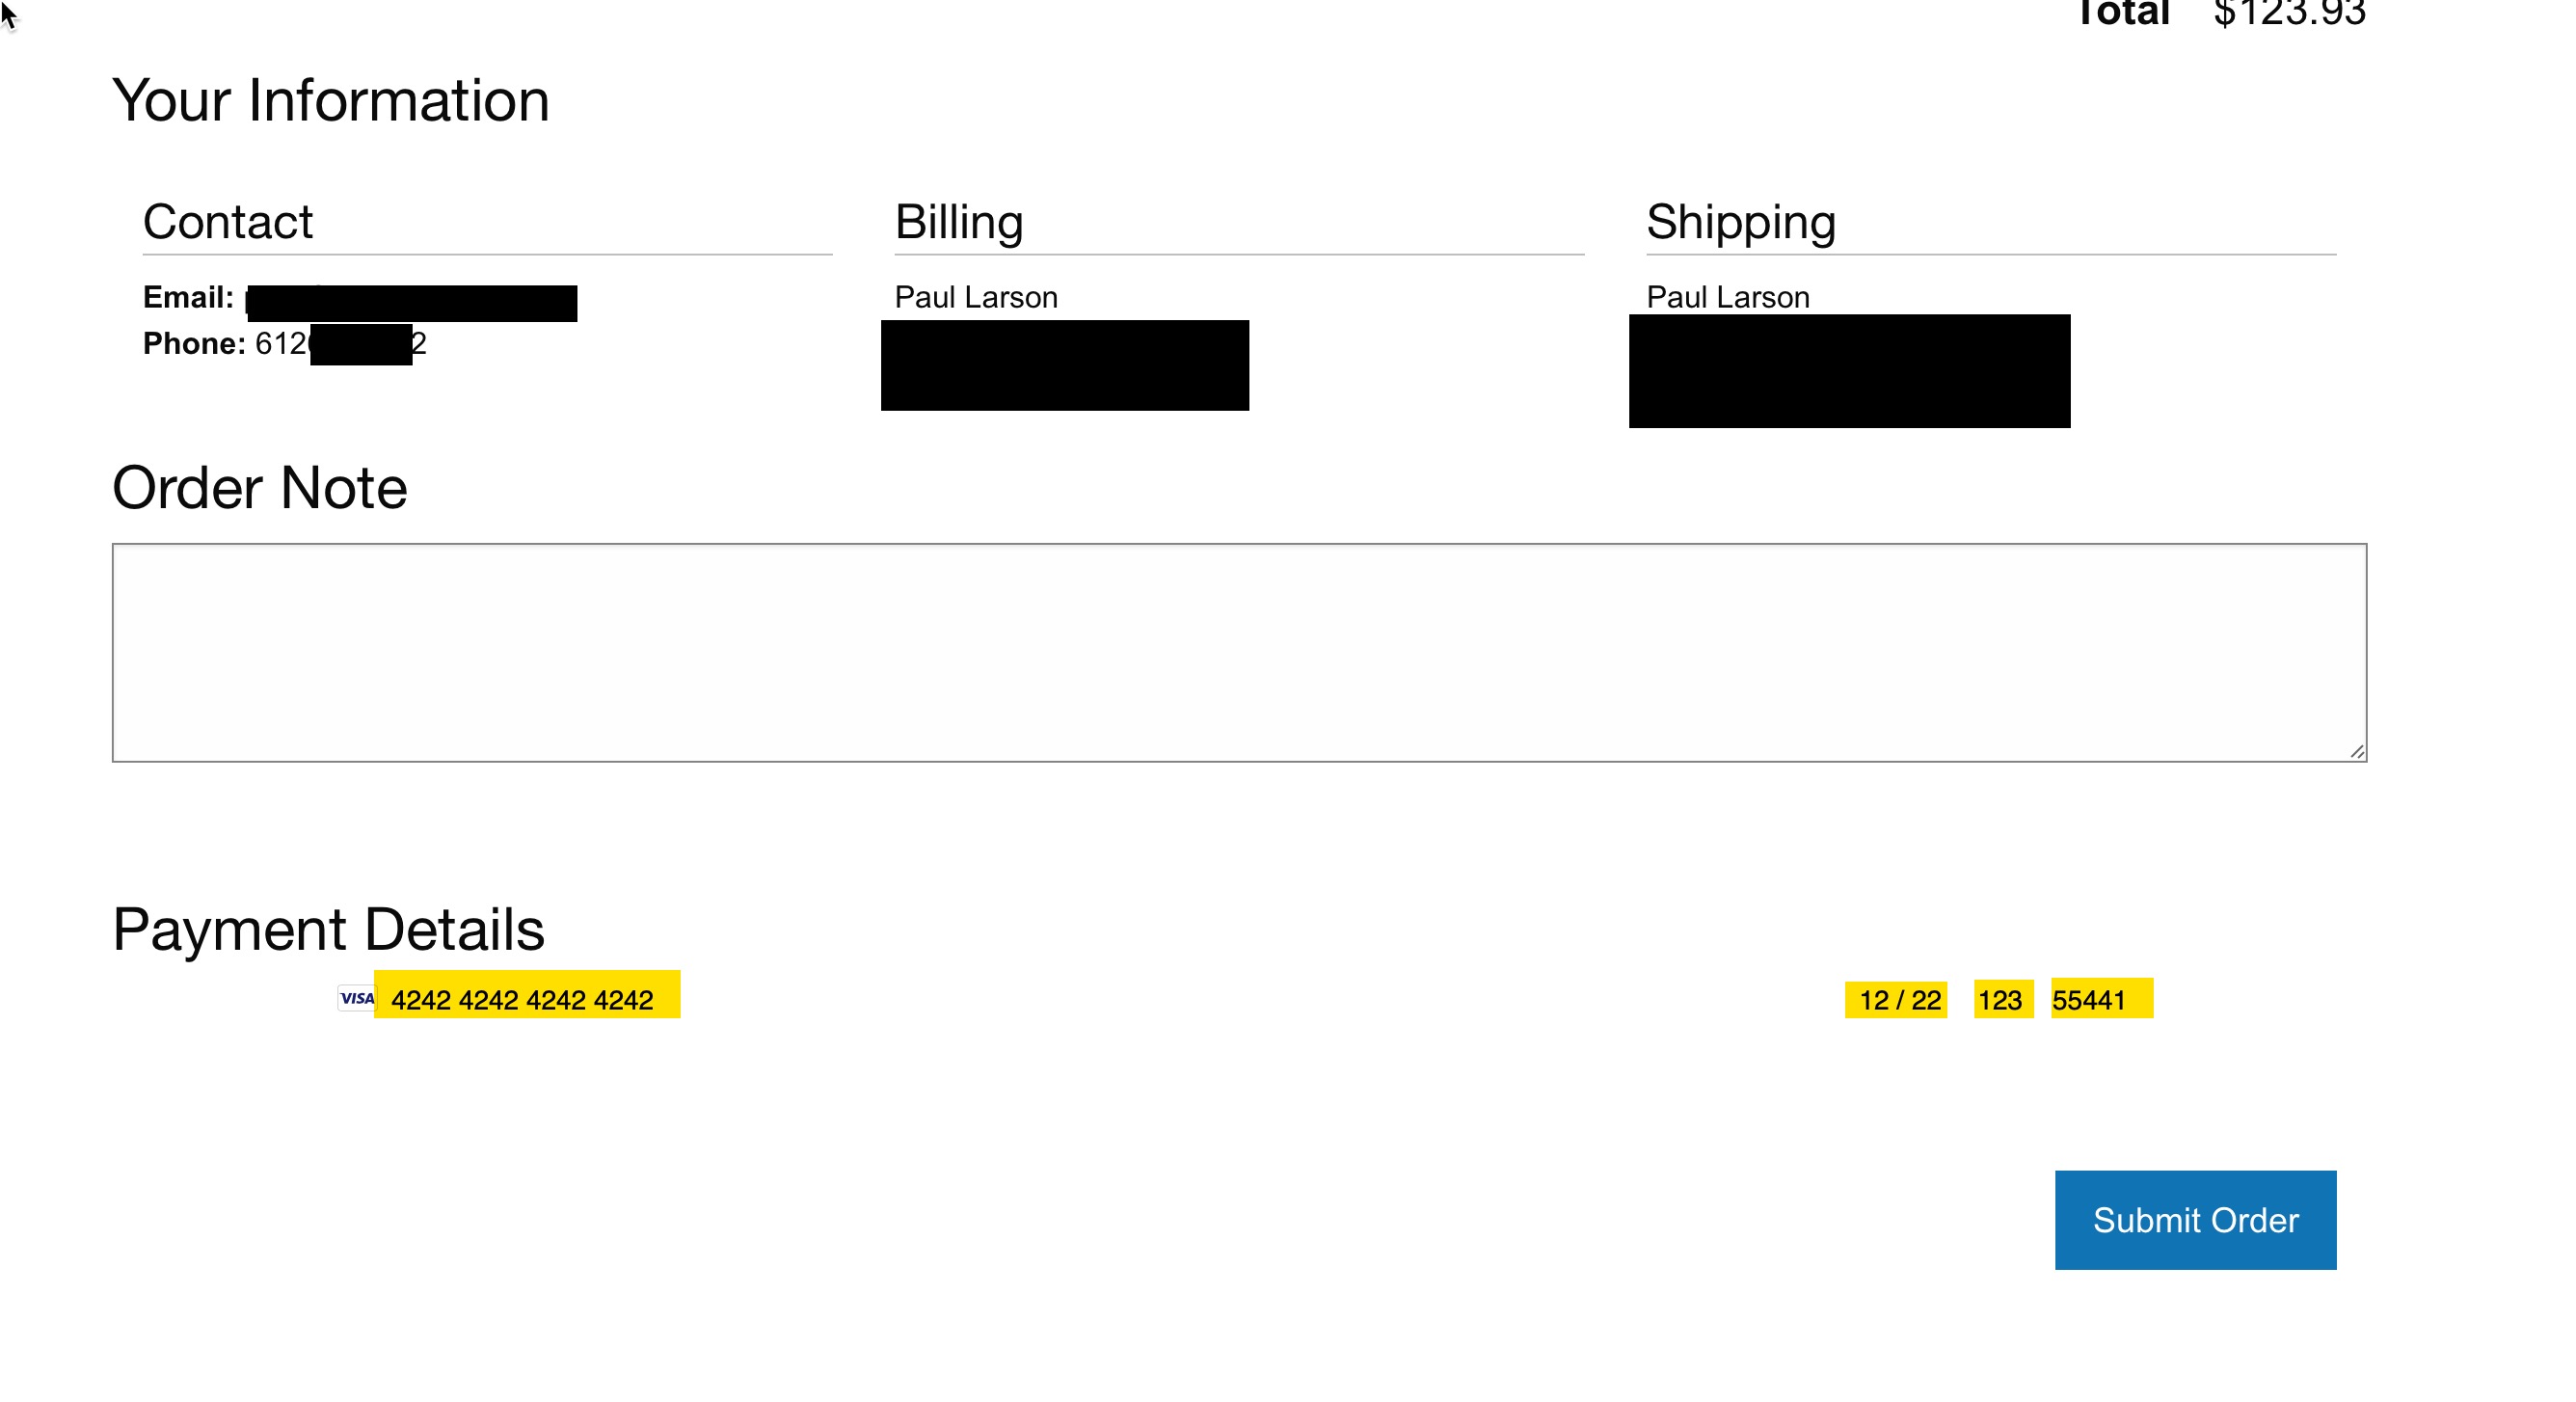
Our test order was hopefully successful! Head over to Stripe (or your gateway), and view the appropriate Dashboard for test orders to confirm.
Have questions or comments about this course? Be sure to join the discussion and post in the ExpressionEngine Forums!
