(Methods in this article current as of 2025, and should apply towards any platform that handles cookies server-side)
Cloudflare has been a widely adopted and valuable service for many years, offering speed, security, and scalability benefits for nearly any website. Yet even today, many developers overlook or misunderstand how to properly configure static caching—especially when using a dynamic CMS like ExpressionEngine, and when cookies (like consent banners) are involved.
If you’re only using Cloudflare as your DNS, you’re just scratching the surface. While you’ll see improved DNS reliability and asset performance (images, stylesheets, etc.), your full page load times can still be bottlenecked by unnecessary dynamic requests.
This post walks through the full setup to properly configure Cloudflare to serve your site from cache, reduce server load, and still respect ExpressionEngine’s admin and cookie behavior.
(While this article is geared towards ExpressionEngine, these methods will work for any CMS that uses Apache or Nginx and handles cookies server-side)
Cloudflare relies on HTTP headers to determine whether a page is cacheable. If those headers are missing or improperly set, your site will default to dynamic mode, meaning Cloudflare will always fetch a fresh copy from your server.
This is a common mistake, especially among first-time Cloudflare users.
In my case, I’m using Plesk with Nginx. Within my domain’s settings, I configure a cache-control header to be sent with every URL:
Cache-Control: public, max-age=31536000

Now head to your Cloudflare dashboard and open the Rules section for your site.
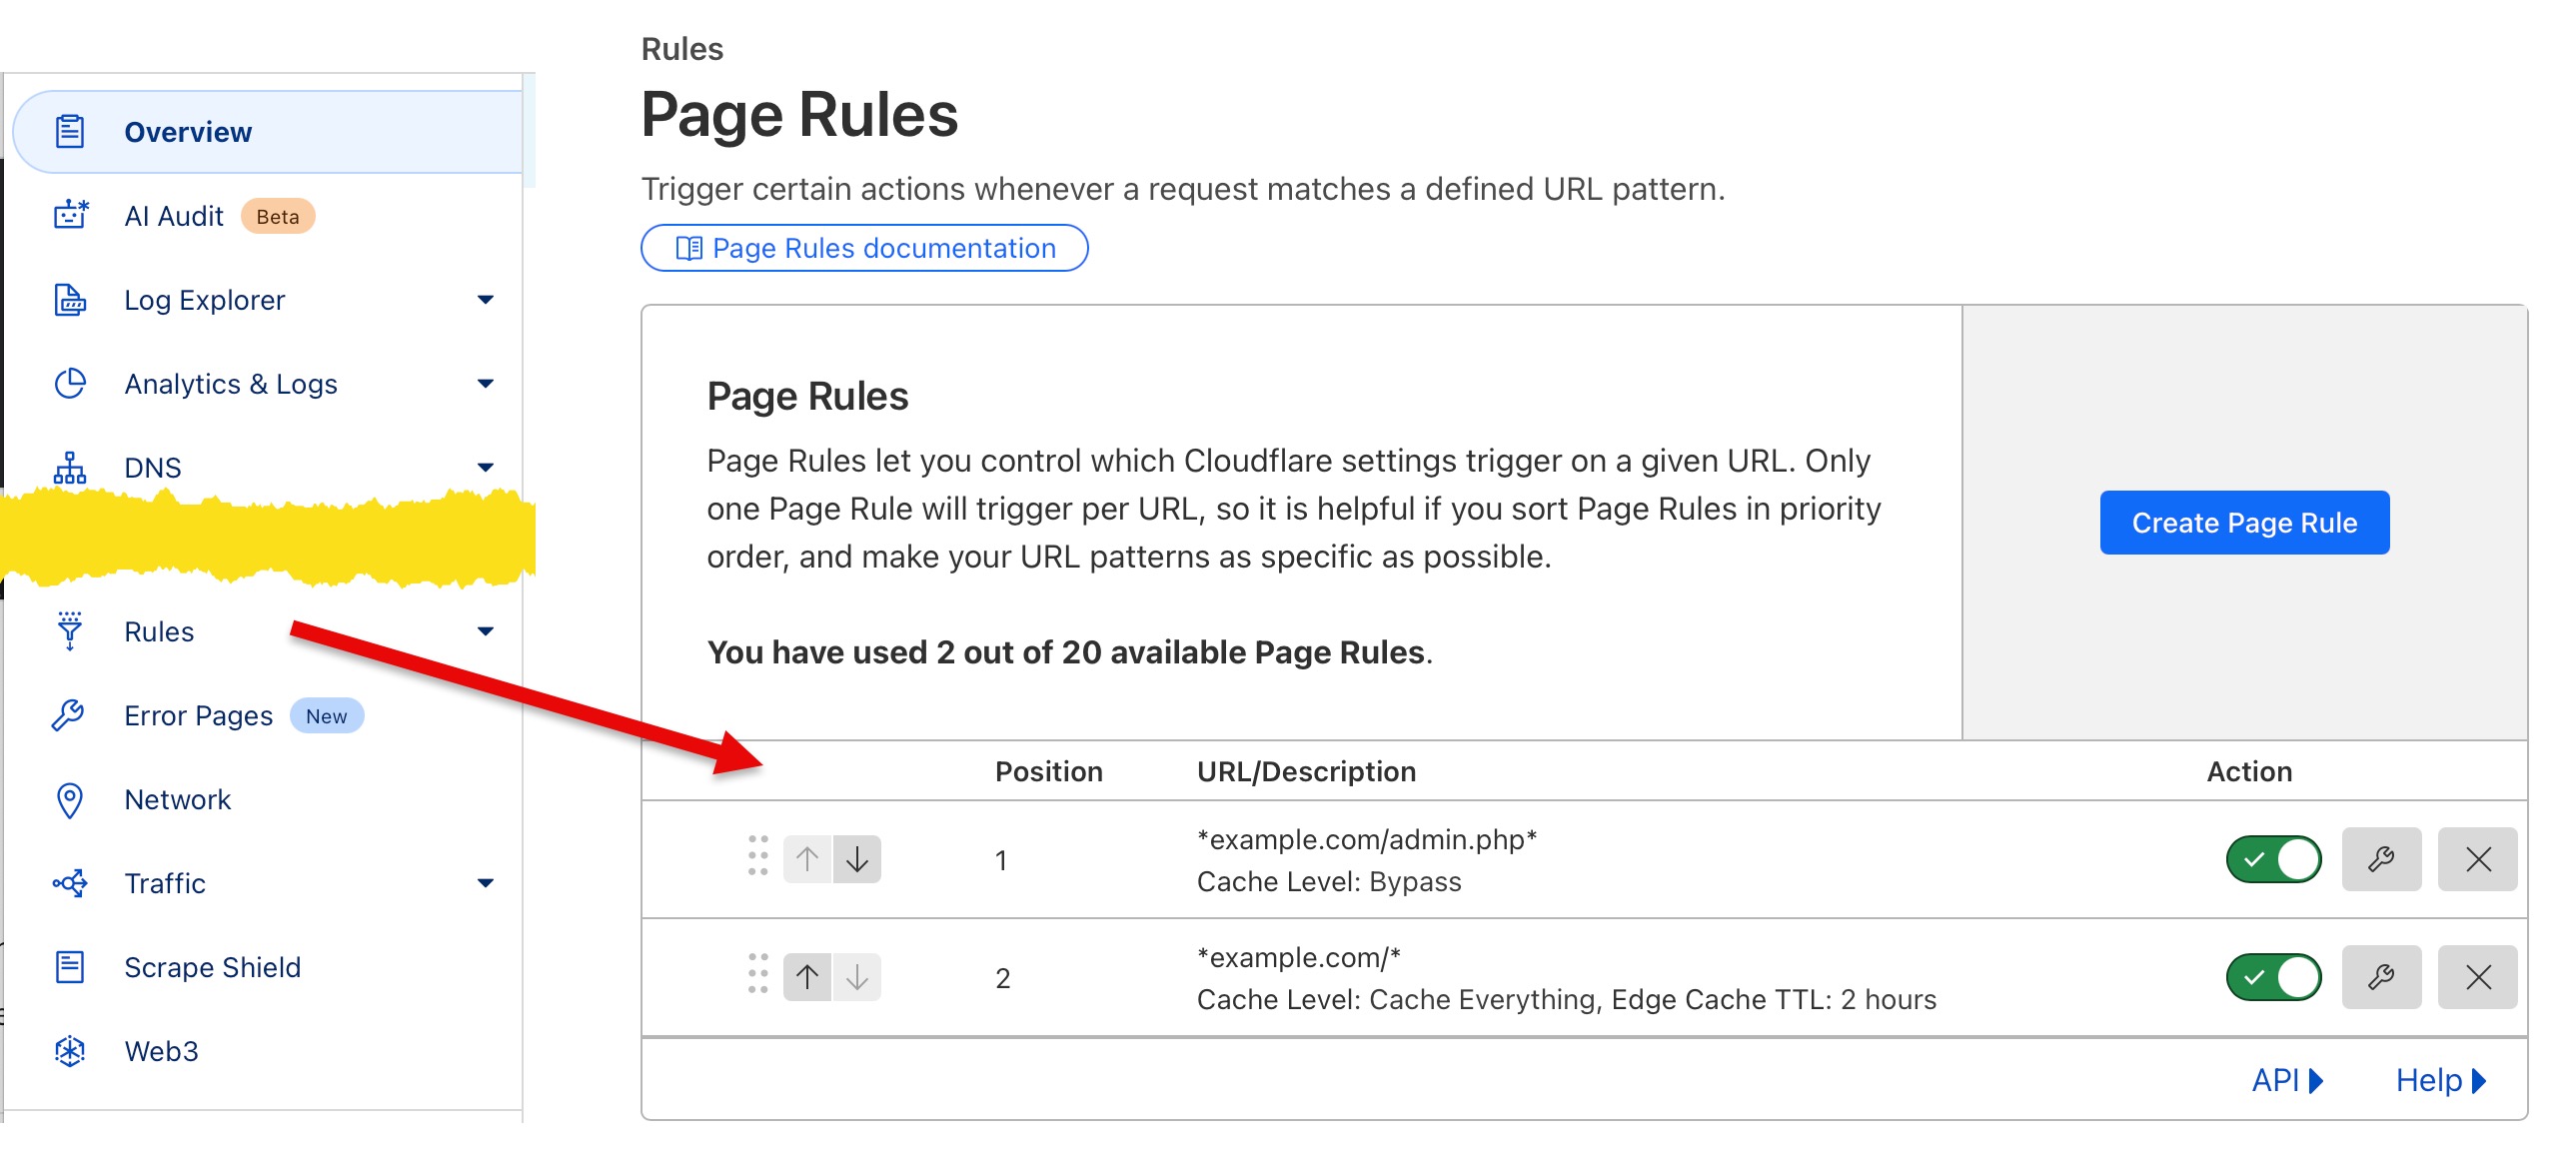
Create a page rule that bypasses caching for ExpressionEngine’s control panel. This is typically any URL containing /admin.php (or whatever your CP trigger is).
Rule example:
→ example.com/admin.php*
→ Cache Level: Bypass
This ensures Cloudflare won’t interfere with login states or admin page behavior.
Next, create a page rule that caches your entire site at the edge:
Rule example:
→ example.com/*
→ Cache Level: Cache Everything
→ Edge Cache TTL: [choose based on your update frequency]
Now, your public-facing pages will be fully cached by Cloudflare, reducing the number of requests hitting your server.
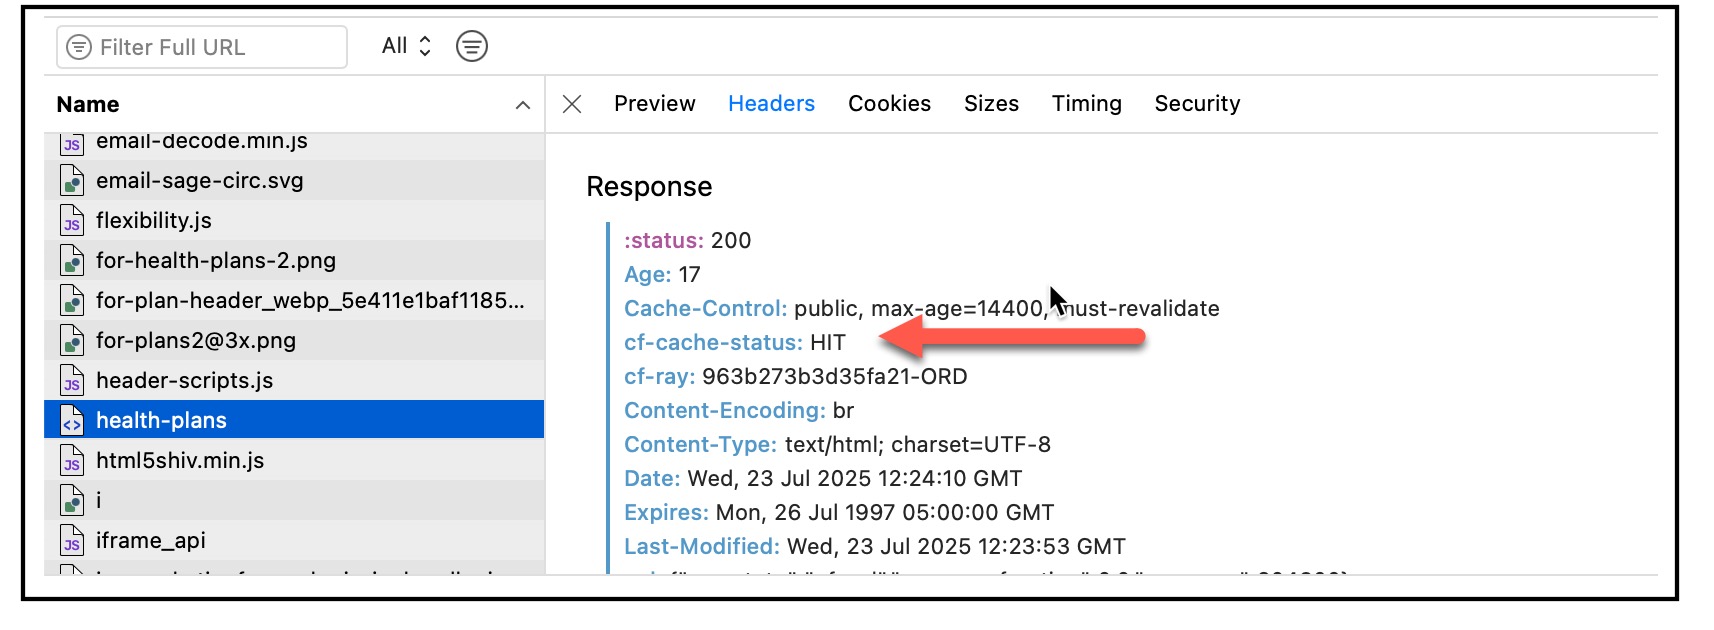
Reload one of your public pages while inspecting the cf-cache-status header. Open your browser’s developer tools, go to the Network tab, and reload your site. Look for Cloudflare-specific headers like cf-cache-status.
You should now see MISS or HIT depending on whether the resource is cached:
Refresh twice to confirm: the first load should be MISS, the second should be HIT.
Note: it is useful to use a secondary browser, and/or use Private/Incognito mode, as your primary browser may locally cache resources that prevent you from seeing the proper cf-cache-status.
Many websites—including mine—use a consent module that depends on cookies to store user preferences. In ExpressionEngine, these cookies typically start with exp_ and are managed by first-party add-ons, and the cookies are handled on the server side rather than with JavaScript.
By default, Cloudflare may cache pages even when these cookies are present, which can break consent tracking. To fix this:
Create a new rule that bypasses caching if a cookie name starts with exp_.
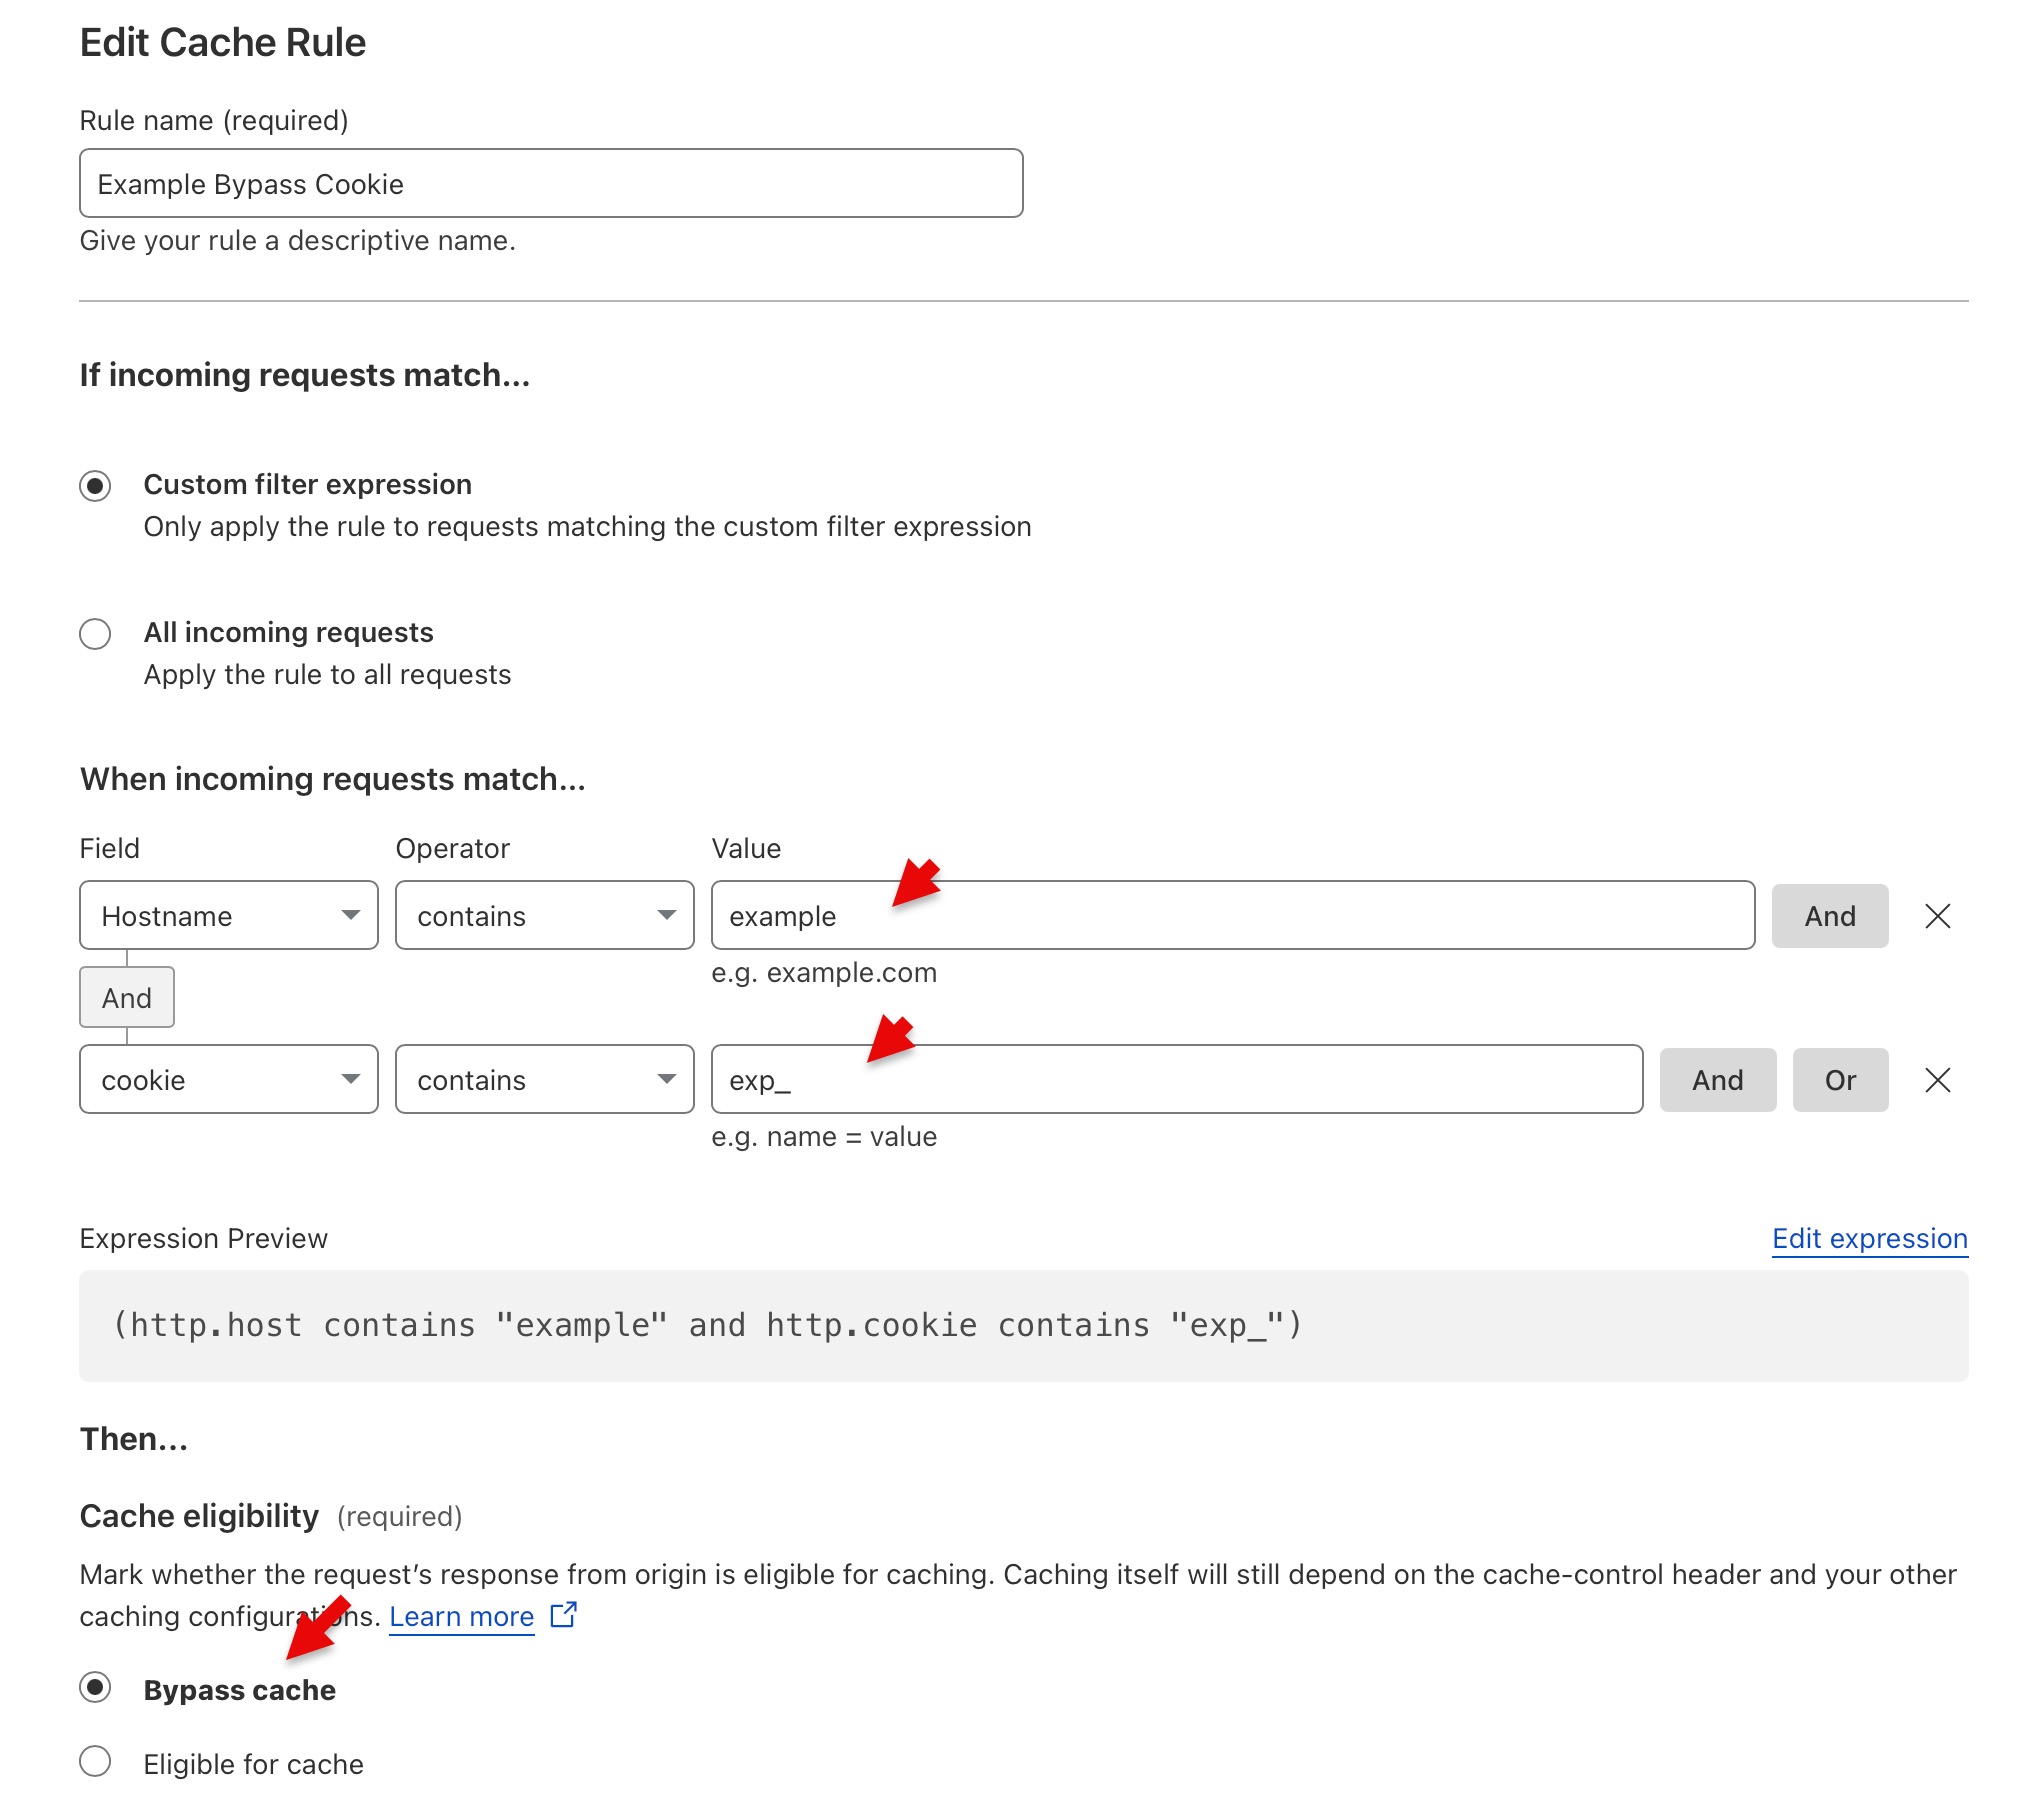
Save your settings.
With these steps in place, you’re now leveraging the full speed and power of Cloudflare’s edge caching, while avoiding common pitfalls like caching admin URLs or breaking consent behavior.
This hybrid setup is ideal for ExpressionEngine users—and ensures your audience enjoys lightning-fast load times without sacrificing control or compliance.
ExpressionEngine’s filesystem layer was refactored in version 7 to make use of the popular Flysystem library. Flysystem is a mature and stable filesystem abstraction library that allows us to easily create more adapters and integrate with a diverse set of filesystems. This is where Cloud Files comes in, it is a free first-party (built by Packet Tide, the developers of ExpressionEngine) Add-on that enables the use of cloud filesystems from several popular providers.
At the time of this writing Cloud Files can help you store your files with Amazon S3, Digital Ocean Spaces and CloudFlare R2 with more options on the way.
Cloud storage solutions provide a number of benefits including redundancy, virtually unlimited space, edge caching through CDNs and even more so it’s natural to ask why isn’t this included in ExpressionEngine?
The current Amazon AWS SDK is over 30MB which would more than double the size of ExpressionEngine. And while storage space may not be an issue for everyone we always aim to keep our resource footprint as small as possible. So we decided to offer this set of features as an optional first party Add-on that you can download and install for free if it meets your needs.
Cloud Files is open source and we welcome user contributions and feedback to our Github repository.
Check out the documentation to get started with Cloud Files today!
ExpressionEngine does not ship with a universal Composer file or support installing add-ons via Composer. However, many add-on developers use Composer internally to include popular packages and avoid reinventing the wheel.
While powerful, this approach can create conflicts when two or more add-ons require the same third-party package. If they use the same version, everything works smoothly. But when versions differ, trouble can arise—and the only way to spot a potential conflict is by digging through source code. Let’s be honest: nobody does that.
If you develop and distribute add-ons, dependency conflicts are always a risk. The only reliable solution is scoping your dependencies.
Scoping means updating your add-on’s vendor references from something like:
use Illuminate\Database\DatabaseManager;
You’ll update it to something like this:
use BoldMinded\Queue\Dependency\Illuminate\Database\DatabaseManager;
With scoping in place, multiple add-ons can use the same package—even different versions (e.g., Laravel 7, 9, or 12)—without conflicts. Otherwise, you might receive support tickets about cryptic errors like:
“Call to undefined method GuzzleHttp\Utils::chooseHandler()”
In such cases, Add-on A might use a newer Guzzle version that includes chooseHandler(). But if Add-on B loads afterward with an older Guzzle version lacking that method, everything breaks.
To prevent these issues, I use PHP-Scoper for all my add-ons. In this guide, I’ll walk through how to update an add-on using PHP-Scoper. (Full transparency: I learned to use PHP-Scoper by studying ExpressionEngine’s repository, which also scopes some dependencies.)
You could do this manually by editing package files in your vendor folder and adding the vendor folder to your add-on’s zip file for distribution, but doing that would be very time consuming, and you’ll have to repeat that work the next time you update a package to the latest version. This is exactly the kind of thing we want to automate, and that is what PHP-Scoper does. It reads all the files in your vendor folder, updates class names, use statements, and various other things necessary to isolate the files in your vendor directory to just your add-on.
For this example, I’ll use the Queue module.
First, we’re going to make sure our Git ignore settings are updated. We’ll be adding two new new directories, vendor-build and vendor-bin. We want to keep vendor-bin and it’s contents and commit them to Git, but we want to ignore the vendor directory within vendor-bin. So we’ll update our .gitignore file to contain the following:
/addons/queue/vendor
/addons/queue/vendor-build
/addons/queue/vendor-bin/php-scoper/vendor/
PHP-Scoper needs to be installed with it’s own vendor directory. Create a vendor-bin/php-scoper folder and scope.inc.php file in your add-on directory.
Your folder should look similar to this:
addons/
    myaddon/
        Model/
        Service/
        scoper.inc.php
        views/
        vendor-bin/
            php-scoper/
                composer.json
Add the following to your new vendor-bin/php-scoper/composer.json file with the following contents. The reason we add all of this to a separate directory is if PHP-Scoper is installed into the main vendor directory, it will try to update it’s own namespaces, and we don’t want that.
{
  "minimum-stability": "dev",
  "prefer-stable": true,
  "require-dev": {
    "humbug/php-scoper": "^0.17.5"
  }
}
Next, you’ll need to tell PHP-Scoper how to scope your add-on’s dependencies. Below is a full example of the scoper.inc.php file used for the Queue module. The main setting to update is the prefix, which defines the namespace PHP-Scoper will apply to your vendor files.
The 'finders' property can be updated to include any files or folders you want to ignore.
The 'patchers' property is kind of a special one. In this example, which is a little unique, and I’ve only had to do this for 2 of my add-ons, highlights some edge cases where PHP-Scoper just doesn’t work. It’s important to note that I didn’t just know to add these patchers. I added them after receiving random errors after running the scoper. If you run into such issues then it’ll be trial and error for you to make the appropriate updates through the patchers. In most cases you can leave patchers as an empty array.
'patchers' => []
Here is a full example of the scoper.inc.php file used for the Queue add-on highlighting the shenanigans in the patchers array. For comparison the patchers array for all my other add-ons, except Publisher, is empty and the overall file is much simpler.
<?php

use Isolated\Symfony\Component\Finder\Finder;

return [
   'prefix' => 'BoldMinded\\Queue\\Dependency',
   'finders' => [
        Finder::create()
            ->files()
            ->ignoreVCS(true)
            ->notName('/LICENSE|.*\\.md|.*\\.dist|Makefile|composer\\.json|composer\\.lock/')
            ->exclude([
                'bin',
                'doc',
                'test',
                'test_old',
                'tests',
                'Tests',
                'vendor-bin',
                'vendor',
            ])
            ->in('vendor'),
    ],

    'exclude-files' => [],

    'patchers' => [
        static function (string $filePath, string $prefix, string $contents): string {

            if (strpos($filePath, 'helpers.php') !== false) {
                $contents = str_replace(
                    "function_exists('BoldMinded\\\\Queue\\\\Dependency\\\\",
                    "function_exists('",
                    $contents
                );

                $contents = str_replace(
                    'namespace BoldMinded\Queue\Dependency;',
                    '',
                    $contents
                );
            }

            // Because the AWS package we're using from EE's Cloud Files add-on expects this.
            if (strpos($filePath, 'SqsQueue.php') !== false) {
                $contents = str_replace(
                    'use BoldMinded\Queue\Dependency\Aws\Sqs\SqsClient;',
                    'use BoldMinded\Queue\Queue\Connectors\SqsClient;',
                    $contents
                );
            }

            // https://boldminded.com/support/ticket/2715
            // Fix deprecation warning in PHP 8.1 without upgrading all packages which don't work in PHP 7.4 :/            if (strpos($filePath, 'CarbonInterface.php') !== false) {
                $contents = str_replace(
                    'public function jsonSerialize();',
                    '#[\ReturnTypeWillChange]' . "\n" .'    public function jsonSerialize();',
                    $contents
                );
            }

            if (strpos($filePath, 'Creator.php') !== false) {
                $contents = str_replace(
                    'static::setLastErrors(parent::getLastErrors());',
                    'if (is_array(parent::getLastErrors())) { static::setLastErrors(parent::getLastErrors()); }',
                    $contents
                );
            }

            return $contents;
        },
    ],

    'exclude-namespaces' => [
        'BoldMinded\Queue',
        'Composer\Autoload',
        'PHPUnit',
    ],
    'exclude-classes' => [
    ],
    'exclude-functions' => [
        // 'mb_str_split',
    ],
    'exclude-constants' => [
        // 'STDIN',
    ],

    'expose-global-constants' => true,
    'expose-global-classes' => true,
    'expose-global-functions' => true,
    'expose-namespaces' => [],
    'expose-classes' => [],
    'expose-functions' => [],
    'expose-constants' => [],
];
Below is the full composer.json file for Queue. We’ll talk more about the individual parts soon. For now, you will need to run composer require bamarni/composer-bin-plugin which will ask you if it should allow plugins to run, and will add the config.allow-plugins section to your composer.json file.
The extra section may also need to be added manually to your composer.json file. Note that the target-directory property links to the newly created vendor-bin directory mentioned above.
{
  "name": "boldminded/queue",
  "description": "ExpressionEngine's missing queue module",
  "license": "proprietary",
  "require": {
    "litzinger/basee": "dev-master",
    "bamarni/composer-bin-plugin": "^1.8.2",
    "illuminate/queue": "^12.1",
    "illuminate/bus": "^12.1",
    "illuminate/contracts": "^12.1",
    "nesbot/carbon": "3.8.6",
    "illuminate/events": "^12.1",
    "illuminate/redis": "^12.1"
  },
  "config": {
    "vendor-dir": "addons/queue/vendor",
    "preferred-install": "dist",
    "platform": {
      "php": "8.2"
    },
    "allow-plugins": {
      "bamarni/composer-bin-plugin": true
    }
  },
  "extra": {
    "bamarni-bin": {
      "bin-links": false,
      "target-directory": "addons/queue/vendor-bin",
      "forward-command": false
    }
  },
  "autoload": {
    "psr-4": {
      "BoldMinded\\Queue\\" : "addons/queue"
    }
  },
  "scripts": {
    "scope": [
      "rm -rf ./addons/queue/vendor-build",
      "./addons/queue/vendor-bin/php-scoper/vendor/bin/php-scoper add-prefix --output-dir=vendor-build --working-dir=addons/queue --force",
      "COMPOSER_VENDOR_DIR=addons/queue/vendor-build composer dump-autoload"
    ],
    "post-install-cmd": [
      "@composer bin all install --ansi",
      "@scope"
    ],
    "post-update-cmd": [
      "@composer bin all install --ansi",
      "@scope"
    ]
  },
  "require-dev": {
    "rector/rector": "^2.0"
  }
}
Then at the top of your add-ons addon.setup.php file add the path to the vendor-build directory.
<?php
require_once PATH_THIRD . 'queue/vendor-build/autoload.php';
At this point, everything should be configured. When you load the ExpressionEngine control panel with your add-on installed, you might encounter some errors. That’s expected until you run:
composer install
Or, if you’re paying close attention to the composer.json example above, you can run composer scope on its own.
Last thing to remember, when you package up your add-on as a zip to share with the world, be sure to delete the vendor and vendor-bin folders. You should only ship the vendor-build folder, which includes everything that is in vendor (minus dev only dependencies) except all the files should have a prefixed namespace at the top of them, thus making them scoped to your add-on.
I hope this helps other add-on developers who are distributing software and leveraging Composer. Don’t let past experiences with vendor conflicts discourage you—Composer can be safely and effectively integrated into your add-ons. By scoping your dependencies, you can avoid conflicts, improve maintainability, and confidently take advantage of modern PHP packages in your development workflow.
Variables, whether output within tags or free standing global variables, are the primary mechanism for presenting your content. Variable modifiers give you a way to precisely control what that output on an individual basis, without altering the content itself.
A variable modifier is a method name linked to a single variable with a colon. For instance, if you want to limit the length of the displayed entry title to 80 characters, you could use limit modifier like this:
{title:limit characters="80"}
Starting with ExpressionEngine 7.3, variable modifiers can be chained together, allowing you to make multiple modifications. For example, say you’re using abbreviations in the entry title, but you’d like to expand those when the entry is displayed on the front-end. At the same time, you want to keep the title short. You can do both at once by using multiple modifiers:
{title:replace:limit find="EE" replace="ExpressionEngine" characters="80"}
The chained modifiers are applied left-to-right. In the above example, that means that first the replacement of “EE” with “ExpressionEngine” in displayed entry title is made and then it gets shortened to 80 characters. The order of parameters does not matter, but the order of the modifiers does.
Each modifier has its own set of parameters and most of the time it will know which parameters it should use. In rare cases when the same parameter name is used by different modifiers, you can specify which modifier the parameter belongs to by prefixing the parameter with the modifier name, colon-separated. So the equivalent of the above example would be:
{title:replace:limit limit:characters="80" replace:find="EE" replace:replace="ExpressionEngine"}
Chaining modifiers can become very handy when applying on-the-fly image manipulations.
Suppose we have a File Grid field named images that contains, well, images. Let’s output a gallery of images that are:
a) first, resized to 250 px wide b) then, cropped to 200x200px c) lastly, converted to webp format
We can do this with a single template tag:
<ul>
{images}
    <li>{images:file:resize:crop:webp resize:width="250" crop:width="200" crop:height="200" crop:x="25" crop:y="25" crop:maintain_ratio="n" wrap="image"}</li>
{/images}
</ul>
You can use modifiers on most ExpressionEngine variables, including:
A prolet is an add-on component in ExpressionEngine that enables front-end interaction with an add-on’s Control Panel functionality. It allows developers to make certain parts of their add-ons accessible and usable on the front-end of the website, bringing additional features and interaction possibilities to users.
Before we begin, make sure you have the following: - The latest version of ExpressionEngine 7 running on your server. - An existing add-on you would like to add a prolet to
Let’s create a prolet for our example add-on, “emoji_reactions.” We want this prolet to bring some of its Control Panel functionality to the front-end, allowing users to interact with emoji reactions tied to the current channel entry.
Open your terminal or command prompt and navigate to the root directory of your ExpressionEngine installation. The eecli.php file is located in the system/ee directory.
To create the prolet, use the EE CLI tool with the “make:prolet” command, followed by the name of the prolet, and additional options such as the addon and description.
php eecli.php make:prolet 'Manage Reactions' --addon=emoji_reactions --description="This prolet allows users to interact with emoji reactions tied to the current channel entry."
In the above command: ‘Manage Reactions’ is the name of the prolet. Choose a descriptive name that reflects the purpose of the prolet. –addon=emoji_reactions specifies the name of the add-on (in this case, “emoji_reactions”) to which the prolet will belong. –description=”…” provides a brief description of the prolet’s functionality.
Once the command runs successfully, you will find a new PHP file created in your add-on’s folder under the “prolets” directory. In this example, you should see a file named pro.manage_reactions.php under the emoji_reactions/ folder.
Now that the prolet has been generated, open the newly created PHP file in your preferred code editor. The file will contain a basic template for the prolet. All prolets are required to implement ExpressionEngine\Addons\Pro\Service\Prolet\ProletInterface. The easiest way to achieve that is to make prolet extend abstract class ExpressionEngine\Addons\Pro\Service\Prolet\AbstractProlet. The CLI takes care of all of these details for us, and allows us to just write the code to make it work.
Add the necessary code within the index function of this file to enable front-end interaction with the emoji reactions tied to the current channel entry. You may use the ExpressionEngine APIs to fetch and display the reactions. A prolet’s index function is expected to return an array, or a string. If the data returned is of Array type, it is being passed to ExpressionEngine Pro’s shared form view, which is similar to ExpressionEngine’s Shared Form View, however you are only required to have sections key in the returned data array. The result will be a form with submission endpoint being set to same prolet controller action.
If the data returned is of String type then this string is being wrapped in some required HTML and returned into prolet popup window.
In our emoji reaction addon, we will call a service to give us an ExpressionEngine table, and use that in conjuncture with a view file to show our response. Here is the final index function:
    public function index()
    {
        $entry_id = ee('Request')->get('entry_id', null);
        $data['table'] = ee('emoji_reactions:ManageReactions')->getTable($entry_id)->viewData();
        return ee('View')->make('emoji_reactions:index')->render($data);
    }
Creating a prolet for an ExpressionEngine add-on via the CLI allows you to bring some of your add-on’s Control Panel functionality to the front-end, enhancing user interaction and experience. By building prolets, you can unlock new possibilities for your add-on and make it even more powerful and user-friendly.
Remember to refer to the official ExpressionEngine documentation and EE CLI documentation for more details and best practices when building add-ons. Happy coding!
In ExpressionEngine, you can use the Command Line Interface (CLI) to quickly generate both the basic add-on files and custom template tags. The combination of only a few commands allows you to build a comprehensive add-on with a custom template tag efficiently. In this guide, we will walk you through the steps of generating the “emoji_reactions” add-on and adding a custom template tag.
The CLI simplifies the add-on development process, enabling users to concentrate on crafting business logic that suits their requirements. This shift in focus allows users to prioritize writing code that meets their needs, rather than getting caught up in the technical intricacies of making an add-on operational within ExpressionEngine. Our new CLI make commands are designed to make it as simple as possible to get up and running with building an add-on.
Open your terminal or command prompt and navigate to the root directory of your ExpressionEngine installation. The eecli.php file is located in the system/ee directory.
To generate the scaffolding for a new add-on, use the following command:
php eecli.php make:addon "emoji_reactions"
This command will create the basic add-on files, including the upd file, mod file, and lang file, for the “emoji_reactions” add-on. Follow all prompts in the command to complete the creation of the add-on. You can also use the --help parameter to see all available options for the command.
The result of that one command will give you an add-on that can be installed and uninstalled, and contains everything you need to get started.
To add a custom template tag to your add-on, use the following command:
php eecli.php make:template-tag ListReactions --addon=emoji_reactions
This command will generate the file system/user/addons/emoji_reactions/Tags/ListReactions.php.
Open the file system/user/addons/emoji_reactions/Tags/ListReactions.php and implement the functionality of your template tag. When the template tag is called, ExpressionEngine will run the process() function in the newly created ListReactions.php file.
Here is an example of what the process() function of our ListReactions template tag looks like:
    // Example tag: {exp:emoji_reactions:list_reactions entry_id="1"}
    public function process()
    {
        $entry_id = ee()->TMPL->fetch_param('entry_id');
        $entry = ee('Model')->get('ChannelEntry', $entry_id)->first();

        // Retrieve the search_id
        if (! $entry) {
            return ee()->TMPL->no_results();
        }

        $emojis = ee('Model')->get('emoji_reactions:Emoji')->all();

        $reactions = ee('Model')->get('emoji_reactions:EmojiReaction')
            ->with('Emoji')
            ->filter('entry_id', $entry_id)
            ->all();

        foreach($emojis as $emoji) {
            $data[] = [
                'html_entity' => $emoji->unicode,
                'short_name' => $emoji->name,
                'reaction_count' => $reactions->filter('emoji_id', $emoji->emoji_id)->count(),
            ];
        }

        return ee()->TMPL->parse_variables(ee()->TMPL->tagdata, $data);

    }
Matt also gave a presentation at the July 2023 ExpressionEngine meetup. Check out the video of his talk on Building an ExpressionEngine Add-on the Easy Way
By combining only a few commands, you can efficiently generate an add-on with a custom template tag in ExpressionEngine via the Command Line Interface. This enables you to extend the capabilities of your ExpressionEngine website and create a more powerful and feature-rich experience for your users. The CLI streamlines the process of building an add-on in a way that allows the user to focus more on writing business logic to suit their needs, rather than focusing on the specifics of how to get it to run in ExpressionEngine.
In addition to being able to add custom CSS to an RTE field, it is also possible to add custom JavaScript to an RTE field when using Redactor. This is particularly useful when adding custom plugins. For this example, we’re going to add a button to our Redactor toolbar, which will prompt the user for text and then add a danger alert box when clicked.
Using custom JS with CKEditor is a little more complicated so we will not cover that here. Be sure to check out the ExpressionEngine docs if you need to add custom JS to CKEditor.
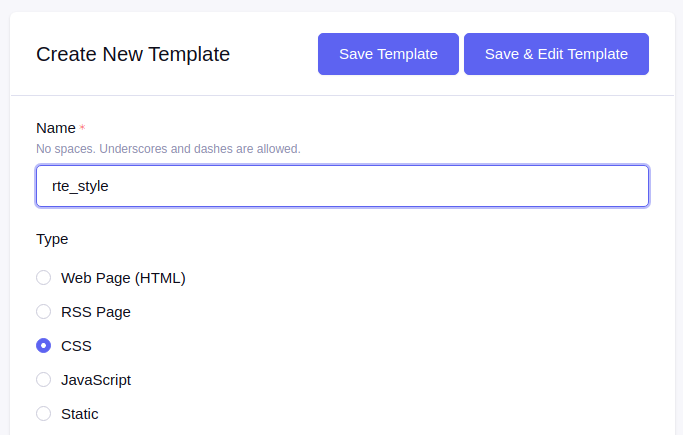
Start by creating a new template in the Template Editor and selecting “JavaScript” as the type.

In our template, we will slightly modify the “Sample plugin with modal window” demo plugin from Imperavi.
(function($R)
{
$R.add('plugin', 'warningAlert', {
modals: {
'warningAlert': '<form action="">'
+ '<div class="form-item">'
+ '<label>## warningAlert-label ##</label>'
+ '<textarea name="text" style="height: 200px;"></textarea>'
+ '</div>'
+ '</form>'
},
translations: {
en: {
"warningAlert": "Add A Warning",
"warningAlert-label": "Please, type some text"
}
},
init: function(app)
{
// define app
this.app = app;
// define services
this.lang = app.lang;
this.toolbar = app.toolbar;
this.insertion = app.insertion;
},
// messages
onmodal: {
warningAlert: {
opened: function($modal, $form)
{
$form.getField('text').focus();
},
insert: function($modal, $form)
{
var data = $form.getData();
this._insert(data);
}
}
},
// public
start: function()
{
// create the button data
var buttonData = {
title: this.lang.get('warningAlert'),
api: 'plugin.warningAlert.open'
};
// create the button
var $button = this.toolbar.addButton('warningAlert', buttonData);
},
open: function()
{
var options = {
title: this.lang.get('warningAlert'),
width: '600px',
name: 'warningAlert',
handle: 'insert',
commands: {
insert: { title: this.lang.get('insert') },
cancel: { title: this.lang.get('cancel') }
}
};
this.app.api('module.modal.build', options);
},
// private
_insert: function(data)
{
this.app.api('module.modal.close');
if (data.text.trim() === '') return;
this.insertion.insertHtml('<div class="alert"><span class="closebtn" onclick="this.parentElement.style.display=\'none\'\;">×</span><strong>Danger!</strong> '+ data.text +'</div>');
}
});
})(Redactor);
This plugin will create a button on our field with the label of “Add A Warning”. When the user clicks the button, a modal appears with a textarea for the user to input the text to be displayed in the warning alert box. Once submitted the text wrapped in our HTML and inserted into the field using Redactor’s insertHtml() service.
Learn more about creating Redactor plugins
Note that we have also added these custom styles to our RTE stylesheet using the steps in the first half of this article. To follow along, the styles for this alert box are:
.alert {
  padding: 20px;
  background-color: #f44336;
  color: white;
}

.closebtn {
  margin-left: 15px;
  color: white;
  font-weight: bold;
  float: right;
  font-size: 22px;
  line-height: 20px;
  cursor: pointer;
  transition: 0.3s;
}

.closebtn:hover {
  color: black;
}
Now that we have our JS template, we can configure our RTE toolset.
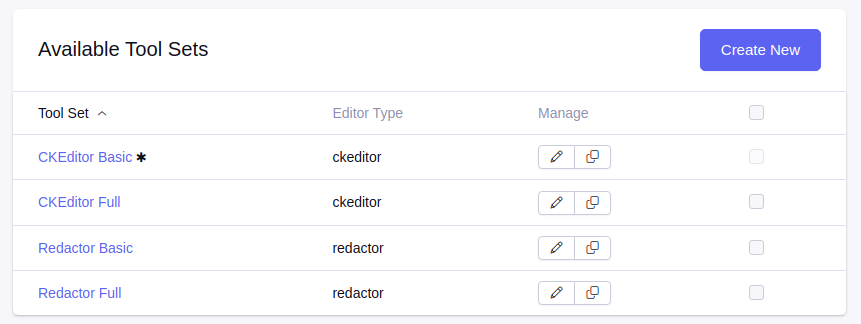
To do this, select the RTE configuration you would like to edit by navigating to the Rich Text Editor add-on, then selecting the configuration you want to edit from the “Available Tool Sets” section. Again, be sure to choose a toolset based on Redactor for our example.
Next, we will toggle on “Advanced configuration.” Activating the advanced configuration will reveal the “Configuration JSON” field, which is being pre-populated with JSON config based on the currently saved configuration as well as the “Extra Javascript” dropdown.
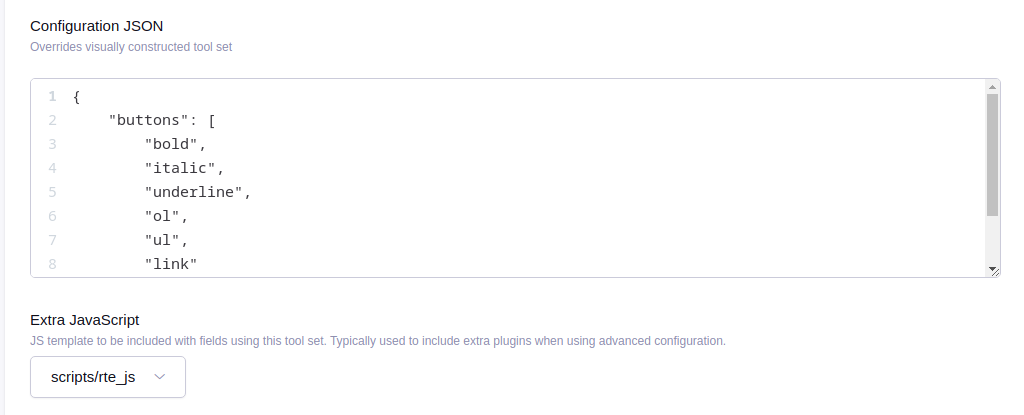
In the Configuration JSON field, we will add our plugin to the list of plugins (from the sample code we used we know our plugin is labeled warningAlert):
{
    "buttons": [
        "bold",
        "italic",
        "underline",
        "ol",
        "ul",
        "link"
    ],
    "plugins": [
        "warningAlert"
    ]
}
Now in the Extra JavaScript field, we will select our JavaScript template created above.

Now that your custom configuration and plugin are saved, our button is available when editing your field in an entry.

I really like the Shared Form functionality. It makes sense to me. Define a data structure, pass it to a view array, and you’re done. Even wrote 3 articles explaining and showcasing how easy Shared Forms are, to boot. The reaction was not what I had thought it’d be…
People starting talking about Shared Form in the ExpressionEngine Slack channel. And, oh boy, did they have a lot to say about it, and it was all on point. The community pointed out that the Shared Form can get complicated for large forms. It can increase mental costs debugging errors. How, “nested arrays are painful” and “wow, that’s a lot of code though”. They weren’t wrong. In fact, they were so not wrong that the entire discussion was moved to a private channel (by the mods) so the problems could be talked out. Like grown ups.
The end consensus of which was, “We like the uniformity of the output, wish there were more options for customization if we’re being honest, but really don’t like having to scroll through hundreds of lines of nested array code to find the field we want to modify. Oh. And, also, the docs need work.”, which lead to someone just throwing out there, “Let’s maybe build a better way?”. So the community did just that, and the new CP\Form library is the result.
It's awesome to wake up and see this PR come through!
— ExpressionEngine (@eecms) May 31, 2022
This community effort will make using the Shared Form View so much easier. Big kudos to @dougblackjr, @mithra62, @jcogsdesign, @skippybla, @robsonsobral, and Stephen G. https://t.co/4UEX3KDfZI#expressionEngine #eecms
The new Shared Form View is included with ExpressionEngine 6.4 and above and allows developers to create Shared Form Views using an object interface instead of dealing with arrays.
For example:
$form = ee('CP/Form');
$field_group = $form->getGroup('General Settings');

$field_set = $field_group->getFieldSet('First Name');
$field_set->getField('first_name', 'text');

$field_set = $field_group->getFieldSet('Last Name');
$field_set->getField('last_name', 'text');

$vars = $form->toArray();
$vars['cp_page_title'] = lang($this->getCpPageTitle());
$vars['base_url'] = $this->url($this->getRoutePath($id));
$vars['sections'] = [
    [
        [
            'title' => 'first_name',
            'fields' => [
                'first_name' => [
                    'name' => 'first_name',
                    'type' => 'text',
                ],
            ],
        ],
    ],
    [
        [
            'title' => 'last_name',
            'fields' => [
                'last_name' => [
                    'name' => 'last_name',
                    'type' => 'text',
                ],
            ],
        ],
    ]
];
$vars['save_btn_text'] = lang('save');
$vars['save_btn_text_working'] = 'saving';
So basically, a simpler and easier way to visualize and create Forms within ExpressionEngine. There’s a lot of flexibility.
Just like with the traditional Shared Form View layer, the basic idea is that every form contains one or more Field Groups, which contain one or more Field Sets, which contain one or more Fields. In the CP/Form use case, you create the Form, which you create a Field Group from, which you create a Field Set from, which you create Fields with. In code, this reads as:
$form = ee('CP/Form');
$field_group = $form->getGroup('The Group');
$field_set = $field_group->getFieldSet('The Field Set');
$field = $field_set->getField('the_field', 'the_field_type');
You can add and remove all the various items (Groups, Field Sets, Fields, and Buttons). That’s just the basic workflow though; each object contains its own options and configurability, so be sure to read up on the docs.
If you’re like me and like to read the code, you can find it at the entry point ExpressionEngine\Library\CP\Form within the codebase.
The Form object allows control over the Form details. As mentioned above, the Form contains Field Groups but also so much more. The Form object is where you define your form as outputting Tabs, custom Alerts to display, page title(s), whether it’ll contain file upload fields, or any custom hidden fields, just to name a few.
$form = ee('CP/Form');
$form->setCpPageTitle('My Custom Form')
    ->asFileUpload()
    ->asTab()
    ->addAlert('custom_alert');
Be sure to read up on the full API in the docs to see what’s possible.
The Field Group object is unique in that it has a basic interface, but it’s also the basis for any Tabs you want to define. If your Form is set to output Tabs, every Field group will be its own Tab, with every Field Set being used for the content.
$form = ee('CP/Form');
$field_group = $form->getGroup('General Settings');
Field Groups aren’t too deep, but you can learn more in the full API docs.
With Field Sets, you have a ton of flexibility. Yes, this is where you start defining your Fields, but it’s also where you define Field Set attributes. You can set the title, description, provide example copy, and apply buttons for JavaScript events.
$form = ee('CP/Form');
$field_group = $form->getGroup('General Settings');

$field_set = $field_group->getFieldSet('Field Set Name');
$field_set->withButton('My Button', 'my-rel', 'my-for')
    ->setDesc('Field Set Description')
    ->setTitle('The Field Set Title')
    ->setDescCont('Here\'s the next line of description')
    ->setExample('do something with another thing');
You can learn more in the official documentation.
And here’s the actual form input object. As mentioned, you get the Form\Field Object from the Form\Set object.
$form = ee('CP/Form');
$field_group = $form->getGroup('General Settings');
$field_set = $field_group->getFieldSet('Field Set Name');

$field = $field_set->getField('first_name', 'text')
    ->setPlaceholder('First Name')
    ->setRequired(true);
To say that the Field object layer is deep would be an understatement. You’re really going to want to take a look at the official documentation to see all the possibilities.
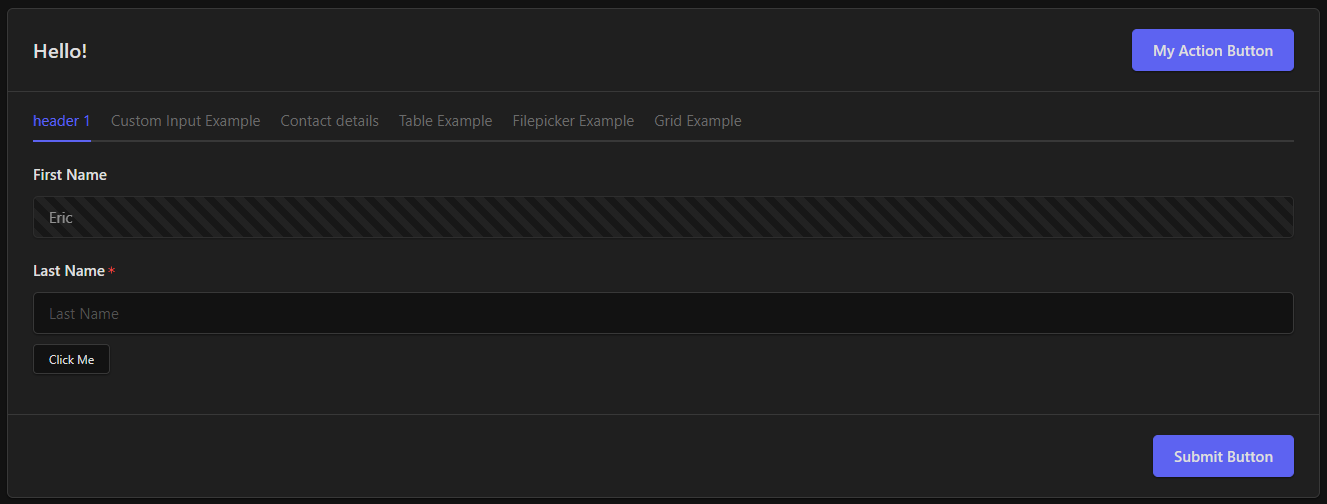
To show how this all works together, we’ll build a sample add-on Control Panel page that has multiple tabs with different inputs. Below you can see the complete code for this form and matching screenshots of how the form would output in the Control Panel.
$form = ee('Cp/Form');
$form->asTab();
$form->asFileUpload();
// Create our first Tab called "header 1"
$field_group = $form->getGroup('header 1');
//Now add a "First Name" and "Last Name" field
$field_set = $field_group->getFieldSet('First Name');
$field_set->getField('first_name', 'text')
->setDisabled(true)
->setValue('Eric');
//notice that where adding a button with the Last Name
$field_set = $field_group->getFieldSet('Last Name')->withButton('Click Me');
$field_set->getField('last_name', 'text')
->setPlaceholder('Last Name')
->setRequired(true);
$form->setCpPageTitle('Hello!');
//Create tab called "Custom Input Example"
$field_group = $form->getGroup('Custom Input Example');
$field_set = $field_group->getFieldSet('email');
$field_set->getField('email', 'email')
->setPlaceholder('Your Email Address')
->setValue('[email protected]')
->setRequired(true);
$field_set = $field_group->getFieldSet('color');
$field_set->getField('color', 'color')->setValue('#C86565');
$field_set = $field_group->getFieldSet('number');
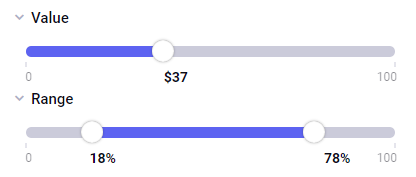
$field_set->getField('number', 'number')->params(['min' => 100, 'max' => 1000])->setRequired(true);
//Create tab called "Contact details"
$field_group = $form->getGroup('Contact details');
$field_set = $field_group->getFieldSet('Address');
$field_set->getField('address1', 'text');
$field_set->getField('address2', 'action_button')->setText('Hello');
$field_set->getField('state', 'dropdown')->withNoResults('Nothing Here', 'fdsa', 'fdsa');
$form->withActionButton('My Action Button', 'https://google.com');
$button = $form->getButton('button_1');
$button->setType('submit')->setText('Submit Button')->setWorking('Submitting...');
$form->getButton('button_2');
$form->removeButton('button_2');
$hidden_field = $form->getHiddenField('my_hidden_field');
$hidden_field->setValue('my_value');
//Create tab called "Table Example"
$field_group = $form->getGroup('Table Example');
$field_set = $field_group->getFieldSet('My Table Data');
$table = $field_set->getField('my_table', 'table');
$table->setOptions([
'lang_cols' => true,
'class' => 'product_channels'
]);
$table->setColumns([
'details' => ['sort' => false],
'value' => ['sort' => false],
]);
$table->setNoResultsText(sprintf(lang('no_found'), lang('product_channels')));
$table->setBaseUrl( ee('CP/URL')->make($this->base_url ));
$data = [];
$data[] = [
'Hello',
'You',
];
$table->setData($data);
$table->addRow([
'No, Hello',
'To You!',
]);
//Create tab called "Filepicker Example"
$field_group = $form->getGroup('Filepicker Example');
$field_set = $field_group->getFieldSet('My Filepicker');
$file_picker = $field_set->getField('my_file_picker', 'file-picker');
$file_picker->asImage()->withDir(7)->setValue('https://ellislab.com/asset/images/features/path.jpg');
//Create tab called "Grid Example"
$field_group = $form->getGroup('Grid Example');
$field_set = $field_group->getFieldSet('My Grid')->withGrid();
$grid = $field_set->getField('my_grid_field', 'grid');
$grid->setOptions([
'field_name' => $grid->getName(),
'reorder' => true,
]);
$grid->setColumns([
'text example' => ['sort' => false],
'select example' => ['sort' => false],
'password example' => ['sort' => false],
'checkbox example' => ['sort' => false],
'textarea example' => ['sort' => false],
'upload example' => ['sort' => false],
]);
$options = ['foo' => 'Foo', 'bar' => 'Bar'];
$cols = [
['name' => 'foo-text', 'type' => 'text', 'value' => ''],
['name' => 'barr-select', 'type' => 'select', 'value' => '', 'choices' => $options],
['name' => 'foo-password', 'type' => 'password', 'value' => ''],
['name' => 'bar-checkbox', 'type' => 'checkbox', 'value' => 1],
['name' => 'foo-textarea', 'type' => 'textarea', 'value' => '', 'cols' => 2, 'rows' => 5],
['name' => 'bar-upload', 'type' => 'file', 'value' => '', 'cols' => 2, 'rows' => 5],
];
$grid->defineRow($cols);
$grid->setData([
['foo-text' => 'bar', 'barr-select' => 'foo', 'foo-password' => 'fdsa', 'bar-checkbox' => 1, 'foo-textarea' => '', 'bar-upload' => ''],
['foo-text' => 'fdsafdsa', 'barr-select' => 'bar', 'foo-password' => 'fdsa', 'bar-checkbox' => true, 'foo-textarea' => '', 'bar-upload' => '']
]);
$grid->setNoResultsText(sprintf(lang('no_found'), lang('table-thing')), 'add');
$grid->setBaseUrl( ee('CP/URL')->make($this->base_url ));
$test_form = $form->toArray();
.png)
.png)
.png)
.png)
In ExpressionEngine 7.2, Rich Text Editor fields can now be configured using JSON and custom CSS or JS files. This allows site admins more control over how the field and its content look and what editors are allowed to do. It also allows quicker configuration of these fields over the drag and drop toolbar interface if you have a standard toolset you use on most of your sites.
In our first example, we want to allow content editors to format text as headers but only use H2 and H3 tags. We also want the headers to look just like on the frontend of the site (in our example that will be blue text-color and underlined).
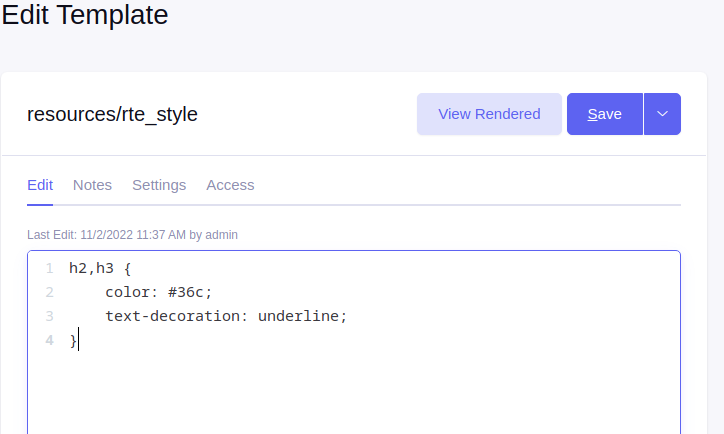
First, we will create a CSS template for the styles that we need. We do this by creating a new template in the Template Editor and selecting “CSS” as the type.
In our template, we will add some simple CSS. Again, our goal is to have H2 and H3 headers appear blue and underlined simply. For this example, we’ll use the following snippet:
h2,h3 {
    color: #36c;
    text-decoration: underline;
}
Now that we have our custom stylesheet, we will edit the toolset configuration used by our RTE field and select the CSS template with our styles.
To do this, select the RTE configuration you would like to edit by navigating to the Rich Text Editor add-on, then selecting the configuration you want to edit from the “Available Tool Sets” section.
Next, we will select our stylesheet under “Custom Stylesheet” and toggle on “Advanced configuration.” Activating the advanced configuration will reveal the “Configuration JSON” field, which is being pre-populated with JSON config based on the currently saved configuration.

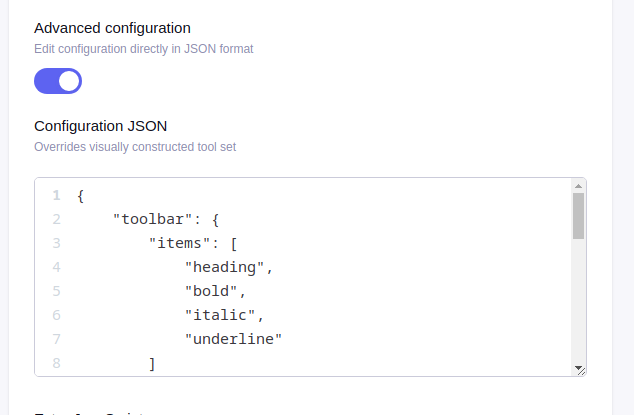
We will edit it by removing the options that we don’t need and end up with the following:
{
    "toolbar": {
        "items": [
            "heading",
            "bold",
            "italic",
            "underline"
        ]
    },
    "heading": {
        "options": [
            {
                "model": "paragraph",
                "title": "Paragraph"
            },
            {
                "model": "heading2",
                "view": "h2",
                "title": "Header",
                "class": "ck-heading_heading2"
            },
            {
                "model": "heading3",
                "view": "h3",
                "title": "Subheader",
                "class": "ck-heading_heading3"
            }
        ]
    }
}
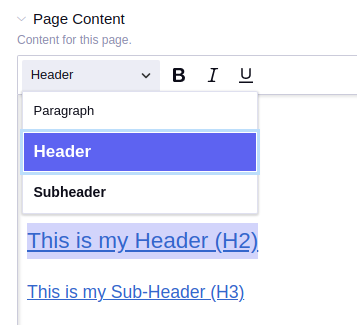
The settings will only allow content editors to use the heading, bold, italic, and underline tools. The heading options will only be paragraph, Header (which will be an H2 using our custom styles), and Subheader (which will be an H3 using our custom styles).
Then Save the updated configuration.
Learn more about editing CKEditor configurations
Learn more about editing Redactor configurations
Now that your custom styles and toolset are saved, content editors will only see the available options with their respective styles when editing your field in an entry.
New to ExpressionEngine 6.4 and 7.2, EEObjects is a new way to organize add-on code, automatically routing actions, tags, extension hooks, and control panel routes into their own logical classes. This allows for cleaner, more readable add-on code, and an officially supported way to build add-ons moving forward. This was a community-driven update from Eric Lamb (mithra62), so HUGE shout out to him for spearheading it!
Extension hooks can now be organized into a single file per hook. Create an Extensions folder in your add-on folder, and then create a file for your extension hook. The name of this file should be in PascalCase, and should be the name of the hook method you are replacing. Here is an example of what that would look like:
<?php

namespace AddonDev\ExampleAddon\Extensions;

use ExpressionEngine\Service\Addon\Controllers\Extension\AbstractRoute;

class SessionsStart extends AbstractRoute
{
    public function process()
    {
        // Run extension hook here
    }
}
This is an example of the sessions_start hook, and in this example, when the hook fires, the process() function will run. To get the extension to actually start using these hooks, the ext file needs to extend the ExpressionEngine\Service\Addon\Extension class and define the $addon_name protected property as the add-on shortname.
🙌 EE Conf Spring Summit 2021 Videos Sponsored by: Aquarian Web Studio (http://www.aquarianwebdesign.com/)
📺 Description: The State of ExpressionEngine Commerce
🙌 EE Conf Spring Summit 2021 Videos Sponsored by: Aquarian Web Studio ( http://www.aquarianwebdesign.com/)
📺 Description: Digital Accessibility has become even more important this year as work, school, and other aspects of life have transitioned online. However, almost every website and mobile app on the market is not accessible for blind, deaf, and keyboard-only users.
Learn about the ins and outs of accessible development from both blind and sighted developers, as well as some key tips, trends, and tricks for bringing your UX into compliance in 2021.
🙌 EE Conf Spring Summit 2021 Videos Sponsored by: Aquarian Web Studio (http://www.aquarianwebdesign.com/)
📺 Description: Most of the time, ExpressionEngine’s template processing “just works” the way you’d expect it to.
But occasionally, especially when creating pages with complex interlocking functions, it’s important to understand just how EE processes each of the tags, variables, commands, PHP and embeds in a given template.
This is called Parse Order, and we’re going to walk you through it and test your understanding of it with some interactive quiz questions. We’ll also share some clever ways to work around Parse Order problems without an add-on.
↓ ↓Links↓ ↓ Parse Order Reference Guide: https://hopstudios.com/blog/expressionengine_parse_order_quick_reference_guide
🙌 EE Conf Spring Summit 2021 Videos Sponsored by: Aquarian Web Studio (http://www.aquarianwebdesign.com/)
📺 Description: There are so many reasons for ExpressionEngine to take over for a website once the site has outgrown WordPress. Furthermore, as many as a thousand people a month who search for this hang in the balance. Part of our job as developers looking for work is to identify a good fit when we see it; so it’s up to us to bridge the gap and reach the people looking for us who may not have heard of ExpressionEngine. This talk will suggest ways to think about approaching potential clients who may be looking for a way out of the most ubiquitous CMS* on the planet.
🙌 EE Conf Spring Summit 2021 Videos Sponsored by: Aquarian Web Studio ( http://www.aquarianwebdesign.com/ )
📺 Description: The ExpressionEngine team gives updates on what they’ve been working on, what’s next for ExpressionEngine and the community, and host a live Q&A with the entire team.
In this video course we’re going to walk through different fieldtypes in ExpressionEngine, how to configure them and start working with them.


Seeder by CartThrob (Seeder from here out) is a free ExpressionEngine focused data seeding tool. If you’re not familiar, a database seeding tool is one of the most aptly named tools in our universe; it seeds data into a database. Which solves so very many problems; they help with load testing, removes the dependence on client content for site structuring, and can really help push the limits on any UI.
Note that Seeder is a stand-alone tool; no other Add-on is required.
This being for ExpressionEngine means we’re Seeding Channel Entries and Members (out of the box). Basically, set up your Channel structure, execute a command, and, BOOM! you got data in your site.
But wait! There’s more.
Crap. I wrote that. Ugh… Sigh… It is true though. This well runs deep. Yeah, it Seeds Channel Entries and Members. But there’s also:
As I said. Deep.
So, in this series, I’m going to go over Seeder by CartThrob and provide examples and explanations on how to get things done.
First, like any program, we have to understand the rules of its universe.
It’s important to understand that Seeder will rarely (99.99%) relate to “real” data; it works in its own sandbox. For example, as we know, every Channel Entry requires a Member as an Author; Seeder will only use a Fake Member for these situations.
Which brings us to Dependencies.
Every Seed can define its own Dependencies; the items, and how many of them, the Seed requires to be created before it can be created. Again, using the Channel Entry Seed as an example, it requires 100 Fake Members be created before it’ll install a single Channel Entry to be used as Author relationships.
Seeder keeps a record of every fake item created so it can be rolled back at any time and provide a pool of relatable data points. This becomes extremely important when creating your own Seeds (more on this in a later post).
There are 2 points of execution with Seeder: ExpressionEngine Actions and the new Command Line Interface (released with ExpressionEngine 6.1). There aren’t any template tags; it’s a utility so is executed like one. For example purposes, I’ll be sticking to the Command Line Interface.
./ee/eecli.php cartthrob:seeder:seed
./ee/eecli.php cartthrob:seeder:cleanup
./ee/eecli.php cartthrob:seeder:purge
To Seed data, you execute a command like so:
./ee/eecli.php cartthrob:seeder:seed --type SEED_TYPE --limit TOTAL_TO_SEED --verbose
The above would create XX Seeds and show you the progress of it doing so. Depending on the Seed though, you may be required to add additional parameters.
| Parameter | Definition | Type | Required |
|---|---|---|---|
type |
What Seed object to execute | string | Yes |
limit |
How many of each type to seed (20 is default) | int | No |
list |
When called with seeds, will display out the various Seed Types you can Seed with |
string | No |
channel |
The shortname for the channel you want to seed entries to | string | No |
role |
The Member Role you want to assign to Seed Members | string | No |
verbose |
Whether to display output on progress | flag | No |
Seeding Members into your site will require you also provide a role that is the shortname for the Member Role you want to assign these Fake members to.
./ee/eecli.php cartthrob:seeder:seed --type member --limit 10 --role members --verbose
Seeder will inspect your Member configuration, determine which Member Field Type you are using, and apply content to those fields.
Member Fields aren’t exactly extensible (*glares at Packet Tide) so the below is the complete coverage of Member Fields and how Seeder handles them.
| Field | Fake Data |
|---|---|
| Date | Generates a DateTime object with now |
| Select | Random selection from the setup options |
| Text | 3 to 6 random words combined |
| Textarea | A single paragraph of Lorem Ipsum |
| Url | Random URL |
When Seeding Channel Entries, you’ll be required to provide which Channel you want to assign your Entries to.
Note that the Entry Seed type requires there be 100 Member Seeds created prior to creation. It’s good practice to provide a
roleoption just in case.
./ee/eecli.php cartthrob:seeder:seed --type entry --channel blogs --role authors
Just like with Member Seeds, Seeder inspects your Channel Entry configuration and applies Fake data based on the Field(s) used.
The below is which FieldTypes are specifically are supported by Seeder. You’ll likely note a couple missing (Grid and Fluid) but they’re in the works no doubt.
| Field | Fake Data |
|---|---|
| Checkbox | Random selection from the setup options |
| Colorpicker | Random hex color code |
| Date | Generates a DateTime object with now |
| Duration | A random number between 1 and 200 |
| Email Address | A random email address |
| File | The first file in the configured site |
| MultiSelect | Random selection from the setup options |
| Relationship | Uses the Field configuration to pick a random selection of Entries |
| Rte | Between 2 and 20 paragraphs |
| Select | Random selection from the setup options |
| Text | 3 to 6 random words combined |
| Textarea | A single paragraph of Lorem Ipsum |
| Toggle | A random binary return |
| Url | Random URL |
In a future post, I’ll go into detail on how Third Party developers can configure their Add-ons to work with Seeder. For now though, there ya go. A list. Of things.
If you want to manage your Seeds at a granular level, you can use the cleanup command to get rid of specific Seeds. Note that due to how ExpressionEngine relates data at the Model level which means if you remove an asset that “owns” another data point, it’ll cascade accordingly.
./ee/eecli.php cartthrob:seeder:cleanup --type SEED_TYPE --limit TOTAL_TO_SEED
| Parameter | Definition | Type | Required |
|---|---|---|---|
type |
What Seed you want to remove | string | Yes |
limit |
How many of each type to seed (20 is default) | int | No |
If you want to set your system back to a usable state, the purge Command is where it’s at. Every Seed. Gone. Like it never ever happened.
./ee/eecli.php cartthrob:seeder:purge --verbose
| Parameter | Definition | Type | Required |
|---|---|---|---|
verbose |
Whether to display output on progress | flag | No |
All that’s pretty great, right? You can create Seed data and remove Seed data. Good stuff. Something’s missing though; data has structure and context. Your Blog post doesn’t need 5 paragraphs in the blurb field. Your Titles might follow a specific format. You want to ensure a specific format for XXX instead of YYY.
Seeder has your back on that front with Configuration Overrides.
The format’s fairly straightforward (relying on ExpressionEngine’s structure) and boils down to an array full of closures using the Faker PHP library.
Like all ExpressionEngine config files, it should be stored at system/user/config though this HAS to be named seeder.php. For Seed override, you use the index seeds as your parent array.
Seeder will pass the Faker PHP Library to your closure which will allow you to generate any type of Fake data you require.
$config = [
    'seeds' => [
        'SEED_NAME' => [
            'DATA_POINT_OF_EMAIL' => function(Faker $faker) {
                return $faker->email();
            },
        ],
        'OTHER_SEED_NAME' => [
            'DATA_POST_OF_NAME' => function(Faker $faker) {
                return $faker->firstName();
            }
        ]
    ]
]
To override Channel Entry data, you’ll have to break it down by channel_name and then define your channel fields. It’s important to note that you’ll use the field name to denote data. For example:
<?php
use \Faker\Generator AS Faker;

$config = [
    'seeds' => [
        'entry' => [
            'CHANNEL_NAME' => [
                'title' => function(Faker $faker) {
                    return 'Order #'.$faker->randomNumber();
                },
                'order_customer_phone' => function(Faker $faker) {
                    return $faker->phoneNumber();
                },
                'order_customer_email' => function(Faker $faker) {
                    return $faker->email();
                },
                'order_billing_first_name' => function(Faker $faker) {
                    return $faker->firstName();
                },
                'order_billing_last_name' => function(Faker $faker) {
                    return $faker->lastName();
                }
            ]
        ],
    ],
];
Just like with Channel Entry configuration, to Seed Member data per field, you use the input name.
<?php
use \Faker\Generator AS Faker;

$config = [
    'seeds' => [
        'member' => [
            'first_name' => function(Faker $faker) {
                return $faker->firstName;
            },
            'last_name' => function(Faker $faker) {
                return $faker->lastName;
            },
            'join_date' => function(Faker $faker) {
                return $faker->dateTimeThisYear->format('U');
            }
        ],
    ],
];
And that’s Seeder. About half of it. As mentioned at the top, Seeder also has a complete API for extending and personalizing the experience. In the next piece, we’ll go over creating Seeds and updating FieldTypes to work with Seeder.
So, we know how to build a form. A big ol’ array with a lot of options. But, I mean, that’s pretty unsatisfying. “Write out a complicated data structure in your Controller”, is a pretty terrible place to end things. So we’re not done. (Also, we really haven’t gone over Tables, Grid Fields, and Image Filepicker flows.)
So, in this Part, we’re going to go over what’s worked best for me to:
To help keep things conceptually fun, let’s assume we have a client who wants us to build a Control Panel form that will allow editing of the ExpressionEngine Site details.
That’s it, pretty simple. Also, a huge waste of money but, also, a man’s gotta eat, so that’s what we’re building.
Which means we have the following flow for the program:
So, really, I see 3 objects at this stage; the ExpressionEngine Control Panel object and a Form and Abstract object that’ll handle the generation of the particulars of a Form.
Just to keep me (personally) honest, I like to write out the general flow of my programs in pseudo code first. It helps me make sure I don’t miss anything and provides a reference point on the functionality that doesn’t require digging through emails or Pdf/Word docs.
$site = getSite();
if(!$site) {
    redirect();
}

$form = getForm();
$vars = [];
if(isPost()) {
    if($site->isValid()) {
        $site->save();
        redirect();
    }

    $vars = getErrors();
}

renderPage($form, $vars);
And, yeah, I really do want it that short and concise in the end; future me will be happy the code’s in a readable format.
So. Time to build.
When creating a Shared Form for a Model, it’s all about keeping things one to one in naming; your form fields should match your Model column names. They don’t have to match, but you’re going save yourself a ton of time not wrangling the data structures.
So, using the database table used by the Site Model (exp_sites) as an example, we can tell we’ll need form fields for:
I’m sure you can imagine how unwieldy this becomes if we put everything into the Control Panel object. Especially when you want to reuse the form (gotta create as well as update, after all).
So, to me, we need to abstract things a bit. I like my code to be lean and readable; I locked into the fat model skinny controller paradigm early and it really pays dividends in 2022.
For every project I do that requires Shared Form Views, I always start with an AbstractForm object that all the other Form objects will inherit. Just keeps things uniform; I want every form to work the same and have the same capabilities since clients are insane and shifting priorities are a thing.
At the most basic, it resembles the below:
abstract class AbstractForm
{
    protected $data = [];

    abstract public function generate(): array;

    public function setData(array $data): AbstractForm
    {
        $this->data = $data;

        return $this;
    }

    public function get(string $key = '', $default = '')
    {
        return isset($this->data[$key]) ? $this->data[$key] : $default;
    }
}
I have a more full fledged implementation that I use nowadays, but the above is really the core; an object that returns a form (to be defined) and a couple helpers for handling values.
Really though, all the above is is a simple base that allows setting an array as a data store and a getter to grab what we want without worrying about its existence. Just makes for a smooth dev experience for me since we don’t have to test return values.
The idea is that every Form I build is based off the Abstract, with one domain per Form. For example, a SiteForm and then a MemberForm, etc. Each stand-alone. Each contained to its own domain/namespace. And each able to be tested stand-alone.
So, let’s put it together.
class SiteForm extends AbstractForm
{
    public function generate(): array
    {
        return [
            [
                [
                    'title' => 'site_label',
                    'fields' => [
                        'site_label' => [
                            'name' => 'site_label',
                            'type' => 'text',
                            'value' => $this->get('site_label'),
                            'required' => true,
                        ],
                    ],
                ],
                [
                    'title' => 'site_name',
                    'fields' => [
                        'site_name' => [
                            'name' => 'site_name',
                            'type' => 'text',
                            'value' => $this->get('site_name'),
                            'required' => true,
                        ],
                    ],
                ],
                [
                    'title' => 'site_description',
                    'fields' => [
                        'site_description' => [
                            'name' => 'site_description',
                            'type' => 'text',
                            'value' => $this->get('site_description'),
                        ],
                    ],
                ],
                [
                    'title' => 'site_color',
                    'desc' => 'site_color_desc',
                    'fields' => [
                        'site_color' => [
                            'name' => 'site_color',
                            'type' => 'text',
                            'value' => $this->get('site_color'),
                            'required' => true,
                        ],
                    ],
                ],
            ],
        ];
    }
}
The below may look like a lot but it’s really just a basic POST flow with Model validation and heavy use of the Cp/Alert object.
class Custom_module_mcp
{
    public function index()
    {
        $base_url = 'addons/settings/custom-module';
        $site_model = ee('Model')->get('Site')
            ->filter('site_id', 1)
            ->first();

        if (!$site_model instanceof SiteModel) {
            ee('CP/Alert')->makeInline('shared-form')
                ->asIssue()
                ->withTitle(lang('site_not_found'))
                ->defer();
            ee()->functions->redirect(ee('CP/URL')->make($base_url . '/settings'));
        }

        $variables = [];
        $form = new MyFormObject();
        $form->setData($site_model->toArray());
        if ($_SERVER['REQUEST_METHOD'] === 'POST') {

            $site_model->set($_POST);
            $result = $site_model->validate();
            if ($result->isValid()) {
                $site_model->save();
                ee('CP/Alert')->makeInline('shared-form')
                    ->asSuccess()
                    ->withTitle(lang('form_success'))
                    ->defer();
                ee()->functions->redirect(ee('CP/URL')->make($base_url . '/index'));

            }  else {
                $variables['errors'] = $result;
                ee('CP/Alert')->makeInline('shared-form')
                    ->asIssue()
                    ->withTitle(lang('form_processing_failed'))
                    ->now();
            }
        }

        $variables = array_merge([
            'cp_page_title' => 'Your Custom Form',
            'save_btn_text' => 'save',
            'save_btn_text_working' => 'saving',
            'base_url' => ee('CP/URL')->make($base_url),
            'sections' => $form->getForm() //returns the Shared Form array
        ], $variables);

        return [
            'body' => ee('View')->make('ee:_shared/form')->render($variables)
        ];
    }
}
It’s actually pretty straightforward, though I admit; it looks complicated. So, let’s step through the index method.
To be honest, I usually make this a class property, so every Control Panel method can use this value, so it’s purely for example purposes in the example. Still, definitely want a $base_url variable since your view needs it and it’s handy for redirect URLs
$base_url = 'addons/settings/custom-module';
When you’re working with Models (or, anything, really), always, always, ALWAYS, ensure its integrity matches the program’s expectations. Do you have what you expected? And handle failures gracefully for the user. In this case, “Do I have a Site Model?” and, if not, get the user out of there since everything relies on a healthy Site Model object.
$site_model = ee('Model')->get('Site')
    ->filter('site_id', 1)
    ->first();

if (!$site_model instanceof SiteModel) {
    ee('CP/Alert')->makeInline('shared-form')
        ->asIssue()
        ->withTitle(lang('site_not_found'))
        ->defer();
    ee()->functions->redirect(ee('CP/URL')->make($base_url . '/settings'));
}
Also, whenever the situation allows, I’m a big fan of dropping an Alert into the request to let the user know why they aren’t allowed to do what they wanted to do.
Once I know I have a valid Model, I start constructing the rest of the page, which includes checking if we have to process anything. Basically, “Is this a POST Request?” becomes a really important question at this point.
$variables = [];
$form = new MyFormObject();
$form->setData($site_model->toArray());
if ($_SERVER['REQUEST_METHOD'] === 'POST') {
Because, let’s start the form processing.
First things first, we set our POST data into our Model and validate the Model. This verifies we have the data, in the right format, that the Model requires to do any writes.
$site_model->set($_POST);
$result = $site_model->validate();
if ($result->isValid()) {}
This part’s a little bit of magic, which I know sucks, but the Model objects can define their own Validation Rules within themselves, so they’re a bit self moderating. Definitely a bigger discussion, but if you’re curious, the official ExpressionEngine docs are actually very informative on how Models are structured and how to handle Validation.
Upon a valid Validation check, we just call the Model save() method and redirect the user away with a handy success Alert.
$site_model->save();
ee('CP/Alert')->makeInline('shared-form')
    ->asSuccess()
    ->withTitle(lang('form_success'))
    ->defer();
ee()->functions->redirect(ee('CP/URL')->make($base_url . '/index'));
Upon a Validation check that fails, we let the View continue processing and let the Shared Form take over. It’ll automatically handle value keys and error message within form fields for us so we really only have to let the user know with a pretty Alert banner.
$variables['errors'] = $result;
ee('CP/Alert')->makeInline('shared-form')
    ->asIssue()
    ->withTitle(lang('form_processing_failed'))
    ->now();
If we’re just displaying the form, rather simple:
$variables = array_merge([
    'cp_page_title' => 'Your Custom Form',
    'save_btn_text' => 'save',
    'save_btn_text_working' => 'saving',
    'base_url' => ee('CP/URL')->make($base_url),
    'sections' => $form->getForm() //returns the Shared Form array
], $variables);

return [
    'body' => ee('View')->make('ee:_shared/form')->render($variables)
];
So far, and still, easy enough, I think. Everything is nicely self contained, everything logically laid out and compartmentalized.
Next steps, Grid, Tables, and Filepicker. Later though. For now, it’s Friday and I don’t wanna do this any longer.
Here they are. Every single field option with every available setting. What you can do and what you get from it. Minimal snark.
Note that this is Part 2 of a series on the ExpressionEngine Shared Form View libraries. It’s assumed you’ve read Part One so if you haven’t yet, go nuts.
If it gets overwhelming, just remind yourself, “not all variables are needed depending on the ‘type’ value”. It’ll help. Maybe. What do I know.
Also, keep your pets nearby for moral support.
Oh. Right. Yeah. There are 2 of them :shrug-emoji:
| Variable | Definition | Type | Required |
|---|---|---|---|
name |
The value to use for the name parameter of the input field |
string | No |
type |
One of a ton of varying values, described below | string | Yes |
These will work in about 90% of situations. FWIW, the parser doesn’t really care if you have variables for Fields that aren’t used. So there’s no real worry of anything breaking if you, for example, use the no_results variable on the text input field.
| Variable | Definition | Type | Required |
|---|---|---|---|
class |
Any specific CSS class to apply. | string | No |
margin_top |
Adds the CSS class add-mrg-top to the containing div |
boolean | No |
margin_left |
Adds the CSS class add-mrg-left to the containing div |
boolean | No |
value |
The data to populate the Field | string | No |
required |
Denotes the field visually as being required for validation | boolean | No |
attrs |
A complete key="value" string to apply to the field |
string | No |
disabled |
Whether the field can accept input/editing | string | No |
group_toggle |
Used in conjunction with group to hide/show field sets. See the docs for details |
string | No |
maxlength |
Hard lock a field to only allow XX characters | integer | No |
placeholder |
The string to use for the input fields placeholder parameter |
string | No |
group |
Used in conjunction with group_toggle to hide/show field sets. See the docs for details |
string | No |
note |
A raw string of text to output BENEATH the field | string | No |
no_results |
Used to define quick links when choices are empty |
array | No |
choices |
A simple key=>value array pair to populate options |
array | No |
no_resultsThe no_results variable should follow the format of:
[
    'text' => '',
    'link_href' => '',
    'link_text' => '',
]
And now we’re here. The whole freaking point. All the fields. Leggo.
textshort-textfilepasswordhiddentextareaaction_buttonhtmlselecttoggledropdowncheckboxradiomultiselectsliderimagetext Adds a traditional input HTML field.
'fields' => [
    'FIELD_NAME' => [
        'name' => 'FIELD_NAME',
        'type' => 'text'
    ],
]
Output
<input type="text" name="FIELD_NAME" value="">
'fields' => [
    'FIELD_NAME' => [
        'name' => 'FIELD_NAME',
        'type' => 'text',
        'class' => 'my-custom-class', //note this is applied to wrapping div on input
        'attrs' => ' custom-param="12" ',
        'value' => '[email protected]',
        'maxlength' => 24,
        'placeholder' => 'Your Email Here',
        'note' => 'Another Place for copy',
        'disabled' => false, //note if true the `attrs` attribute is ignored
    ],
]
Output
<input type="text" name="FIELD_NAME" value="[email protected]" custom-param="12" maxlength="24" placeholder="Your Email Here">
short-text Adds a small input HTML field wrapped in a div with flex-input as the class. Useful for stacking fields horizontally.
'fields' => [
    'FIELD_NAME' => [
        'name' => 'FIELD_NAME',
        'type' => 'short-text'
    ],
]
Output
<label class="flex-input ">
    <input type="text" name="FIELD_NAME" value="">
</label>
The short-text field only has 1 custom variable lol
| Variable | Definition | Type | Required |
|---|---|---|---|
label |
Will place a bold string under the field for users to clickety clackity on | string | No |
'fields' => [
    'FIELD_NAME' => [
        'name' => 'FIELD_NAME',
        'type' => 'short-text',
        'class' => 'my-custom-class', //note this is applied to wrapping label on input
        'attrs' => ' custom-param="12" ',
        'value' => '[email protected]',
        'maxlength' => 24,
        'placeholder' => 'Your Email Here',
        'label' => 'FIELD_LABEL_VALUE',
        'note' => 'Another Place for copy',
        'disabled' => false, //note if true the `attrs` attribute is ignored
    ],
]
Output
<label class="flex-input my-custom-class">
    <input type="text" name="FIELD_NAME" value="[email protected]" custom-param="12"  maxlength="24" placeholder="Your Email Here">
    <span class="label-txt">FIELD_LABEL_VALUE</span>
</label>
file Adds a traditional file HTML field to your form.
Note that to use the
filefield you’ll have to set'has_file_input' => truein the view level variables you pass toee:_shared/formso the formenctypeis changed to allow file uploads.
'fields' => [
    'FIELD_NAME' => [
        'name' => 'FIELD_NAME',
        'type' => 'file',
    ],
],
Output
<input type="file" name="FIELD_NAME" class="">
'fields' => [
    'FIELD_NAME' => [
        'name' => 'FIELD_NAME',
        'type' => 'file',
        'class' => 'my-custom-class', //note this is applied to the input element
        'attrs' => ' custom-param="12" ',
        'note' => 'Another Place for copy',
        'disabled' => false, //note if true the `attrs` attribute is ignored
    ],
]
Output
<input type="file" name="FIELD_NAME" disabled="disabled" class="my-custom-class">
password Adds your run of the mill password input field wrapped in magic that puts an eye in it users can click to deobfuscate the input.
It’s important to note the value you use for the
namevariable. If the value isverify_passwordorpassword_confirm, theautocompleteparameter iscurrent-passwordotherwise the value isnew-password.
'fields' => [
    'FIELD_NAME' => [
        'name' => 'FIELD_NAME',
        'type' => 'password'
    ],
],
Output
<input type="password" name="FIELD_NAME" value="" autocomplete="new-password" class="">
'fields' => [
    'FIELD_NAME' => [
        'name' => 'FIELD_NAME',
        'type' => 'password',
        'class' => 'my-custom-class', //note this is applied to the input field
        'attrs' => ' custom-param="12" ',
        'value' => 'THE_VALUE',
        'maxlength' => 24,
        'placeholder' => 'PLACEHOLDER_VALUE',
        'note' => 'NOTE_STRING',
        'disabled' => false, //note if true the `attrs` attribute is ignored
    ],
]
Output
<input type="password" name="FIELD_NAME" value="THE_VALUE" autocomplete="new-password" custom-param="12" maxlength="24" placeholder="PLACEHOLDER_VALUE" class="my-custom-class">
hidden Adds a hidden field to your form.
Note that if you care about visual dissonance, you REALLY don’t want to use this stand-alone in your form. It throws the spacing off. Like, WAY off. It’ll legit just look weird. Either append it to an existing field group at the bottom of your form (last element, basically), OR define your hidden fields in your view variables.
'fields' => [
    'FIELD_NAME' => [
        'name' => 'FIELD_NAME',
        'type' => 'hidden',
        'value' => 'VALUE'
    ],
]
Output
<input type="hidden" name="FIELD_NAME" value="VALUE">
There are ony 4 for, hopefully, obvious reasons.
'fields' => [
    'FIELD_NAME' => [
        'name' => 'FIELD_NAME',
        'type' => 'hidden',
        'value' => 'THE_VALUE',
        'note' => 'NOTE_STRING',
    ],
]
Output
<input type="hidden" name="FIELD_NAME" value="THE_VALUE">
textarea Adds a full textarea input field.
'fields' => [
    'FIELD_NAME' => [
        'name' => 'FIELD_NAME',
        'type' => 'textarea'
    ],
]
Output
<textarea name="FIELD_NAME"></textarea>
| Variable | Definition | Type | Required |
|---|---|---|---|
cols |
How many columns to set the field to use | int | No |
rows |
The total rows | int | No |
kill_pipes |
Flag to replace any ¦ delimiters with new lines (\n) |
boolean | No |
'fields' => [
    'FIELD_NAME' => [
        'name' => 'FIELD_NAME',
        'type' => 'textarea',
        'class' => 'my-custom-class', //note this is applied to input field
        'attrs' => ' custom-param="12" ',
        'value' => 'THE_VALUE',
        'maxlength' => 24,
        'placeholder' => 'PLACEHOLDER_VALUE',
        'note' => 'NOTE_STRING',
        'disabled' => false, //note if true the `attrs` attribute is ignored
        'cols' => 20,
        'rows' => 30,
        'kill_pipes' => false,
    ],
]
Output
<textarea name="FIELD_NAME" cols="20" rows="30" custom-param="12" maxlength="24" placeholder="PLACEHOLDER_VALUE">THE_VALUE</textarea>
action_button Adds a “pretty” button style link to your form.
Note that
action_buttonrequires 2 additional variables by default.
| Variable | Definition | Type | Required |
|---|---|---|---|
link |
The full URL you want to use | string | Yes |
text |
The copy to use for the button | string | Yes |
'fields' => [
    'FIELD_NAME' => [
        'name' => 'FIELD_NAME',
        'type' => 'action_button',
        'link' => 'https://u.expressionengine.com/',
        'text' => 'Ultra Double Secret Manual for ExpressionEngine Shared Form View Part Two'
    ],
]
Output
<a class="button button--secondary tn " href="https://u.expressionengine.com/">Ultra Double Secret Manual for ExpressionEngine Shared Form View Part Two</a>
'fields' => [
    'FIELD_NAME' => [
        'name' => 'FIELD_NAME',
        'type' => 'action_button',
        'link' => 'https://u.expressionengine.com/',
        'text' => 'Ultra Double Secret Manual for ExpressionEngine Shared Form View Part Two',
        'class' => 'my-custom-class', //note this is applied to wrapping div on input
        'note' => 'NOTE_STRING',
    ],
]
Output
<a class="button button--secondary tn my-custom-class" href="https://u.expressionengine.com/">Ultra Double Secret Manual for ExpressionEngine Shared Form View Part Two</a>
html Allows for putting raw (unformatted) HTML inside your form.
Note that
htmlrequires 1 additional variable by default.
| Variable | Definition | Type | Required |
|---|---|---|---|
content |
The HTML ahem content you want to output | string | Yes |
'fields' => [
    'FIELD_NAME' => [
        'name' => 'FIELD_NAME',
        'type' => 'html',
        'content' => '<strong>my string</strong>'
    ],
]
Output
<strong>my string</strong>
'fields' => [
    'FIELD_NAME' => [
        'name' => 'FIELD_NAME',
        'type' => 'html',
        'content' => '<strong>my string</strong>',
        'class' => 'my-custom-class', //note this is applied to wrapping div around the content
        'note' => 'NOTE_STRING',
    ],
]
Output
<div class="my-custom-class">
    <strong>my string</strong>
</div>
select Adds a traditional select input field to your form.
'fields' => [
    'FIELD_NAME' => [
        'name' => 'FIELD_NAME',
        'type' => 'select',
        'choices' => [
            1 => 'One',
            2 => 'Two',
            3 => 'Three'
        ]
    ],
]
Output
<select name="FIELD_NAME"  class="">
    <option value="1">One</option>
    <option value="2">Two</option>
    <option value="3">Three</option>
</select>
| Variable | Definition | Type | Required |
|---|---|---|---|
encode |
Whether to format text so that it can be safely placed in a form field in the event it has HTML tags. | boolean | No |
'fields' => [
    'FIELD_NAME' => [
        'name' => 'FIELD_NAME',
        'type' => 'select',
        'choices' => [
            1 => 'One',
            2 => 'Two',
            3 => 'Three'
        ],
        'class' => 'my-custom-class', //note this is applied to input field
        'attrs' => ' custom-param="12" ',
        'value' => 'THE_VALUE',
        'note' => 'NOTE_STRING',
        'disabled' => false, //note if true the `attrs` attribute is ignored
        'no_results' => [
            'text' => 'Nothing Here',
            'link_href' => 'URL_TO_ADD_OPTION',
            'link_text' => 'Add Option'
        ],
    ],
]
Output
<select name="FIELD_NAME"  custom-param="12"  class="my-custom-class">
    <option value="1">One</option>
    <option value="2">Two</option>
    <option value="3">Three</option>
</select>
toggle / yes_no Adds a Toggle control that returns either y or n respectively when yes_no is used or a traditional boolean when toggle is used.
'fields' => [
    'FIELD_NAME' => [
        'name' => 'FIELD_NAME',
        'type' => 'yes_no', // | toggle
    ],
]
Output
<button type="button" class="toggle-btn off yes_no  " data-toggle-for="FIELD_NAME" data-state="off" role="switch" aria-checked="false" alt="off">
    <input type="hidden" name="FIELD_NAME" value="n">
    <span class="slider"></span>
</button>
'fields' => [
    'FIELD_NAME' => [
        'name' => 'FIELD_NAME',
        'type' => 'yes_no', // | toggle
        'class' => 'my-custom-class',
        'value' => 'THE_VALUE',
        'note' => 'NOTE_STRING',
        'disabled' => false,
    ],
]
Output
<button type="button" class="toggle-btn off yes_no  my-custom-class" data-toggle-for="FIELD_NAME" data-state="off" role="switch" aria-checked="false" alt="off">
    <input type="hidden" name="FIELD_NAME" value="n">
    <span class="slider"></span>
</button>
dropdown Adds a fancy select input field especially useful for large data sets to choose from.
'fields' => [
    'FIELD_NAME' => [
        'name' => 'FIELD_NAME',
        'type' => 'dropdown',
        'choices' => [
            1 => 'One',
            2 => 'Two',
            3 => 'Three',
            4=> 'Four',
        ]
    ],
]
| Variable | Definition | Type | Required |
|---|---|---|---|
limit |
Magic | integer | No |
filter_url |
Magic | string | No |
'fields' => [
    'FIELD_NAME' => [
        'name' => 'FIELD_NAME',
        'type' => 'dropdown',
        'value' => 2,
        'limit' => 100,
        'empty_text' => 'Whatever you want',
        'filter_url' => '',
        'choices' => [
            1 => 'One',
            2 => 'Two',
            3 => 'Three',
            4=> 'Four',
        ],
        'no_results' => [
            'text' => 'Nothing Here',
            'link_href' => 'URL_TO_ADD_OPTION',
            'link_text' => 'Add Option'
        ],
    ],
]
checkbox Adds a specialized widget for checkbox.
Note that if you have more than 8 options the widget becomes a unicorn with a beautiful horn.
'fields' => [
    'FIELD_NAME' => [
        'name' => 'FIELD_NAME',
        'type' => 'checkbox',
        'choices' => [
            1 => 'One',
            2 => 'Two',
            3 => 'Three',
        ],
    ],
]
| Variable | Definition | Type | Required |
|---|---|---|---|
disabled_choices |
A list of keys used in the options array to prevent selection |
array | No |
selectable |
Whether to allow user interaction with the field | boolean | No |
reorderable |
Allow drag and drop ordering of the options? | boolean | No |
removable |
Adds UI element to remove options | boolean | No |
encode |
Whether to format text so that it can be safely placed in a form field in the event it has HTML tags. | boolean | No |
'fields' => [
    'FIELD_NAME' => [
        'name' => 'FIELD_NAME',
        'type' => 'checkbox',
        'value' => [2,1],
        'choices' => [
            1 => 'One',
            2 => 'Two',
            3 => 'Three',
        ],
        'disabled_choices' => [
            3
        ],
        'selectable' => true,
        'reorderable' => false,
        'removable' => false,
        'editable' => false,
        'encode' => true,
        'attrs' => ' custom-param="12" ',
        'no_results' => [
            'text' => 'Nothing Here',
            'link_href' => 'URL_TO_ADD_OPTION',
            'link_text' => 'Add Option'
        ],
    ],
]
radio This behaves just like checkbox with the exception of being scalar so uses a scalar for the value. See checkbox for details.
Note you can alias this with
radio_blockorinline_radiofor reasons
multiselect Deploys a series of select input fields together.
'fields' => [
    'FIELD_NAME' => [
        'name' => 'FIELD_NAME',
        'type' => 'multiselect',
        'choices' => [
            'bday_day' => [
                'label' => 'Day',
                'choices' => [],
                'value' => ''
            ],
            'bday_month' => [
                'label' => 'Month',
                'choices' => [],
                'value' => ''
            ],
            'bday_year' => [
                'label' => 'Year',
                'choices' => [],
                'value' => ''
            ]
        ]
    ],
]
Output
<div class="field-inputs">
<label>
    Day<select name="bday_day"></select>
</label>
<label>
    Month<select name="bday_month"></select>
</label>
<label>
    Year<select name="bday_year"></select>
</label>
</div>
'fields' => [
    'FIELD_NAME' => [
        'name' => 'FIELD_NAME',
        'type' => 'multiselect',
        'note' => 'MY_NOTE',
        'choices' => [
            'bday_day' => [
                'label' => 'Day',
                'choices' => [],
                'value' => ''
            ],
            'bday_month' => [
                'label' => 'Month',
                'choices' => [],
                'value' => ''
            ],
            'bday_year' => [
                'label' => 'Year',
                'choices' => [],
                'value' => ''
            ]
        ]
    ],
]
Output
<div class="field-inputs">
<label>
    Day<select name="bday_day"></select>
</label>
<label>
    Month<select name="bday_month"></select>
</label>
<label>
    Year<select name="bday_year"></select>
</label>
</div>
slider Puts a slider widget into your form
Note that this field appears to still be expirmental. Hence why it’s not “officially” documented.
'fields' => [
    'FIELD_NAME' => [
        'name' => 'FIELD_NAME',
        'type' => 'slider',
    ],
]
Output
<input type="range" rel="range-value"
    id="FIELD_NAME"
    name="FIELD_NAME"
    value=""
    min="0"
    max="100"
    step="1"
        >
<div class="slider-output"><output class="range-value" for="FIELD_NAME"></output>%</div>
| Variable | Definition | Type | Required |
|---|---|---|---|
min |
The lowest value in the range of permitted values | integer | No |
max |
The greatest value in the range of permitted values | integer | No |
step |
Specifies the granularity that the value must adhere to (if any is used, no stepping is implied, and any value is allowed (barring other constraints, such as min and max) |
mixed | No |
unit |
The symbol your data can best be represented by (defaults to %) |
mixed | No |
'fields' => [
    'FIELD_NAME' => [
        'name' => 'FIELD_NAME',
        'type' => 'slider',
        'min' => 100,
        'note' => 'MY_NOTE',
        'max' => 400,
        'step' => 3,
        'unit' => '$',
    ],
]
Output
<input type="range" rel="range-value"
    id="FIELD_NAME"
    name="FIELD_NAME"
    value=""
    min="100"
    max="400"
    step="3"
        >
<div class="slider-output"><output class="range-value" for="FIELD_NAME"></output>$</div>
image It doesn’t exist. Don’t believe anyone. There is no image field.
Instead, take a look at this Forum post about how to get a head start on a future Part.
I know, pretty unsatisfying, but, I mean, whatever :shakes-head:
At this point, you should know everything you need to know to create a form using the Shared/Form View libraries. There are a couple more points to cover, for example adding Ajax requests and Grid Fields and Tables, but these are the high notes.
Next steps is to focus on form processing, Model objects, and Validation. Which should be a lot more fun.
One of the more understated changes to ExpressionEngine over the last few years is the Shared Form View. Easily, one of my top 3 favorite reasons for why to use ExpressionEngine as a programmer. If you’re not familiar, the nickle explanation is you create form views with array definitions.
I know. Sounds weird. And your instinct to finger wag and wellwhatabout is a natural instinct that’s served you well. Tamp it down for just a minute though; you won’t be disappointed.
Putting aside, “arrays are primitives and you can’t build abstractions around primitives *RAWR*” (except when YOU do it), the implementation ExpressionEngine created allows for some incredibly complex and nuanced solutions that go way beyond what the docs provide. And the docs, as a matter of fact, provide for a lot.
Fun fact; the majority of ExpressionEngine’s Control Panel forms are written using the Shared Form View, so, I mean, examples are all over the place if you’re curious how to do something. Just find it and roll up your sleeves.
So, how do you make a form? No matter what anyone tells you (he says in regards to the straw-man just to make a point), there are really only 2 “chunks” required for your Shared Form View; the Control Panel View and the Shared Form array.
At the most basic, the below is the minimum that’s required for the view within the mcp method. Same as every other Control Panel View you’ve created; declare some variables and return an array with a body key (and others, but that’s a discussion for another place).
$variables = [
'cp_page_title' => 'Your Custom Form',
'save_btn_text' => 'save',
'save_btn_text_working' => 'saving',
'base_url' => ee('CP/URL')->make('addons/settings/custom-module')->compile(),
'sections' => $this->getForm() //returns the Shared Form array
];
return [
'body' => ee('View')->make('ee:_shared/form')->render($variables)
];
Note that all the keys within the $variables array are required for use of the 'ee:_shared/form' view script (provided by ExpressionEngine). You’ll get PHP errors and undefined variables warnings. It’s ugly. Don’t do it. Show some pride in your work. Declare at least those. If you wanna go bare-bones, this is the way, though there are a ton of other options.
Keep in mind the above
sectionskey within the$variablesarray; that’s where ALL form arrays are expected within theee:_shared/formview script. Why it’s not namedformsis none of our business, to be honest, and it’s rude to ask.
To keep things sane, don’t be that developer that just dumps the entire form array into the Controller creating a 1,000 line method within a sea of other 1,000 line methods; separate your code by concern, dammit! I mean, not like I’m about to do. Do better than the below method within the Control Panel object. The below is dumb ‘cause writing examples give me a free pass to be bad at designing my software and double standards are fun.
protected function getForm()
{
    return [
        [
            [
                'title' => 'Email',
                'fields' => [
                    'email' => [
                        'name' => 'email',
                        'type' => 'text',
                    ],
                ],
            ],
            [
                'title' => 'Name',
                'fields' => [
                    'name' => [
                        'name' => 'name',
                        'type' => 'text',
                    ],
                ],
            ]
        ]
    ];
}
Let’s break this down. It’s obviously an array of arrays that contain arrays (O.o) which define form fields. Pretty straight forward concept but this implementation is deceptive; it’s really more a collection of field groups that can contain field sets that can contain multiple fields. The key (puns are fun!) to this is fields; it, too, is an array of arrays.
Consider the below:
protected function getForm()
{
return ['My Name Fields' =>
[
[
'title' => 'Contact Details',
'fields' => [
'email' => [
'name' => 'email',
'type' => 'text',
'placeholder' => 'Email',
],
'name' => [
'name' => 'name',
'type' => 'text',
'placeholder' => 'Name',
],
],
]
]
];
}
Same form fields, just presented differently. And because they’re arrays (even though primitives ARE stupid, I know), we can really make our forms as nuanced as… well… how can I put this… our forms can be as nuanced as our clients believe they need their interpretation of a solution to the problem they’re solving… requires…
Note the array key
My Name Fieldsallows you to put a header (h-something-or-other) in the HTML to delineate your field group. I’m not going to go into it because the docs cover it nicely but check out using Tabs within your Shared Form Views. It’s pretty snazzy.
So, one of the things the docs don’t cover very much is the shear number of variables you can pass to a Shared Form View. Here’s a complete example with every option:
$variables = [
'save_btn_text' => 'save',
'save_btn_text_working' => 'saving',
'ajax_validate' => true,
'has_file_input' => true,
'alerts_name' => '',
'form_hidden' => [],
'cp_page_title_alt' => 'Hello',
'cp_page_title' => 'Will not show',
'action_button' => [],
'hide_top_buttons' => true, //note if 'action_button' is defined this is ignored
'extra_alerts' => [],
'buttons' => [],
'base_url' => ee('CP/URL')->make('addons/settings/custom-module')->compile(),
'sections' => $this->getForm()
];
return [
'body' => ee('View')->make('ee:_shared/form')->render($variables)
];
| Variable | Definition | Type | Required |
|---|---|---|---|
save_btn_text |
Used as the label value within default form buttons | string | Yes |
save_btn_text_working |
Clicked form buttons will have their value changed to this | string | Yes |
base_url |
The URL string to use for form processing | string | Yes |
sections |
The Shared Form View array | array | Yes |
cp_page_title |
Text to display on the View Header | string | Yes |
ajax_validate |
Adds the CSS class ajax-validate to the form tag presumably for reasons |
boolean | No |
has_file_input |
Adds enctype="multipart/form-data" to the form to allow files to be uploaded along with POST |
boolean | No |
alerts_name |
The name for the alerts data specific to your form. Defaults to shared-form |
string | No |
form_hidden |
Any form specific hidden fields you want to attach. Note it MUST be compatible with the form_open() method's parameter |
array | No |
cp_page_title_alt |
An alternative Text to display on the View Header. Useful for multi form views (I imagine) | string | No |
extra_alerts |
A simple array containing the shortname for additional Alerts you want this form to output. See the Cp/Alert Service for details. | array | No |
hide_top_buttons |
Whether to remove the top most submit button from your form. Note if an action_button is defined this setting is ignored. |
boolean | No |
action_button |
An array containing a complete replacement for the top most button (see below) | array | No |
buttons |
Complete override of the buttons on the bottom of the form (see below) | array | No |
Most of the above are pretty self explanatory, but the buttons and action_button also have some nuance.
action_button The format for this array should look like this:
[
    'rel' => '',
    'href' => '',
    'text' => '',
]
buttons This is a multidimensional array that contains definitions for multiple buttons:
'buttons' => [
[
'shortcut' => '',
'attrs' => '',
'value' => '',
'text' => '',
'name' => '',
'type' => '', //submit|button|reset (yeah, reset, 'cause 1998 happened once and it can happen again)
'class' => '',
'html' => '',//prepends to 'text' value
'working' => '',
]
]
So, we’ve already gone into the basics on how a Shared Form View form is created, but just like with the Control Panel there are quite a few hidden gems available to developers. Unfortunately, it’s broken up into 2 separate layers, with the second layer being conditional.
Consider this form array containing 2 fields:
$form = ['member_details' =>
    [
        [
            'title' => 'Email',
            'fields' => [
                'email' => [
                    'name' => 'email',
                    'type' => 'text',
                ],
            ],
        ],
        [
            'title' => 'Name',
            'fields' => [
                'name' => [
                    'name' => 'name',
                    'type' => 'text',
                ],
            ],
        ]
    ]
];
Looking at the commonalities, it’s easier for me to consider this 2 parts that make a whole; the fields key and everything BUT the fields key (we’ll call that “Top”).
Here’s a breakdown of the accepted keys:
| Variable | Definition | Type | Required |
|---|---|---|---|
title |
The colloquial name for the field (processed through the lang() method) |
string | Yes |
fields |
An array of key => $fields that define the actual input layer |
array | Yes |
desc |
A longer description for the field (processed through the lang() method) |
string | No |
desc_cont |
A second description to use for the field that'll be displayed on its own line (processed through the lang() method) |
string | No |
example |
A simple string output (processed through the lang() method) |
string | No |
button |
An array that defines a button; will attach button next to field(s) | array | No |
So a more full fledged example of our form could look like this:
$form = ['member_details' =>
    [
        [
            'title' => 'Email',
            'desc' => 'Put Email here',
            'desc_cont' => 'My did I capitalize Email above?',
            'example' => 'WHY DID I DO IT AGAIN THOUGH?!?',
            'fields' => [
                'email' => [
                    'name' => 'email',
                    'type' => 'text',
                ],
            ],
            'button' => [ //only one per field (apparently)
                'text' => 'Clickety clackity click',
                'rel' => '',
                'for' => '',//adds to the data-for attribute
            ]
        ],
        [
            'title' => 'Name',
            'fields' => [
                'name' => [
                    'name' => 'name',
                    'type' => 'text',
                ],
            ],
        ]
    ]
];
Believe it or not, all the above just barely scratches the surface when it comes to the Shared Form View layer of ExpressionEngine. We’ve covered everything up to defining individual fields. Which is a lot. But I’m not going to go into the rest of it for now since dealing with Fields is well documented and they really do provide a good jumping off point at the official docs. For now, we’re done. Go play. Copy/paste the above into a project and tilt your head at how easy it is to create Control Panel forms with ExpressionEngine.
This article assumes you understand how “simple” conditionals work.
Generally speaking a “simple” conditional lets you evaluate only two things in one way, “advanced” conditionals lets you evaluate many things in many ways.
There are near limitless ways to use advanced conditionals so instead of trying to cover everything, this article deals with commonly used examples and patterns.
Let’s say you have a custom field with values of “yes” and “no” and you want to display a custom message depending on the value, you can do something like this:
{if my_option_field == "yes"}
  The answer is yes
{if:else}
  The answer is no
{/if}
If the answer is yes show the yes message, else show the no message.
By using {if:else} you tell ExpressionEngine to evaluate the first condition, if it’s true do something, if it’s not true do something else.
You could reverse what you evaluate first:
{if my_option_field == "no"}
  The answer is no
{if:else}
  The answer is yes
{/if}
If the answer is no show the no message, else show the yes message.
You could express this particular example as two simple conditionals:
{if my_option_field == "yes"}The answer is yes{/if}
{if my_option_field == "no"}The answer is no{/if}
For binary yes/no or true/false type answers either method will work fine.
What if you need a “don’t know” answer as well? You can evaluate two things with a fallback answer:
{if my_option_field == "yes"}
  The answer is yes
{if:elseif my_option_field == "no"}
  The answer is no
{if:else}
  Don't know
{/if}
If the answer is yes show the yes message, else if the answer is no show the no message, else show the “don’t know” message.
You don’t always need the last {if:else}, if you just wanted to output something for either value you could something like this:
{if my_option_field == "yes"}
  The answer is yes
{if:elseif my_option_field == "no"}
  The answer is no
{/if}
If the answer is yes show the yes message, else if the answer is no show the no message, otherwise do nothing
You can use as many if:elseif statements as you need:
{if my_color == "red"}
  I like red
{if:elseif my_color == "blue"}
  I like blue
{if:elseif my_color == "green"}
  I like green
{if:elseif my_color == "black"}
  I like black
{if:elseif my_color == "white"}
  I like white
{if:else}
  I'm undecided
{/if}
On occasions you may want to evaluate various combinations of information to refine the answer. Here’s an example:
{if my_option_field == "yes" AND my_color_field == "blue"}
  Yes, my favourite color is blue
{/if}
If the answer is yes and blue output the message, otherwise do nothing.
The AND logical operator lets you evaluate two parameters, so if both are true you get a result, if none or neither are true nothing happens.
You can evaluate as many parameters as you want:
{if my_option_field == "yes" AND my_color_field == "blue" AND my_date_field == "Friday"}
  Yes, my favourite color is blue, but only on Friday
{/if}
If the answer is yes and the colour is blue but only show the result of the day is Friday.
You can use other comparisons instead of == (equals to) such as this one that uses != (not equal to):
{if my_option_field == "yes" AND my_color_field != "blue"}
  Yes, but my favourite color is not blue
{/if}
If the answer is yes and the colour is not blue output the message, otherwise do nothing.
You can always include custom field tags to output values dynamically:
{if my_option_field == "yes" AND my_color_field == "blue" my_date_field == "Friday"}
    {my_option_field}, my favourite colour is {my_color_field}, but only on a {my_date_field}
{/if}
In these examples I’m using the {current_time} variable to get the date values in tandem with the various date format values that are available. Note how the {current_time} variable is wrapped in double quotes, and the format parameter value is wrapped in single quotes. While this is often the case, conditionals can sometimes work without them. If unsure test both ways!
{if "{current_time format='%Y'}" == "2021"}
  It's 2021
{if:else}
  It's not 2021
{/if}
You can be more specific with the date format, in this example it will only output the message if the current date is 1st January.
{if "{current_time format='%d/%m'}" == "01/01"}
  It's the first day of the year
{/if}
{if "{current_time format='%D'}" == "Sun"}
  Sorry we're closed on Sundays
{/if}
In this example I’m using the < (less than) and > (greater than) logical operators.
{if "{current_time format='%Y'}" == "2021"}
  It's 2021
{if:elseif "{current_time format='%Y'}" < "2021"}
  It's so last year
{if:elseif "{current_time format='%Y'}" > "2021"}
  This is the future if you hit 88mph
{/if}
In this example I’m evaluating whether an entry was published this year or in a previous years.
{if "{current_time format='%Y'}" == "{entry_date format='%Y'}"}
  Published this year
{if:elseif "{current_time format='%Y'}" < "{entry_date format='%Y'}"}
  This entry is old hat
{/if}
You can evaluate one conditional inside another:
{if my_option_field == "yes"}

  My favourite color is:

  {if my_color_field == "red"}
    red
  {if:elseif my_color_field == "blue"}
    blue
  {if:elseif my_color_field == "green"}
    green
  {if:else}
    undecided
  {/if}

{if:elseif my_option_field == "no"}
    not specified
{/if}
Bear in mind that nesting conditionals many layers deep can sometimes have an impact on performance - the deeper you nest the more database queries may be needed or EE needs more memory to parse the template contents. As usual with these things it depends on what you’re doing, but if you add some deeply nested conditionals and get slower loading pages it could be a culprit.
On occasions you may want to evaluate combinations of information to refine the output. Here’s an example:
{if status == "featured"}
  Featured article
{if:elseif status == "open"}
  This article is merely open, not featured
{/if}
Lets start by just checking if someone from any member role is logged in or not:
{if logged_in}
  Member content
{if:else}
  This page is private, please login
{/if}
Or if you need the messages in two different places you could do simple conditionals:
{if logged_in}
    Member content
{/if}

{if logged_out}
  This page is private, please login
{/if}
{if logged_in_role_id == "7"}
  Gold member!
{if:elseif logged_in_role_id == "8"}
  Silver member
{if:elseif logged_in_role_id == "9"}
  Bronze member
{if:elseif logged_in_role_id == "1"}
  Super admin!
{/if}
Hopefully these examples will help solve some of your advanced conditional problems, or at least point you in the right direction.
Headless is all the rage, and for good reason. People and devices consume content in a variety of ways that have needed a different approach to the CMS as a single platform to handle both the managing of content and displaying the content. The idea of a headless CMS focuses the responsibility of the CMS to only administrating content, while the presentation of content is left to a different stack of tools. The presentation can also benefit from static CDN caching for scaling, and increased security. We are not talking about just blog posts, but also data like the current temperature outside, rocket launch times, and infection rates.
In the world of headless, ExpressionEngine is considered a hybrid CMS. It is able to deliver on many headless concepts, so the final answer depends on which part of the definition is the most useful for your case. Let’s first cover what ExpressionEngine does well around the scope of headless out of the box.
ExpressionEngine excels at content management through user-defined custom fields that are grouped into channels of content. Said another way, content can be broken into highly structured fields that fit the needs of the site. It has robust roles & permission management for users, and a template engine able to output text in most formats, from JSON to HTML and XML. ExpressionEngine can also be wildly extended by add-on modules. All of this is managed by an intuitive control panel.
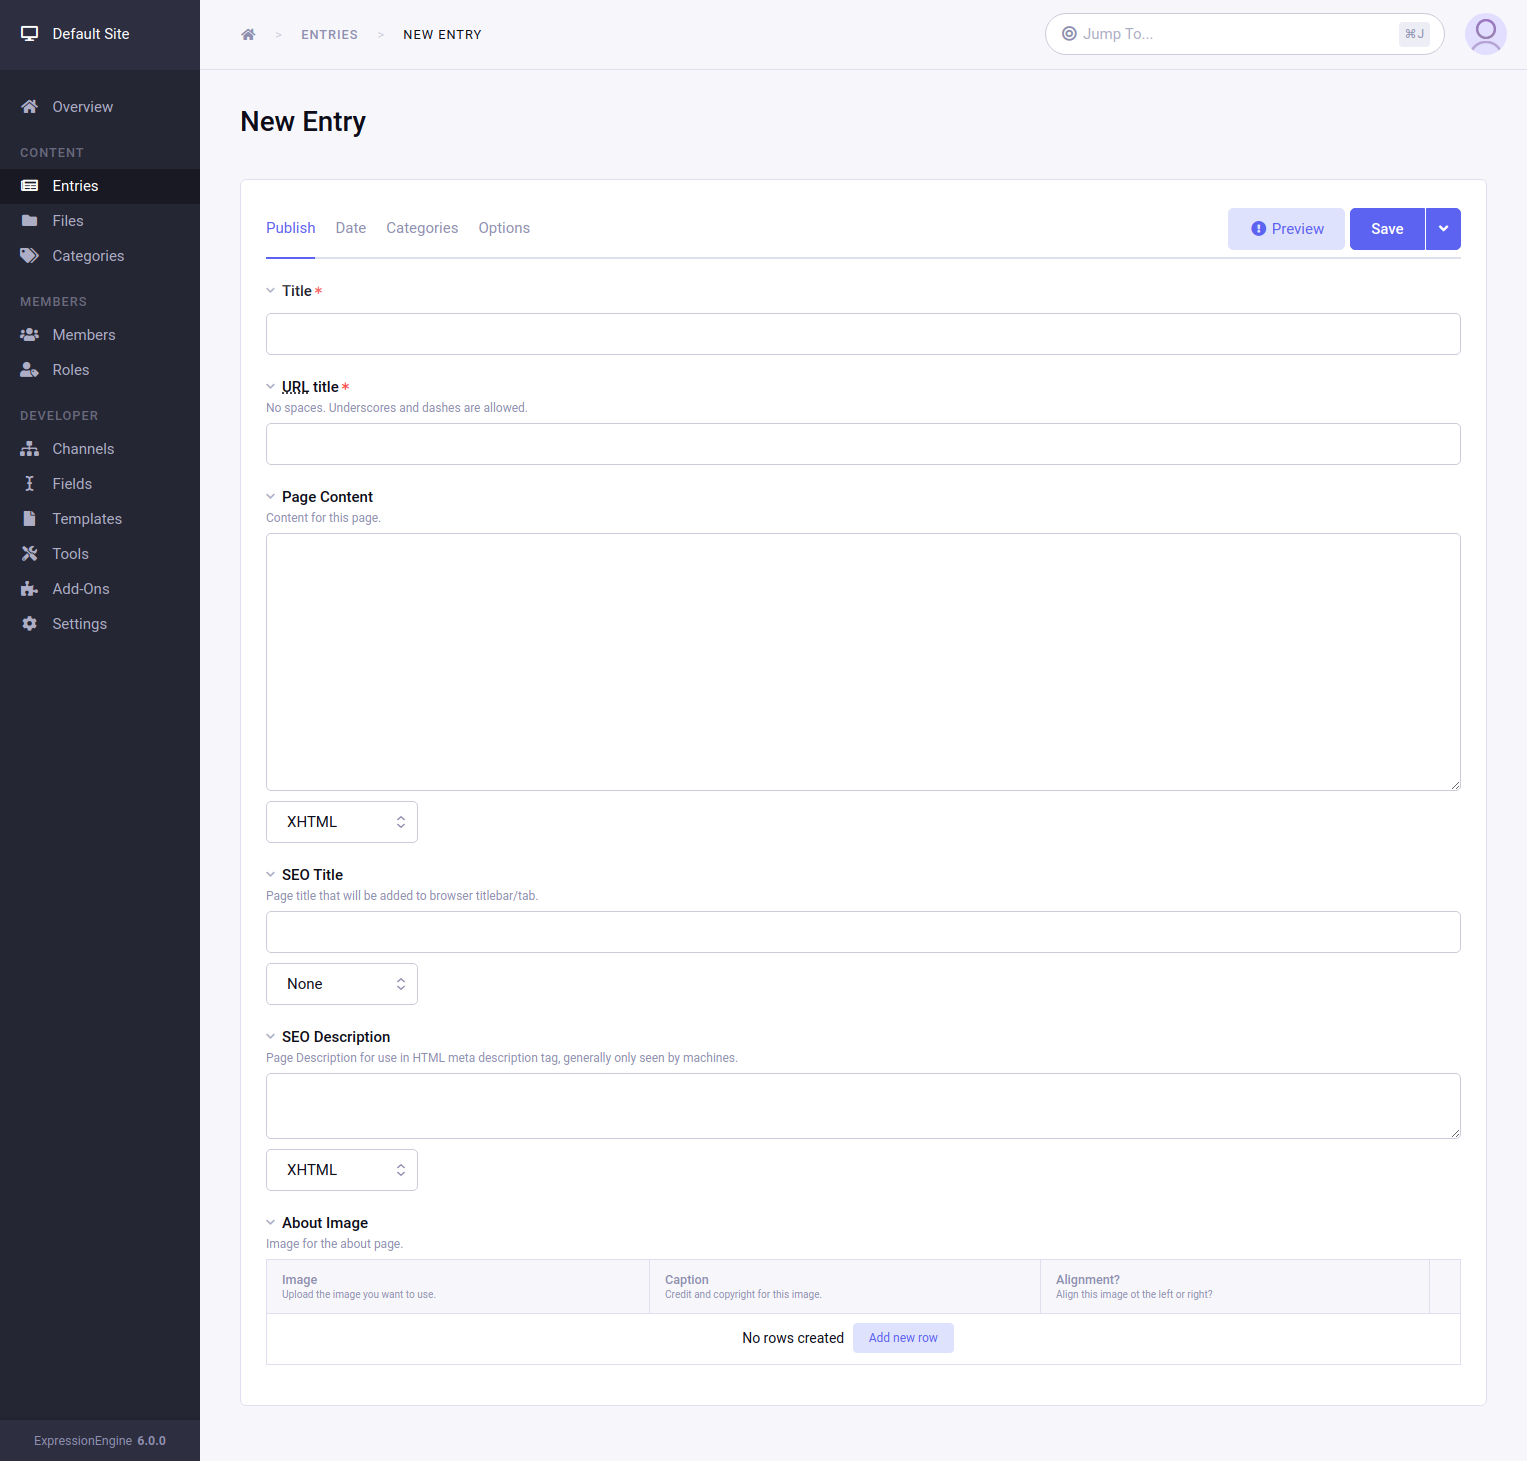
ExpressionEngine is not offered as a SaaS, or built with microservices, and is not currently offered as a fully maintained cloud option. ExpressionEngine is a traditional monolithic PHP application that must be downloaded and installed on a LAMP-like stack. Like most CMS’s in this category, the core can be auto-updated with a single click. It also does not have GraphQL, and editing entries through the API takes a little bit of extra work.
Most APIs for a headless CMS are typically going to return JSON, and this is absolutely possible in ExpressionEngine! To create a JSON-formatted template, simply create a new template, select the type of javascript, and create a tag loop to output entry data. Since templates are independent of each other, it is also possible to run both a standard HTML website alongside various API endpoints in the same ExpressionEngine install.
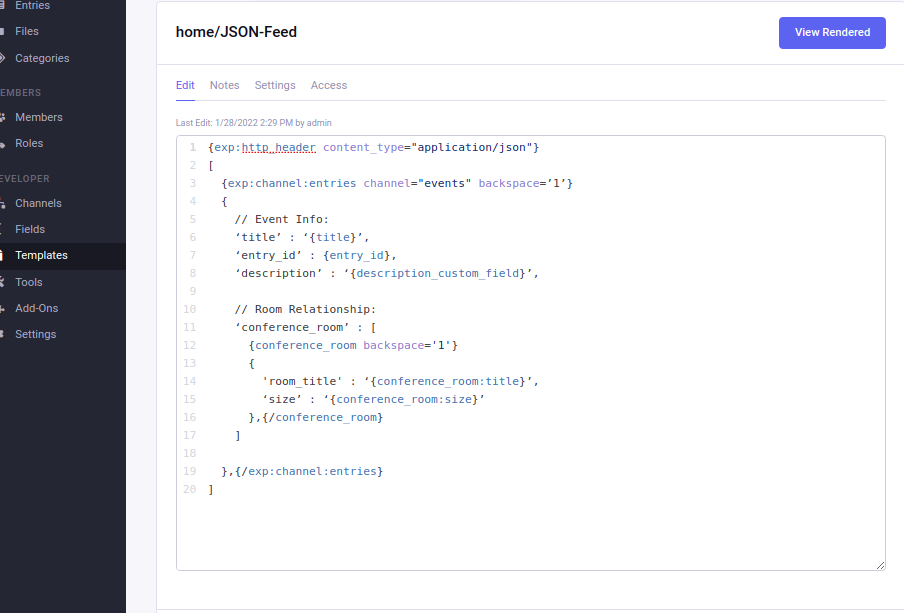
Since these behave like normal web pages, there is not a way to limit page requests per API key.
API keys and tokens in the header of a request to control access or enforce limits are not supported.
Requests that modify data such as POST, PATCH, and DELETE would not be supported out of the box. See further down the article for more information.
GET ExampleTo display a list of upcoming events at, say, a conference center, first create a channel to hold the event information such as the title, event date…etc. Conference rooms in the facility would have their own channel and contain information like hall capacity, name, and photos and then be related to the event. This structure can then be outputted in templates:
/events/item/my-event{exp:channel:entries channel="events"}
<!-- Event Info -->
<h1>{title}</h1>
<time>{entry_date format="%m/%d/%Y"}</time>
<p>{description_custom_field}</p>
<!--- Room Relationship -->
{conference_room}
<h3>Room: {conference_room:title}</h3>
<p>Capacity: {conference_room:size}</p>
{conference_room}
{/exp:channel:entries}
/api/events/my-event{exp:http_header content_type="application/json"}
[
{exp:channel:entries channel="events" backspace=’1’}
{
// Event Info:
'title' : '{title}',
'entry_id' : {entry_id},
'description' : ' {description_custom_field}',
// Room Relationship:
'conference_room' : [
{conference_room backspace='1'}
{
'room_title' : '{conference_room:title}',
'size' : '{conference_room:size}'
},{/conference_room}
]
},{/exp:channel:entries}
]
The vanilla channel entries loop is a bit cumbersome to fine-tune queries using the URL like a typical REST API. To get more control, URL query parameters can be used through the first-party add-on Low Search. They can be any of the standard fields such as date, status, or title plus all custom fields, and relationships.
The most common use for this approach is updating a page with search results using asynchronous javascript (AJAX). Andy McCormick wrote a series on this. While in Andy’s series the templates returned HTML, it can be easily changed to JSON:
Entries Template /group/entries
{exp:http_header content_type="application/json"}
[
  {exp:low_search:results query="{segment_3}" backspace="1"}
    {
      'title' : '{title}',
      'entry_id' : {entry_id},
      'custom_field_1' : '{custom_field_1}',

    },{/exp:low_search:results}
]
Static HTML File:
const request_url = '/group/entries?status=open&channel=events&limit=10';

const entries  = await fetch(request_url).then(response => response.json());

entries.forEach( entry => {

  console.log(entry.title);
  console.log(entry.entry_id);
  console.log(entry.custom_field_1);

});
ExpressionEngine can be extended with Add-ons written by 3rd party developers through the ExpressionEngine Store, or can be custom-written per-project. Here are just a few to check out:
https://expressionengine.com/add-ons/bones
Bones combines both the Low Search query URL feature, plus gives a full output of entry data in a predictable format. This skips a lot of custom template authoring. Data can be returned as JSON through an action URL (see below), or template. Bones also provides the ability to require an API key in order to access data, adding to security. Like the Low Search approach, data queries are made through the URL parameter. Bones also helps with counting objects, and better error handling than a standard template.
https://expressionengine.com/add-ons/reinos-webservice
This add-on provides a highly customized web service for ExpressionEngine that includes GET and POST processes.
If none of these options suit your needs, you can create your own custom add-on. Add-ons can tap into control panel events such as when entries are updated, or someone logs in, to have their own custom logic and endpoints for data.
When building an ExpressionEngine module there is a service called Action ID, or “ACT”. A module method can be run when a specific URL is requested. This can be the start of your API and can accept GET as well as POST and other requests to update ExpressionEngine. For example, by visiting the URL below, the function act_action would be called.
https://example.com/index.php?ACT=23&action=get_entries
// On install, ExpressionEngine can
// create a new ACT ID to the method name of your choice.
function act_action()
{

  if (ee()->input->post('action') === 'get_entries')
  {

    $entries = ee('Model')->get('ChannelEntry')->all();

    return json_encode($entries);

  }

}
Creating and updating entries in ExpressionEngine will take a little bit of work, and require building a Module add-on.
When installing an add-on’s ACT action, setting the csrf_exempt to 1 will disable the token check as shown below. At this point any data can be submitted to your method, so be careful how this is used.
Also to note, updating Grid and Fluid fields take additional steps to be updated and are beyond the scope of this writeup.
Within the add-ons’s upd.myaddon.php file:
$data = array(
    'class'     => 'MyClass' ,
    'method'    => 'my_act_method',
    'csrf_exempt' => 1 // Important, use with care.
);
ee()->db->insert('actions', $data);
From here, the my_method function can alter data in ExpressionEngine. For example, to update the title of an entry we could do something like the following:
POST Request:
curl -d 'title=NewTitle!&entry_id=5' -X POST https://example.com/index.php?ACT=23
mod.myaddon.php :
function my_act_method()
{

    // Get fields from POST using sanitized methods:
    $entry_id  = ee()->input->post('entry_id');
    $new_title = ee()->input->post('title');

    // Use ExpressionEngine models to get an entry.
    $entry = ee('Model')->get('ChannelEntry', $entry_id)->first();
    $entry->title = $new_title; // Change the title.
    $entry->save(); // Save changes.

}
Using ExpressionEngine to power a headless application is absolutely possible, with some limitations. ExpressionEngine excels at content management while providing the possibility for a hybrid of standard HTML and API templates in the same open-source system. It can deliver that data in numerous ways. ExpressionEngine can also be extended with existing or custom add-ons to build more functionality where the native options are limited. Where ExpressionEngine may not fit is if you are looking for a fully-hosted and maintained CMS on a monthly or annual fee with a little extendability, or if a lot of data is being updated outside of the ExpressionEngine control panel.
In this two-part series, we’ll introduce Bones, an ExpressionEngine add-on for headless implementations. We’ll first use Bones to feed data to your front-end JavaScript framework. Once we’re comfortable with that, we’ll make ExpressionEngine completely headless while building out an API and integrating with Jigsaw, a static site generator.
Have questions or comments about this course? Be sure to join the discussion and post in the ExpressionEngine Forums!

ExpressionEngine is so powerful under the hood when it comes to managing content. In this example, we’ll use Bones to use the data from our EE site to build out a static site, using a static site generator called Jigsaw. We’ll explore a bit of API safety, as well as managing data coming from EE.
If you haven’t, watch the first part of our series on Bones here: Using ExpressionEngine To Power Your JavaScript Frontend Using Bones
Bones is a super simple way to utilize ExpressionEngine as a headless content management system for use in javascript frontends, static site builders, and more!
Bones Hello World: https://github.com/dougblackjr/bones-hello-world
Have questions or comments about this course? Be sure to join the discussion and post in the ExpressionEngine Forums!
Let’s take a look at building a Vue.js frontend powered by headless ExpressionEngine using the Bones add-on.
Bones is a super simple way to utilize ExpressionEngine as a headless content management system for use in javascript frontends, static site builders, and more!
Find more information here:
Bones Hello World: https://github.com/dougblackjr/bones-hello-world
Have questions or comments about this course? Be sure to join the discussion and post in the ExpressionEngine Forums!
In ExpressionEngine, navigate to Settings > Outgoing Email. Change the Protocol to SMTP which will open the SMTP Options. Use the following settings:
Lastly make sure your Newline character setting on this page is set to \r\n.
That’s it!
You are finished and ready to start sending emails through your Microsoft Office account. Visit Tools -> Utilities, and from the Communicate utility, send yourself a test email to verify that everything is working.
Wouldn’t it be great if the content of markdown files could be part of your site without having to copy and paste into templates or entries? And without having to keep things manually updated every time you make a change?
What if you could associate markdown files with entries or templates? And, what if your site was updated the moment you saved any change to the markdown files?
ExpressionEngine has great markdown support right out of the box. You can easily use markdown when writing entries by selecting markdown as the formatting option. Or by creating markdown text areas or text input field types. There is even a markdown add-on that enables you to use markdown directly in your templates.
But this all requires you to manually copy your content from the markdown file into an entry or template, so you end up having to maintain two copies of your content.
Here we’ll show you how to place the markdown files on your server, associate them with templates or entries, and have everything update whenever you save changes to the markdown files.
In This Article:
Here is a short outline of what we’ll be doing:
Below I will show how to associate markdown files with entries.
In the section after this, I will show how to do the same with templates instead of entries.
First, we create a directory on our web server, where our markdown files will be placed. I created mine here:
/public_html/markdown-files/
You can create the folder anywhere you like on your web server. So somewhere under /public_html/ or similar will work, but it has to be readable by the web server.
You could, in theory, store your markdown on a totally different server if you wanted. It just has to be readable by the <zero-md> tag shown in step 4 below.
We then create a text input field in ExpressionEngine to hold the filename of the markdown file we want to show. I called my field markdown_filename:
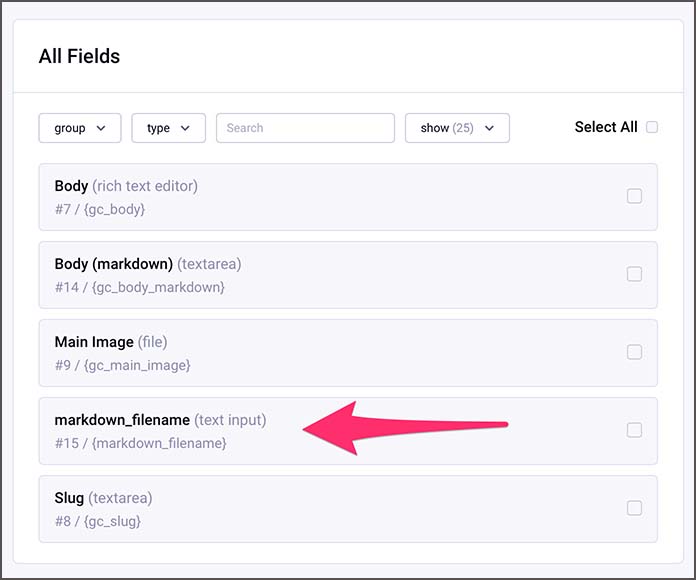
Note: If you need help with creating fields in ExpressionEngine, we go through that in more detail in another guide here. You can also look in the manual here, or check out this getting started video course from ExpressionEngine.com.
Next, we need to call the zero-md.min.js script from within the head tags on the ExpressionEngine template where we want to show the markdown files:
<script type="module" src="https://cdn.jsdelivr.net/gh/zerodevx/zero-md@2/dist/zero-md.min.js"></script>
I chose to use the CDN version of the script, but you can also download it and host it yourself. See the links section below for downloads and further info on Zero-MD.
And finally, we call Zero-MD to pull in the contents of the markdown file. This will be the path to the markdown files from step 1 minus the public_html part, and the field short name from step 2, like so:
<zero-md src="/markdown-files/{markdown_filename}"></zero-md>
Here is an example from a test page I made:
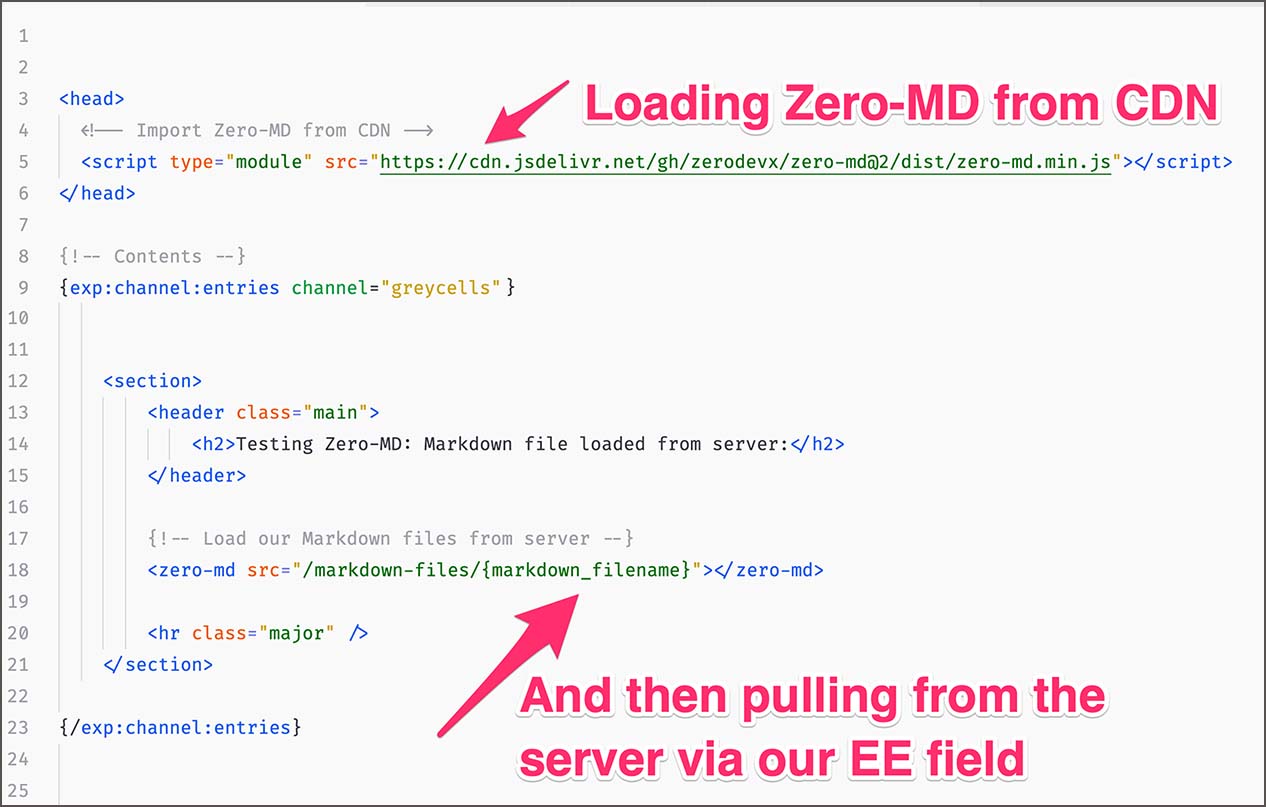
And so, what we’re doing here is:
We will look at how you can edit the markdown files on the server below. But first, let’s do what we did above, but for templates instead of entries.
This time we’re not going to associate the markdown with entries but with templates. This creates a pages-like feature, where one markdown file provides the content for one template. Note that you can also use this technique with the “real” pages functionality, we’re just not covering that here.
It’s pretty much the same procedure as above, except we no longer need to create a text field for the filename. Instead, we hard code the filename in the template where we want the markdown files’ content to appear.
This is the same as step 1 above, where we create a directory on the web server for our markdown files:
/public_html/markdown-files/
This is the same as step 3 above, where we add the zero-md.min.js script to our template’s head section:
<script type="module" src="https://cdn.jsdelivr.net/gh/zerodevx/zero-md@2/dist/zero-md.min.js"></script>
And finally, we do almost the same as in step 4 above. But instead of referencing the markdown file via a filename field in an entry, we add the full path to the file on our server:
<zero-md src="/markdown-files/my-great-awesome-content.md"></zero-md>
This will pull one specific markdown file into one specific template. Something we use here on Greycells.net for our links section.
Let’s look at how we can edit markdown files on the server.
I use Typora on macOS to write my markdown. However, this can’t directly open files on the server via FTP/SFTP/SSH. So I just use Transmit to open the files over SFTP, which in turn opens Typora.
I can then edit the files and have the site update when I hit save from within Typora. Hitting save when files are opened through Transmit triggers it to upload and replace the edited file on the server. It’s just like saving normally, you just need to keep Transmit open in the background. This will also work with any other transfer apps, such as Cyberduck.
The above works great under macOS. Whether the same thing goes for Windows or Linux, I don’t know. I will test this when time permits and report back. But since both CyberDuck and Typora are multi-platform it could and probably should work. Provided Windows and Linux handles files opened via an intermediate application the same as macOS.
However, there are other ways. You can install something like Mountain Duck that will show the server’s filesystem as a normal disk in macOS and Windows. It uses FUSE to do this, so there are many other options like it, that will run under both Windows and Linux
Finally, you can of course edit your files directly on the server using an editor like Visual Studio Code, or terminal-based editors such as Vim, Emacs, Pico, Nano, or similar.
Also note, that just because I mention Typora a lot, it’s by far the only markdown editor out there. So, find the editor and workflow that suits you best.
It would be great if ExpressionEngine could integrate markdown files directly into the editing workflow. For example, if you could designate a folder on the server for markdown files and then have ExpressionEngine pull them directly, as part of regular entries. A more “built-in” version of what we’re doing here.
Or perhaps a third-party developer would consider creating an open-source add-on that does this? This would be a great gift to the ExpressionEngine community, and I’d love to help in any way I can.
I think Typora (or other markdown editors) makes a great editing environment. Far better than one could ever create natively in ExpressionEngine, at least for longer content. The built-in editor is excellent for shorter texts, and it already has great markdown support. But for longer content, like this guide, Typora is much more suited.
A great addition to Zero-MD would be the ability to pull markdown files from Dropbox and Google Drive. I will suggest this to the developer — perhaps it’s not technically possible, but it would be awesome.
Or, if someone creates an add-on, Dropbox/Google Drive support could be added that way?
As an added bonus, even a free Dropbox or Drive account would be able to hold tons and tons of markdown files!
In this article:
We’ll assume that the site you want to create a copy of — your “real” site, so to speak — is running ExpressionEngine under Apache or Nginx. Whether it’s on ExpressionEngine 6 or a lower version won’t matter, but we used EE 6.1 for the examples and screenshots in this guide.
You will also need FTP access to your server because we need to download its database, files, and folders.
If you run into issues, just drop a note in the comments below, and I will do my best to help.
We will use MAMP Pro to run the duplicate of the site on our PC or Mac.
MAMP Pro is a fantastic piece of software for any web developer that enables you to have an unlimited number of hosts, sites, and servers running locally on your computer.
With MAMP Pro, you can run sites using the same technologies as your existing site. Hosts can use Apache or Nginx with full MySQL and PHP support. And technologies such as Redis, Memcached, MailHog, Python, Ruby, Perl, and more, are all available.
In this guide, we’ll be using MAMP Pro to duplicate your existing site, as example.test (you can use another name if you like). And show screenshots and examples from our own test site as well.
MAMP Pro costs $79, €70, or £69, but there is a trial you can download. There are also free alternatives, which you can read more about below.
If you don’t have MAMP Pro or feel like paying for it, you can perhaps get by with the free version. However, you won’t get SSL/HTTPS support, and there are only two versions of PHP available. You’re also limited to one active host at a time, and there is no Dynamic DNS, Memcached, or Redis.
So you may or may not be able to run a true duplicate of your site with the free MAMP. Take a look at this MAMP vs. MAMP Pro Comparison Matrix to see if you can live with its limitations. And please note that we haven’t tested the free version with this guide.
Important: If you’re duplicating a site to run under MAMP free, please read this HTTPS workaround from the troubleshooting section first.
But MAMP is, of course, not the only game in town. If you want some alternatives, here is an excellent review of MAMP, MAMP Pro, XAMPP, Local, and DesktopServer. Including some that run under Linux, which MAMP Pro does not. The ExpressionEngine documentation also contains some recommendations here.
I have been using MAMP Pro since 2006, so that’s what I’ll be using for this guide. But the principles will be the same whichever local development environment/server/stack you choose.
If you need help “translating” some of the steps below to a platform other than MAMP Pro, feel free to post in the comments below, and I will try my best to help.
If you already know MAMP Pro, there will be a lot here you don’t need me to tell you. So feel free to skip parts of this guide, as we will be going into some detail to help as many people as possible.
For this guide, I will be creating a copy of the site found at https://greycells.net, and run it under MAMP Pro using the domain example.test. You will, of course, be creating a copy of your own site.
You can either stay with example.test or replace it with your own .test domain when following the guide.
Example: If your current site is at my-awesome-moneymaker.com, you can either:
So, just choose what you’re most comfortable with.
Now, let’s get to the meat of this guide. Here is what we’ll be doing:
I’ll assume you have MAMP Pro installed already, so let’s create a new host.
Open MAMP Pro and click Add Host in the toolbar:

Select Empty under the Basic tab and click Continue:
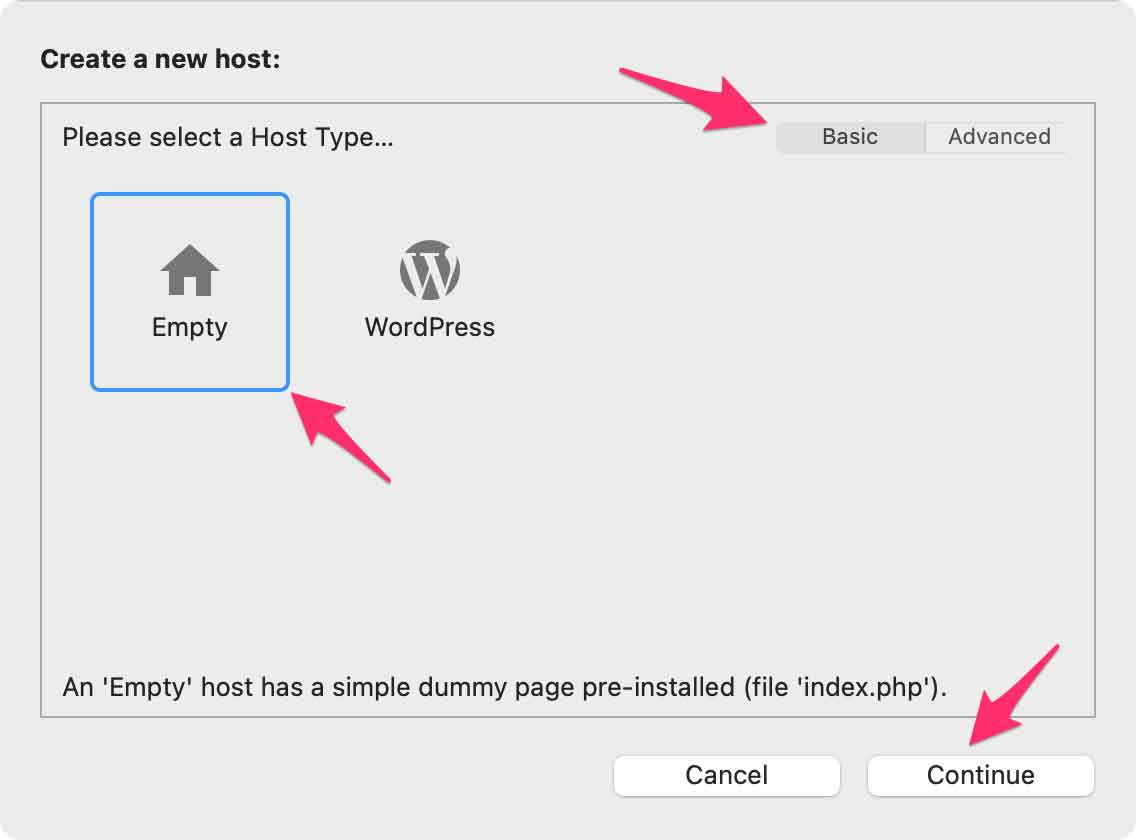
Under Name type your chosen domain — as mentioned, I’ll use example.test in this guide:
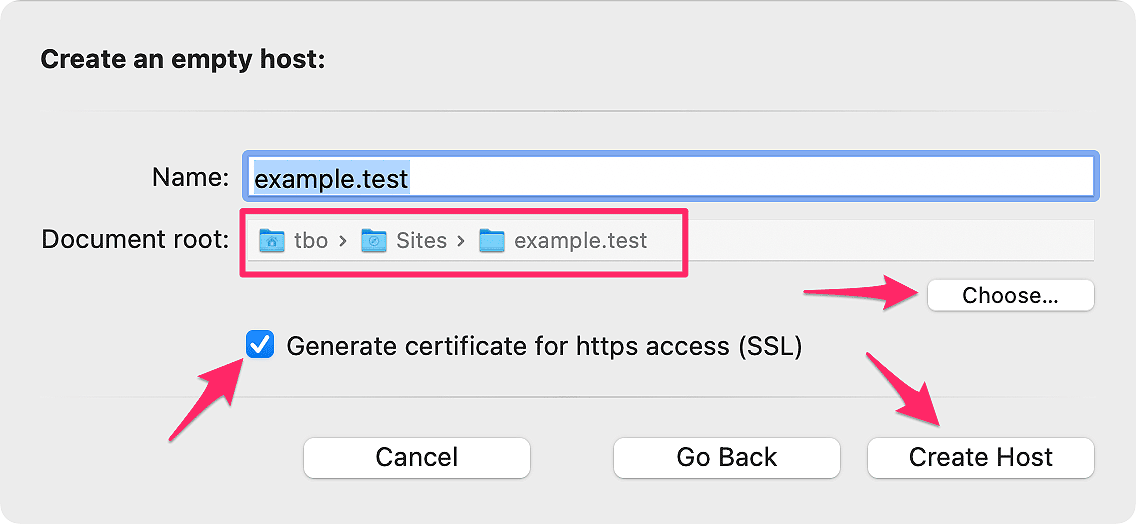
Click Choose… and create a folder that will become your site’s document root. Then select this folder.
~/Sites. That way, your hosts and data are separate from MAMP Pro’s application data found in /Applications/MAMP. You can read more about this here.\Users\MyUserName\Sites or Users\MyUserName\WebSites. That way, your hosts and data are separate from MAMP Pro’s application data found in C:\MAMP. You can read more about this here./Users/tbo/Sites/example.test/ as you can see in the screenshot above.Make sure Generate certificate for https access (SSL) is checked.
Click Create Host.
Click Save in the lower right corner of MAMP Pro’s main window.
We will often need to locate and interact with the folder we just created above. We’ll refer to it as document root since that’s what it’s called in MAMP Pro, but it’s also often called docroot or webroot.
In those cases where we need to interact with it, and you forgot what it is or how to find it, I will link to this section and the description below.
The easiest way to find and open MAMP Pro’s document root is:
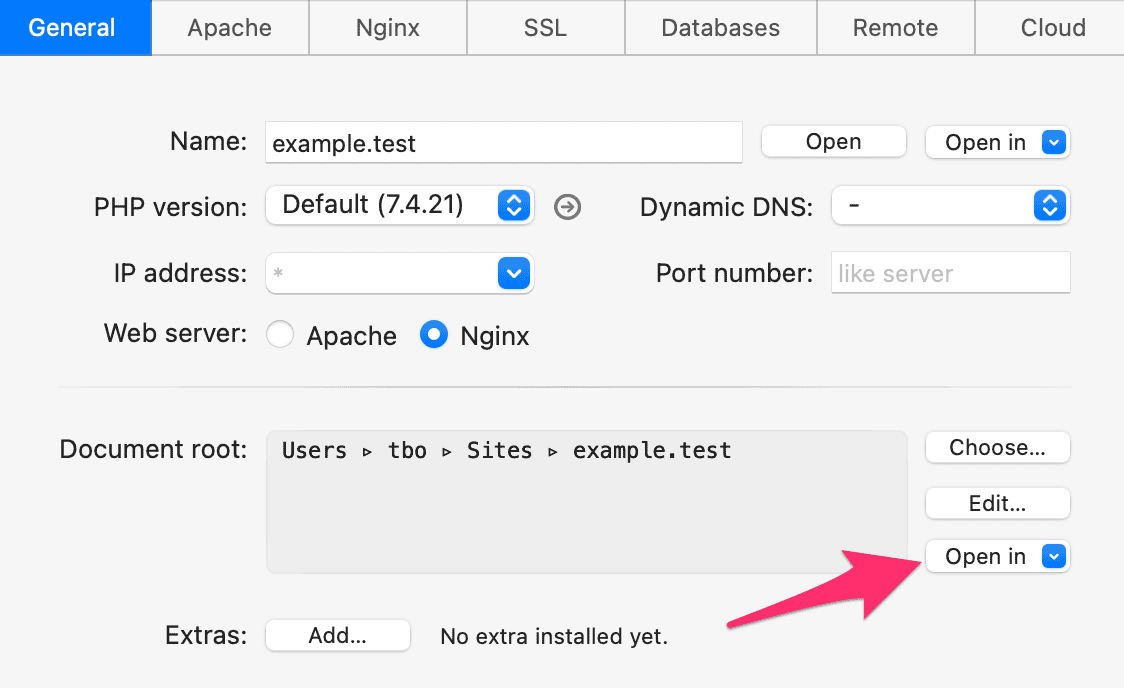
This will open document root for you.
Next, we need to do a couple of things to make sure example.test in MAMP Pro is technically similar to our real site’s server:
Because Greycells.net runs under Nginx, we will change the server our MAMP Pro host uses.
Note: Only change this if your real site runs under Nginx!
First, let’s make sure we have all settings available to us. In MAMP Pro, in the top left corner under View Mode, click the Expert View button:
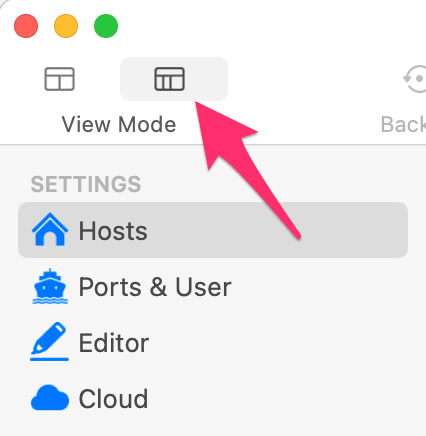
Make sure example.test (or the hostname you chose) is selected and then under General change Web server to Nginx:
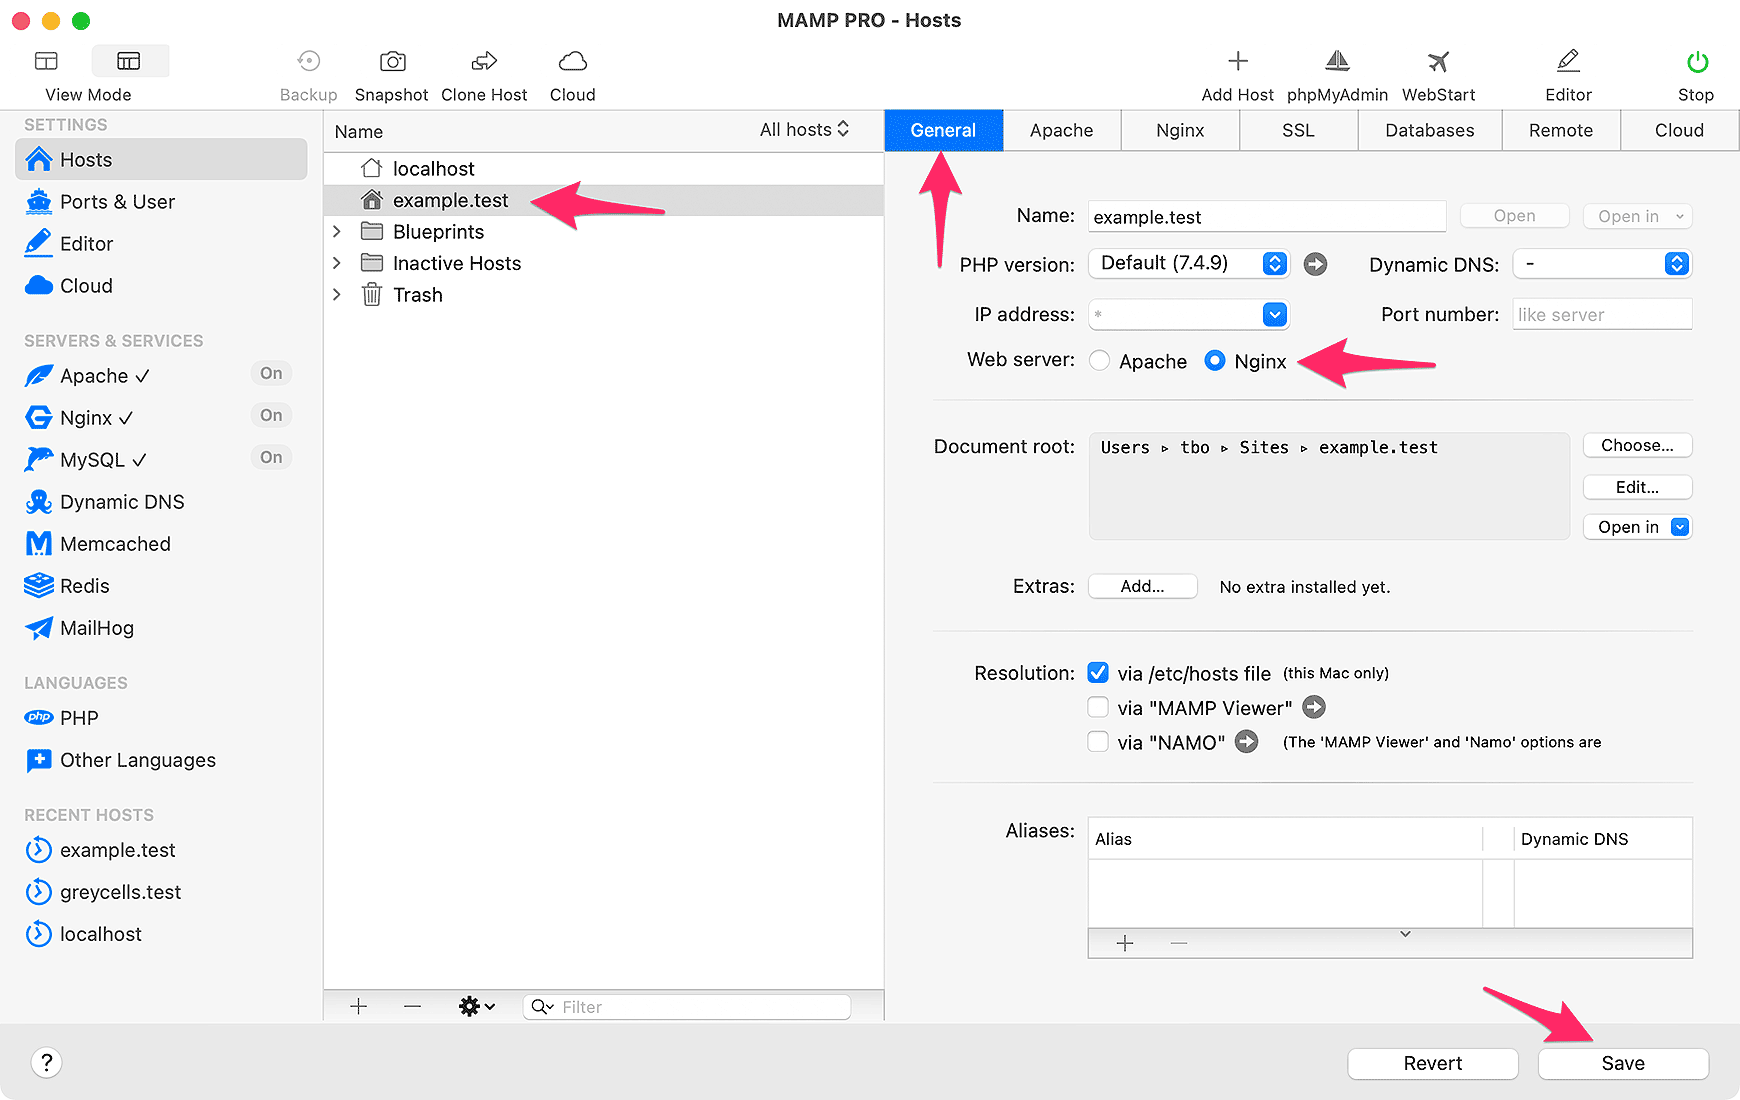
Then click Save to commit the changes and restart the servers.
Next, we’ll make sure our MAMP Pro host is running on the correct ports. This will almost certainly be 80 for HTTP, 443 for HTTPS, and 3306 for MySQL on your existing server, so we’ll mirror those here.
Note: In the event, your server uses different ports, use those below instead.
Click Ports and User in the sidebar. If you don’t see the sidebar check section 1.1 above to enable Expert View.
If you’re running Apache, make sure the Apache ports are set to 80 and 443.
Conversely, if you’re running Nginx, make sure the Nginx ports are set to 80 and 443 instead.
Note: You can click the double arrow to switch the Apache and Nginx ports for you.
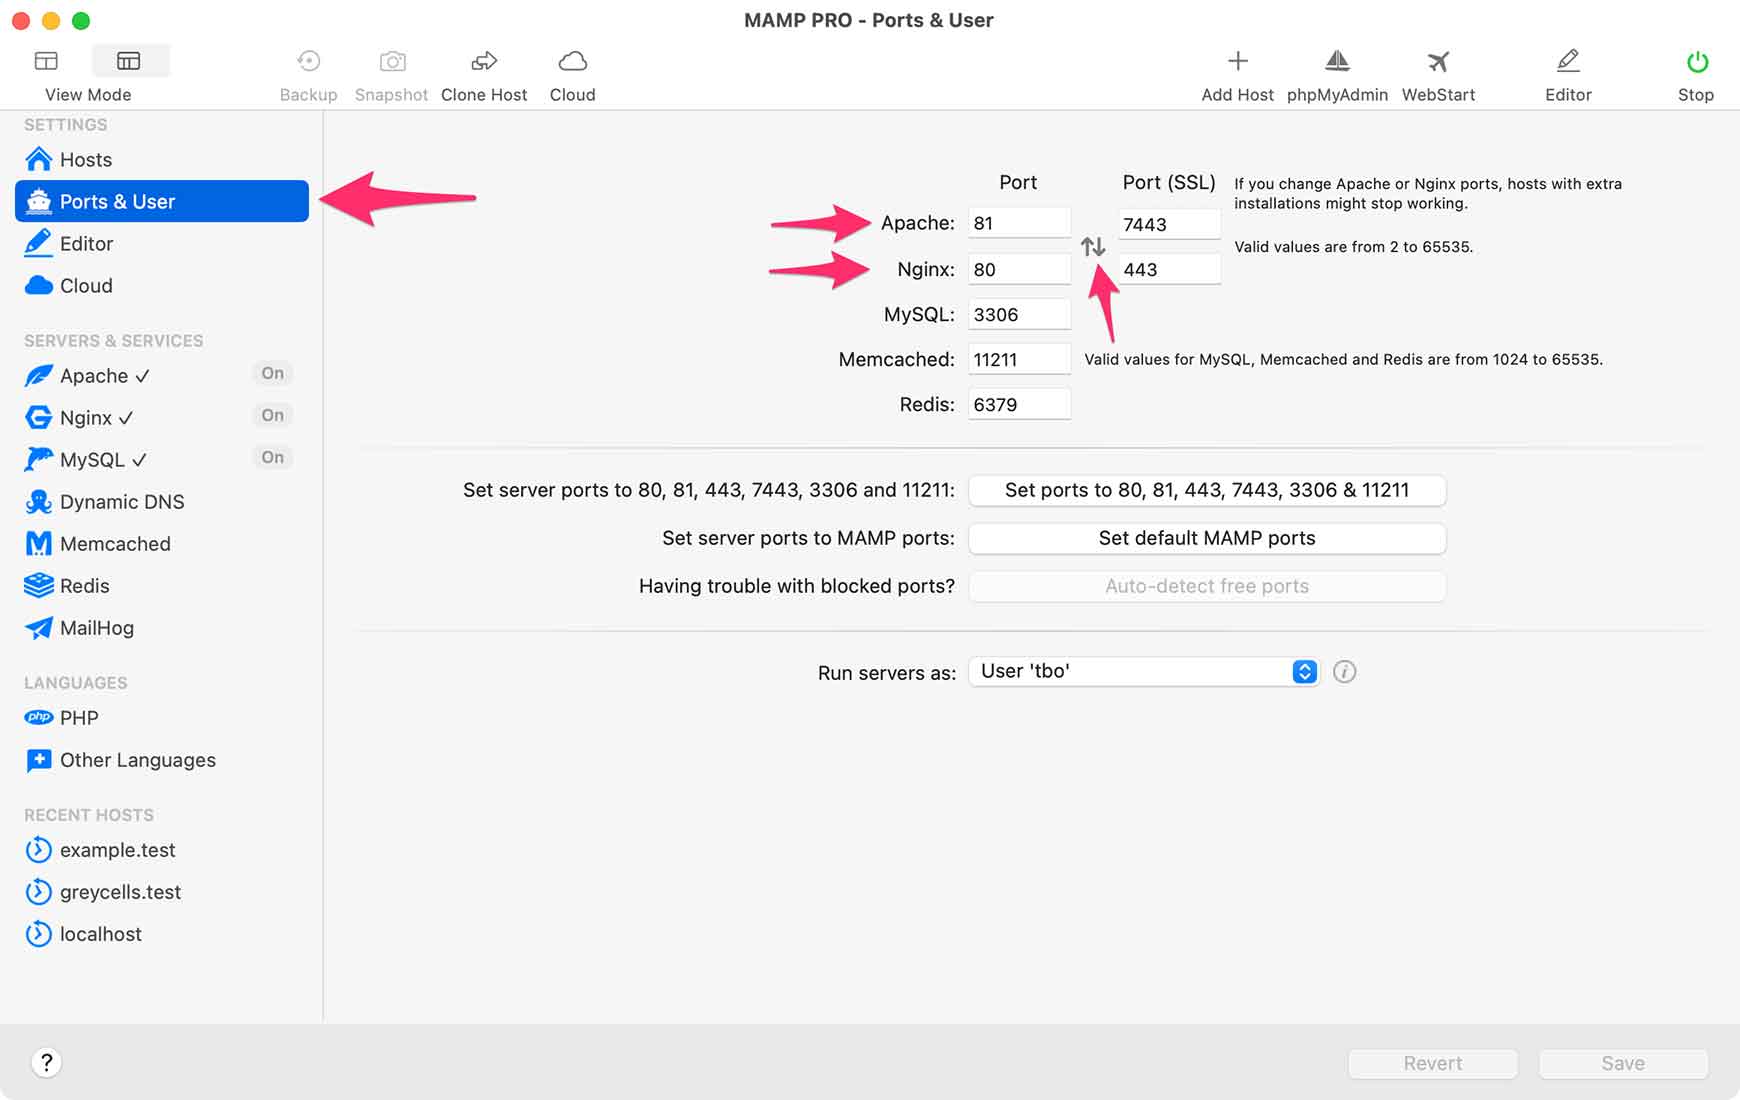
And click Save again to apply any changes made.
Now, let’s check the server is working before we transfer our database and ExpressionEngine installation.
We will check that our local example.test domain is active and the web server can load a page. Plus, we’ll see how we can get some server information and access phpMyAdmin.
Make sure example.test is selected in MAMP Pro, then right-click on it (or click the cog icon) and select Open Host in Web Browser.
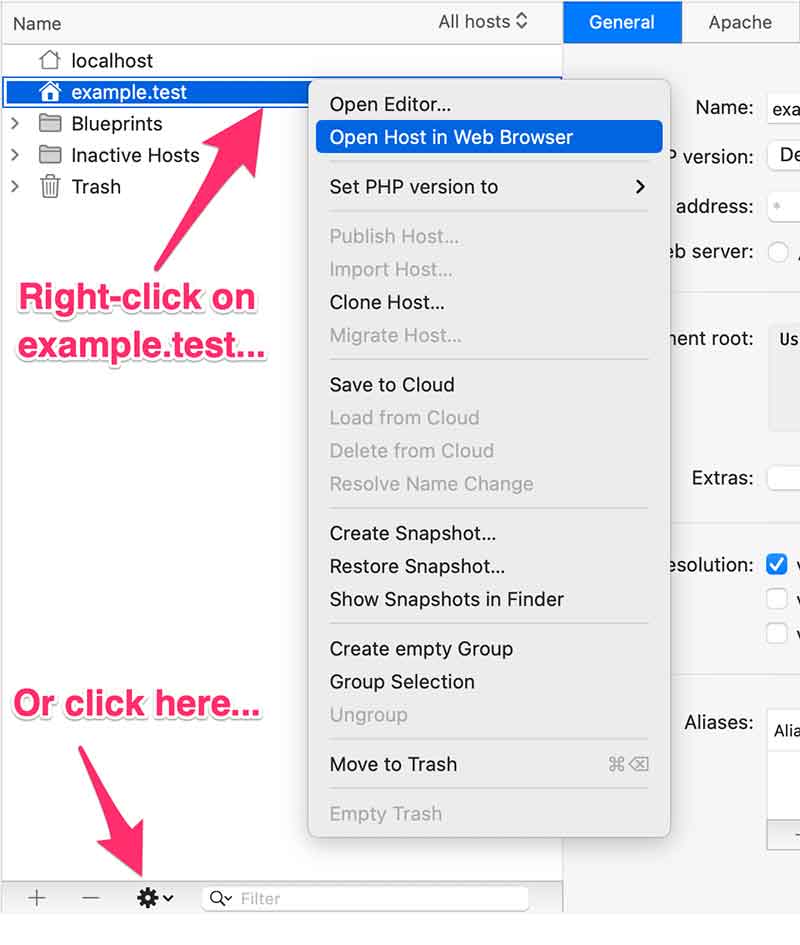
This will open a placeholder web page with some server info. If you don’t see the page, make sure the servers are started in MAMP Pro. If not, click the Start button in MAMP Pro’s toolbar. This is the page you should see:
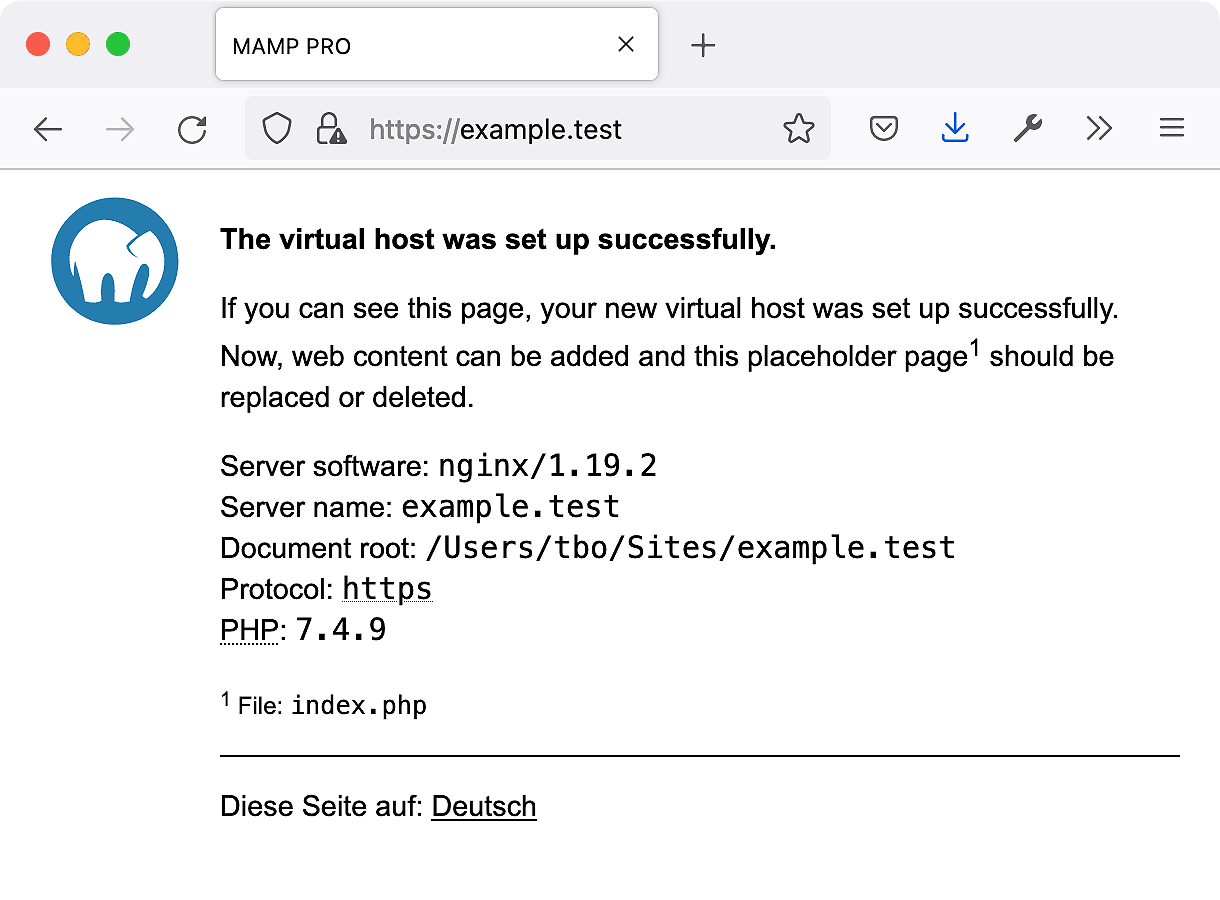
Note: If you’re using Firefox, you may get a warning about a Potential Security Risk Ahead with an error of SEC_ERROR_UNKNOWN_ISSUER.
This is because we’re using self-signed certificates for SSL in MAMP Pro. I got this in Firefox Developer Edition but not in Safari or Chrome Developer. Just be aware that this is not an issue — there is no danger ahead
Simply click Advanced and then Accept the risk and continue…
With the placeholder page open, we can see we’re running Nginx (or Apache) on example.test with HTTPS enabled. We can also see that PHP is active and where our document root is located. In short, everything is sweet and as expected.
MAMP Pro has one more very useful info page called WebStart. This has information common to all hosts.
To open WebStart, click its button in MAMP Pro’s toolbar:
![]()
This will open a page with a plethora of useful information.
In the Tools menu, we find a link to phpMyAdmin:
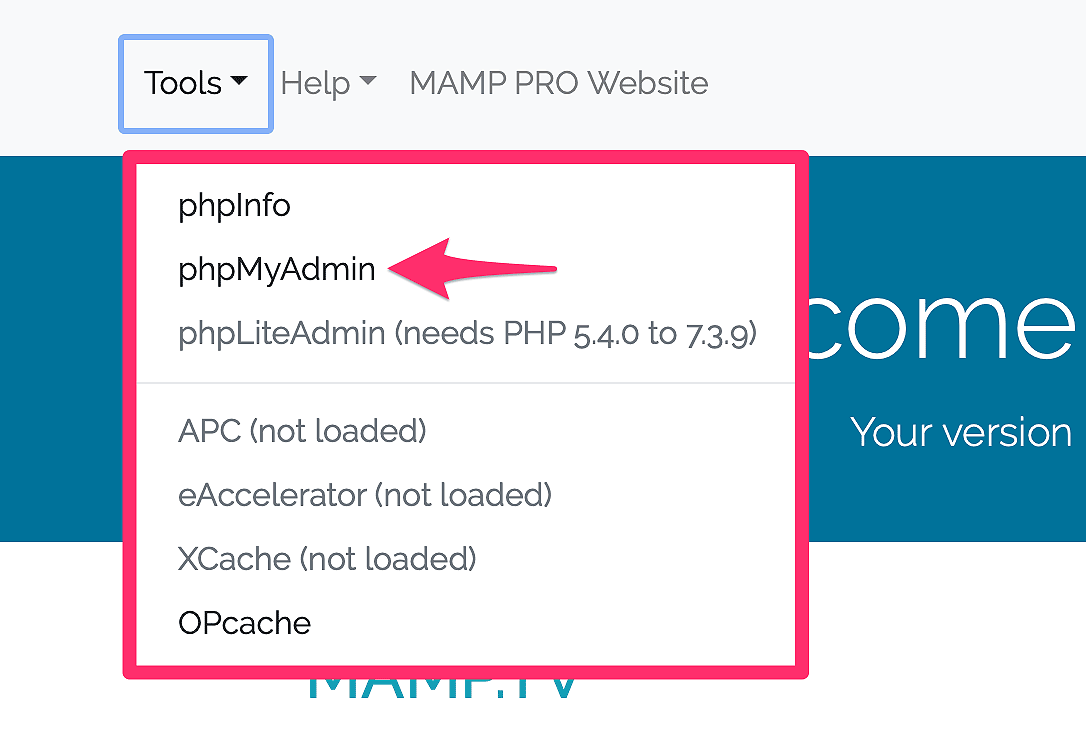
phpMyAdmin can also be launched from MAMP Pro’s toolbar. We will use phpMyAdmin later when uploading our site’s database to the test server.
Further down the page, we find information about PHP, MySQL, Redis, and SQLite. For example, under MySQL, we can see some helpful information:
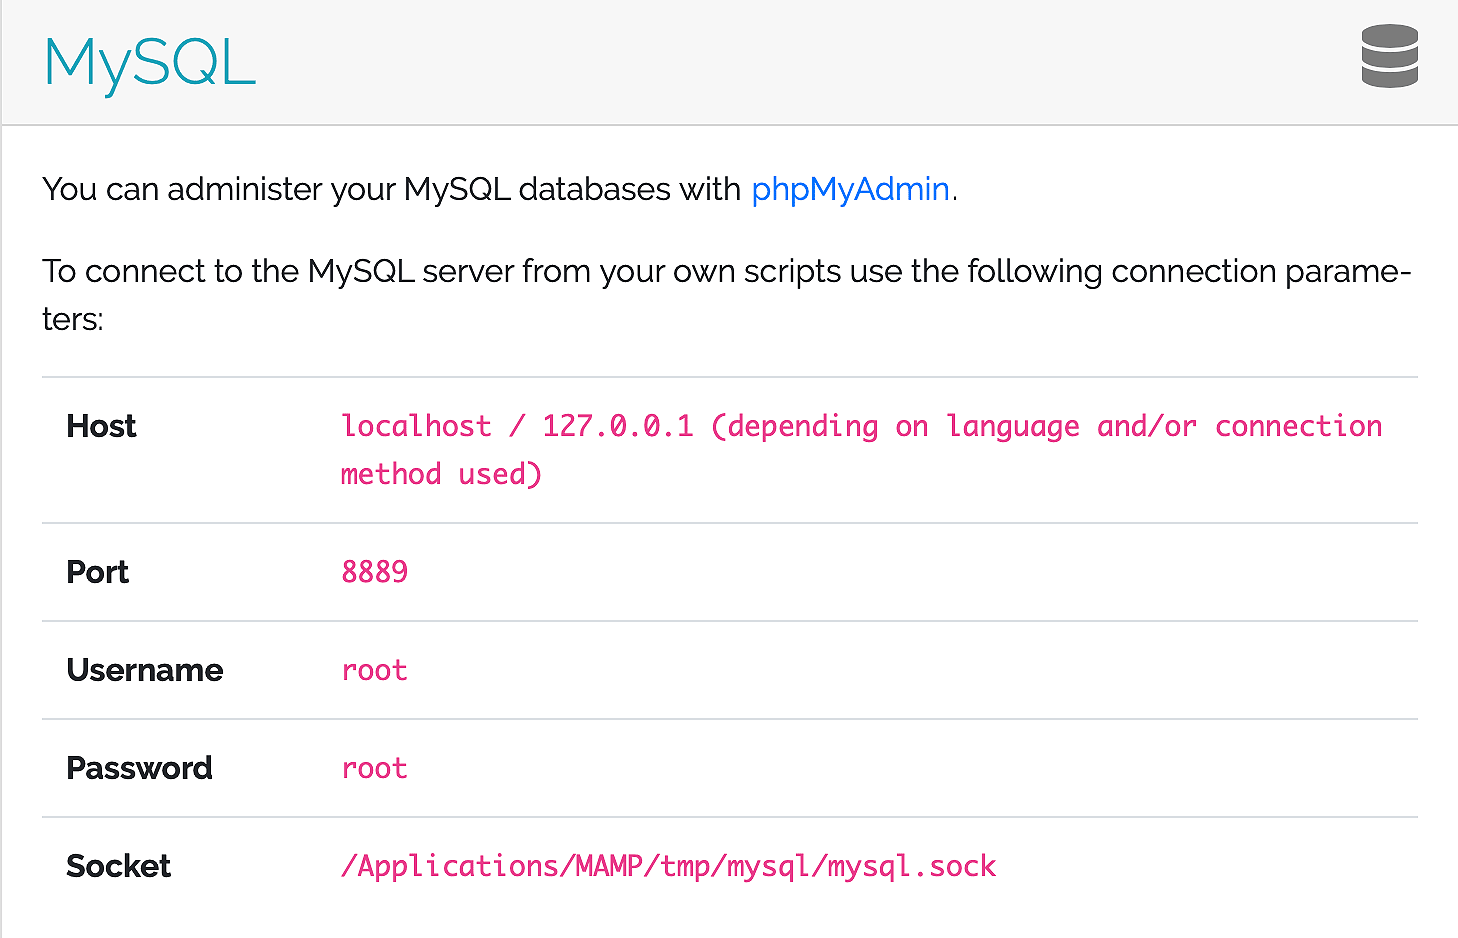
We’ll need this information to update config.php after we download ExpressionEngine to the test server. Unless changed, the username and password for MySQL under MAMP Pro is always root. This keeps things simple and since the site is not online or reachable from the outside, what would otherwise be a massive lapse in security is OK
For MySQL, Redis, and SQLite, there is also plenty of example code — very handy when developing sites:
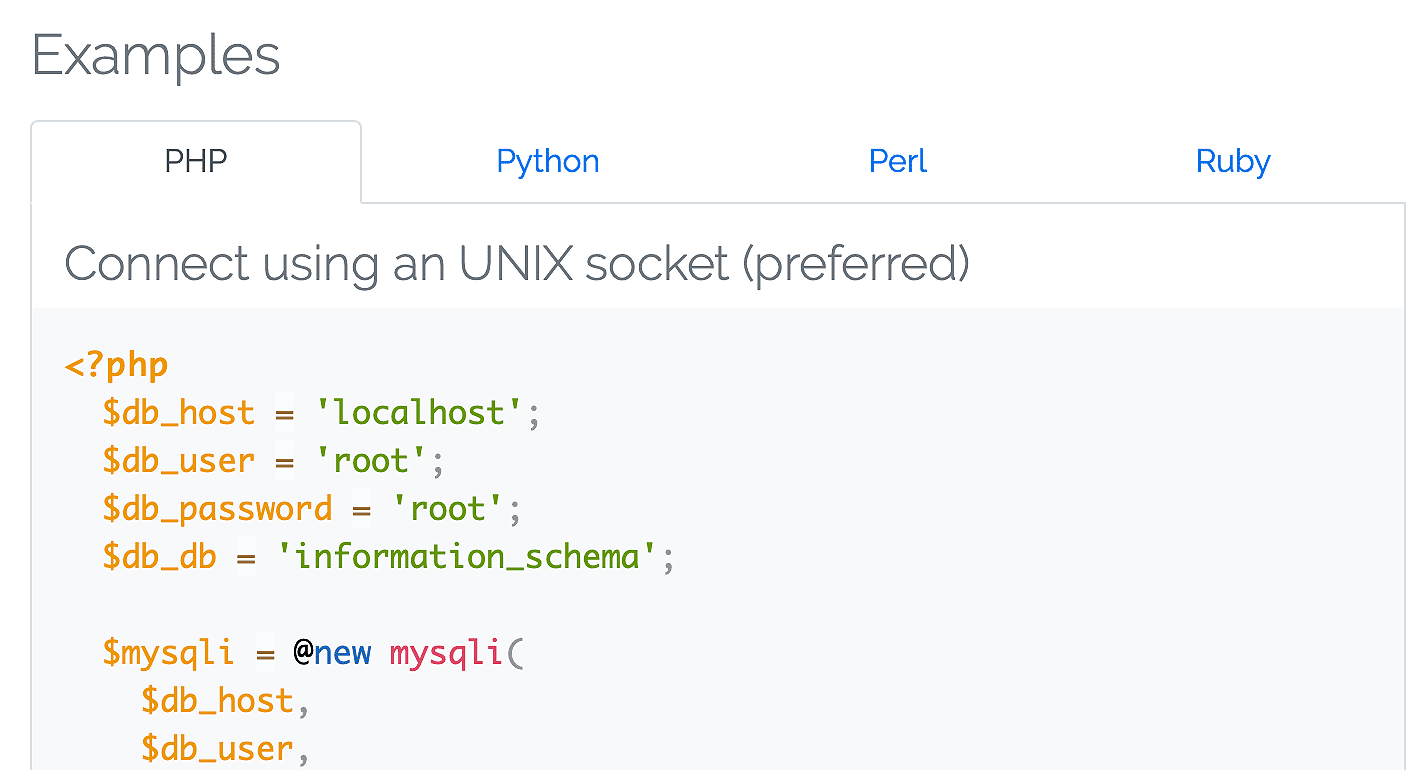
Note: If the WebStart page doesn’t load, you may simply have to click Stop and then Start in the MAMP Pro toolbar.
We’re now ready to download our real site’s database and files.
We’re going to keep things simple here, so the most people can benefit from this guide.
That’s why we will use ExpressionEngine’s built-in Database Backup Utility. This is by far the easiest way to dump/backup the existing site’s database — it’s literally a one-click affair.
Start by logging in to your site’s ExpressionEngine control panel.
Then click Tools → Utilities → Backup Database and click the Backup Database button, as shown here:
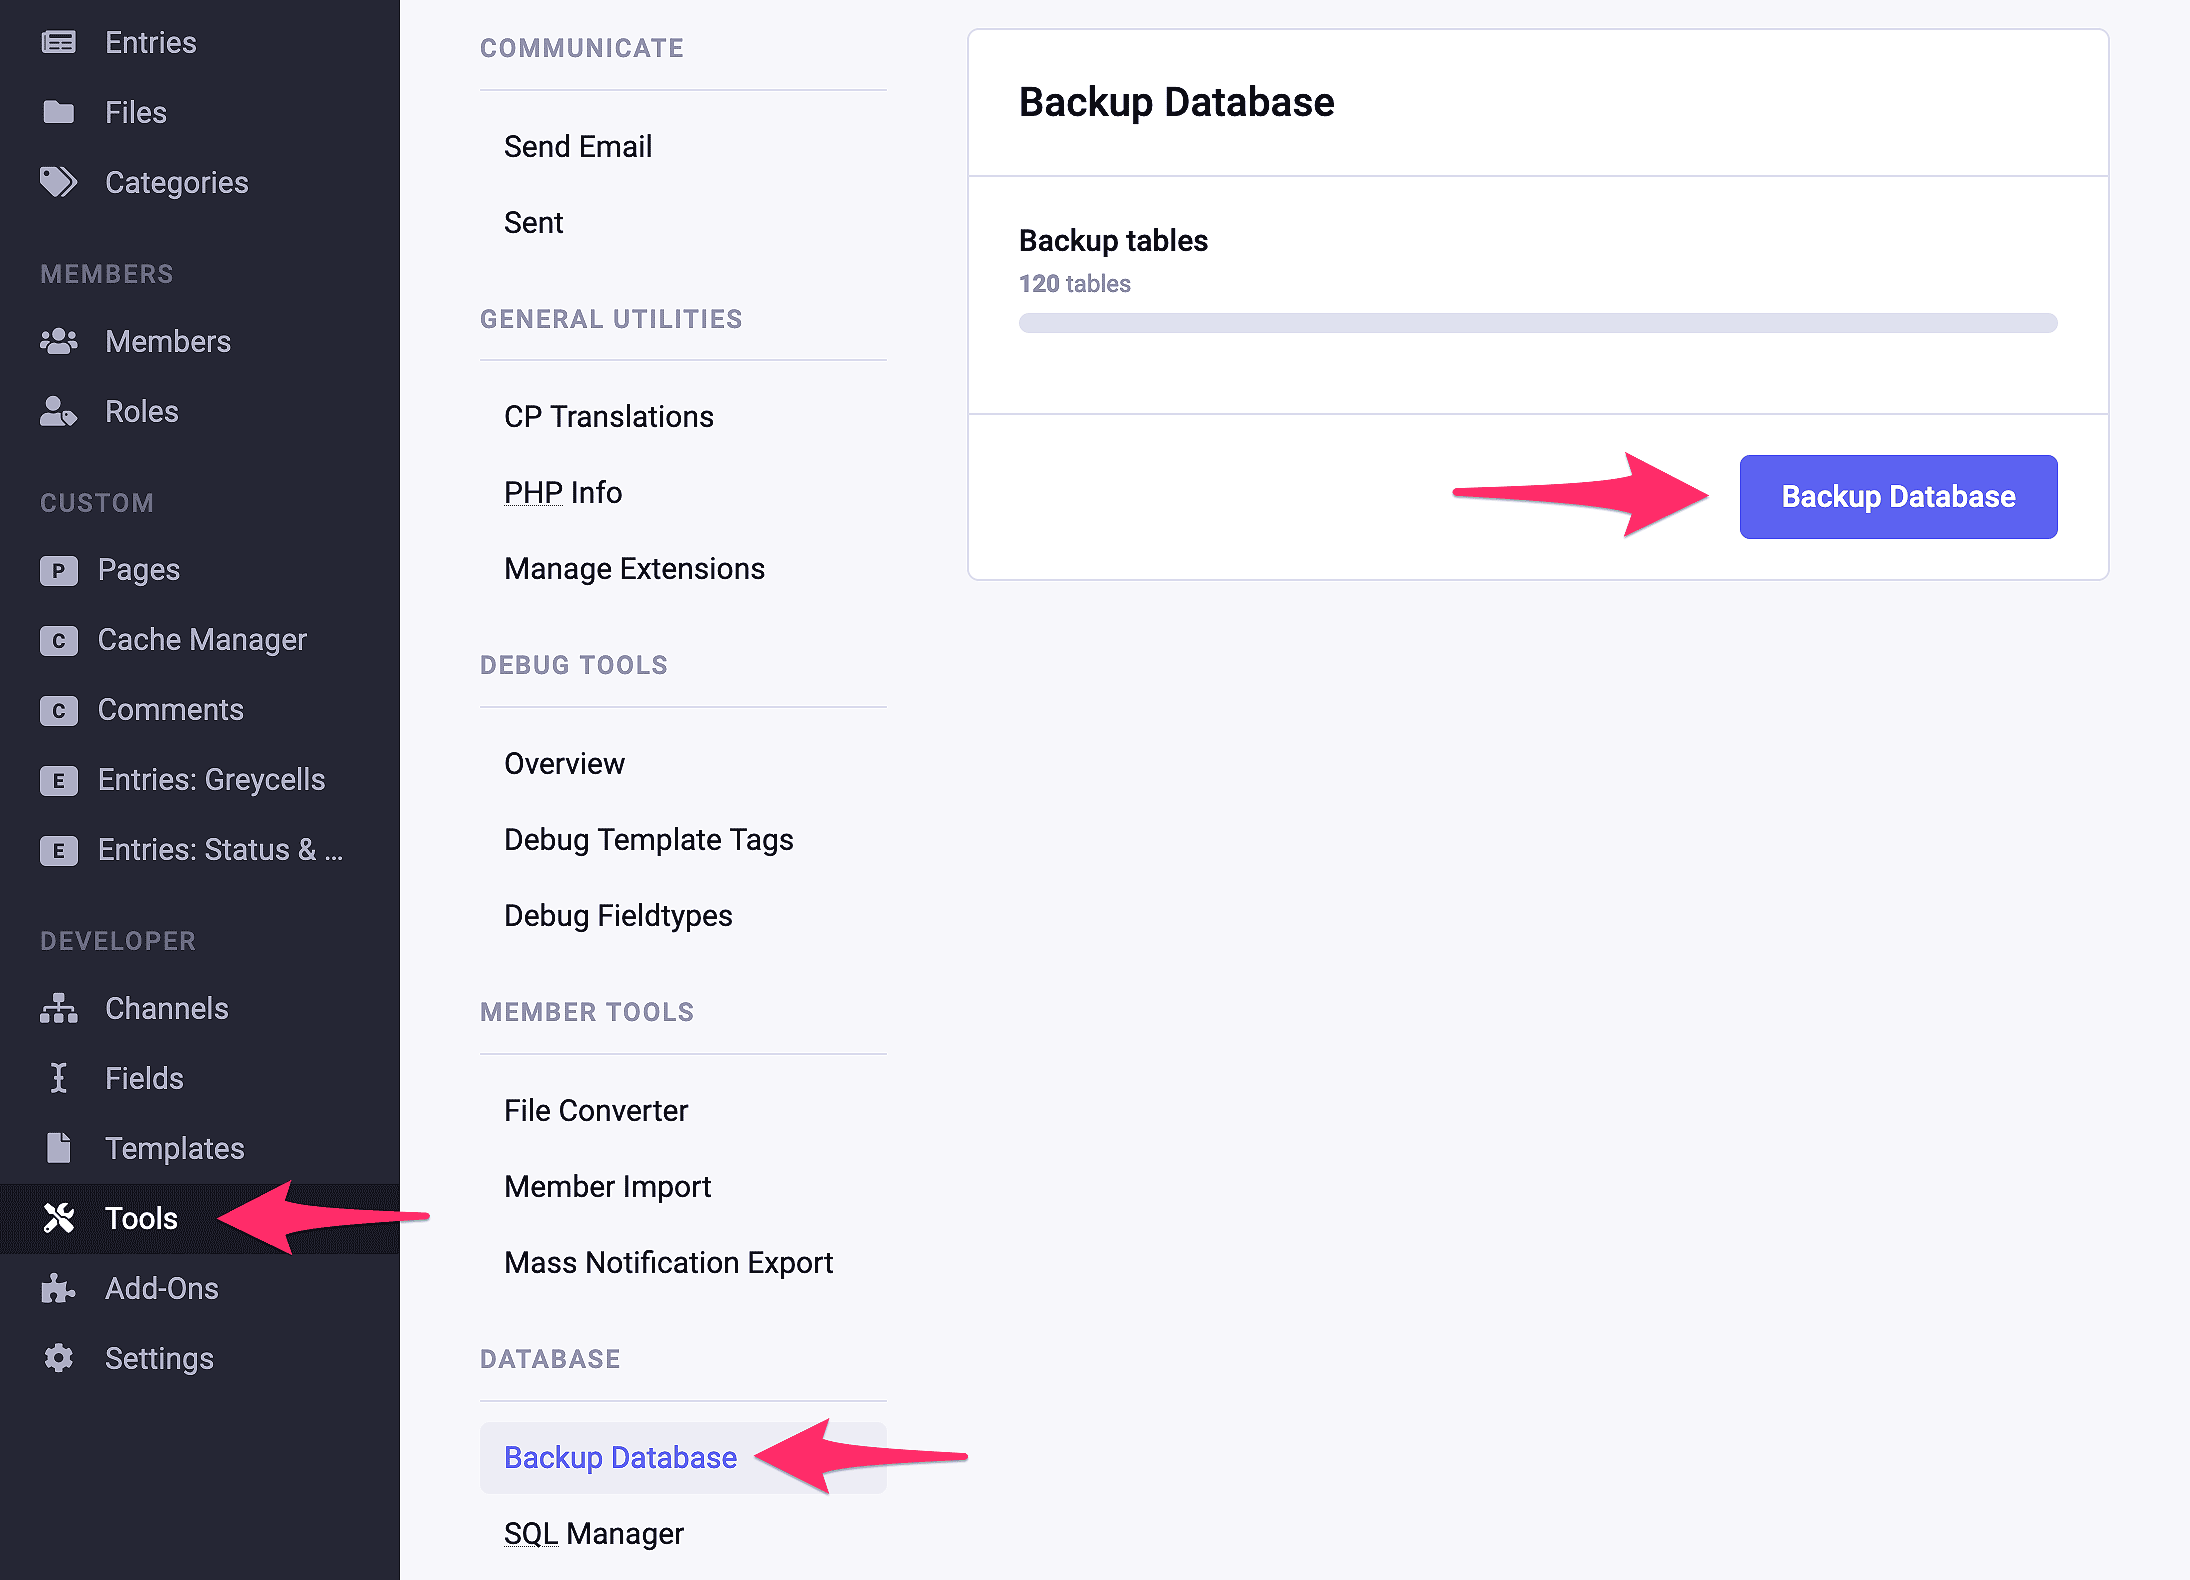
This will generate a dump of the ExpressionEngine database, place it in /system/user/cache/ on the server, and show this message:
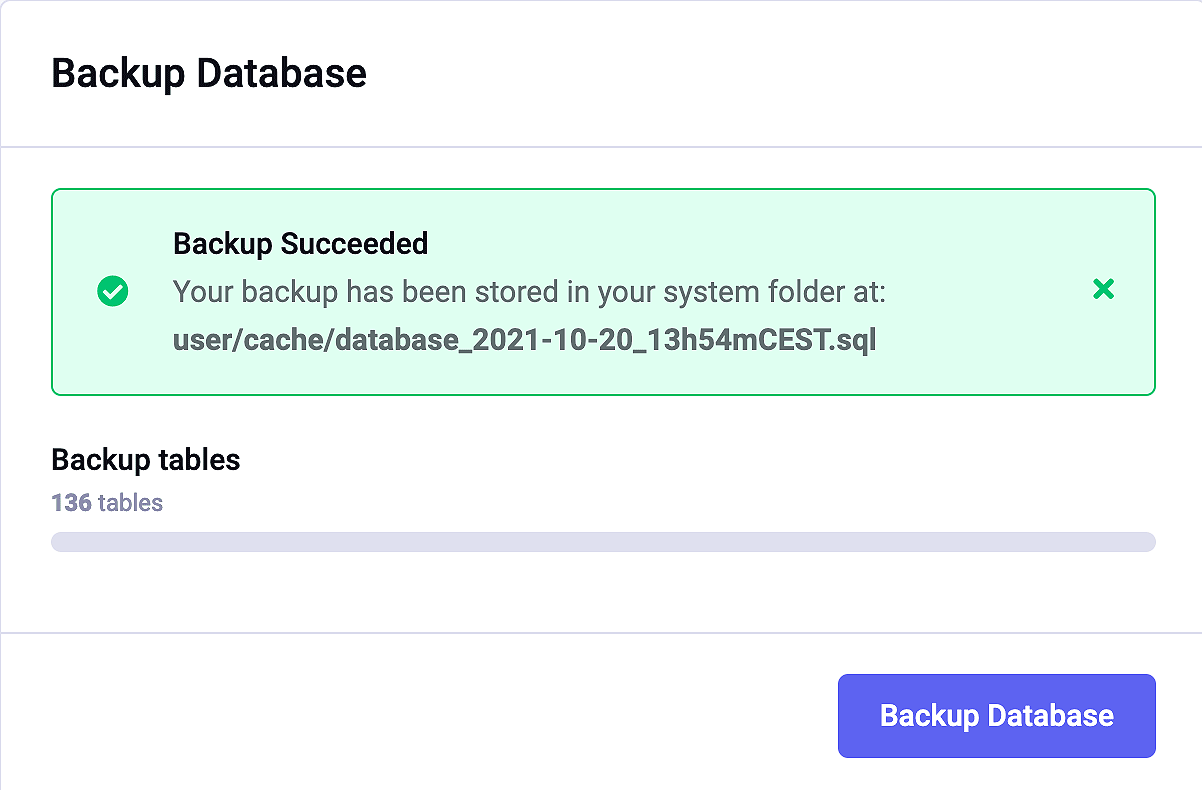
Some may wonder why we don’t use rsync and mysqldump for these tasks? Well, I had started writing sections on both. But they just kept growing and branching into several sub-sections that got more and more complicated.
I kept getting lost in all the details, and if I couldn’t even figure out the instructions, how would anyone else? So I ended up deleting it all and starting over.
Those who know how to dump a database with mysqldump and transfer files with rsync can do it that way. You don’t need me to show you what you already know.
And since everyone can access their web server via FTP, we’ll keep things nice and simple. That way, this guide will help as many people as possible. Which coincidentally is the whole goal of this site
Before we do anything else, we need to rename one file in document root.
Remember under Testing the server: Host Info-page, WebStart & phpMyAdmin when we opened a page with info about our host? This page comes from an index.php file in the document root folder. But ExpressionEngine also has an index.php file, so we need to rename the existing file before downloading anything.
We could also delete it, but maybe we would like to access it in the future. So instead, we’ll rename it to index-mamp.php:
/Users/tbo/Sites/example.test/index.phpindex.php to index-mamp.php — that way, we can always open it again in our browser at: https://example.test/index-mamp.phpNext, we’ll download the entire document root directory from our server. Handily, this will include the database dump we created earlier.
Now it’s time to download everything from your web server’s document root. This is where ExpressionEngine is installed on your live server — the same place you uploaded files to when you installed ExpressionEngine for the first time.
The placement of document root on a web server can vary, but in most cases it will be in one of three locations:
/var/www/html/site-name.com/public_html/
/var/www/html/public_html/
/var/www/html/
Note: You can see what your server’s document root should look like in the screenshots below.
So, let’s download everything from here to our MAMP Pro document root. If you already know how to do this, you can skip this section, download the files, and continue to Putting it all together below.
Below, we’re using Cyberduck because it’s a free and very capable FTP client that runs under Windows and macOS. If you already have a favorite client, just use that.
Log on to your web server and navigate to its document root, where your ExpressionEngine files and folders are located:
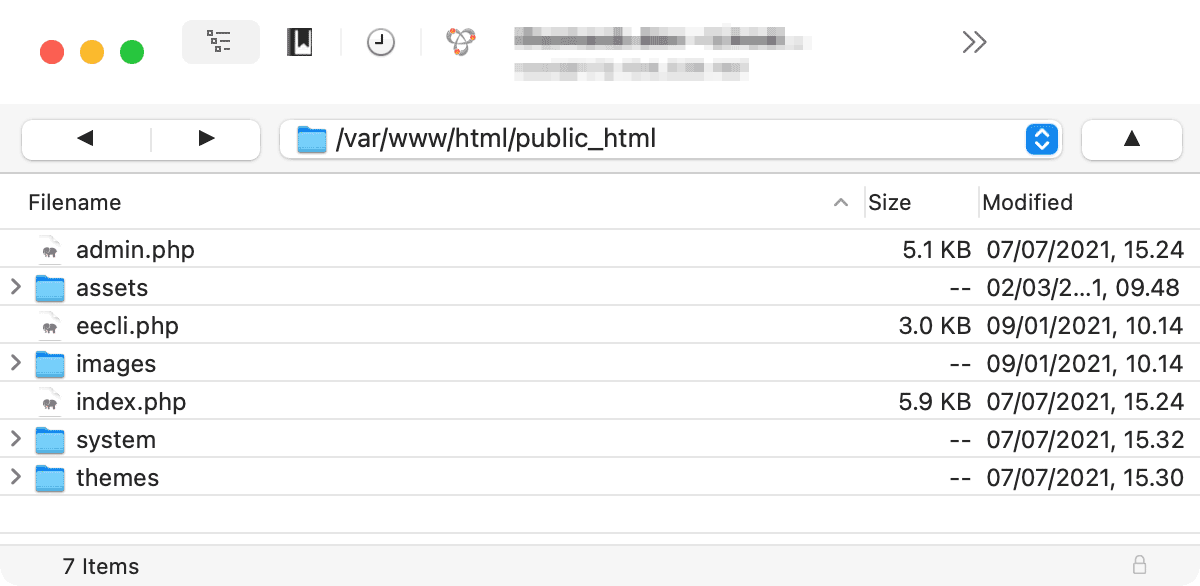
Note: This is the document root from one of our servers.
Here, we simply need to download everything:
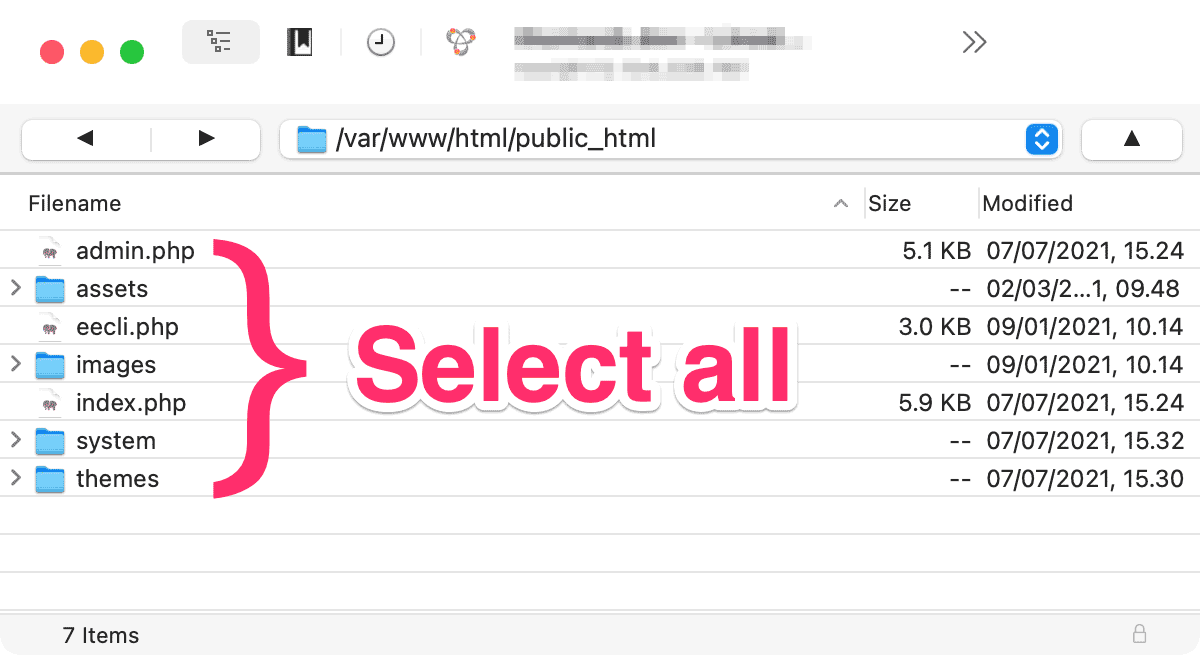
Note: You may not have the assets folder, or you may have more files and folders than shown above. Just be sure to select everything.
So, using Cyberduck, we select all with Ctrl-A or Cmd-A, then right-click and choose Download To…
Then, find and select your MAMP Pro document root so the files will download into that. On my machine, that would be inside the /Users/tbo/Sites/example.test/ folder, as shown here:
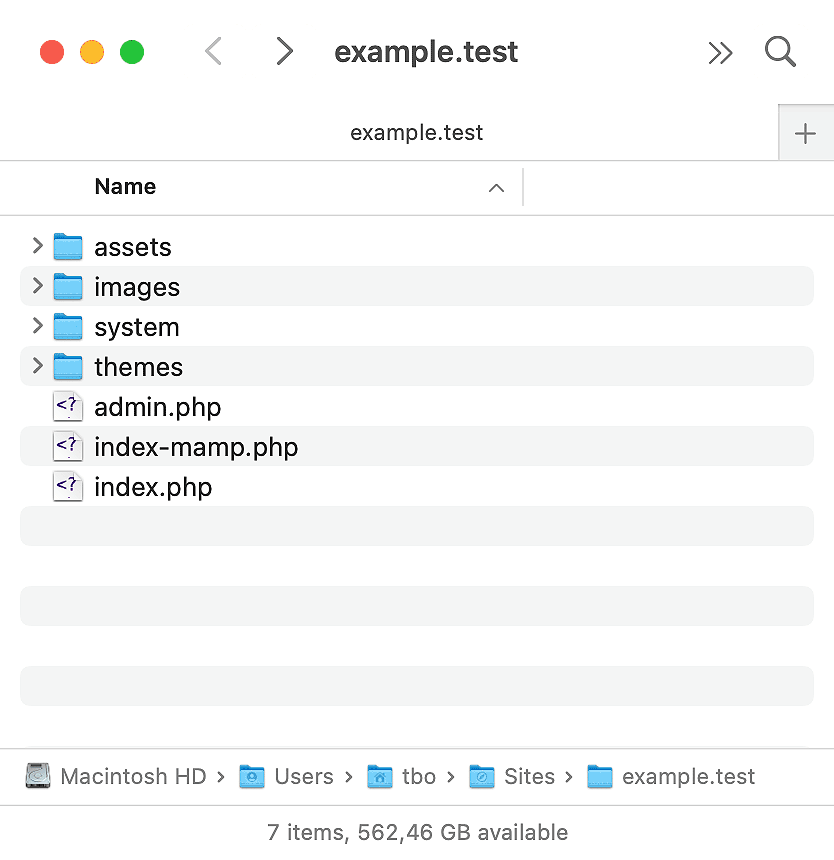
Here the files have been downloaded to their correct location. Note the index-mamp.php file we renamed previously. If you’re using another FTP client, you can use its Download To… function, or use drag-and-drop.
As we saw in Creating a database dump/backup above, ExpressionEngine creates database backups in /system/user/cache/database-name_date_and_time.sql. So by downloading everything as we just did, we also captured that file.
Please note that if:
index.php from your URLs.…you will also need to download the file named .htaccess from your web server. This file is responsible for removing index.php from your site’s URLs and may be hidden in Cyberduck and other FTP apps.
The file is located in your web server’s document root, as shown below.
To show hidden files in Cyberduck, choose View → Show Hidden Files:
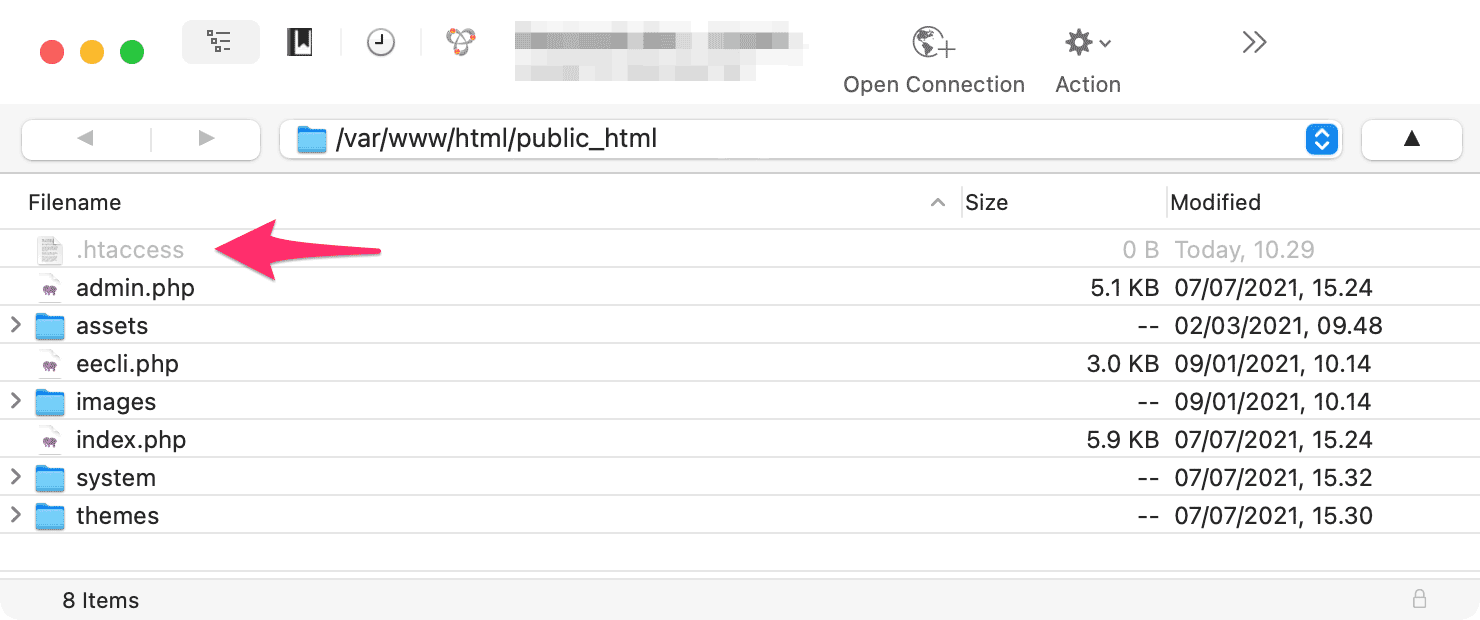
Download .htaccess to the same location in MAMP Pro’s document root on your hard drive.
Click Stop, then Start in MAMP Pro to reload its servers.
Skip the next section (for those running Nginx) and continue with Putting it all together below.
Please note that if:
index.php from your URLs.…you will need to set this up in MAMP Pro. Nginx, unlike Apache, does not use .htaccess files, so the removal of index.php from URLs is accomplished in another way. With Nginx, you edit the .conf file for your site instead.
Below is an easy way to add the necessary configurations to Nginx in MAMP Pro:
Start by finding the two lines below in your Nginx .conf file on your live server. These are responsible for removing index.php and will look like this:
try_files $uri $uri/ /index.php;

rewrite    ^/index\.php(.*)    $1    permanent;
Copy the first line, select your host in MAMP Pro, and paste it into the try_files section of the Nginx tab.
Copy the second line and paste that into the Custom section.
Check that things look like this:
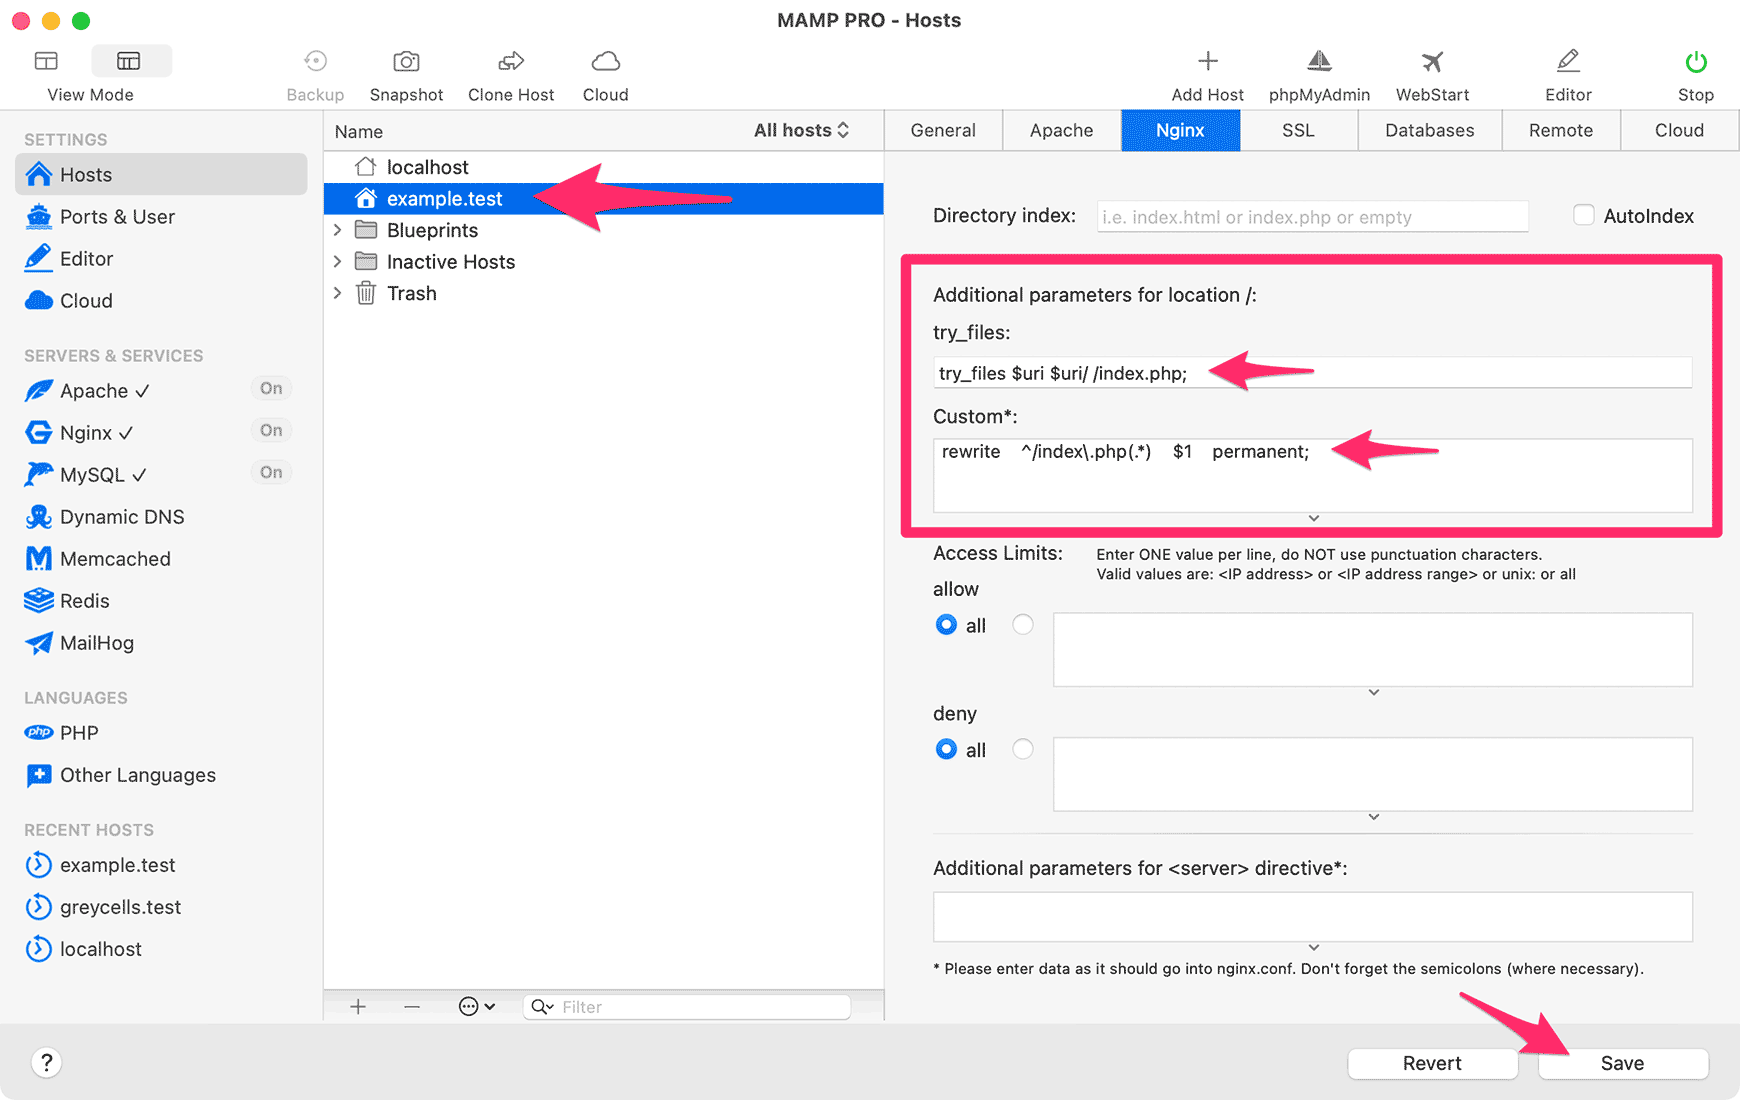
Click Save to activate the changes.
Now we’re ready to merge all our efforts, ensuring the test site runs off our MAMP Pro server and database. Here’s what we’ll do:
Then we’ll be in business, running a local copy of our site, ready for all the testing and abuse we can throw at it.
First, let’s create a MySQL database and then import the dump from our real site into this.
Select your host in MAMP Pro.
Click the Databases tab and then click the plus-sign to create a new database:
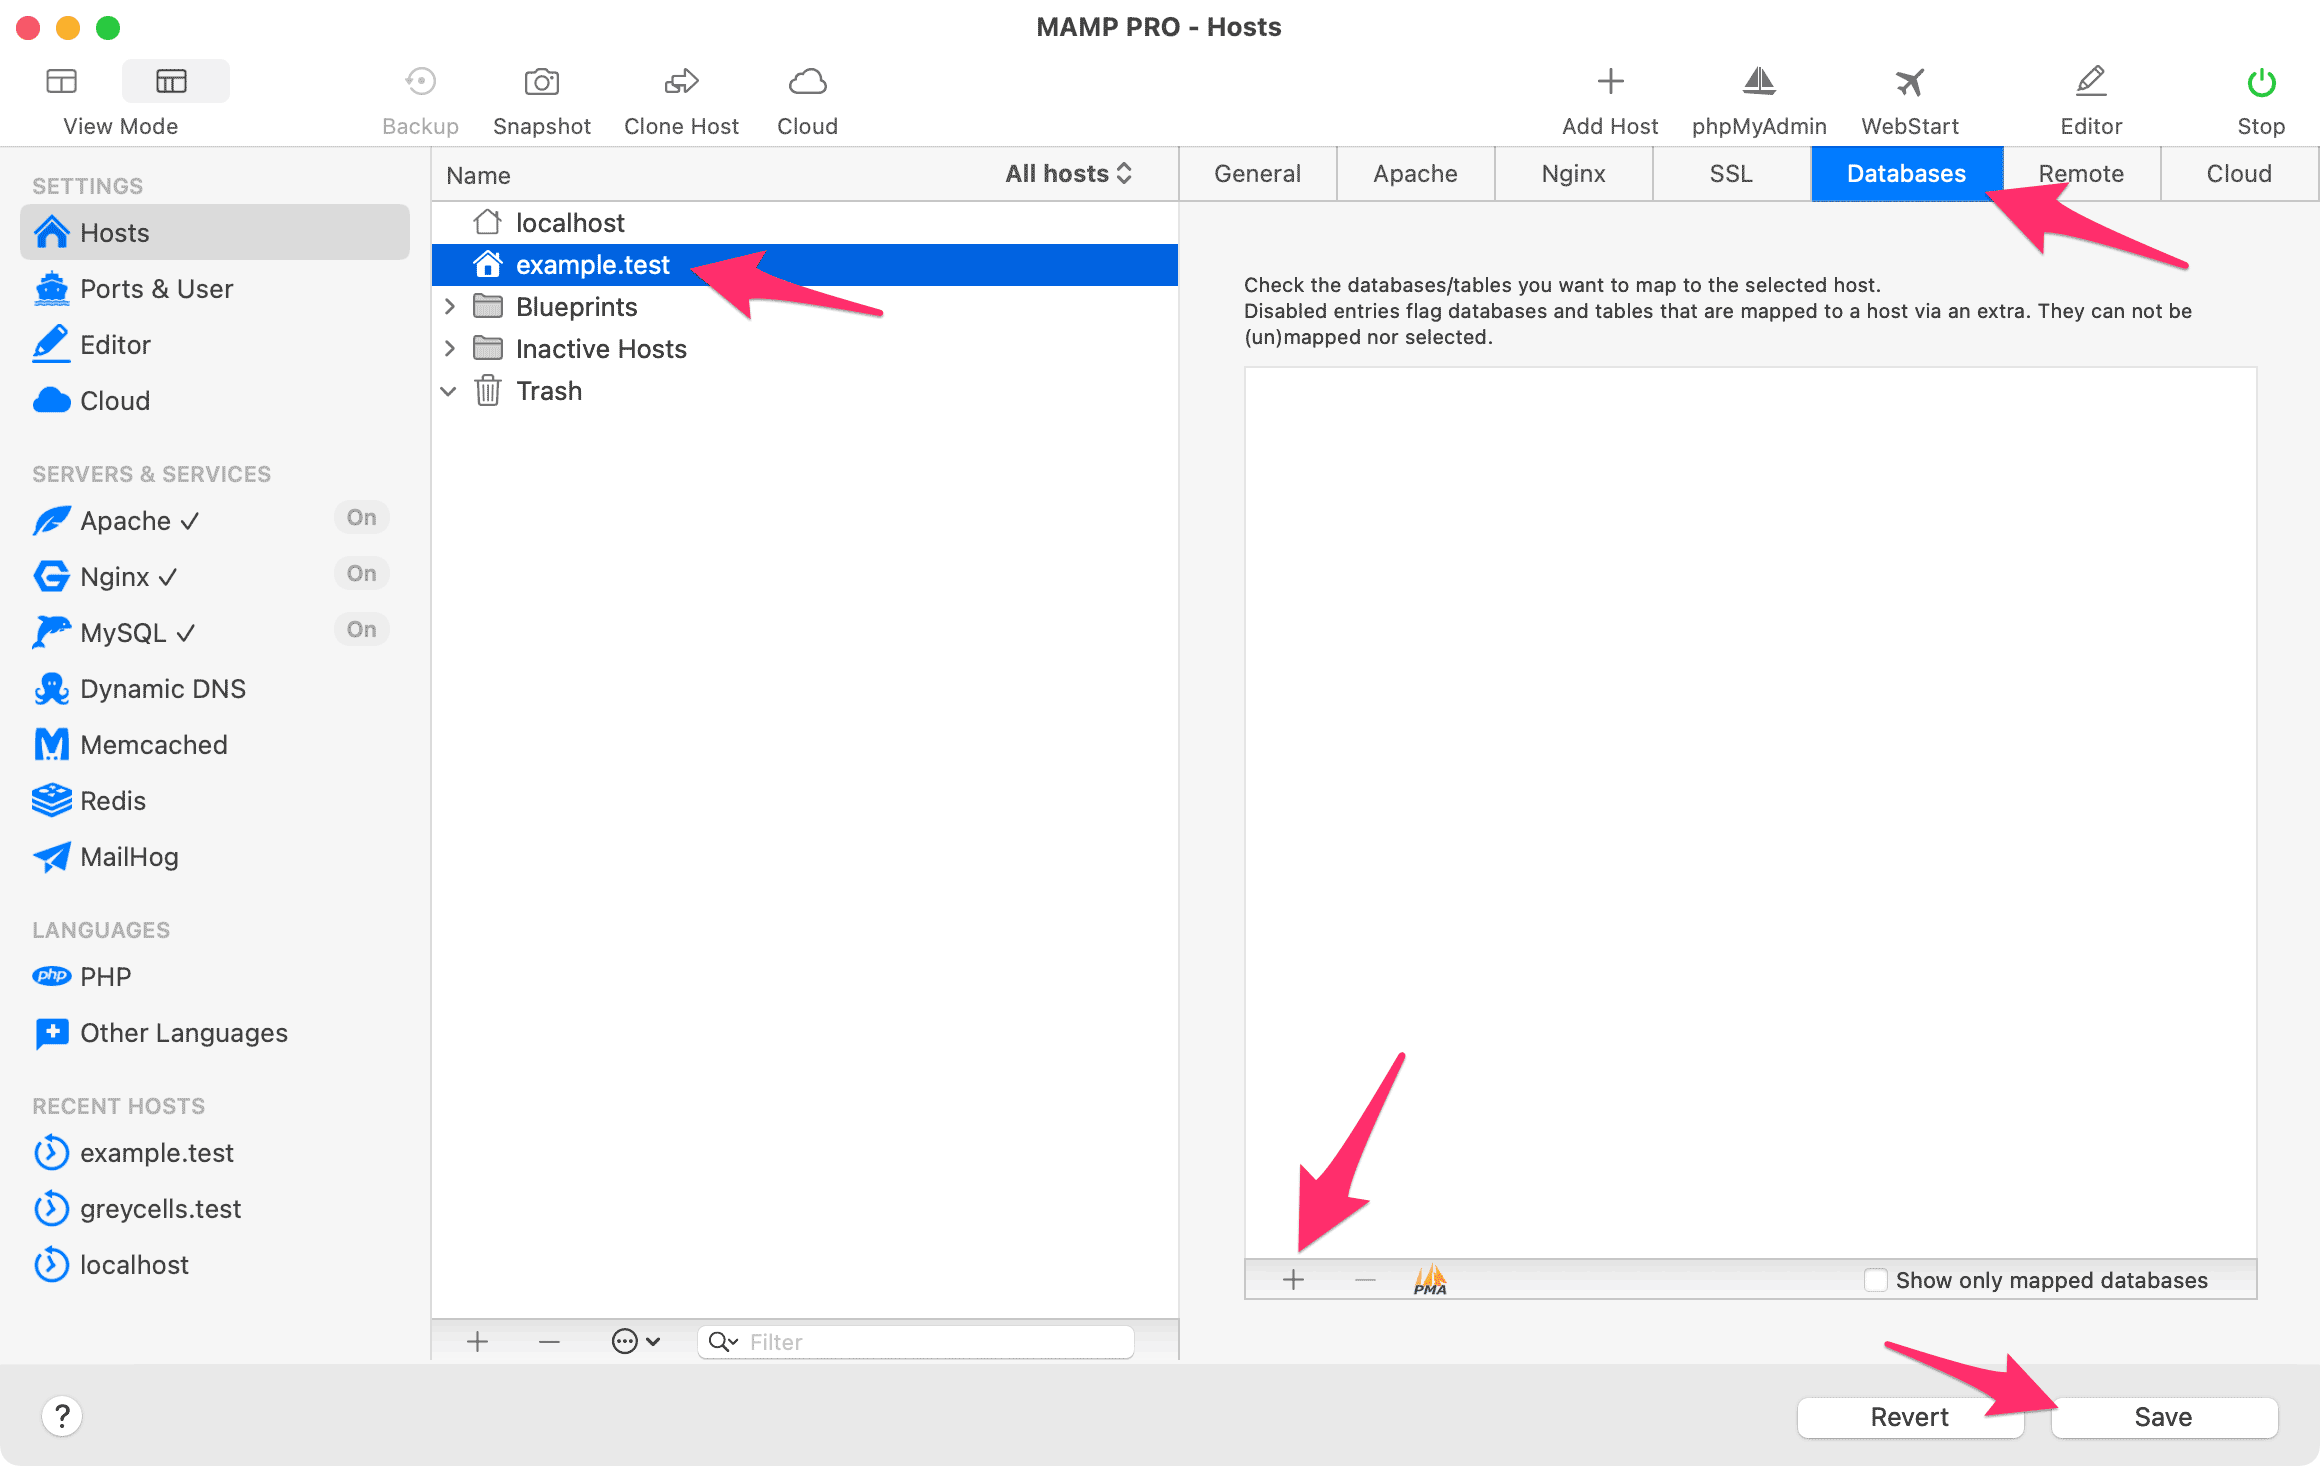
You can name the database whatever you like. It probably makes the most sense to name it after the test site, so we will call ours example_test:
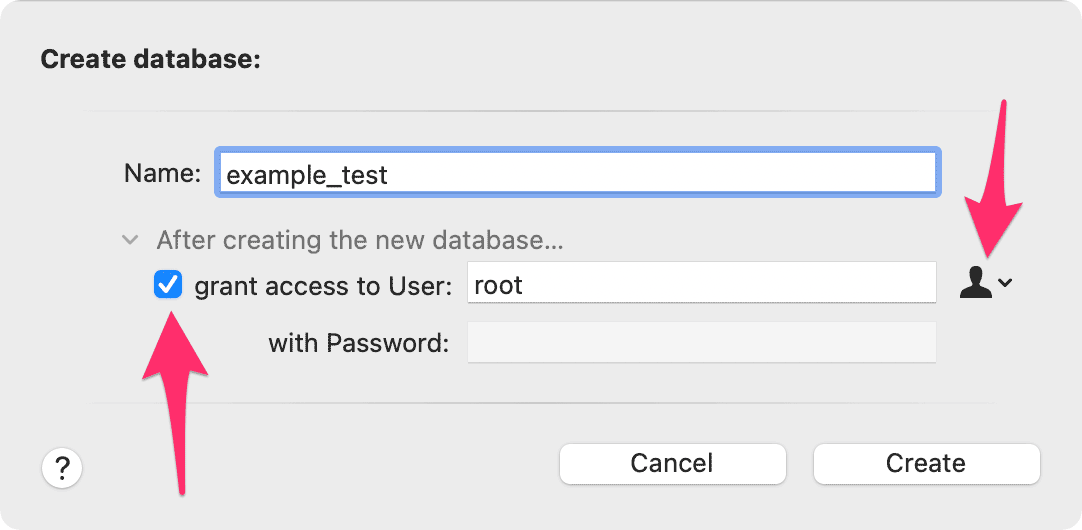
Also, select grant access to User and choose the root user from the popup menu, as shown above. This will give ExpressionEngine read/write access to the database via the root MySQL user.
Click Create and then select the checkbox next to the new database. This will map it to the MAMP Pro host:
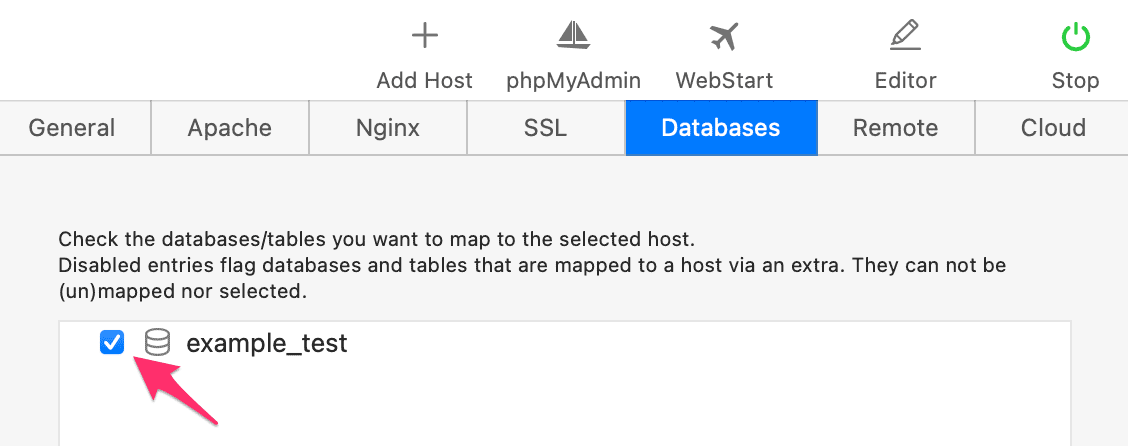
Finally, click Save.
Next, we’ll use MAMP Pro’s built-in database administration software, phpMyAdmin, to update the new database with the dump from our live server.
In MAMP Pro, click the phpMyAdmin button in the toolbar:
![]()
After launching phpMyAdmin, you will see this window:
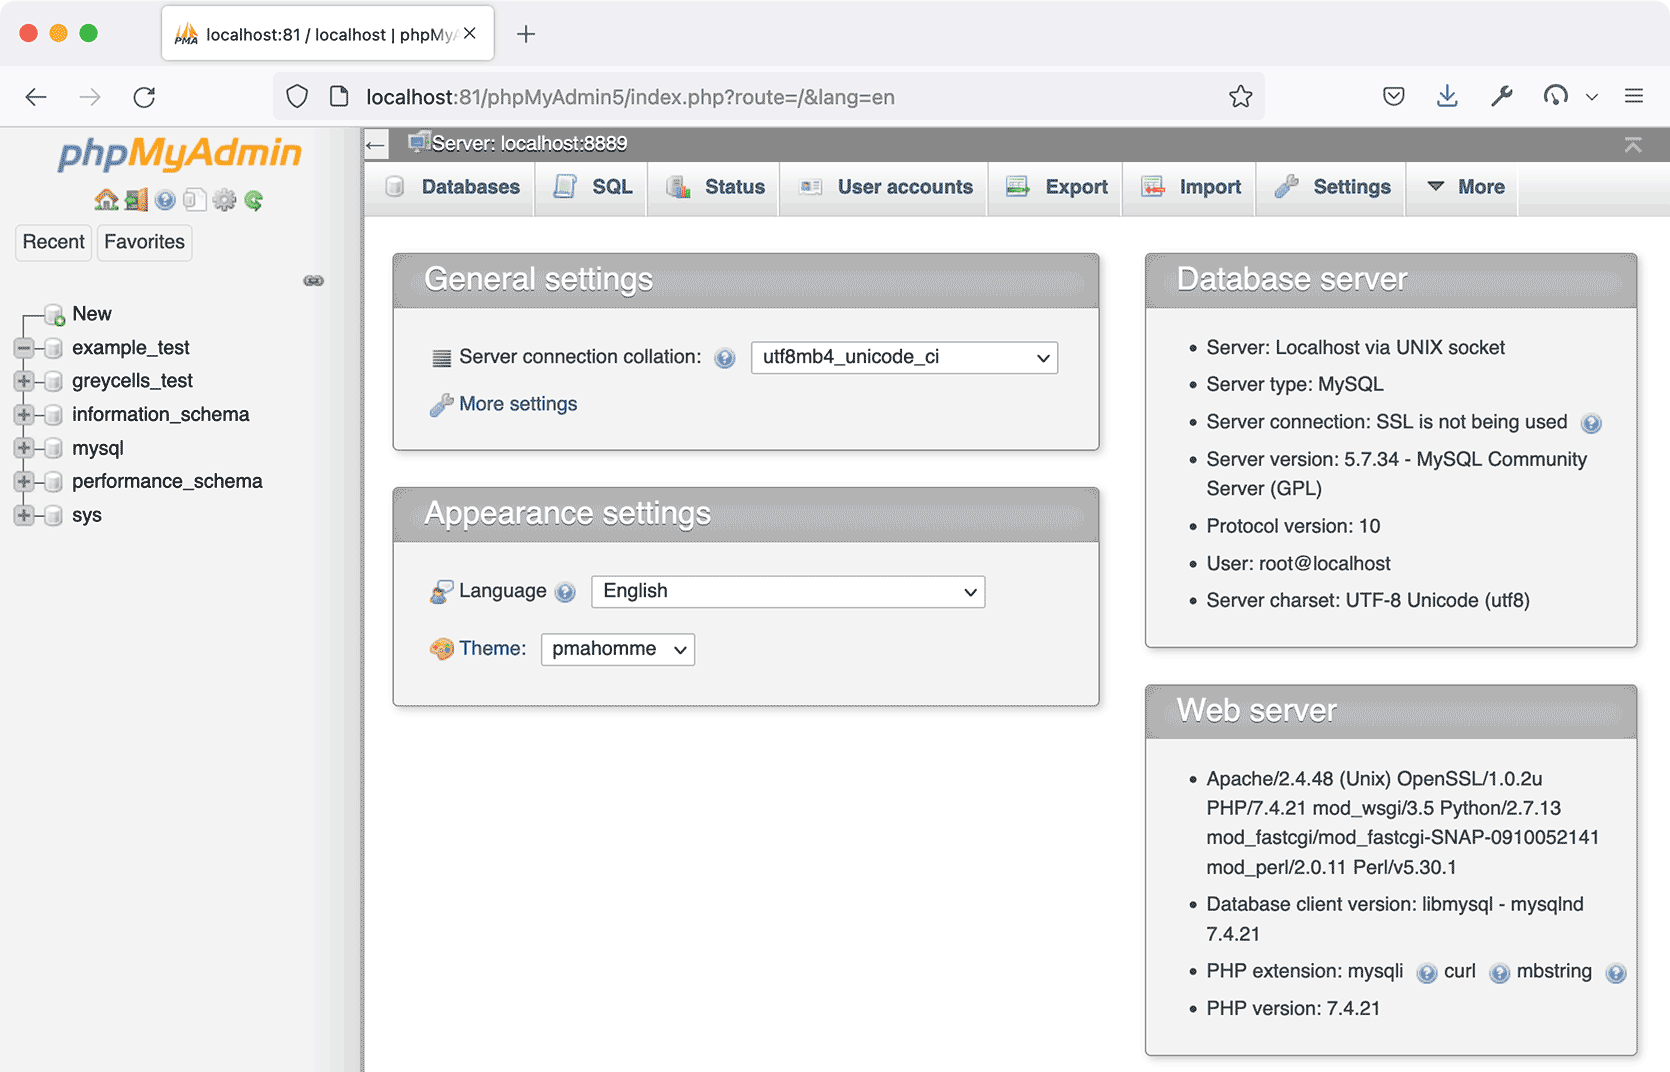
The left sidebar shows any databases available to phpMyAdmin, including example_test that we just created.
The screenshot also shows one named greycells_test. This is the database for my own Greycells test site — you won’t have that one.
The rest are databases MySQL uses internally.
To import the database dump, click on example_test (or whatever you named your database). Double-check that the correct database is selected!
Then select the Import tab and click Browse…:
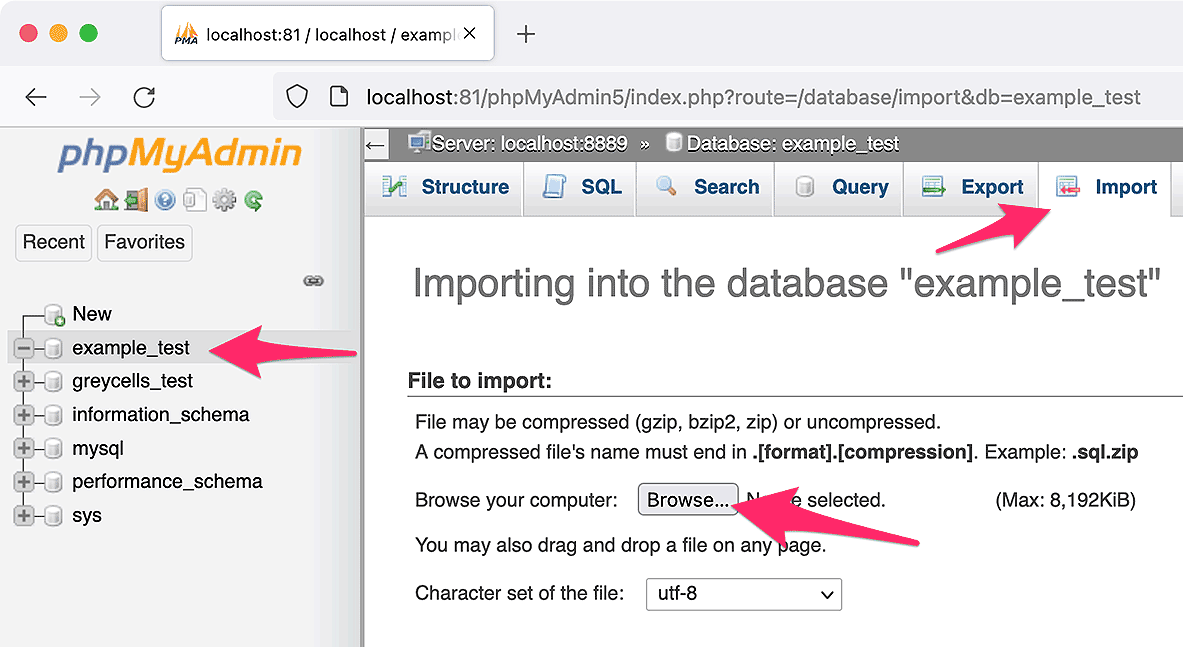
Navigate to the dump of your real site’s database. This is the file we generated here. It will be located inside MAMP Pro’s document root on your hard drive and then in /system/user/cache/ and be named something like real-site-db-name_2021-09-26_10h05mCEST.sql. That is: The name of your real site’s database, plus the date and time of the dump, and then .sql.
The full path to the file on my computer would be:
/Users/tbo/Sites/example.test/system/user/cache/real-site-db-name_2021-09-26_10h05mCEST.sql
After locating the SQL file, click Open in the file selection dialog and then Go in phpMyAdmin.
After a short while, you should see the sidebar filled with lots of new tables and a green success banner:
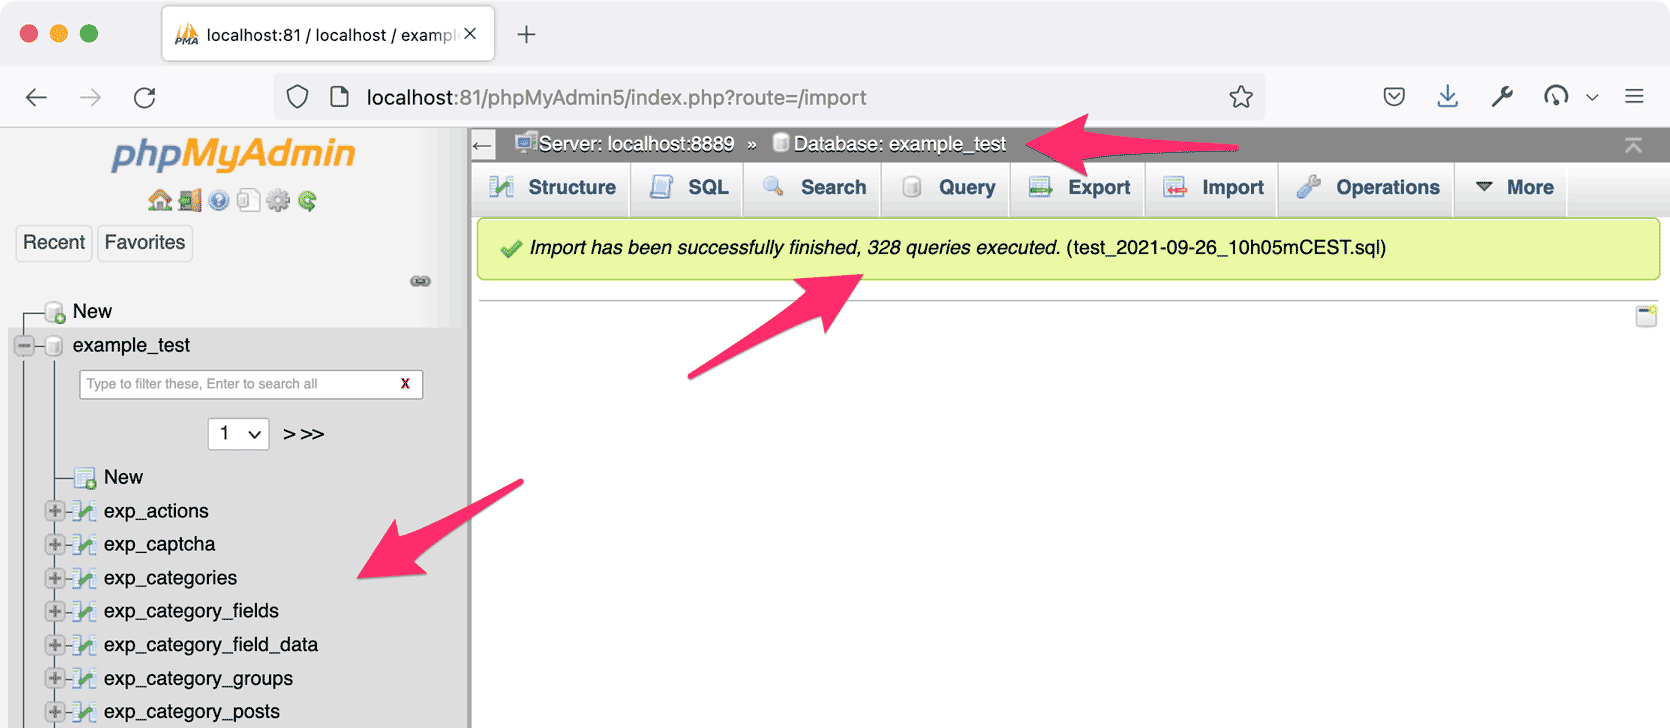
Note: Here, I imported a file called test_2021-09-26_10h05mCEST.sql to create the screenshot. Yours will be named differently
Now we’re really close. Just need to edit a few things, and then we can see our test site
Next, we need to edit a few things in ExpressionEngine’s config.php file.
Go to MAMP Pro’s document root folder on your hard drive and then drill down to find config.php here:
/system/user/config/config.php
On my computer, the full path to config.php would be:
/Users/tbo/Sites/example.test/system/user/config/config.php
Open config.php in your text editor. I’m using Visual Studio Code but if you already have a favorite editor, just use that. If you choose Visual Studio Code, we have some tips on using it with ExpressionEngine sites, in our guide: Use Any HTML Template With ExpressionEngine - Part 2.
With config.php open, we need to update the following:
In config.php, change — or add — the following two configs, so they point to the correct URL and path for the test server:
$config['theme_folder_url'] = "https://example.com/themes/";
$config['theme_folder_path'] = "/home/user/example.com/themes/";
So for $config['theme_folder_url'] it’s the test site’s URL + /themes/
And for $config['theme_folder_path'] it’s the test site’s document root + /themes/
Note: If you have never moved the site before, you may not have those two configs in config.php. In that case, just copy them from above, add them to config.php, and modify them to point to the themes directory.
On my own Greycells test server, they look like this:
$config['theme_folder_url'] = "https://greycells.test/themes/";
$config['theme_folder_path'] = "/Users/tbo/Sites/greycells.test/themes/";
With config.php still open, find the MySQL configs, as shown here:
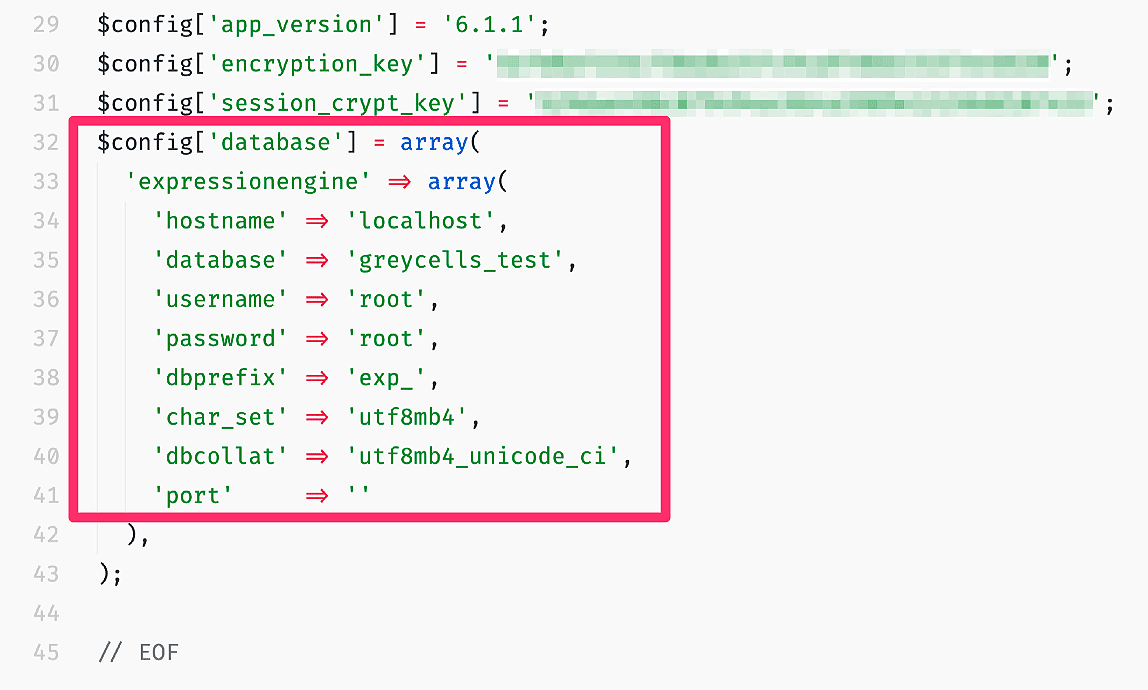
Note: The values shown in the screenshot are from my own Greycells test server.
Change the values for database, username, and password.
Here I have highlighted in pink the parts that should be edited:
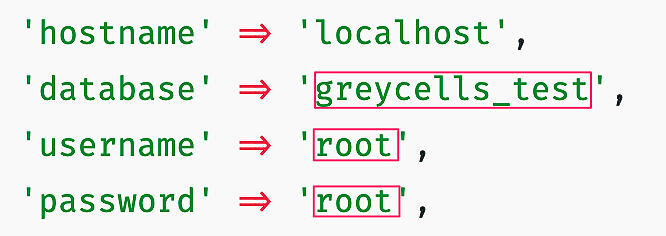
Save config.php in your editor.
Now we just need to set and verify a few things in ExpressionEngine’s control panel, and then our test site is ready!
Note: As mentioned in the ExpressionEngine User Guide under Moving to another server, you can also set the values below in config.php if you prefer.
Open your browser, go to the ExpressionEngine control panel of the test site, and log in. Your username and password will be the same as for your real site.
We need to set the following URLs and paths to their correct values for the test site:
Under Settings → URL and Path Settings, change all URLs and paths, so they are correct for your test server.
Note: The values shown in the screenshot below are from my own test server!
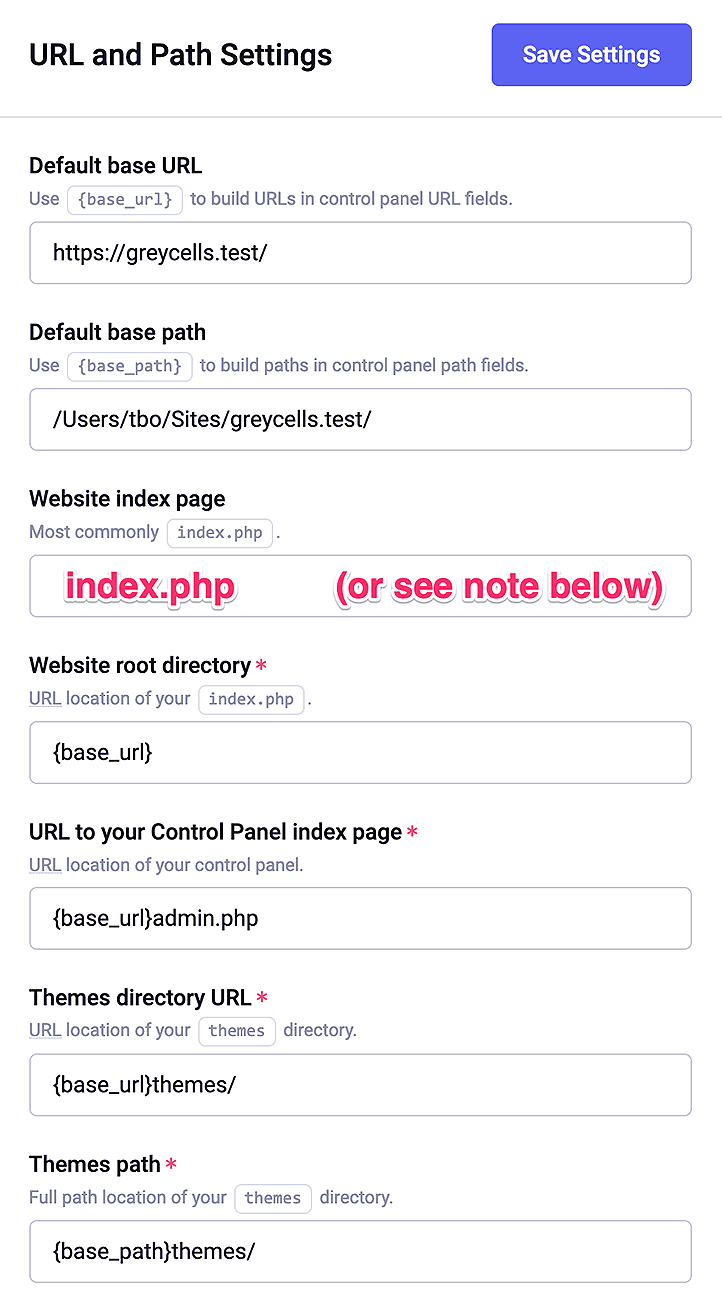
So, for Default base URL, set that to https://example.test/, or whatever you decided to name your test site.
Similarly, for Default base path, set that to your host’s document root.
{base_url} and {base_path} can save you from having to update tons of places in the control panel. If you ever move your site, like we’re doing here, you only have to update the Default base URL and Default base path fields, and every other field that uses these values will instantly be up-to-date. This works throughout the control panel.Note: If (and only if) you’re removing index.php from your URLs, check that the field Website index page is blank (meaning the field has no content).
On the other hand, if you’re not removing index.php, its value must be set to index.php
Click Save Settings when done.
Next, go through the following sections of the control panel and check that all fields have the correct URLs and paths for the test site. Change them if not:
Settings → CAPTCHA
Settings → Content & Design
Settings → Avatars
Developer → Channels
Files → Any upload directories you’ve made
Make sure the site is set to On under Settings → General Settings → Website online?
Congratulations! Your new test site is now ready to use (and abuse) so let’s go do that
Yes, it’s true — you can now finally load the site in your browser and begin developing and testing all the new features and optimizations you’ve had planned for ages.
The last sections of this guide are optional but contain some great tips. If you can’t bear reading any more now, and who could blame you, you can always come back later
If you’re using the free version of MAMP and you’re unable to log in to the test site’s control panel, you may have run into the issue that reader striio mentions in the comments below. He was kind enough to post a solution to it too, which we’ll reprint here:
The issue stems from this control panel setting: Settings → Security & Privacy → CP session type.
If this is set to Cookies and session ID or to Cookies only on your real site, then on the MAMP free site, you won’t be able to log in. The reason is that MAMP free doesn’t support SSL/HTTPS. So if you transfer a site that uses HTTPS and the above settings, you won’t be able to log in.
Luckily it’s an easy fix:
You can set the CP session type to Session ID only before dumping your real site’s database and downloading its files and folders. After the DB dump and FTP transfer, you can set it back.
Or, as striio mentions in the comments, you can add the following config to /system/user/config/config.php :
$config['cp_session_type'] = 's';
Both do the same thing, so if you’ve already gone through the guide and can’t log in, adding the above config to config.php is the easiest solution.
Thank you very much to striio for mentioning this and for providing the solution — it’s very much appreciated!
The rest of this guide consists of a few optional tips and tricks:
Now that we have an exact duplicate of our site, we run into the problem that it’s an exact duplicate! This can and will cause confusion:
As you can probably hear, I have made those mistakes. So below are a couple of small yet effective ways to differentiate the two sites to spare you the same trouble.
Here is what I have done to distinguish my test site from the original.
First off, you can change the header graphic or logo to stand out from the real site. Here I have made sure it really stands out:
![]()
If you’re running ExpressionEngine Pro, you can add branding to your test site’s login screen:
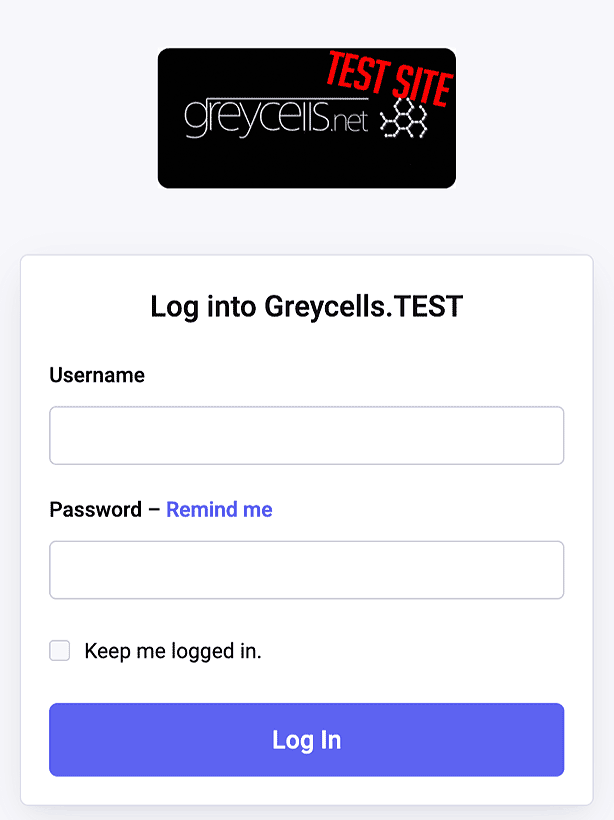
You can change the favicon for the test site:
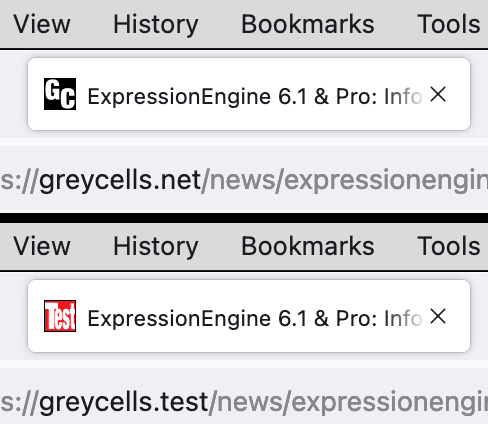
And finally, you can interact with your test site exclusively from one browser. I use Firefox Developer Edition for my test site and Safari for the live one. Of course, I test in multiple browsers, but otherwise, Firefox Dev is the only place I run the test site.
It’s also important not to make code changes for the wrong site. I use Visual Studio Code, and here are the things I changed to make the test site stand out:
I changed the name of the workspace I use for the test site to greycells_TEST, so it stands out a bit when I switch workspaces. Tip: You can switch among open workspaces with Ctrl-W.
I also changed the Color Theme to something that stands out more:
For the real Greycells.net workspace, I use the Bluloco Light Theme, which is nice and subtle:
But for the test site, I chose the GitHub Sharp Theme, which has a nice dark border that really stands out.
You can see which theme is active and switch among installed themes in Visual Studio Code by hitting Cmd + K + T (macOS) or Ctrl + K + T (Windows).
One of the many great features of MAMP Pro are snapshots. They’re straightforward to create, and when done, you’ll have an instant snapshot of your current host. The ExpressionEngine files, templates, and database are backed up, so you can always return to that point in time if anything breaks.
But… If this guide’s whole point is to allow us to break stuff, why do we care? Because, even if it doesn’t matter that our test site breaks, it does take time to set it up again if we really break it. By having snapshots, we don’t need to troubleshoot the test site. We can just revert to a time before someone screwed it up
So here’s how snapshots work:
Simply right-click on the host and select Create Snapshot…:
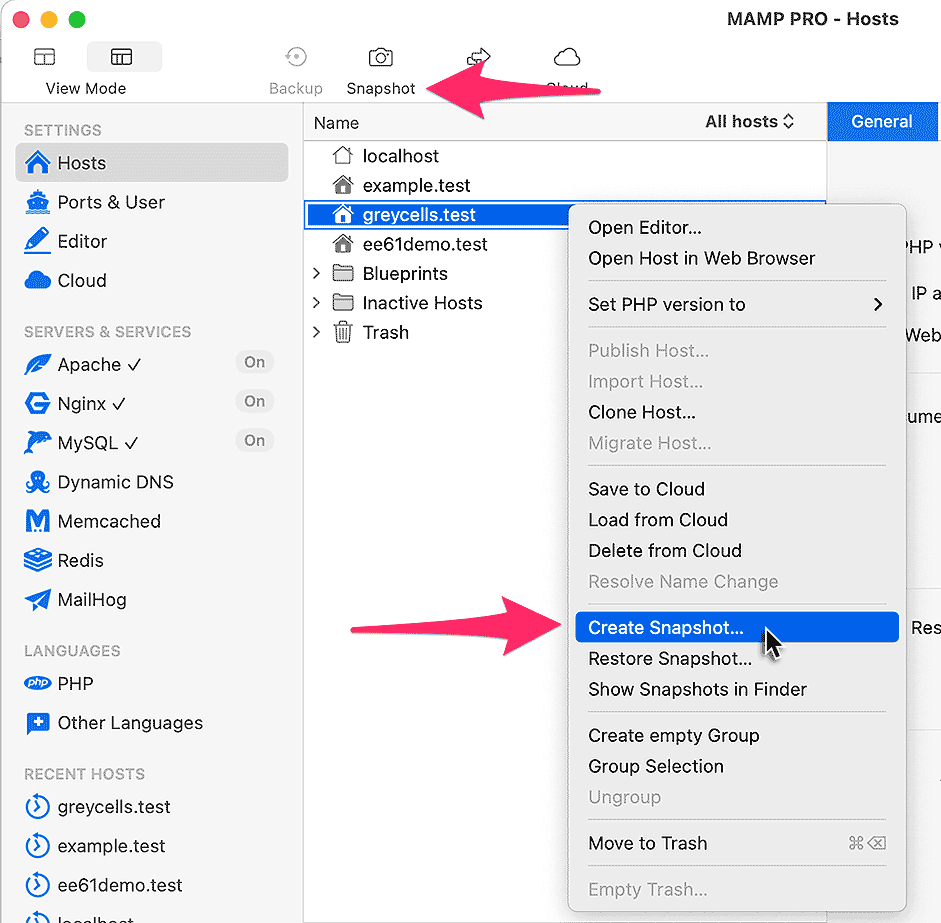
Note: Creating a snapshot can take some time. About 30 seconds to a couple of minutes, depending on the file sizes and complexity of the host/site.
Click OK to the dialog that pops up. Note the warning I have highlighted:
Then select where to save the snapshot. MAMP Pro recommends ~/MAMP PRO/snapshots/name-of-host/ but you can save it where you like. You can even share and exchange snapshots with other users on the same MAMP Pro platform (macOS or Windows, snapshots are not cross-platform).
MAMP Pro will suggest a filename with the host’s name plus the date and time. This makes it easy to revert to the correct snapshot:
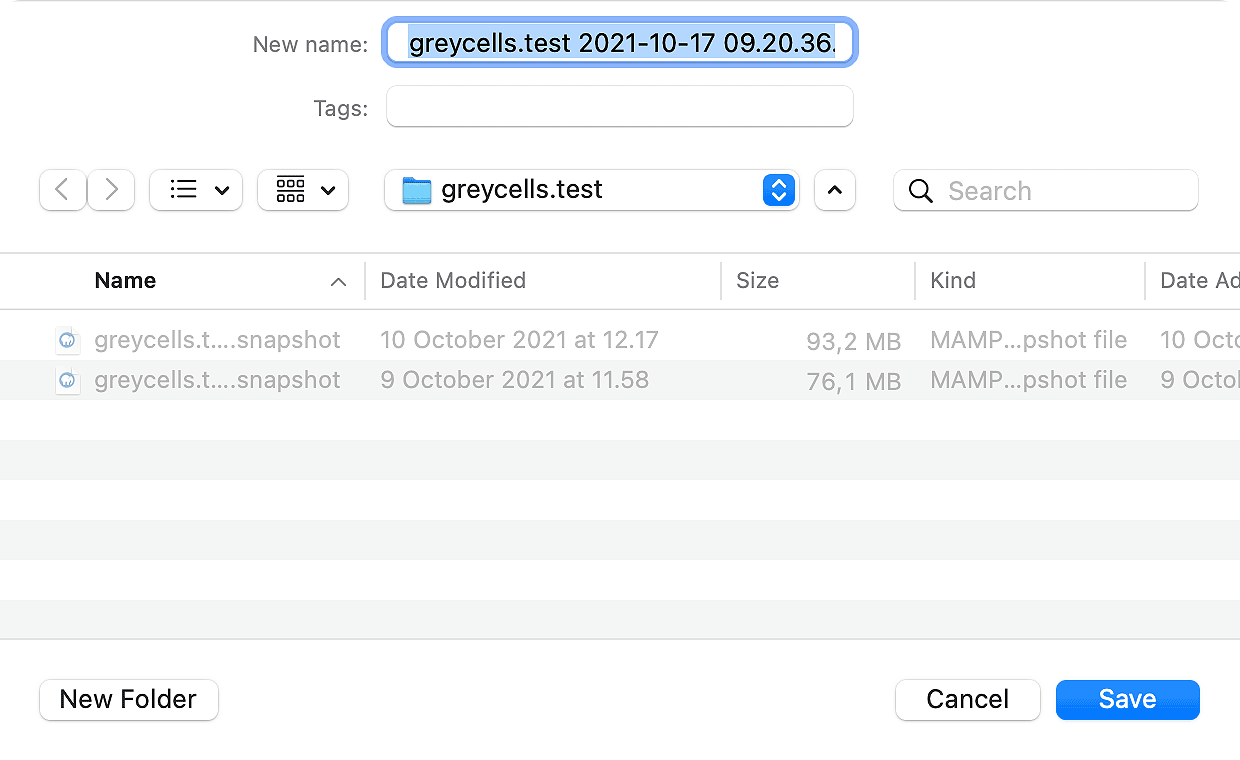
Restoring a snapshot is the same in reverse: Right-click → Restore Snapshot → then select the snapshot file you wish to restore from.
Note: MAMP Pro also has a Cloud Saving feature, where your host can live in Dropbox or OneDrive. But for our use here, snapshots are more appropriate.
Another great feature of MAMP Pro is Blueprint Hosts. These are described in the docs as:
A “Blueprint” host is a clone of a host in the “Blueprint” group. This allows you to prepare a certain type of host and then use it again and again as a template for other hosts.
So, let’s say we have created a new ExpressionEngine host that’s set up just right. Before we start developing anything on it, if we move it to the Blueprint group in MAMP Pro:
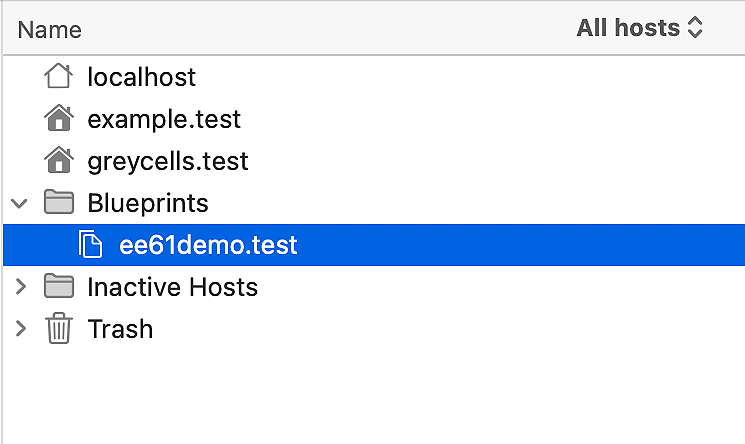
Then the next time we create a new host, we can choose that as a template. We just select the Advanced tab and then Blueprint:
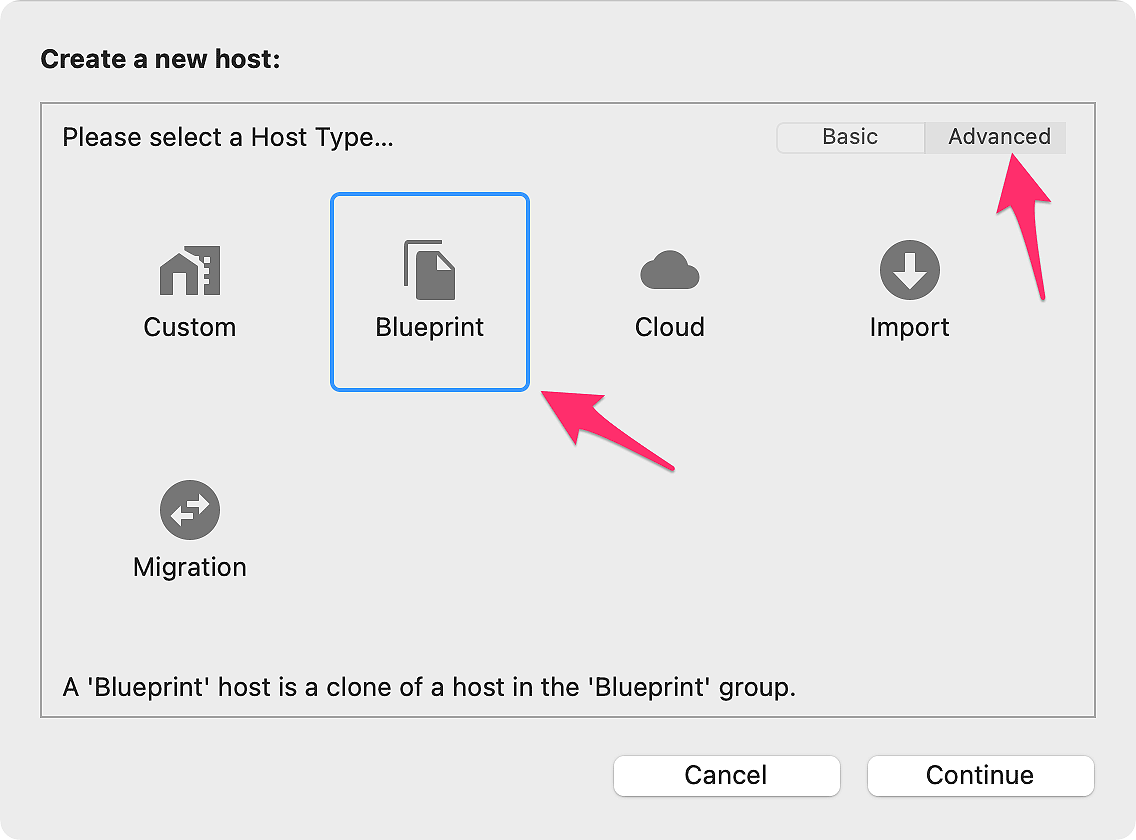
This is an excellent feature that can save a lot of setup time in the long run.
I really hope this guide will help you develop sites with the confidence that you can’t screw things up. Test sites in MAMP Pro have certainly changed my workflow for the better. Especially with the https://greycells.net site beginning to get a bit of an audience, it has become important not to have any downtime
Thank you for your support and encouragement, everyone!
The Consent module isn’t always specifically for cookies, rather it relates to collection (and use) of any personal information, whether stored in cookies or otherwise.
This is just one approach to creating consent forms, the module has many other tags and variables you can use to build your own consent mechanism, see the Consent documentation for full details.
The various consent requests (e.g. ee:cookies_functionality) are found in System settings > Security & privacy > Consent Requests
This form you’d probably display as an overlay, popup or fixed to the bottom of the screen.
{!-- form tag with all default consent= requests --}
{exp:consent:form consent="ee:cookies_functionality|ee:cookies_performance|ee:cookies_targeting"}

  {!-- message --}
  <p>What consents do you want to allow?</p>

  {!-- loop through requests --}
  <ul>
    {consents}
    <li>
        <label>
          <input type="checkbox" name="{consent_short_name}" value="y">
          {consent_title}
        </label>
    </li>
    {/consents}
  </ul>

  {!-- submit/save button--}
  <button type="submit">Save</button>

  {!-- link to privacy/cookies page --}
  <a href="{path='site/cookies'}">Manage options</a>

{/exp:consent:form}
I prefer to add this form in an embed template which is then added to my layout template. The embed template can then be run uncached - because you need it to be dynamic.
When a visitor has saved their preferences you’ll want to hide the form. ExpressionEngine doesn’t do this automatically so we need to wrap the form in a conditional like this:
{if ! consent:has_responded:ee:cookies_functionality}
{exp:consent:form consent="ee:cookies_functionality|ee:cookies_performance|ee:cookies_targeting"}

 ...form code here

{/exp:consent:form}
{/if}
Basically this conditional says if the form has not been actioned/saved, show the form, otherwise don’t show it.
Using the default consents (Functionality, Performance and Targeting), once the consent form has been actioned/saved you can then output any scripts or code that collect personal data.
To do this I add some extra tags to my consent embed template like this:
{!-- performance related opted-in consents --}
{exp:consent:requests consent="ee:cookies_performance"}
  {if consent_granted}

    // performance scripts, typically analytics

  {/if}
{/exp:consent:requests}

{!-- targeting related opted-in consents --}
{exp:consent:requests consent="ee:cookies_targeting"}
  {if consent_granted}

    // targeting scripts, typically 3rd party adtech tracking

  {/if}
{/exp:consent:requests}
Note: I’ve omitted a tag for “Functionality” consents because you probably wouldn’t need to run any consent driven scripts here. Feel free to add if you need it!
After a visitor has saved the consent form you’ll still need to offer the same options so they can opt in and out at any time. To do this I create another template so I can display the consent form on its own page.
The form tag is the same but the output is a little different:
{exp:consent:form consent='ee:cookies_functionality|ee:cookies_performance|ee:cookies_targeting'}

  {!-- no consents message --}
  {if no_results}
    <p>No Consent Requests to Display</p>
  {/if}

  {!-- loop through consents --}
  {consents}
  <fieldset>
    <legend>

      {!-- name of the consent --}
      {consent_title}

      {!-- current status of the consent, accepted or declined --}
      {if consent_granted}(currently accepted){/if}
      {if ! consent_granted}(currently declined){/if}

    </legend>

    {!-- consent description--}
    {consent_request}

    {!-- radio buttons to accept or decline --}
    <ul>
      <li>
        <label>
          <input type="radio" name="{consent_short_name}" value="y" {if consent_granted}checked{/if}> Accept
        </label>
      </li>
      <li>
        <label>
          <input type="radio" name="{consent_short_name}" value="n" {if ! consent_granted}checked{/if}> Decline</label>
      </li>
    </ul>

  </fieldset>
  {/consents}

  {!-- save button --}
  <button type="submit">Save</button>

{/exp:consent:form}
It’s not all about privacy laws and cookies, you can also use the consent mechanism to hide content and make visitors click a button to see it.
You’ll need to create a new consent in System settings > Security & privacy > Consent requests - I’ll call mine “ee:promo”.
Here’s an example:
{!-- consent form tag  --}
{if ! consent:has_responded:ee:promo}
{exp:consent:form consent="ee:promo"}

  {!-- pass the consent value in a hidden input --}
  {consents}
    <input type="hidden" name="{consent_short_name}" value="y">
  {/consents}

  {!-- HTML --}
  <p>Do you want to see this thing?</p>

  {!-- submit button--}
  <button type="submit">Yes please!</button>

{/exp:consent:form}
{/if}

{!-- show the content after the form has been submitted --}
{exp:consent:requests consent="ee:promo"}
  {if consent_granted}

    <p>THIS THING</p>

  {/if}
{/exp:consent:requests}
You could even reverse this idea to show something by default and use the consent mechanism to hide it.

EEConf is a 2-day event that includes hand-picked topics and summit style sessions so you can follow along with the presenter, ask questions, and meet others in the community.


🎤 Presenter: Creative Arc Team, https://creativearc.com
📺 Description: The team from Creative Arc will walk you through everything you need to build an E-commerce site with ExpressionEngine and CartThrob. They will cover planning the schema, configuring CartThrob, and building the templates that allow it all to come together. This is a great opportunity to learn what ExpressionEninge and CartThrob can do from an experienced team. The team from Creative Arc will walk you through everything you need to build an E-commerce site with ExpressionEngine and CartThrob. They will cover planning the schema, configuring CartThrob, and building the templates that allow it all to come together. This is a great opportunity to learn what ExpressionEninge and CartThrob can do from an experienced team.
🎤 Presenter: Robin Sowell, ExpressionEngine, https://www.expressionengine.com
📺 Description: Learn more about debugging ExpressionEngine from ExpressionEngine’s chief debugger.
🎤 Presenter: Erik Reagan, Focus Lab, https://focuslabllc.com
📺 Description: How much does your business rely on you as the owner? Many agency owners and executives have built their business up to a point where their customers are continually pleased and impressed with their products or services. But the owner is attached to the process, the product, the service, or the results in a very tangible way. They can’t be absent from the business for more than a week or so, or things start to fall apart. But it doesn’t have to be that way. If you want to fix this in your own business, but aren’t sure how this is a great starting point. By the end of this session, owners will see a new possible future. And they’ll know what to do to get themselves there.
🎤 Presenter: Blair Liikala, University of North Texas College of Music, https://recording.music.unt.edu
📺 Description: Hear a short case-study using ExpressionEngine to build an automated live streaming and media archive in a university environment, and how that lead to a stand-alone module using the Mux service for live and on-demand streaming. Learn about the strengths this add-on brings to video workflows and if it is right for your next project.
🎤 Presenter: Tim Hoppe, Creative Arc, https://creativearc.com
📺 Description: Creative Arc recently implemented Mouseflow, a user tracking and heat mapping tool, on one of our larger clients who is consistently looking to improve their site performance and UX. Since then, we have started using it for most of our redesigns as a way to focus in on the undiscovered pain points for users, and increase the clients interest and investment in a redesign/redevelopment effort. I will go through a site we have been tracking to show you how to leverage the data available into suggestions on projects.
🎤 Presenter: Alex Brabant, eMarketing 101, http://emarketing101.ca/ 🎤 Presenter: Travis Smith, Hop Studios, https://www.hopstudios.com/
📺 Description: Are you currently spending money advertising with Google Ads, but you’re worried that your dollars are not being well-spent? Or are you considering running Google Ads but daunted by the complexity of configuring a new campaign?
Join Travis Smith (Hop Studios) and Alex Brabant (eMarketing101) as they discuss how to set up and use all the various Google Ads products. They’ll discuss the current system, and share ways to improve the performance of your existing Google Ads campaigns. This interview-style presentation will examine goals and funnels, geo-targetting, keyword strategies, novel ad types, as well as the psychology behind online PPC advertising.
🎤 Presenter: Andy McCormick, ExpressionEngine, https://expressionengine.com/
📺 Description: ExpressionEngine Pro works pretty well out of the box. However, depending on your site’s design and functionality you may need to do a little work to make it work best for your users. Andy will walk you through the initial setup and implementation of ExpressionEngine Pro, as well as how to use template tags and tag parameters to make it work seamlessly with your site.
🎤 Presenter: Donata Skillrud, Termageddon, https://termageddon.com
📺 Description: Did you know that collecting as little as an email address via a website contact form may require you to comply with multiple privacy laws?
This presentation tackles three core concepts about privacy laws and why a Privacy Policy needs to make specific disclosures to comply with these laws.
Which websites need a Privacy Policy; Why Privacy Policies are important; Why you should be the one to talk to your clients about privacy.Did you know that collecting as little as an email address via a website contact form may require you to comply with multiple privacy laws?
This presentation tackles three core concepts about privacy laws and why a Privacy Policy needs to make specific disclosures to comply with these laws.
🎤 Presenter: Neil Williams, ZealousWeb, https://www.zealousweb.com/
📺 Description: What is digital accessibility and why is it important? How do you demonstrate the value of DA to a non-technical audience as part of a sales process and use it as part of our value proposition and as a key differentiator when pitching for project work.
🎤 Presenter: Yuri Salimovskiy, ExpressionEngine, https://expressionengine.com/
📺 Description: We’ll be going through using Cypress IO to test the functionality of your add-ons as well as the contributions to ExpressionEngine core. I will guide you through setting up a testing environment, wring the tests for Control Panel pages and front-end templates, as well as running the tests manually and automatically. This mini-workshop will consist of a presentation and Q&A session.
🎤 Presenter: Andy McCormick and Tom Jaeger, ExpressionEngine Team Members, https://www.expressionengine.com
This is a five-part series on how to build an ecommerce website in ExpressionEngine from scratch using the CartThrob add-on.
This walkthrough is in 5 parts, covering the following:
CartThrob is an ecommerce add-on we’ve used for many years, building sophisticated stores that integrate with ERPs, event ticketing sites, or even basic invoice payment forms. This series provides a foundation for building a CartThrob commerce website from scratch, covering field creation, channel configuration and assignment, payments, shipping, taxes and order notifications. A high-level overview of template tags is found in Part 5 of the walkthrough, along with a zip archive of the full example templates.
Disclaimer: This is a way to build a CartThrob store, not the way. The power of CartThrob is in how it extends ExpressionEngine. You can bring your ExpressionEngine skills to bear and simply extend into commerce.
Acknowledgements: These example templates, and the general configuration covered in this walkthrough are developed by Greg Crane from store builds for our clients.
Introducing our demo store, FakeBowling.shop!
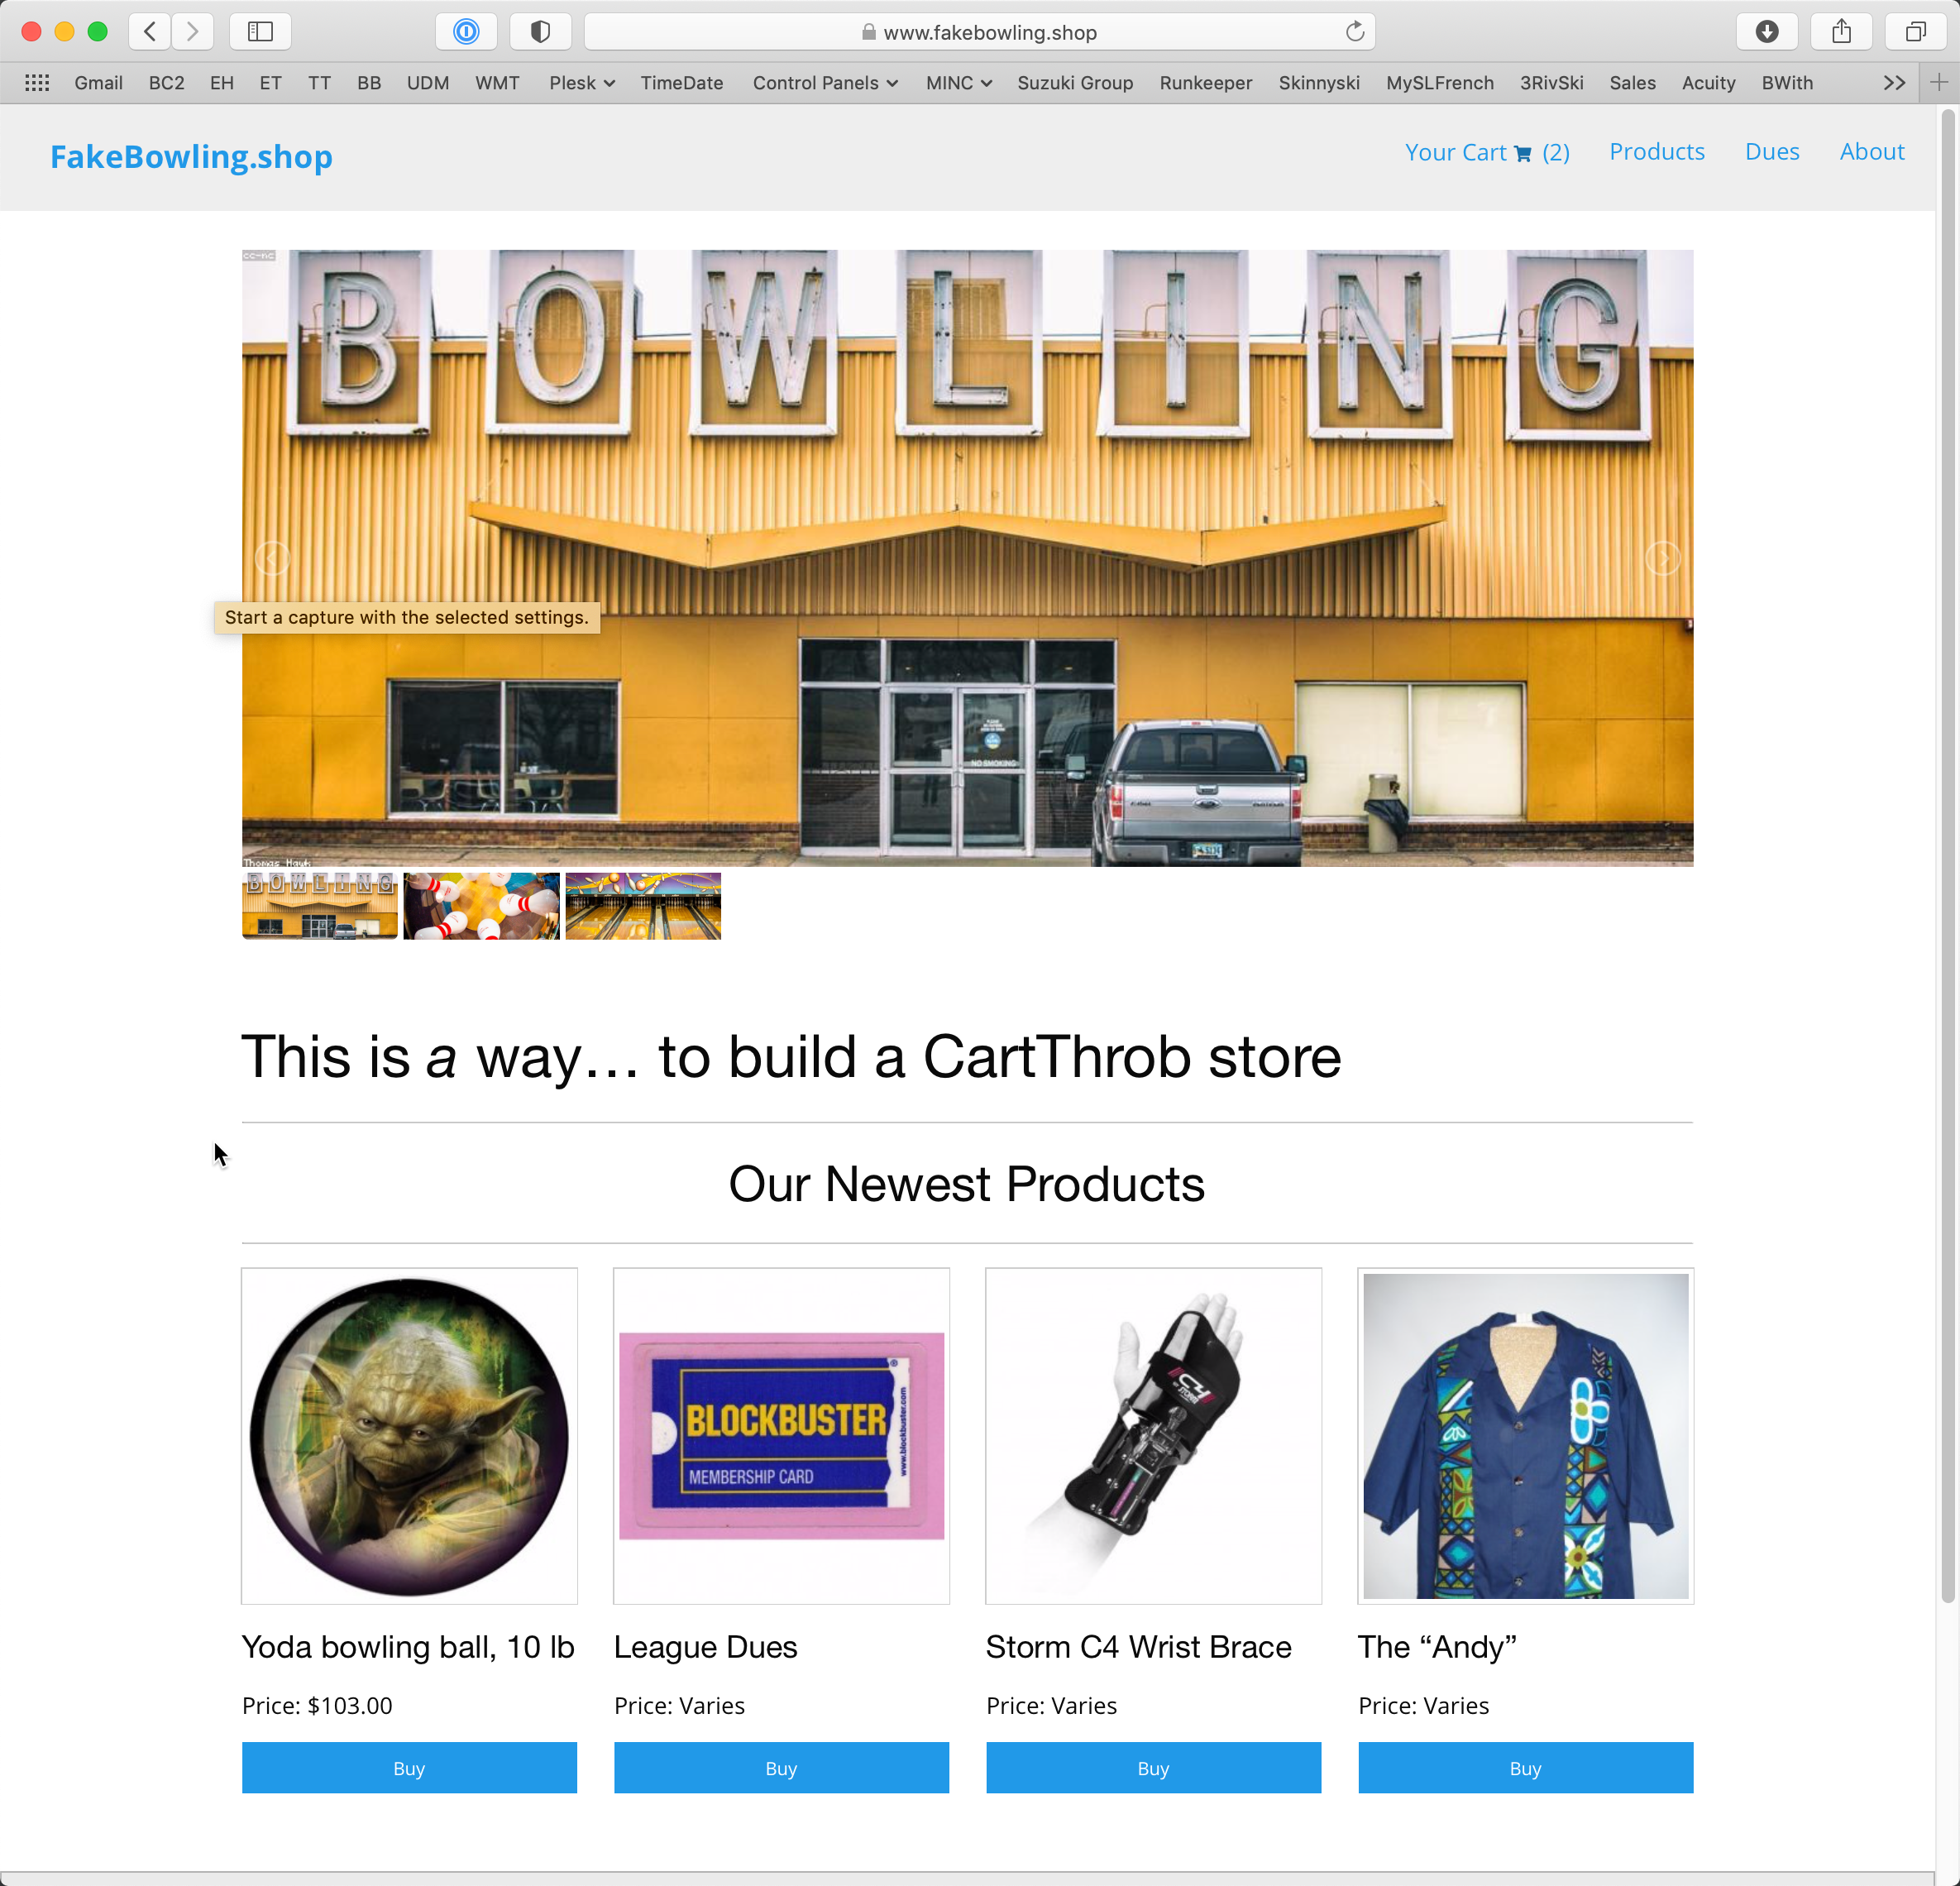
As you might have guessed, our chosen demonstration store is one that sells bowling accessories. Such a store would likely have Simple Products such as a bowling ball, or Optioned Products such as a shirt with size options, or Virtual Products such as League dues where shipping and weight don’t apply.
This is a speed run starting from an existing ExpressionEngine website; our journey begins just after the CartThrob add-on has been installed but none of the configuration has been completed. Two basic channels exist in our ExpressionEngine site for this example: {simple_products} and {optioned_products}.
Let’s get started!
We’re going to create our simple product fields and then review how those appear on the front end, then configure CartThrob so it knows about that simple product channel. Within the Fields menu, you’ll see we already created field groups for our Simple and Optioned products, but for now we’re going to focus on the Simple Product Field group.
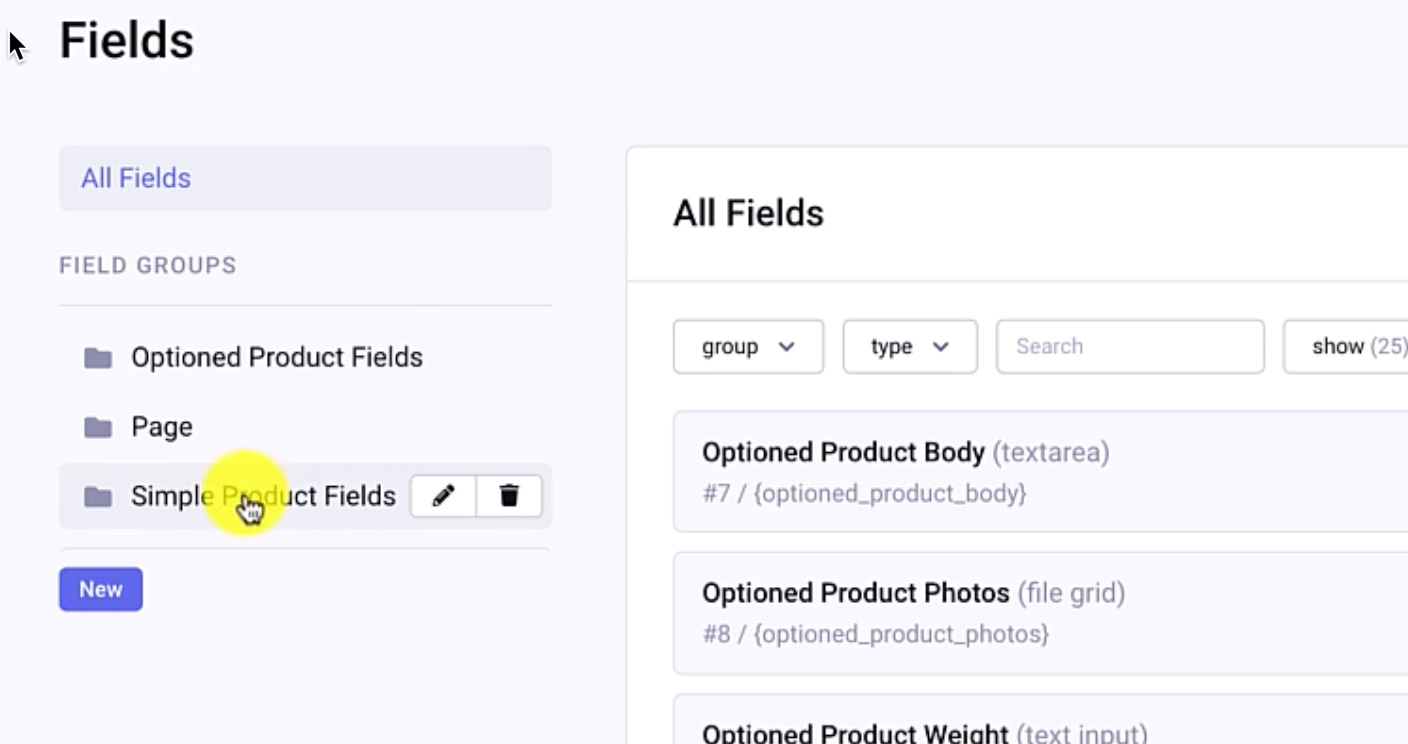
The first field we need to add is the price. Create a new field within this field group; use the field type “CartThrob - Simple”. I’ll call this Simple Product Price , {simple_product_price}, making it required.

The next field is the Quantity, or the Inventory Tracking field, and this can just be text input with “Integer” as the Allowed Content setting. In our case we used {simple_product_inventory}.
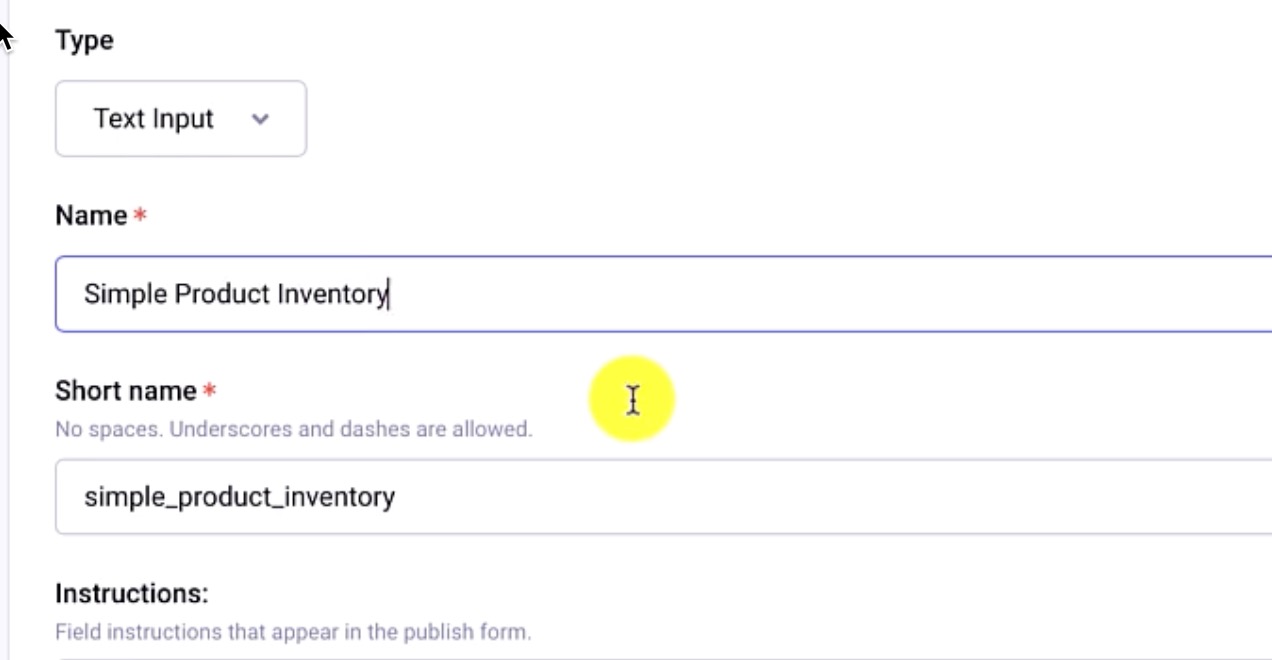
The third field to create is a Text input field, named {simple_product_weight} with Number set for Allowed Content.
We have three demo products in our store (two bowling balls and one accessory). Note that Products within CartThrob are simply ExpressionEngine channel entries: everything you’re accustomed to from a standard ExpressionEngine website applies; we are simply introducing CartThrob field types.
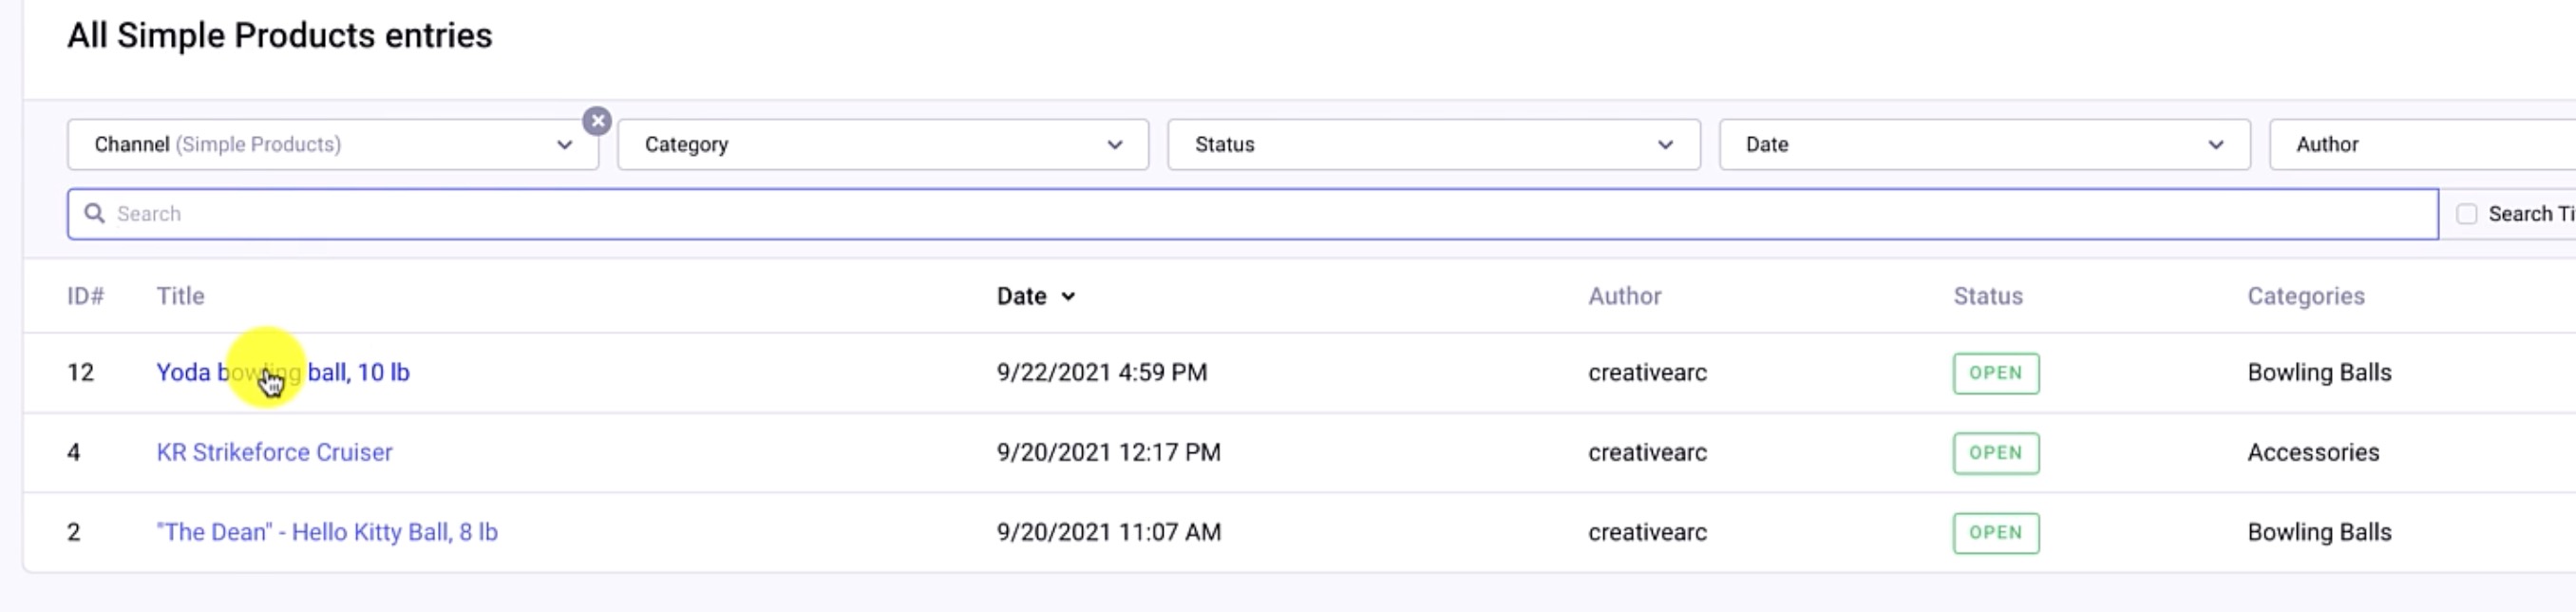
Let’s look at one test product entry as an example (8-pound Hello Kitty ball). We already have the photo and the body and the SKU in there, but I’ll just give this a price of $53 and a quantity of 98 in stock.
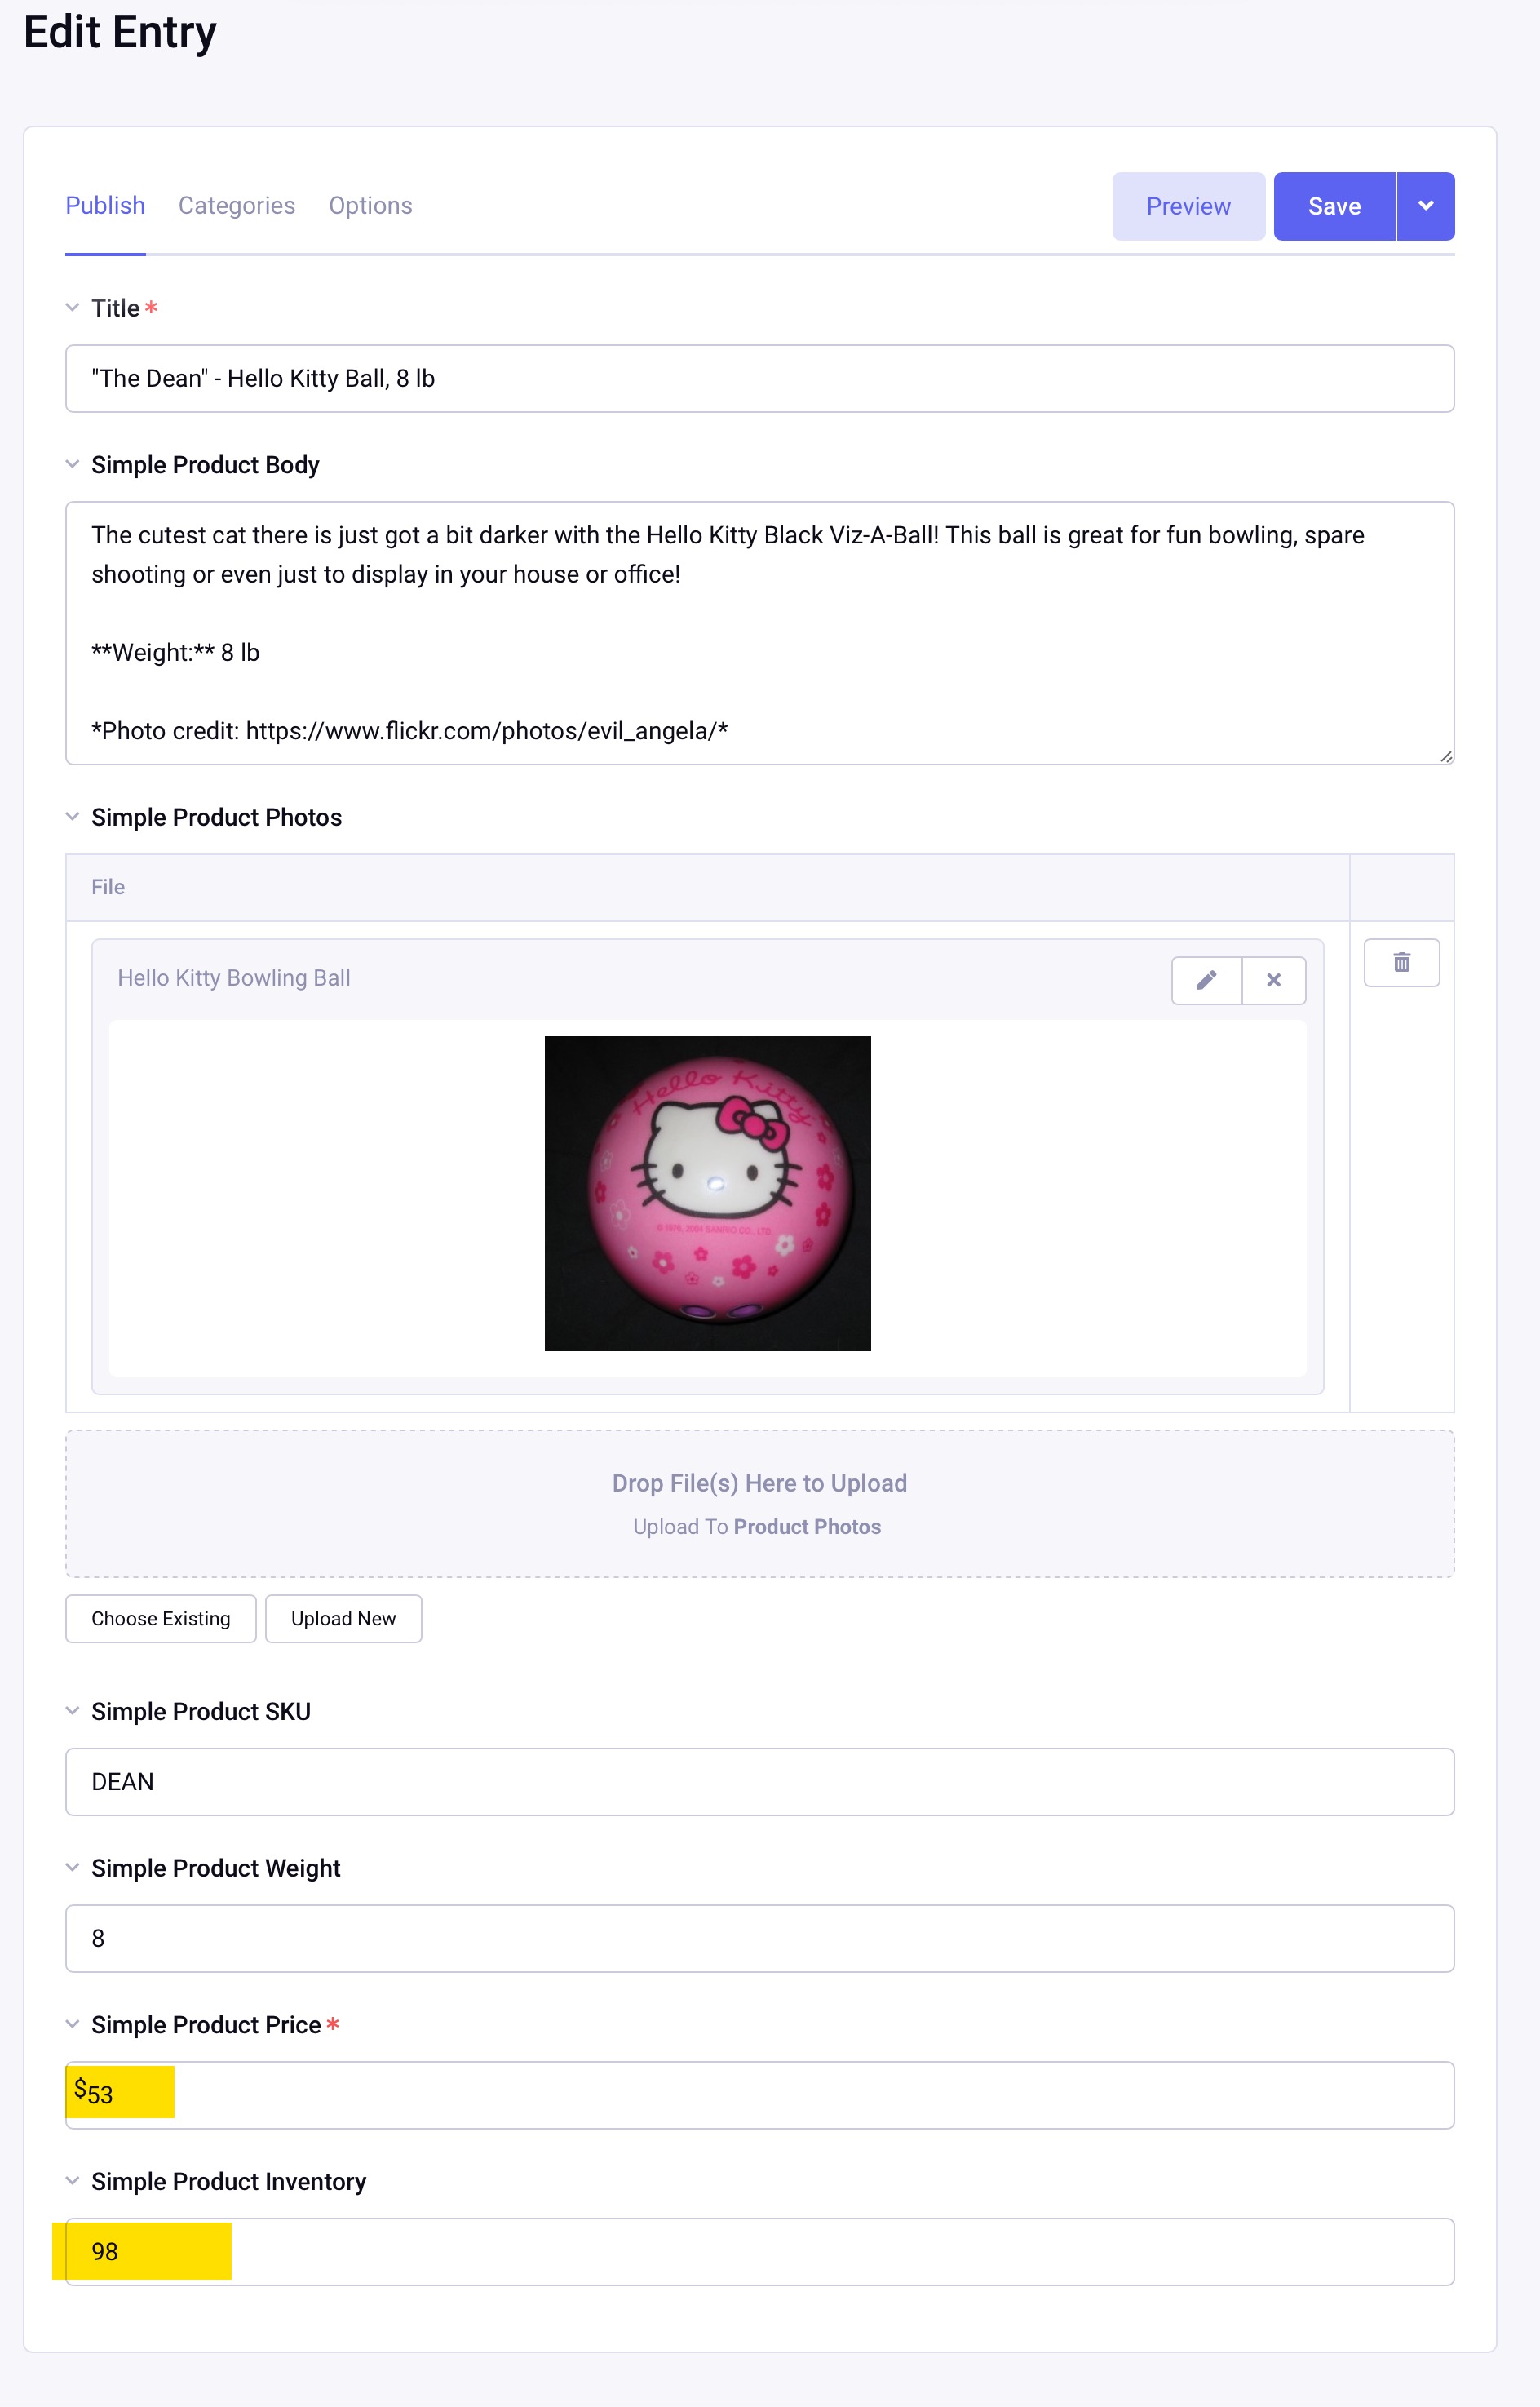
Following suit, the Yoda ball is $103 with a Inventory of 5, followed by the Bag Roller product, priced at $80 and a quantity of 60.
A quick peek at one of these items on the frontend:

Now, we can go to the CartThrob add-on within the ExpressionEngine backend, which at the moment doesn’t know this channel exists. From the Products tab, we’ll assign the channel Simple Products. Our Price Field name is the Simple Product Price, the weight field name is Simple Product Weight and the quantity field is Simple Product Inventory.
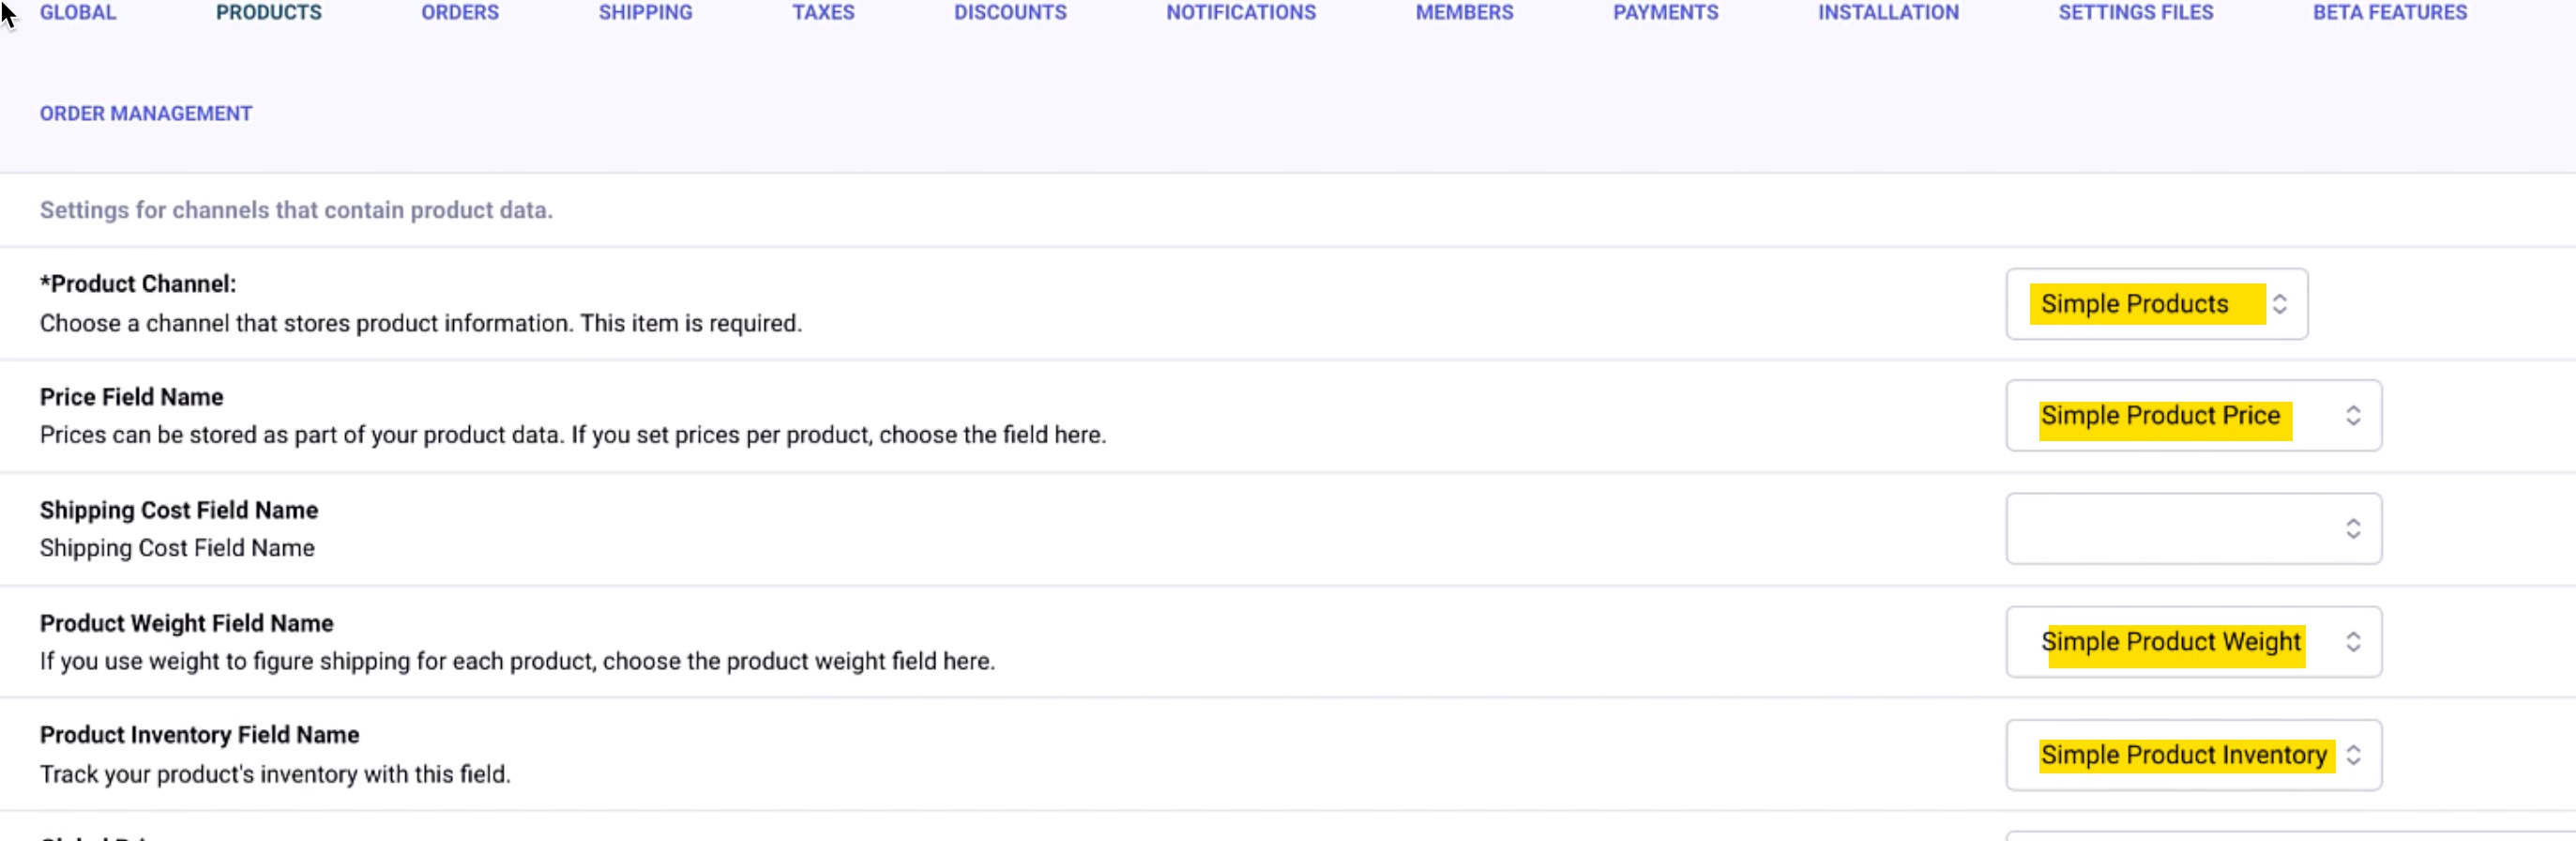
So now CartThrob knows that products are coming from that channel, and it knows which fields to use for the pricing and for the shipping/weight calculations. On to Optioned Products!
So we have the basics of the simple product configured and populated. Now we have our more complicated Optioned products that are in a different channel, and just as we did for the Simple products, we have to make some fields, populate the products, and then configure CartThrob to use the appropriate channel and fields. As a reminder, Optioned products refer to T-shirt with sizes of small, medium, and large, for example.
The CartThrob price modifier field
Returning to the Fields menu, navigate to the Optioned Product Field Group. Create a new field of type CartThrob price modifier. The name of my field is simply “Options,” with a Short name of {optioned_product_options}. Note: On the frontend, the name of the field (Options) is what’s going to display next to the dropdown with the options, shirt sizes and colors, for example.
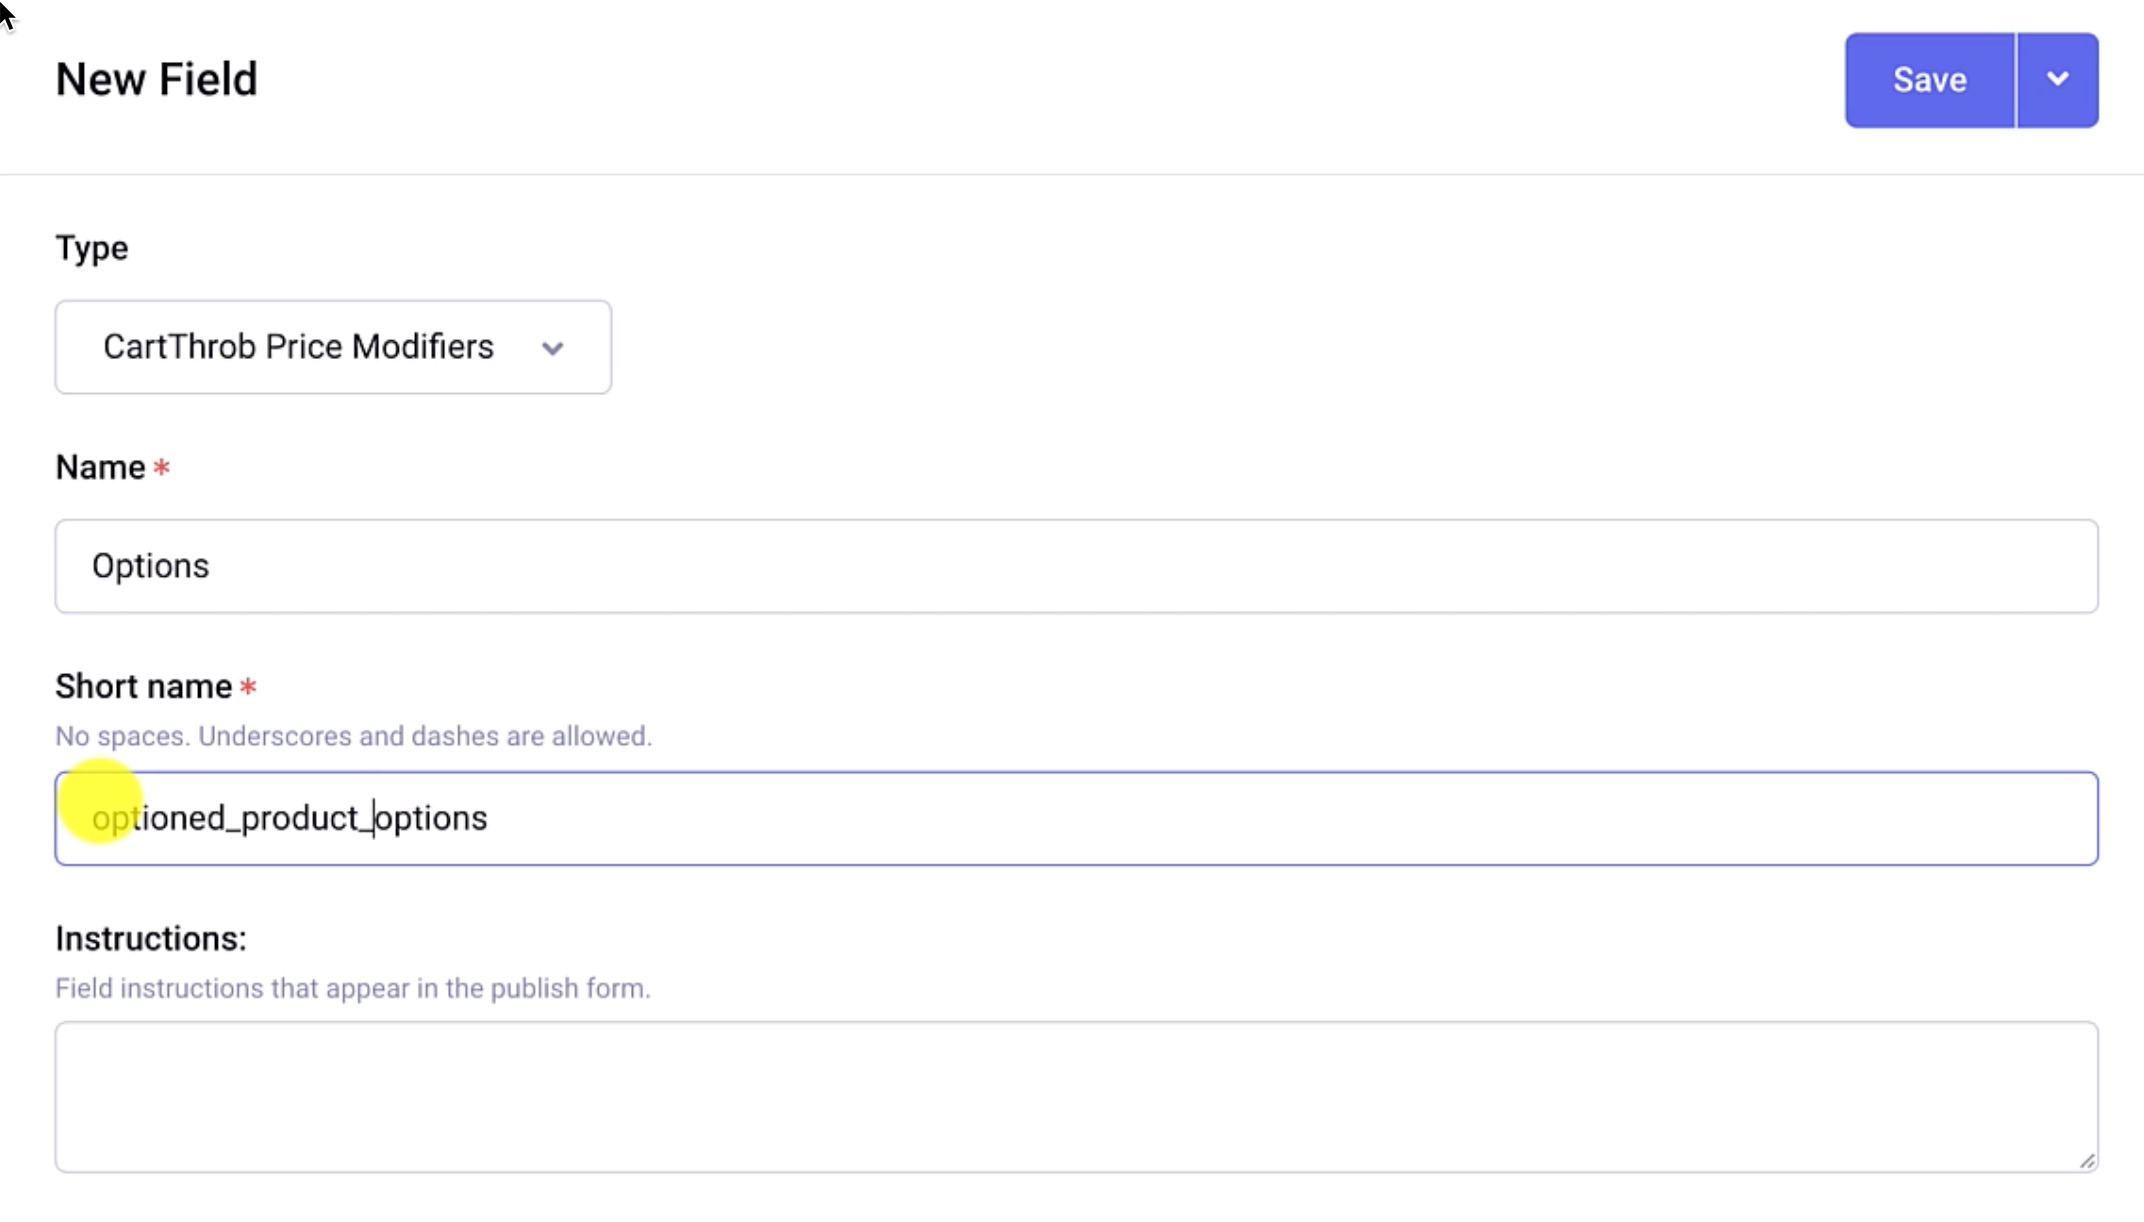
Next, we’ll make a basic Text input field {optioned_product_weight} with Number as the Allowed Content setting.
Add Product Options to Entry
Go to “Edit” menu and bring up our Optioned Product channel. We’ll use our Shirt product (The Andy) as an example.
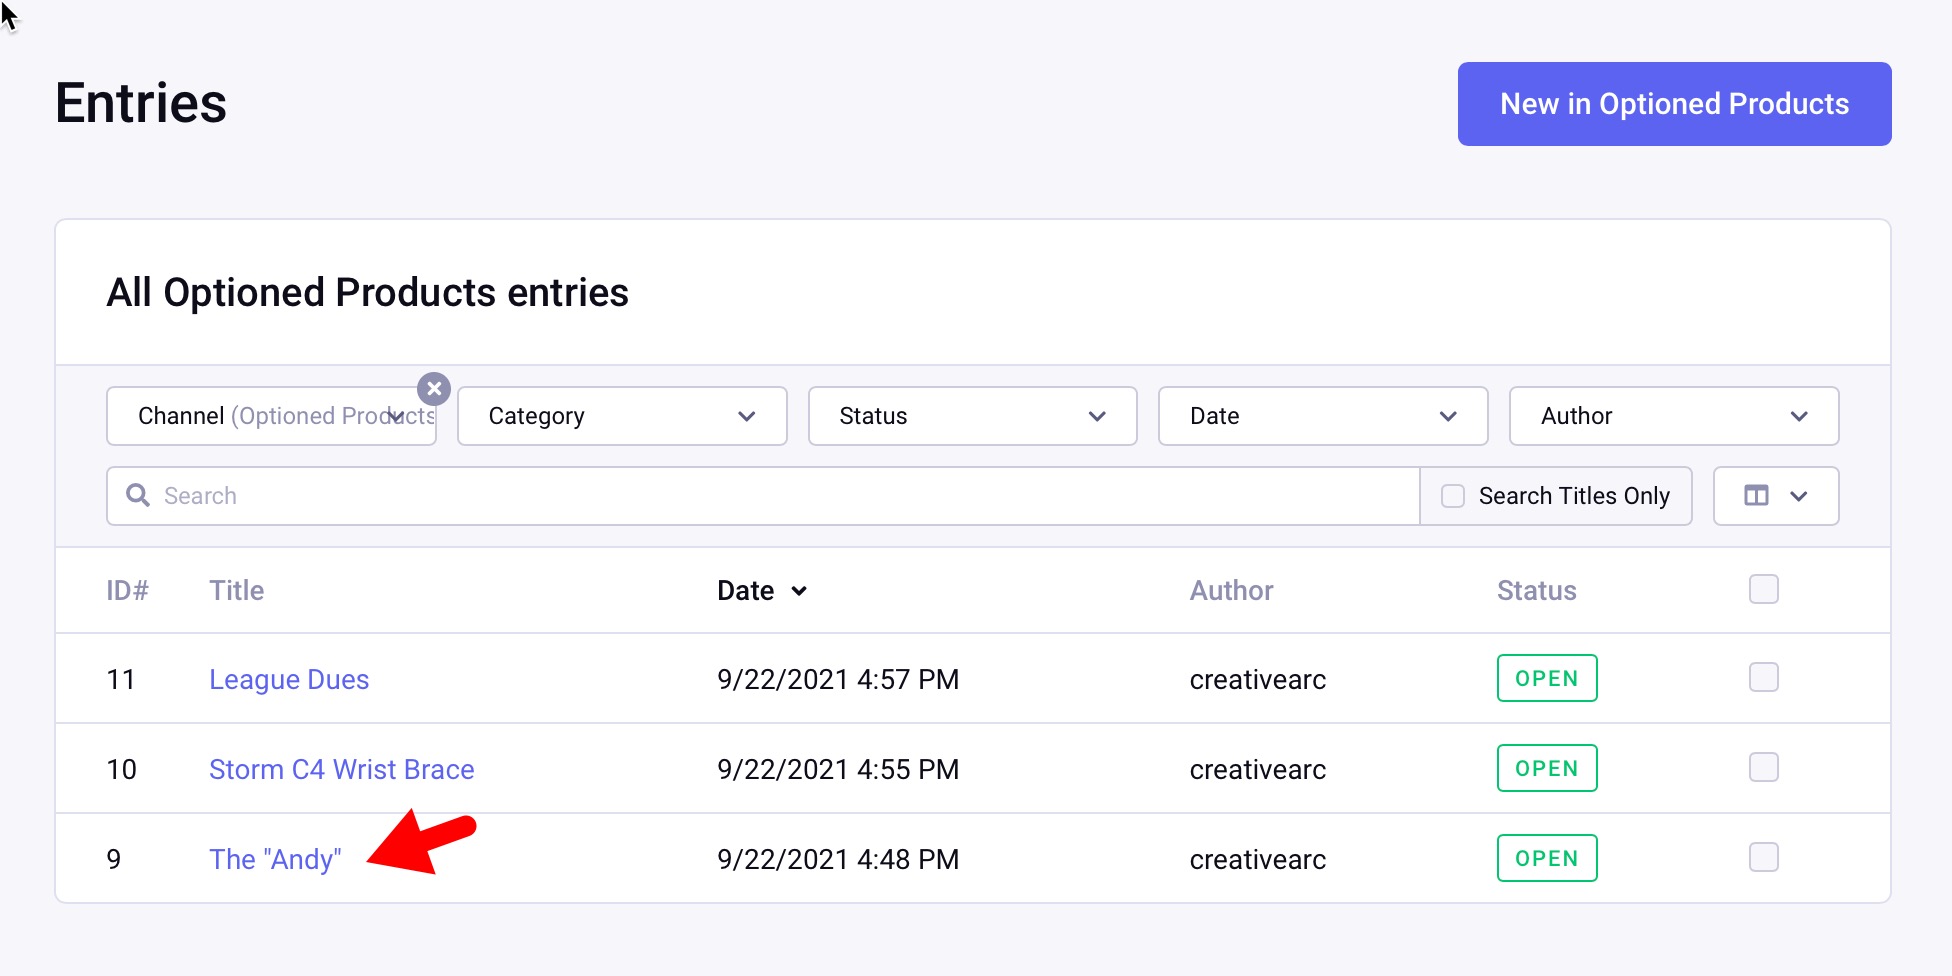
As we scroll down that product entry page, we’ll see our blank CartThrob Price Modifier field with default columns of Option Short Name, Option Label, and Price.
Next, a detail that is easy to miss the first time you do it: we can add additional columns; in our case, Inventory and SKU. (We’re making the assumption that the option prices here are what the customer will see on the frontend. Another option is to have a separate base price for which the price modifiers would add or subtract the prices from that base price). For this example, though, there is no base price, and the Option price is what the customer will see in their cart.
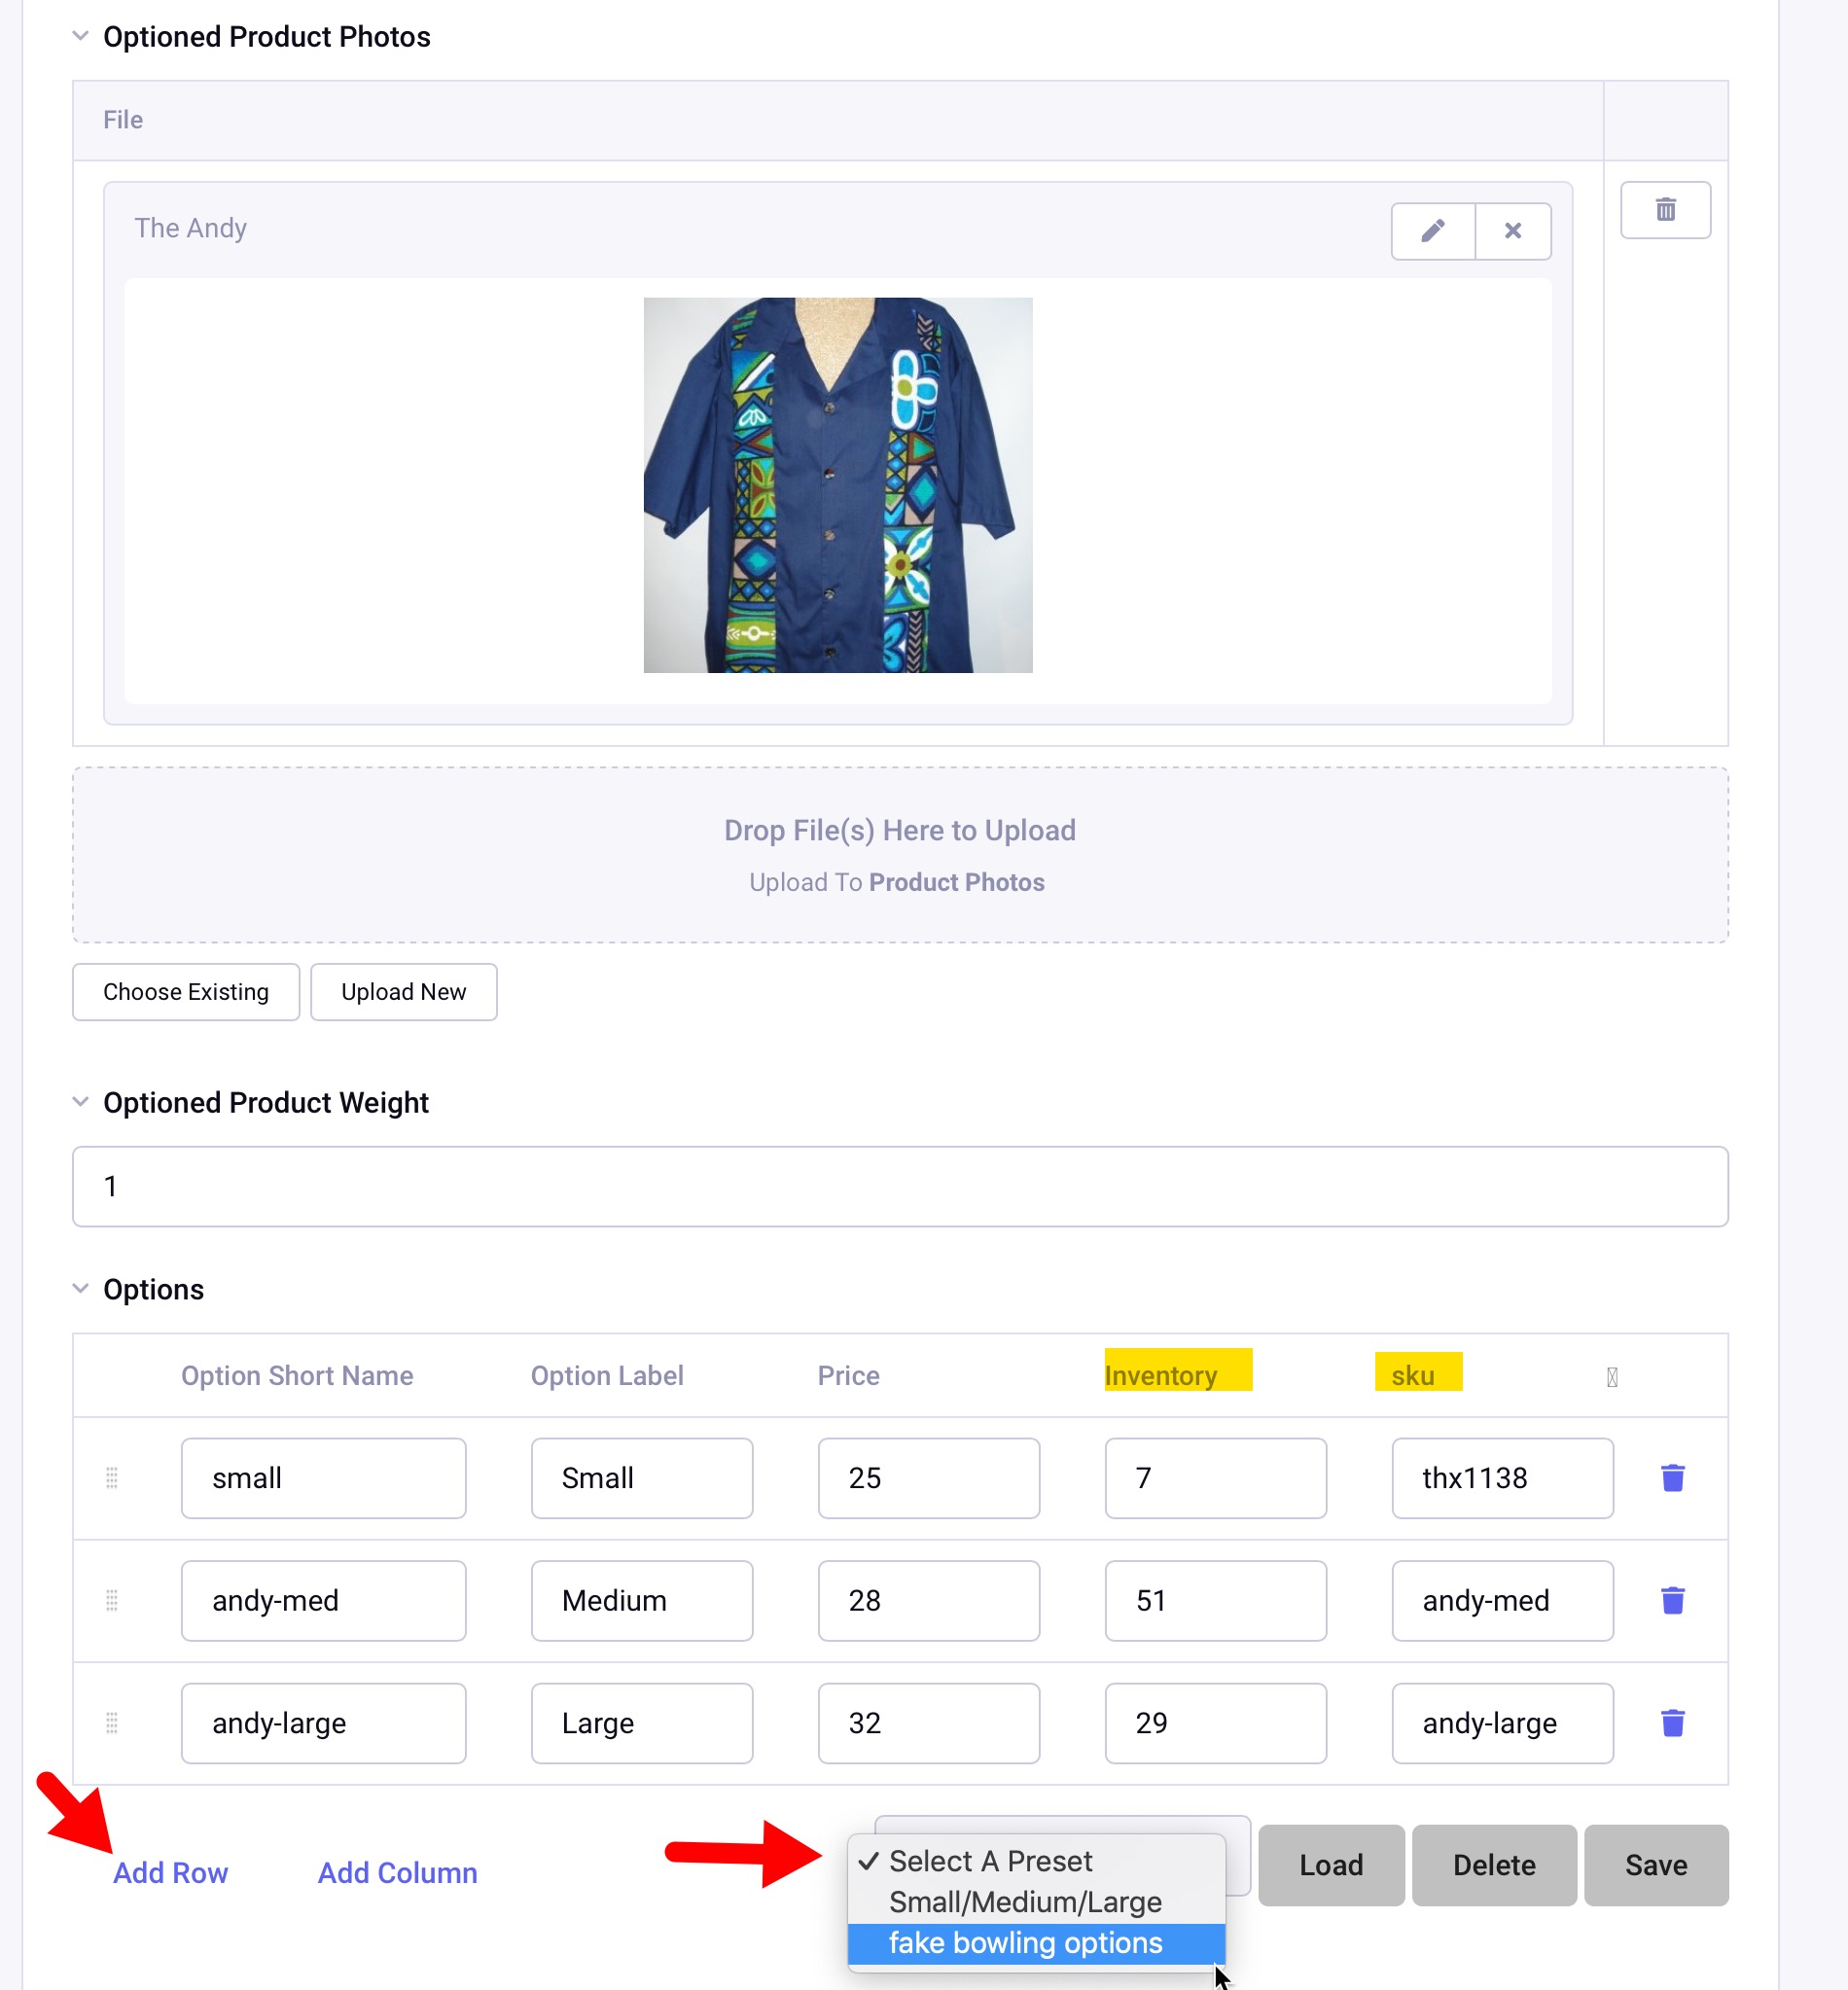
Sizes (Options) have been added: Small, Medium, and Large with their associated price, inventory, and SKU.
Note: Within the Options (CartThrob Price Modifier field), the “Save” action is for the Preset, you’ll need to save the Entry afterwards. The preset makes data entry easier as you add more products.
Setup Optioned Product Channel within CartThrob
CartThrob doesn’t know this “Optioned Products” channel exists yet, so we’ll head back to the CartThrob add-on, “Products” tab. You’ll see our simple products are still there but we’re going to add another channel (click “Add Another Channel”). We’ll choose Optioned Products with the settings below:
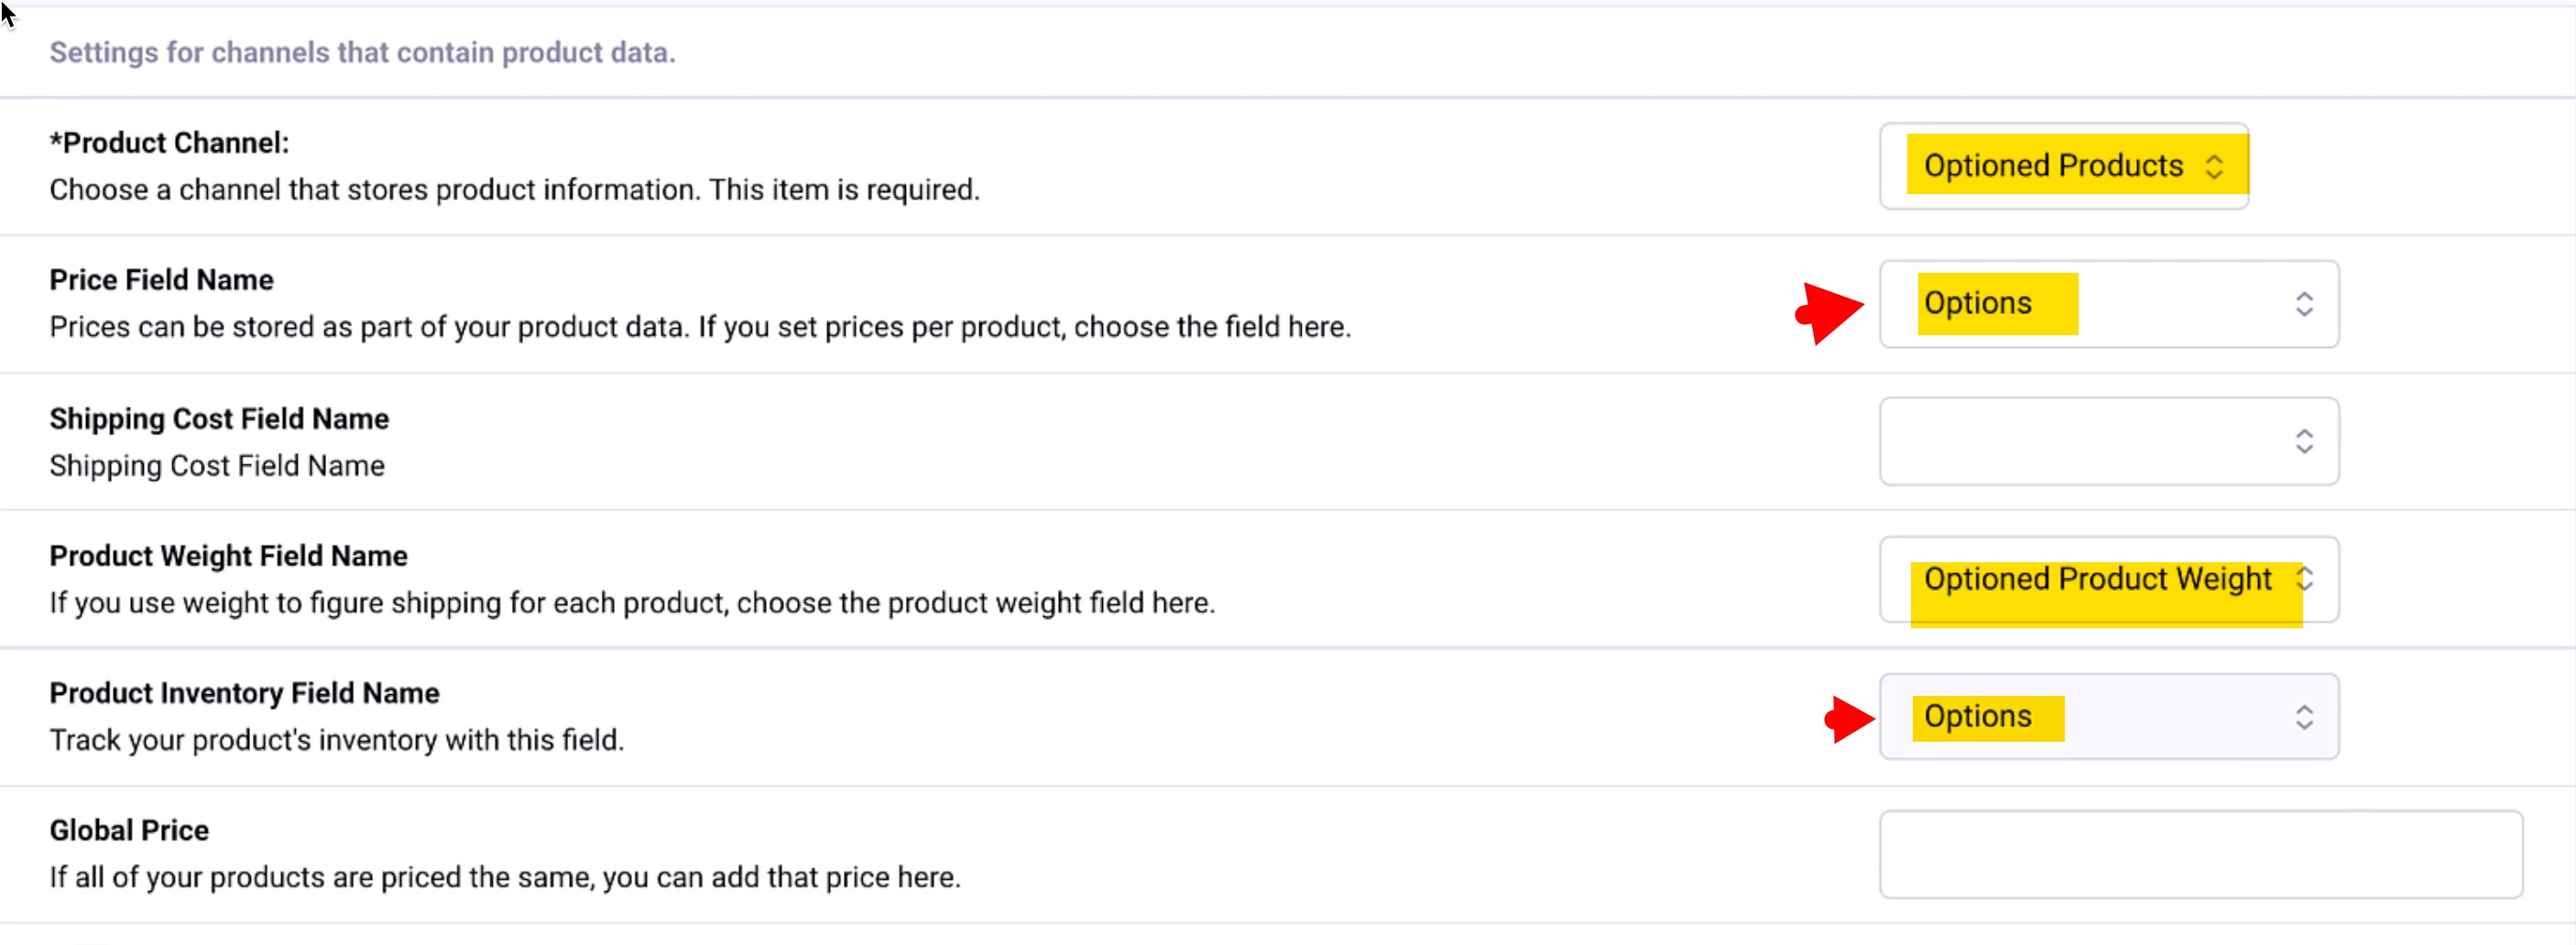
So far so good! Now we have to save by clicking Submit at the bottom of the page. We should be ready to move on.
We now have our products created, both the simple and the optioned products. Upon adding the Yoda bowling ball to the cart, it’s good to see it has the proper line-item cost and then a subtotal cost. Updating the cart to a quantity of 2, for example, properly adjusts the subtotal and listed quantity.

Next, we add the Andy product, size Medium, to the cart.
Both simple and optioned products are together in the same cart with a proper subtotal, all responding to quantity changes by clicking “Update Cart.”
We have the basics of the cart working in terms of the product information and calculations. Next, we’ll continue and configure CartThrob to handle the orders.
Have questions or comments about this course? Be sure to join the discussion and post in the ExpressionEngine Forums!
Back in the ExpressionEngine backend, go to the CartThrob add-on, and then the “Installation” tab. (We’re not going to Orders Tab which would be the logical next step)
Of these available installation options, we actually skip most of them because we’re starting with pretty basic templates that we’ve created. Our store is not really complicated enough for Packages or Discounts channels. Instead, we will only choose Store - Orders and then Store - Coupon Codes channels. (Remember, our FakeBowling.shop ExpressionEngine site already had a Products channel) If you’re curious, Store - Purchased items would be used to if you want to show “Customers Also Bought..” on a product page, which is a cool feature.
We are not installing any templates, as we already have those completed.
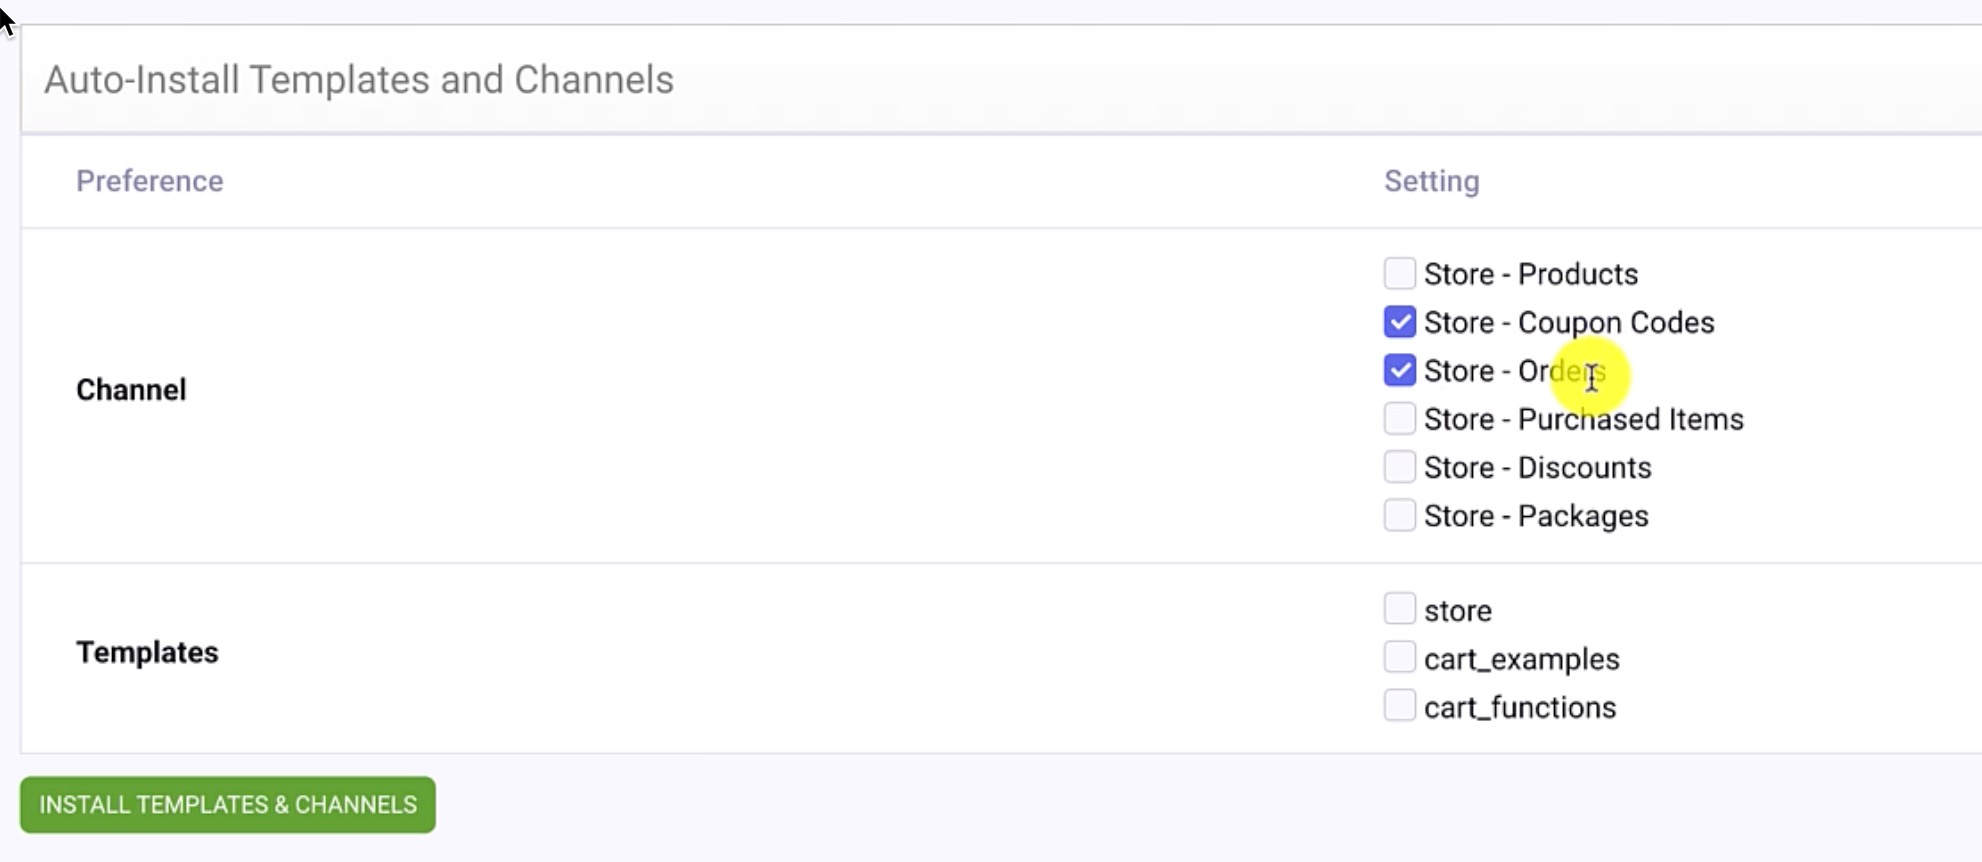
Click Install Templates & Channels.
Navigate to the Channels menu, and you’ll hopefully see that the two new channels were created.
Now, head back to CartThrob, navigate to the Orders tab, and this one’s sort of settle. You have to first click your order channel, Store - Orders, and then be sure to select “Yes” for “Save completed orders to a channel?”
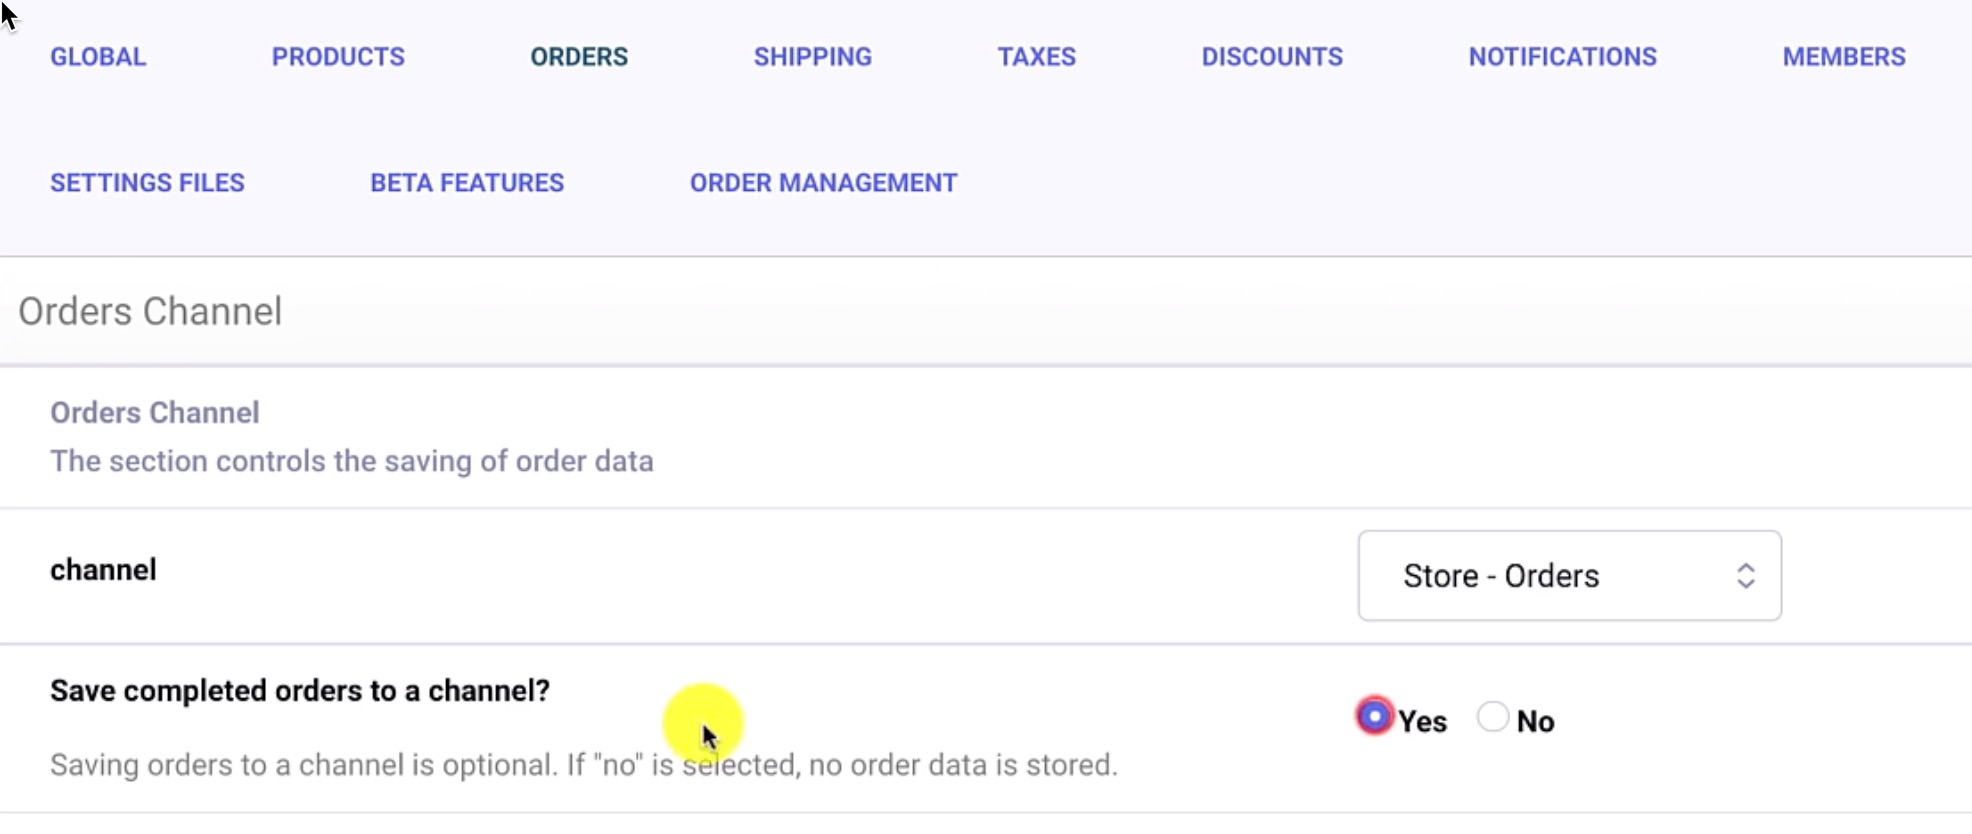
Upon submitting these changes, we should see statuses that need to be assigned. Scroll down to the Order Status section and map each status accordingly.
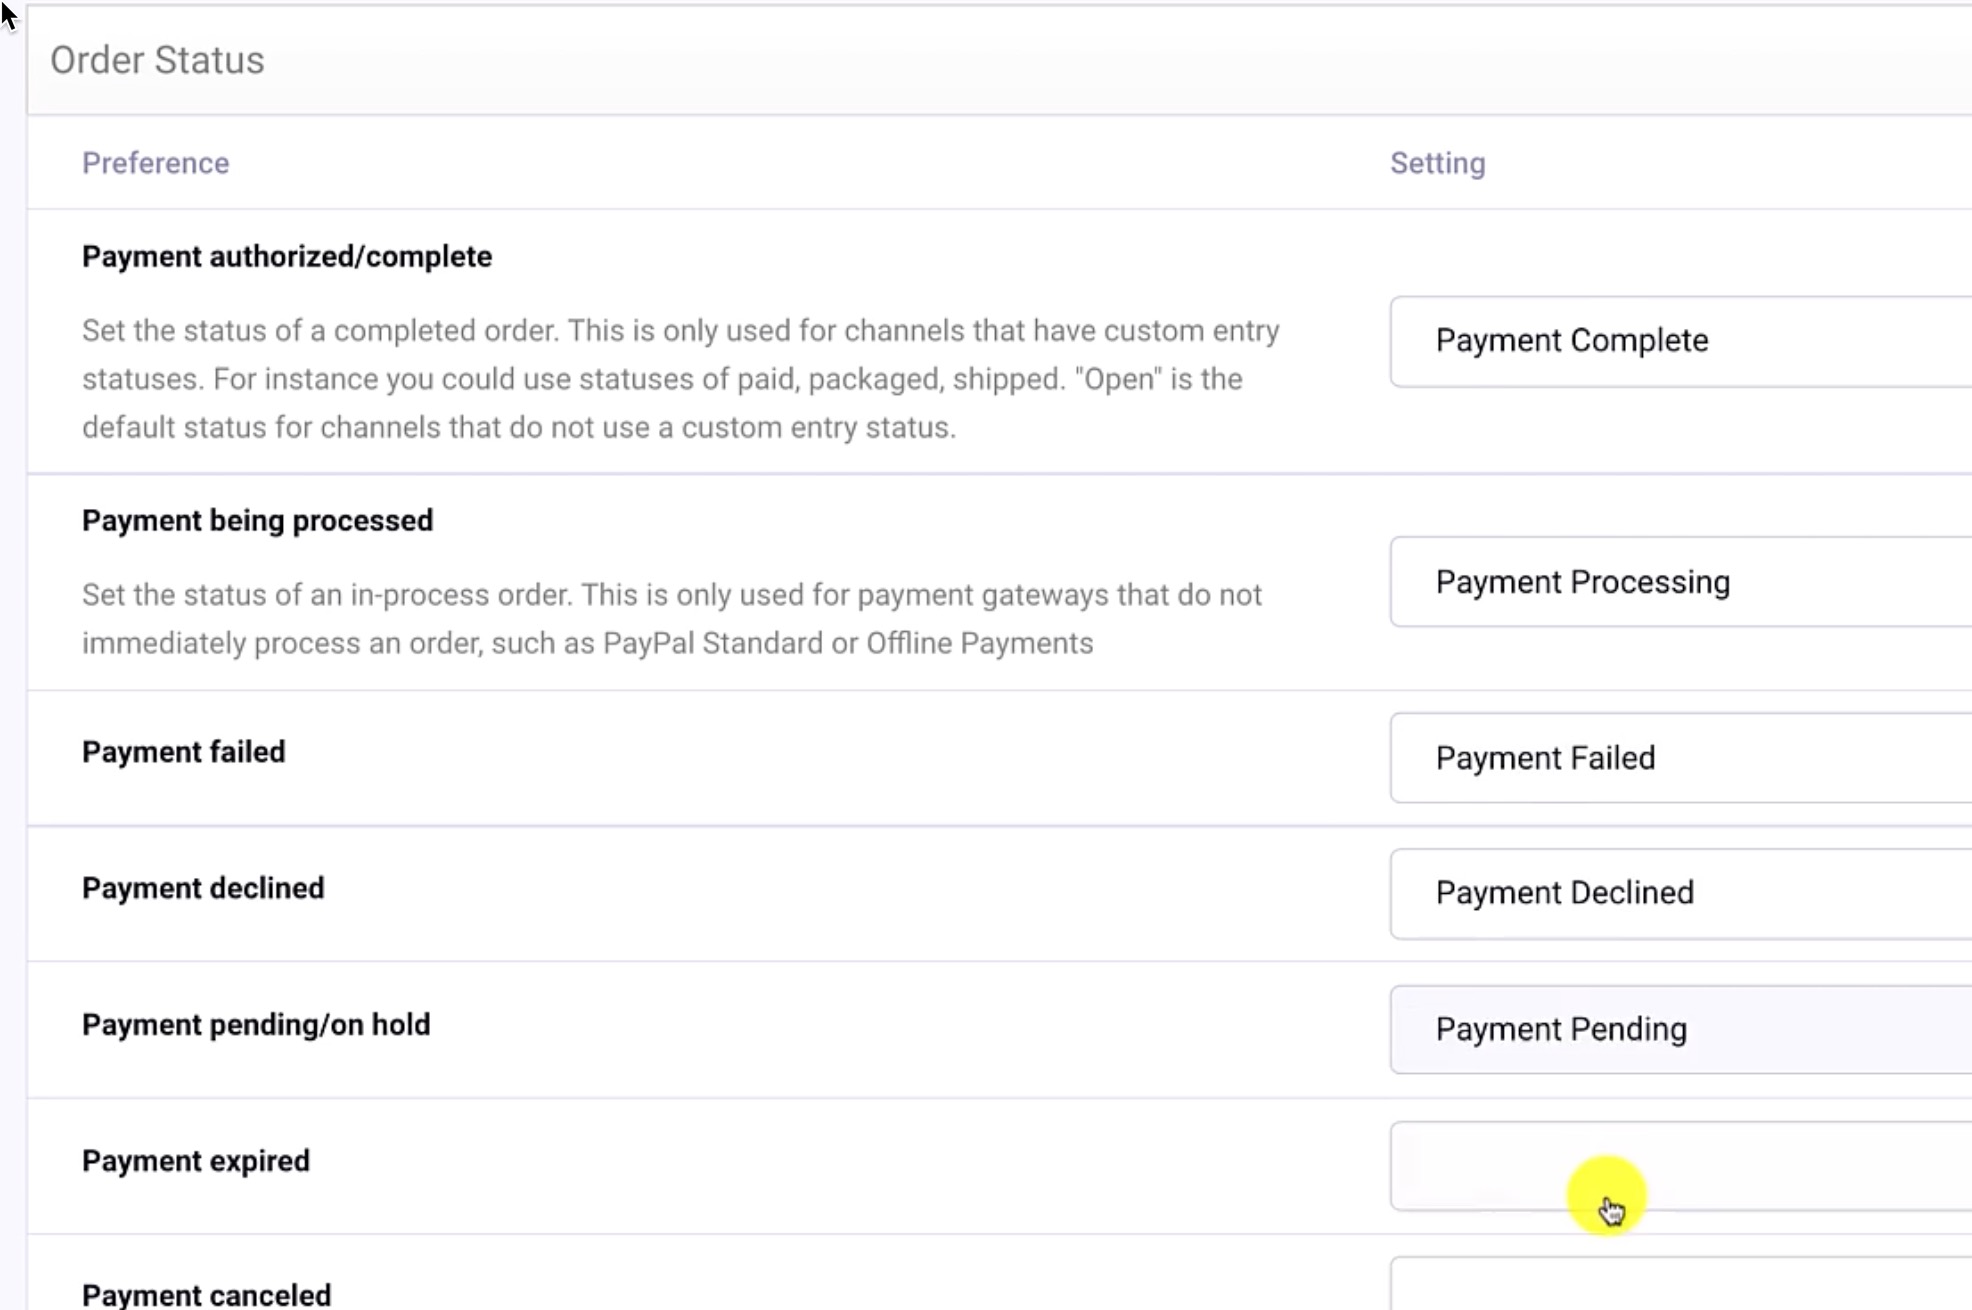
We’ll follow suit with Order Data Fields. (this one takes a while!)
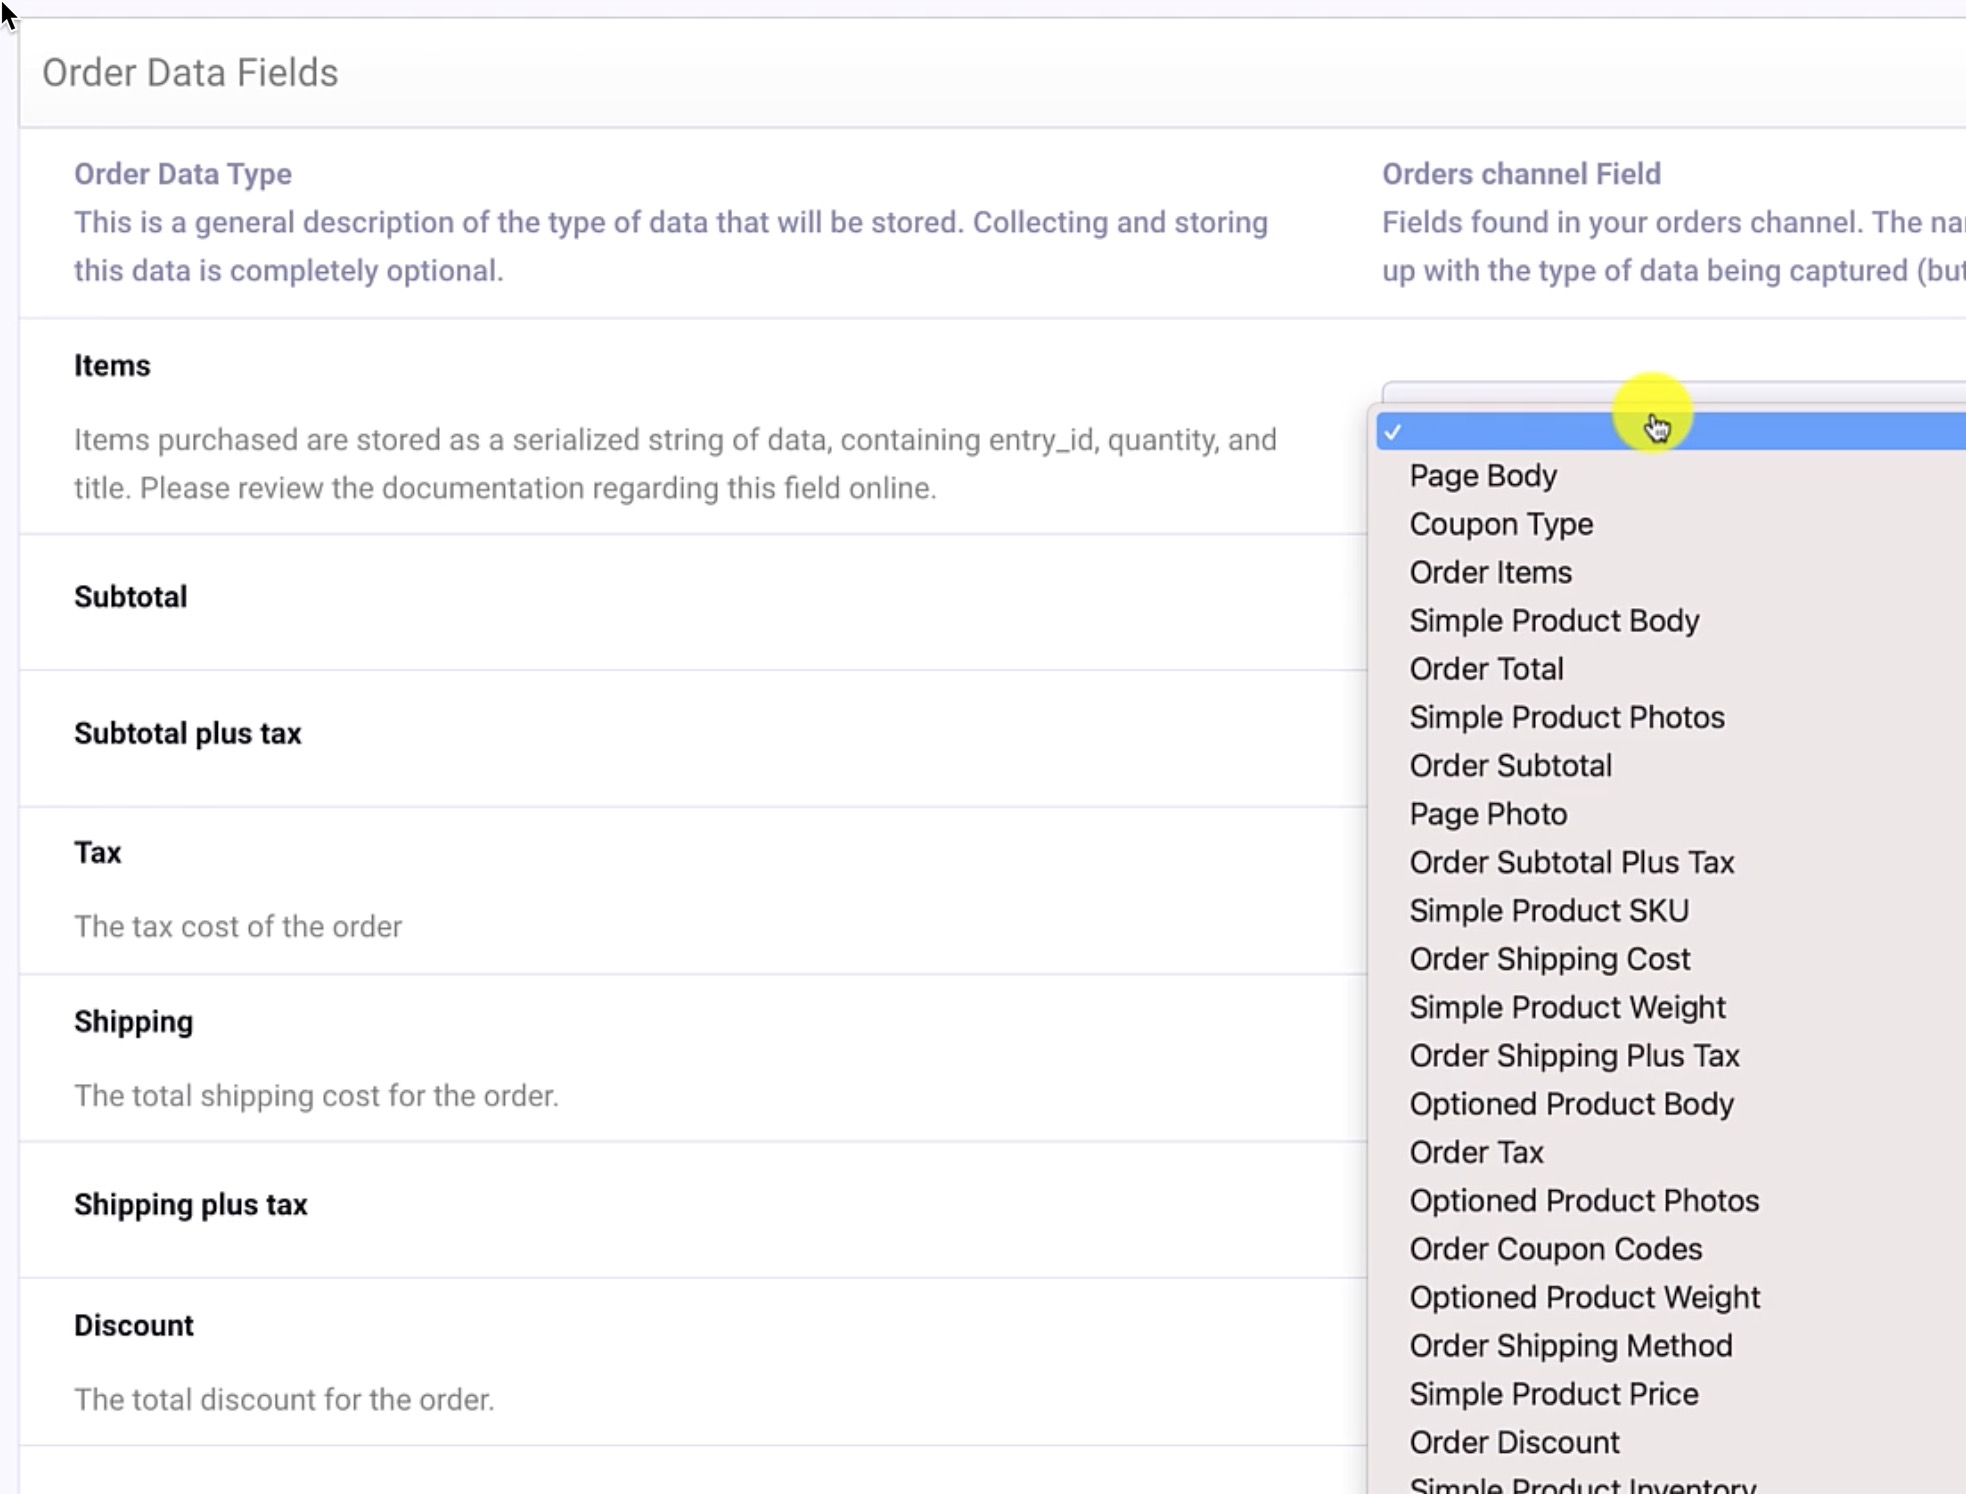
Now CartThrob knows about our Orders channel and its Status and Data fields.
Next, we’re going to make some fields to store coupon codes. In the Fields menu, there’s now a field group called Coupon Codes with a default field {coupon_code_type}. We’re going to supplement this with two more fields of our own.
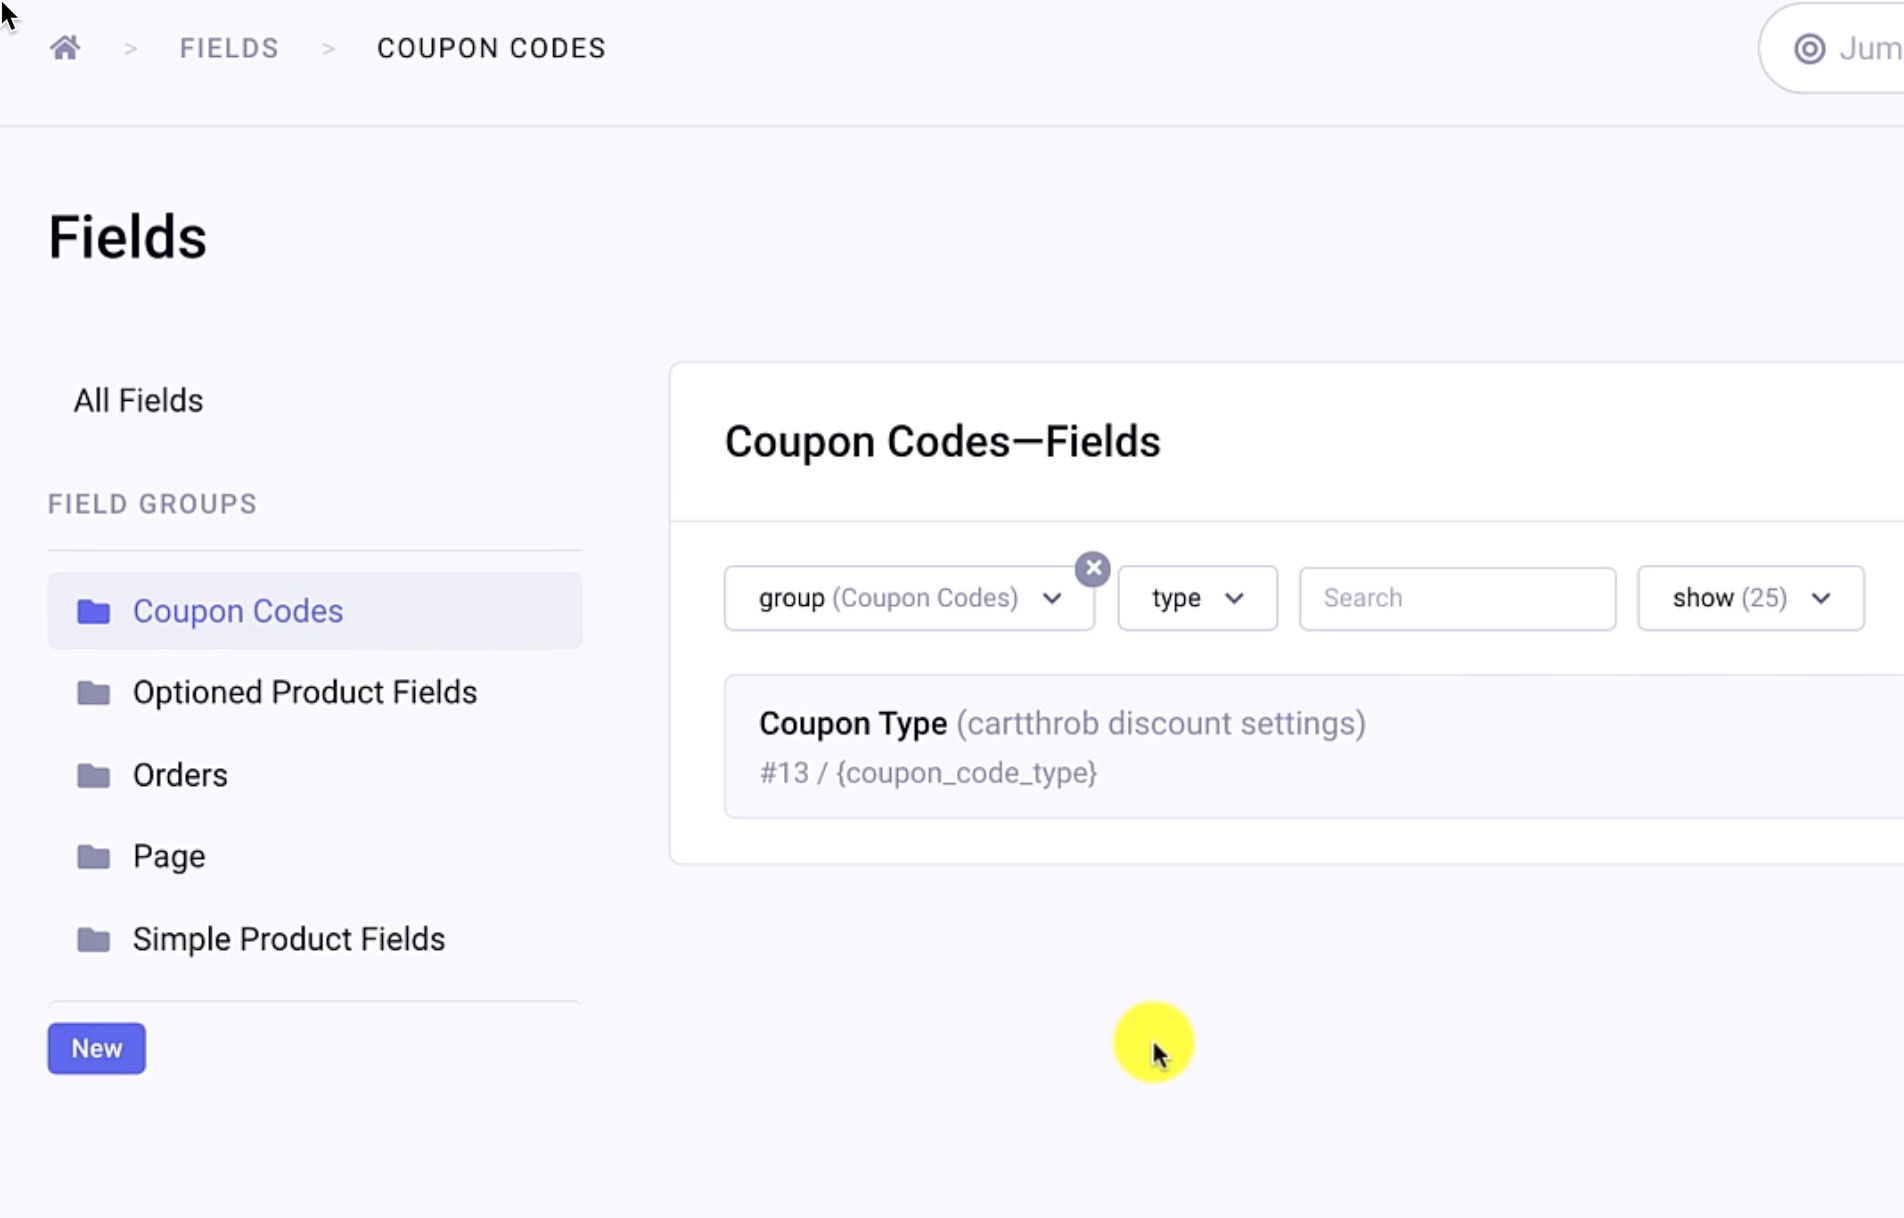
Add a text input field, we’ll call it just “Coupon Code”, shortname {coupon_code}. This will be the field that we put the actual code the customer would type in on the cart page, e.g. “Black Friday” coupon.
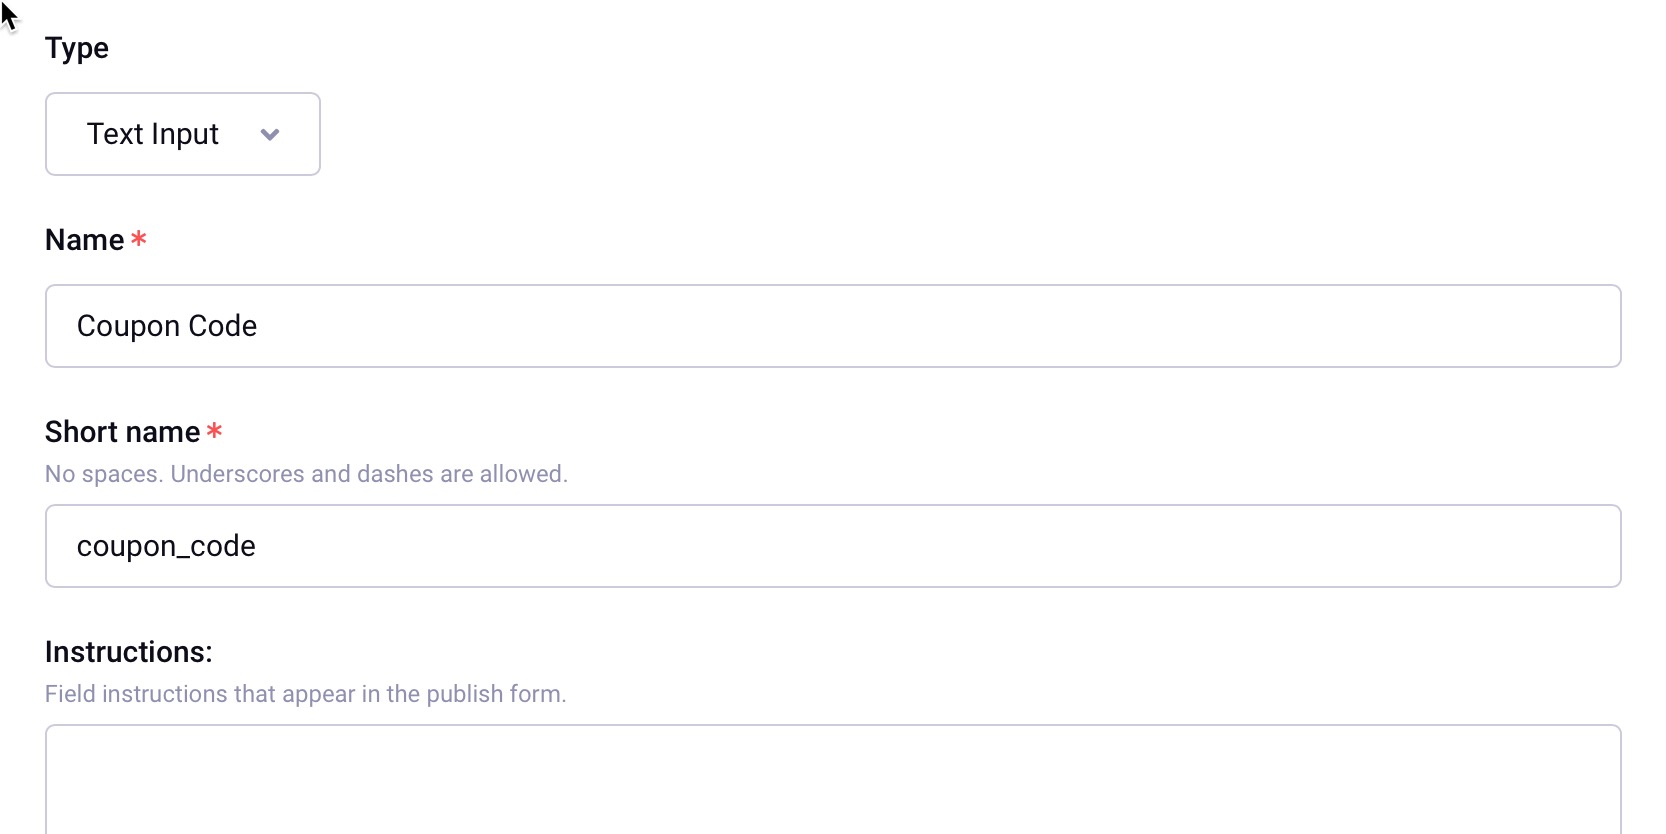
Follow up by creating another text field as the {coupon_description}. This field would be for a frontend display, such as, “You now have a 10% off your order” to display in the cart.
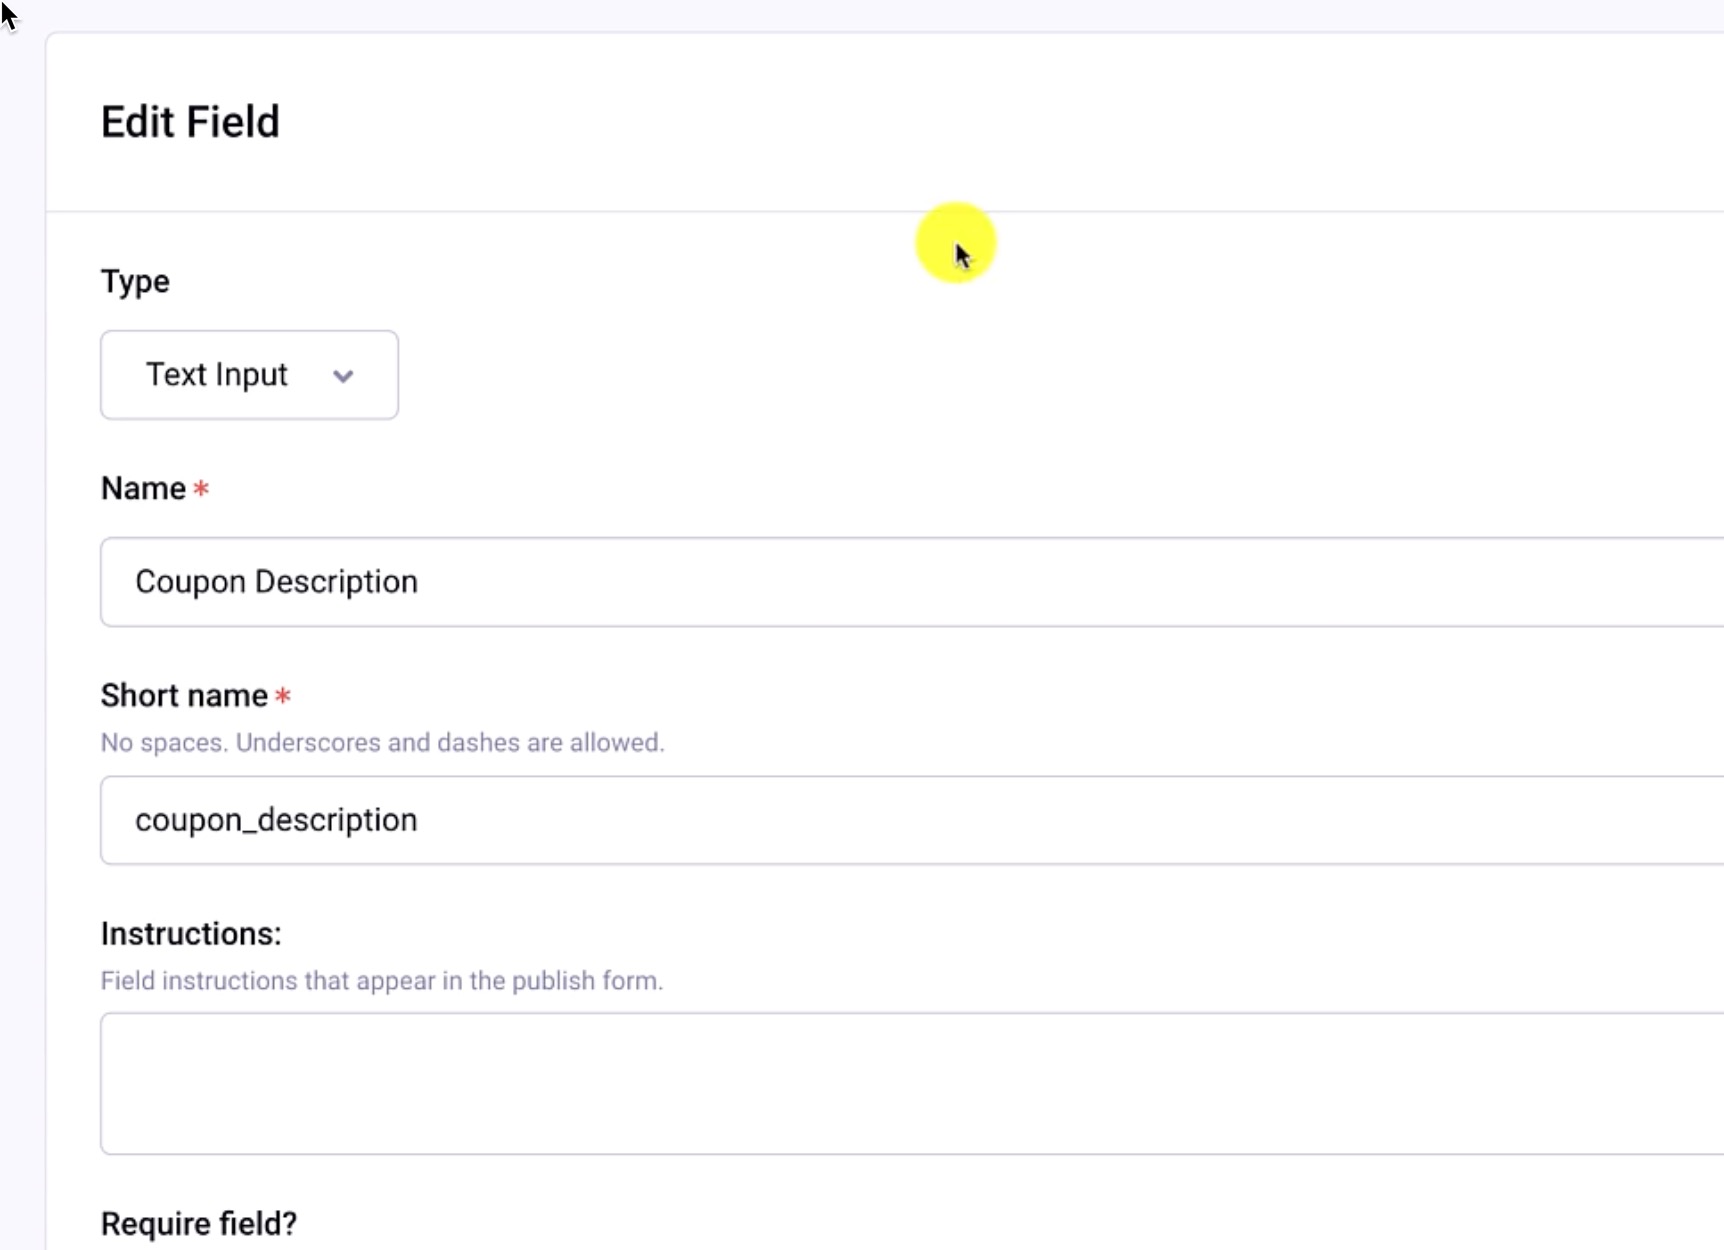
With the discount fields created, it’s back CartThrob settings and then the Discounts tab. Our fields haven’t yet been assigned to the new channel, so we’ll add that setting and click Submit.
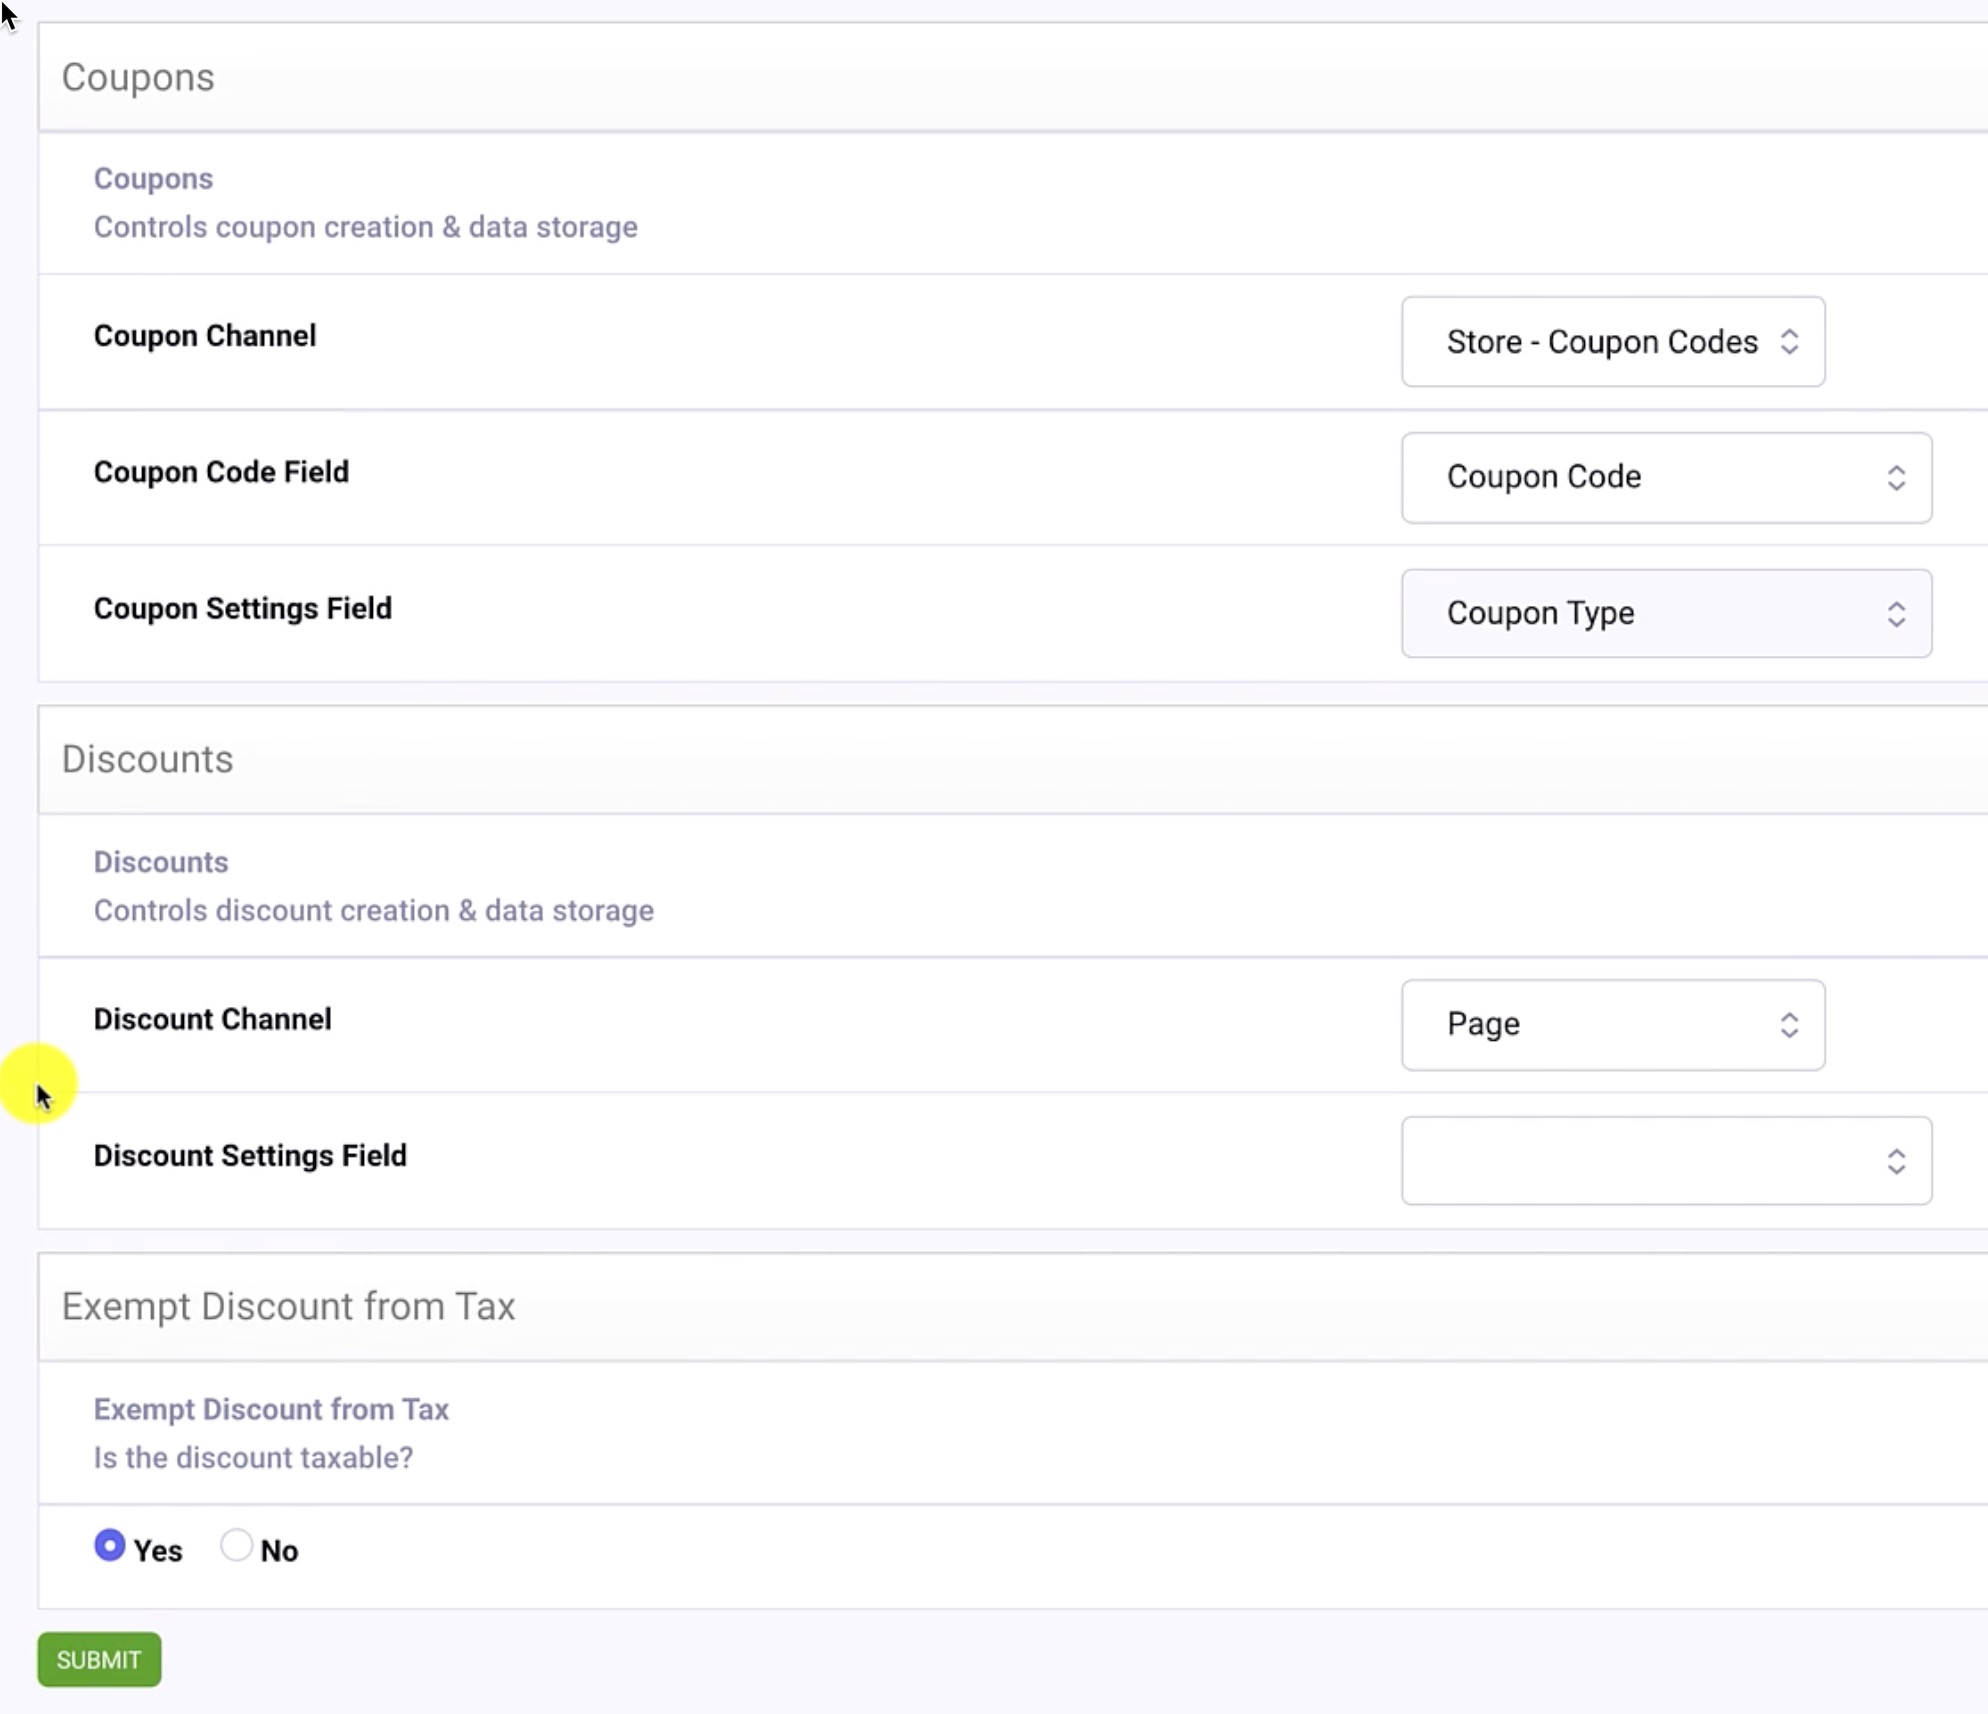
Now we are ready to make a coupon code entry within the Store - Coupon Codes channel. Our title is “Ten Percent Off EE CONF Special,” a Type of “Percentage Off,” and Percentage Off value of 10. And finally, a Coupon Code of “abc123” and a Coupon Description.
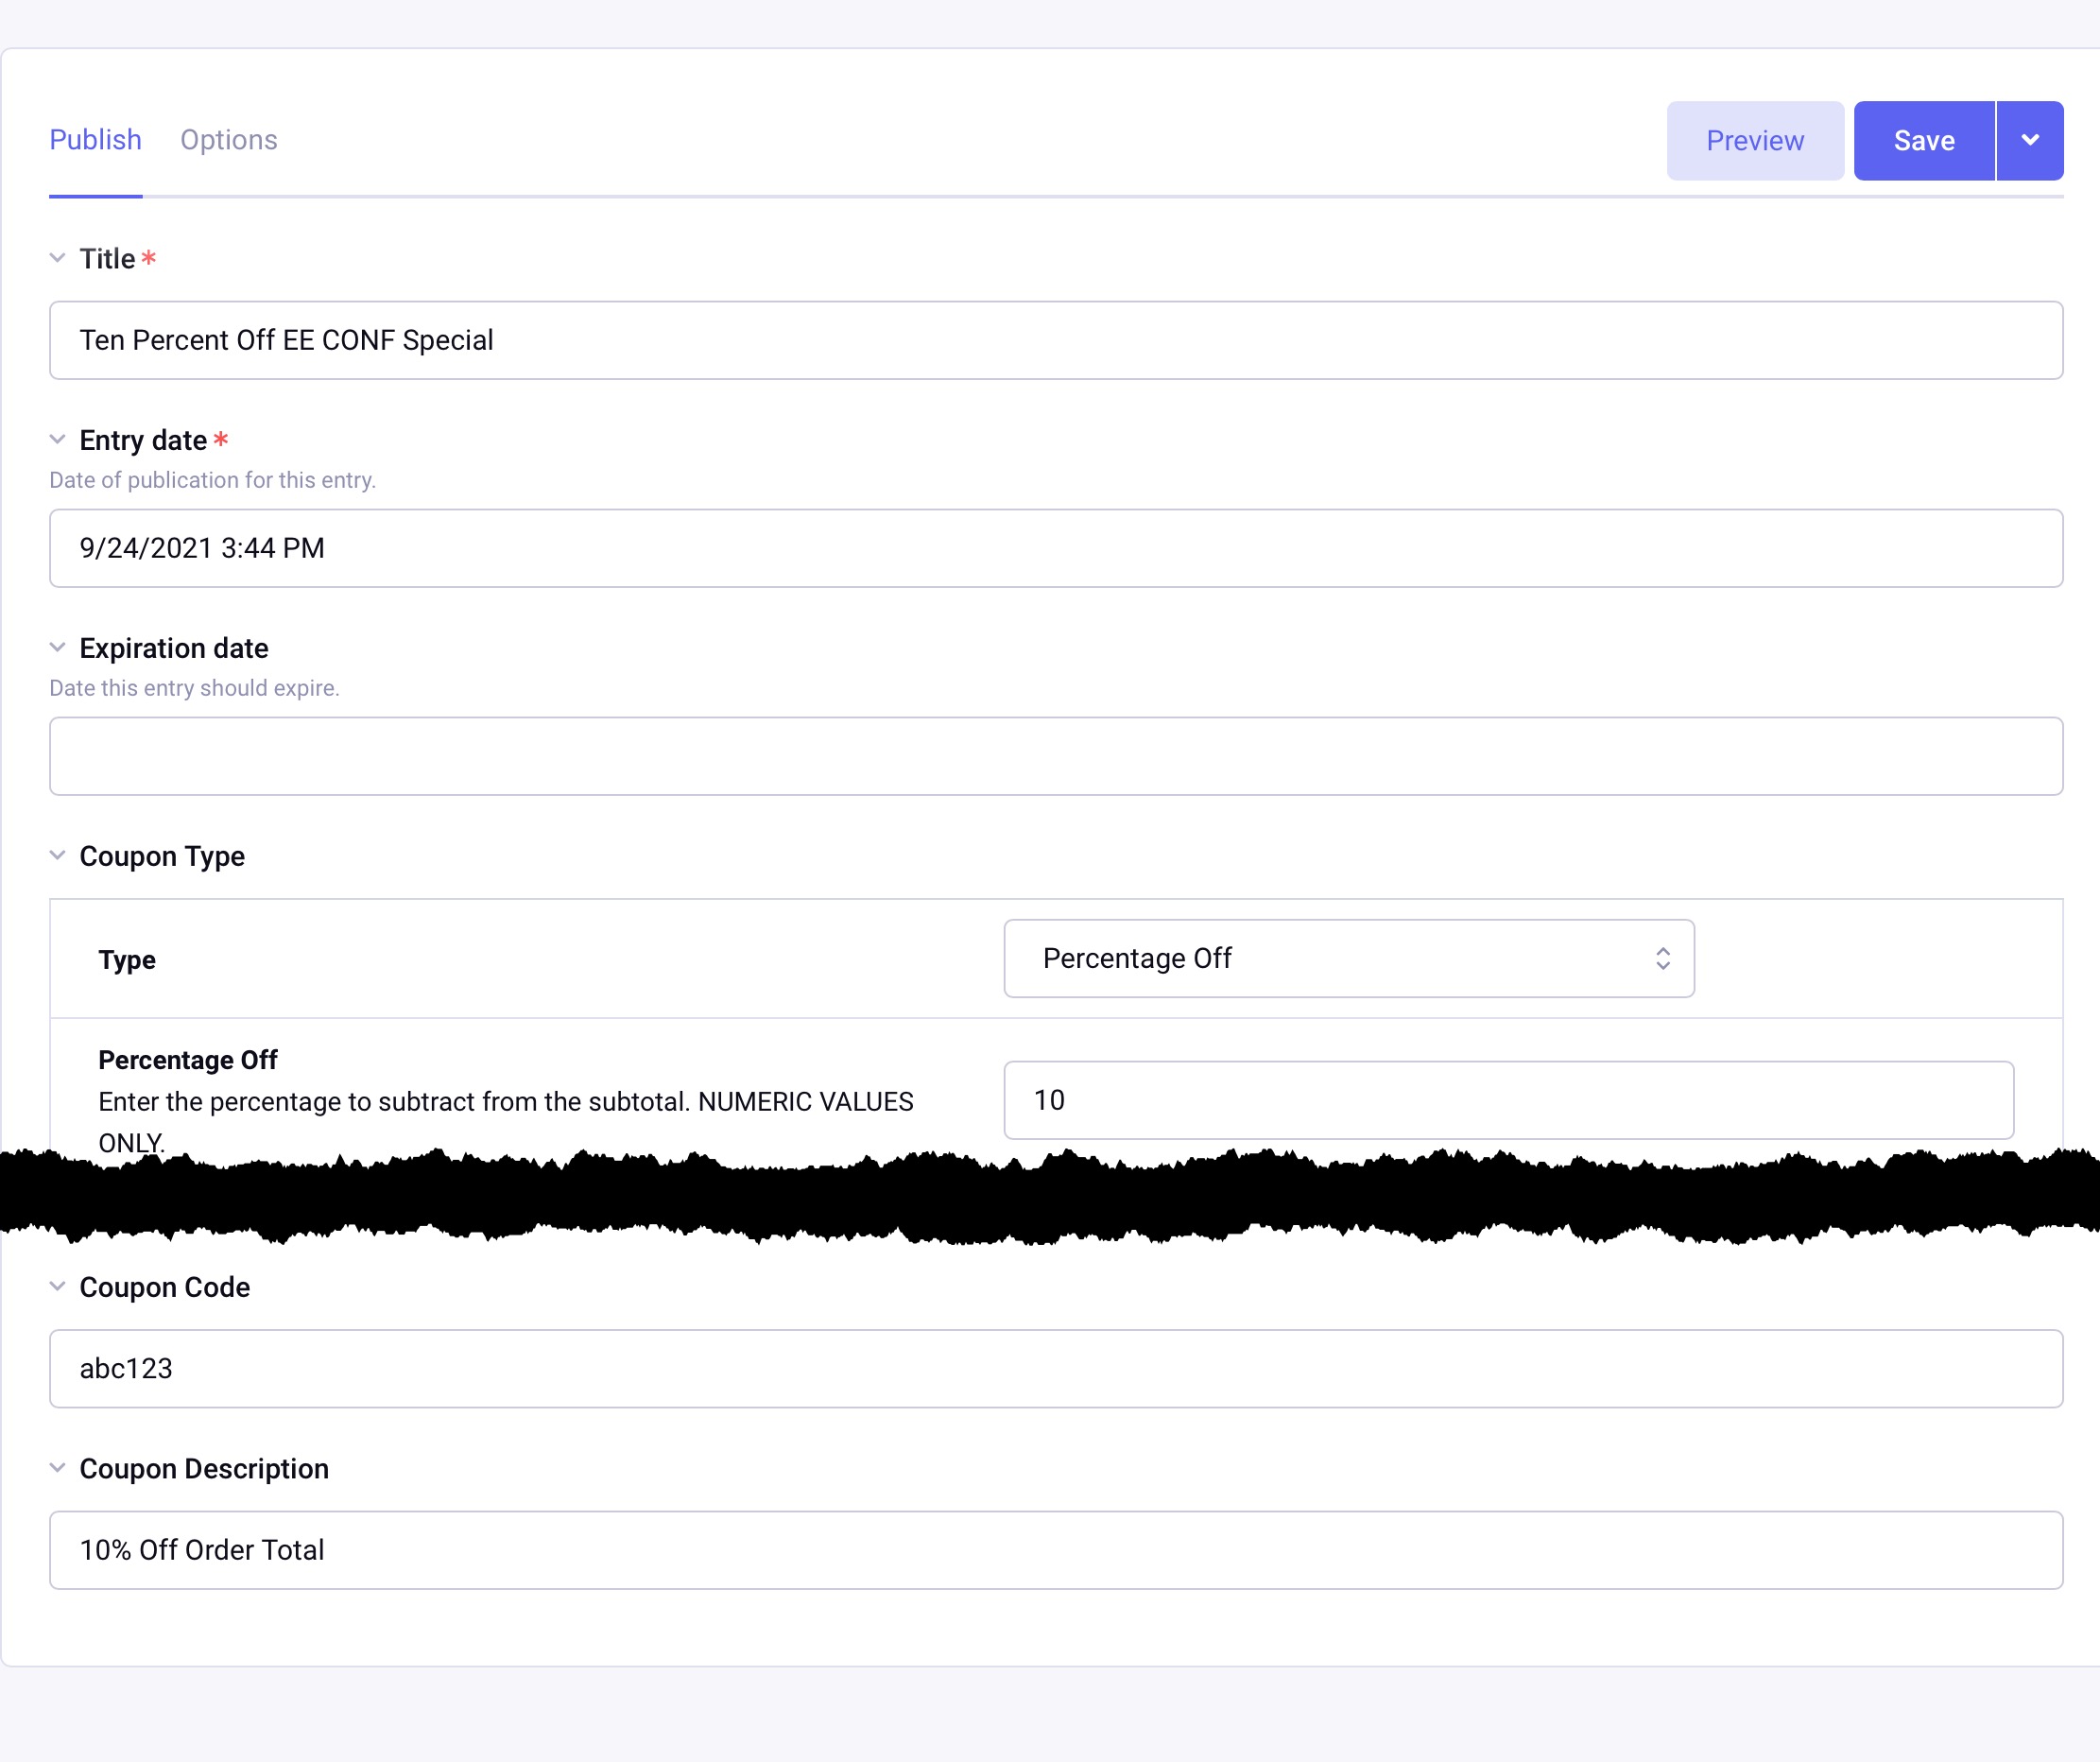
We’re done! These coupon codes can be tested on the frontend.
Have questions or comments about this course? Be sure to join the discussion and post in the ExpressionEngine Forums!
Within CartThrob, navigate to Shipping. There’s several plugins to choose from; for this example I’m using By weight - Threshold. The settings are self-explanatory. The shipping plugin uses a tiered system so any order weight total of up to 5 lbs will match the first row, resulting in a shipping charge of $8, and so on.
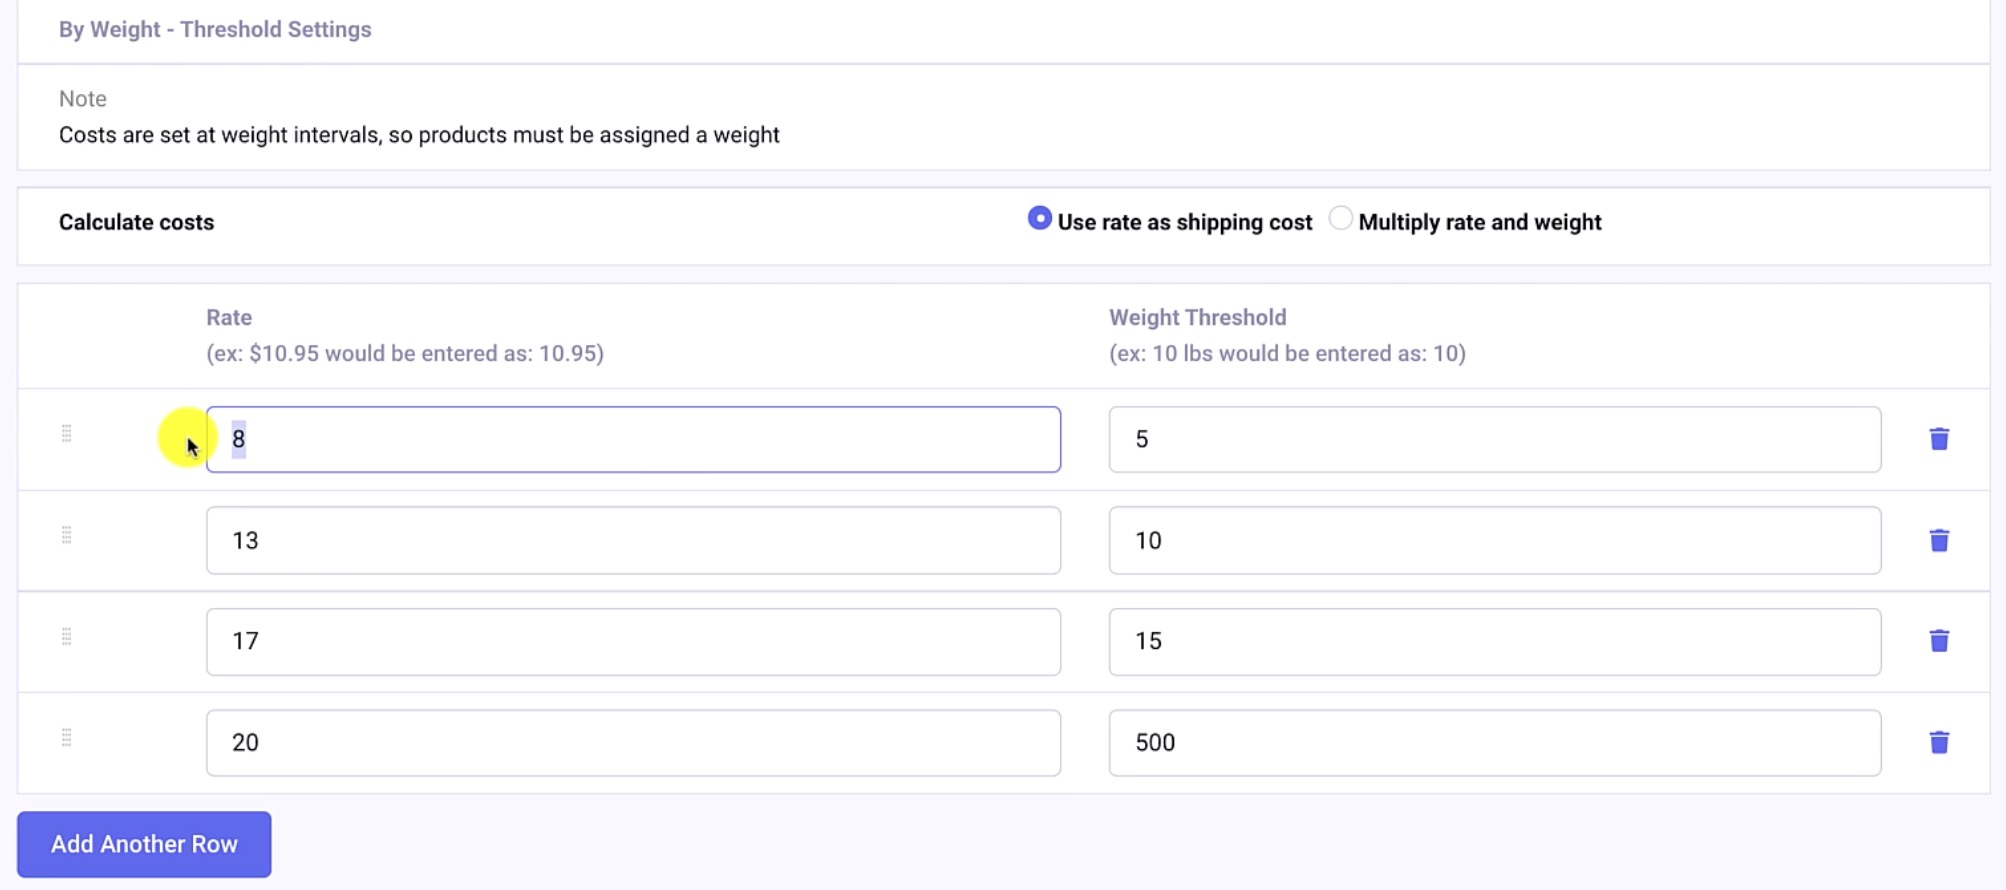
For the last row I have a really high threshold of 500, so anything after 15 lbs will just cost $500.
Click Submit to save the plugin selection and its values.
On the frontend we’ll test the Yoda Bowling Ball. The cart tallies shipping as $13, because the By Weight - Threshold plugin matches the order total of 10 lbs. (Totals up to and matching 10 lbs will match the $13 calculation.)
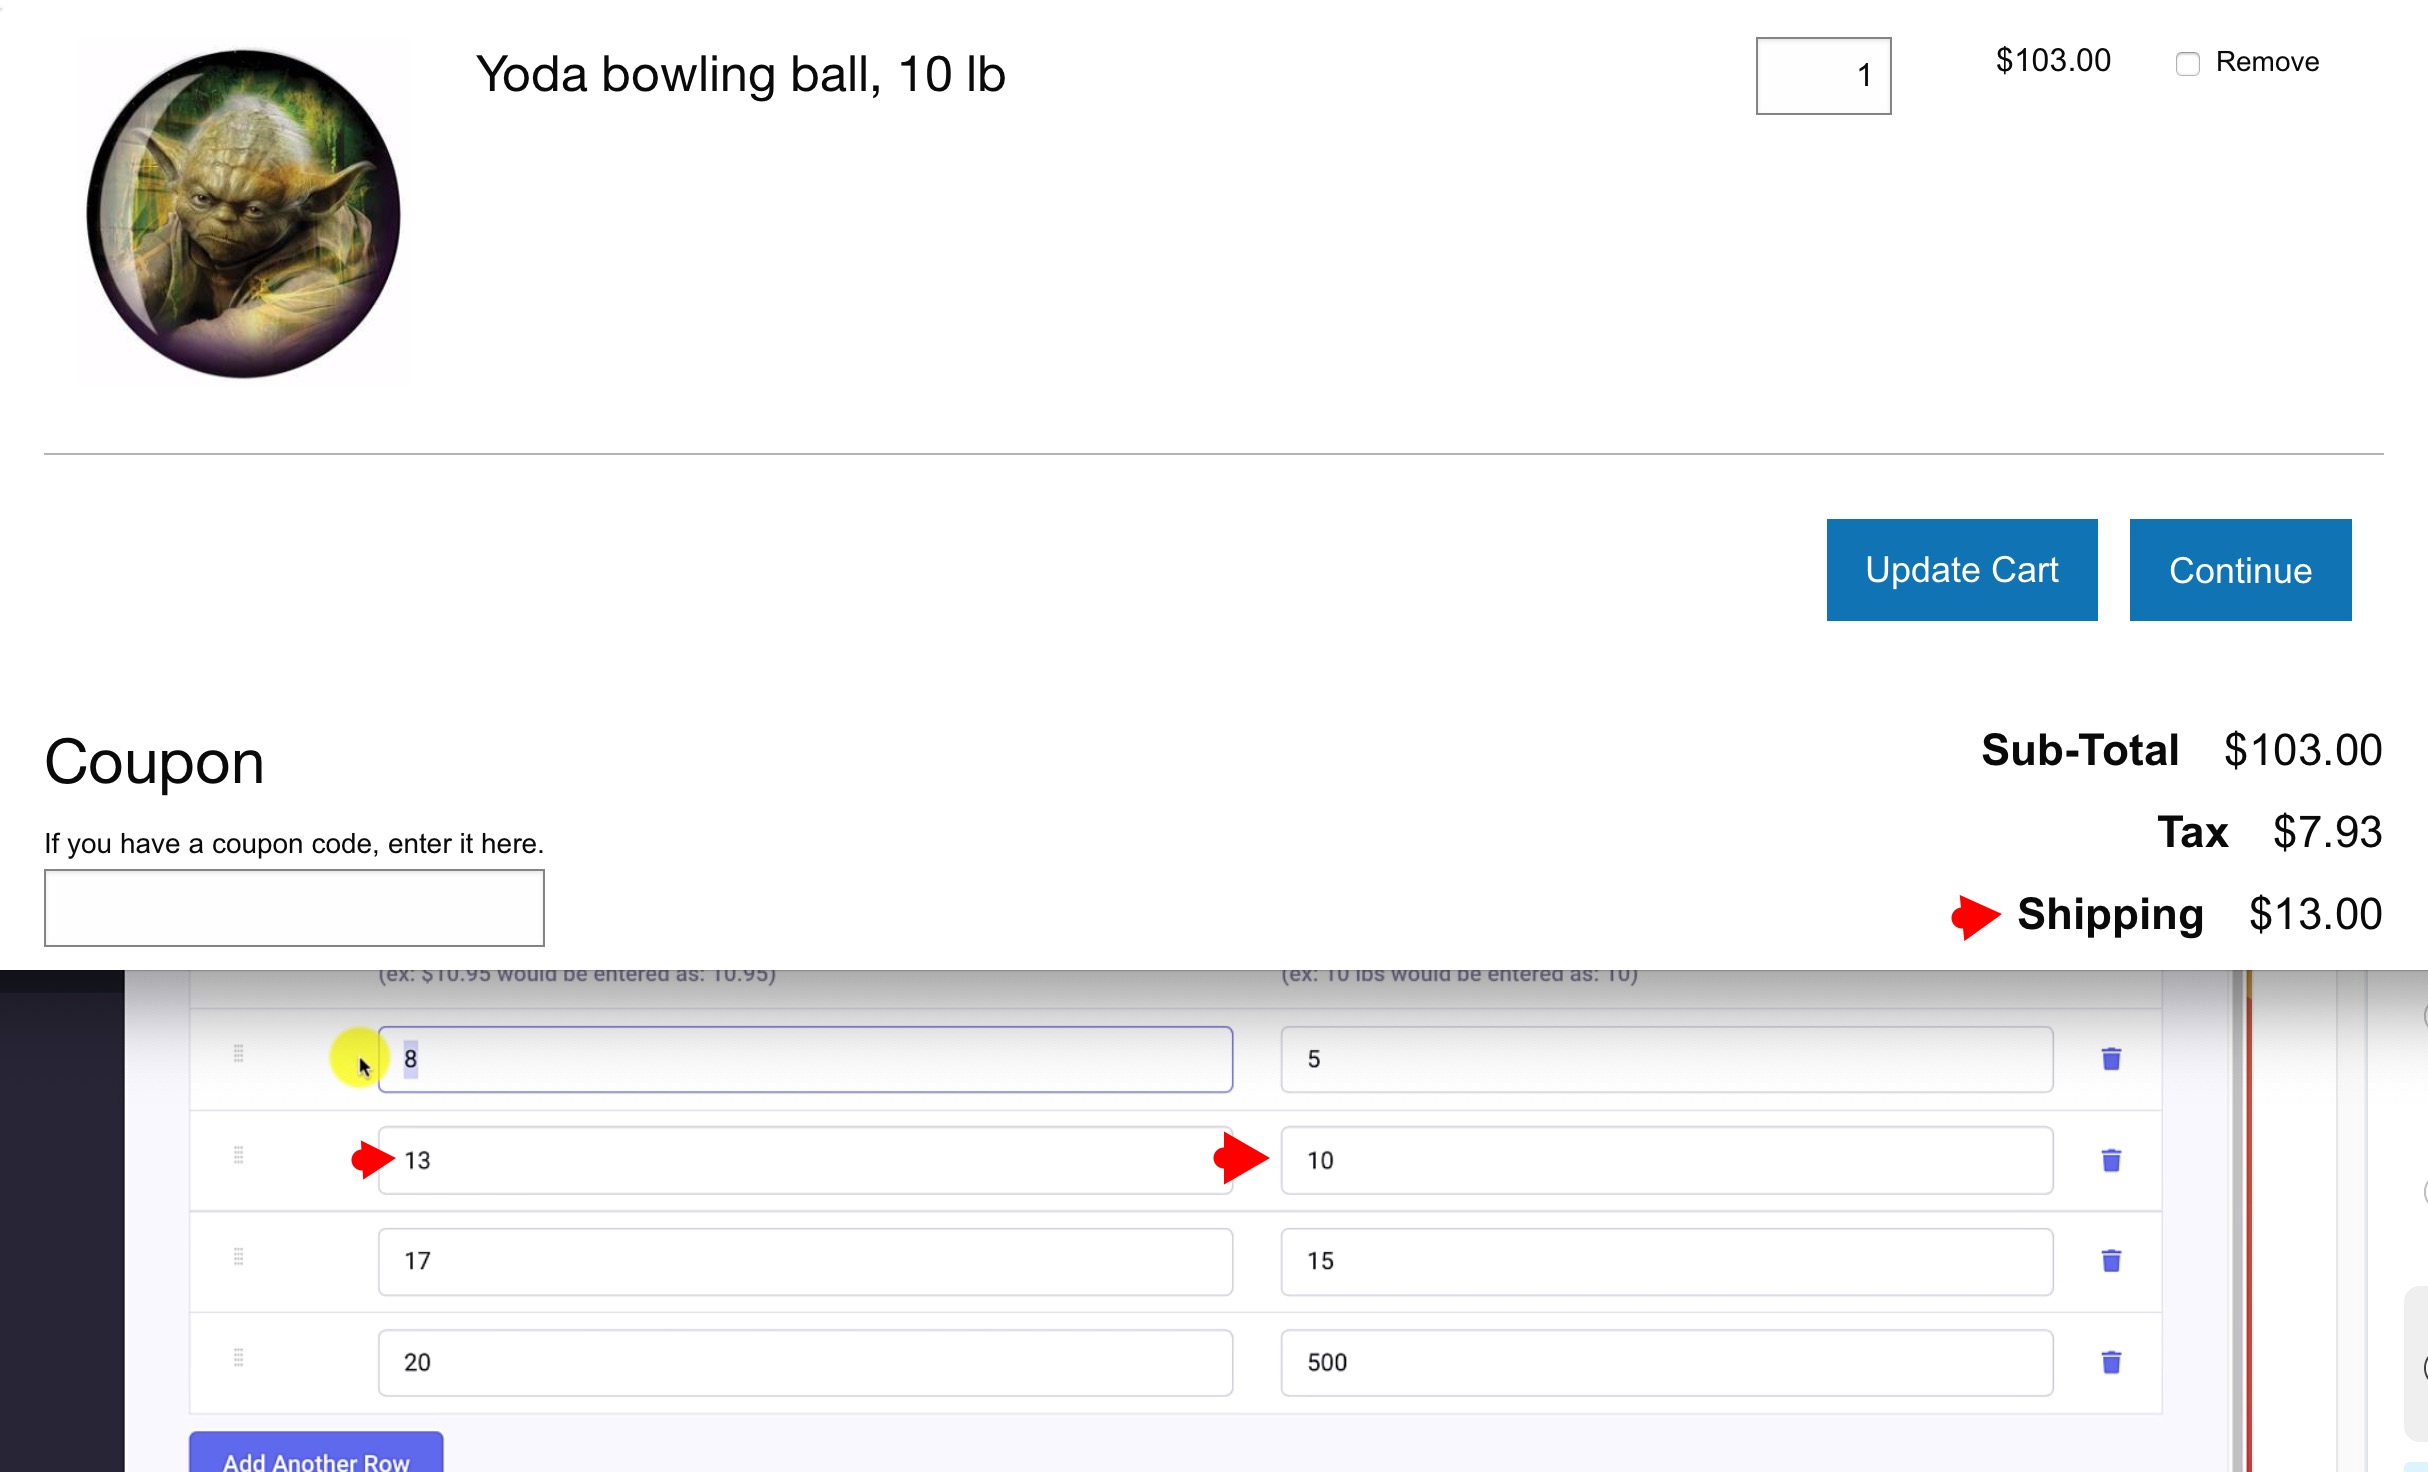
Within CartThrob, navigate to Taxes. I’ll leave “Calculate taxes using shipping address” as No, since I want to calculate by billing address.
For the Tax Plugin, we’ll use “Tax by Location - Percentage”. Each row represents a tax rate, region, and zip. CartThrob will use these values to match to the customer’s billing address to tally the proper tax rate. For this example, I’ll use 7.7%.
Like shipping, I added a second row with a high value to catch all other situations. Anything that doesn’t match the first row would be match by this global rule which is 20%. We could put in more rows and more zip codes and regions, but we’ll leave this simple for now!
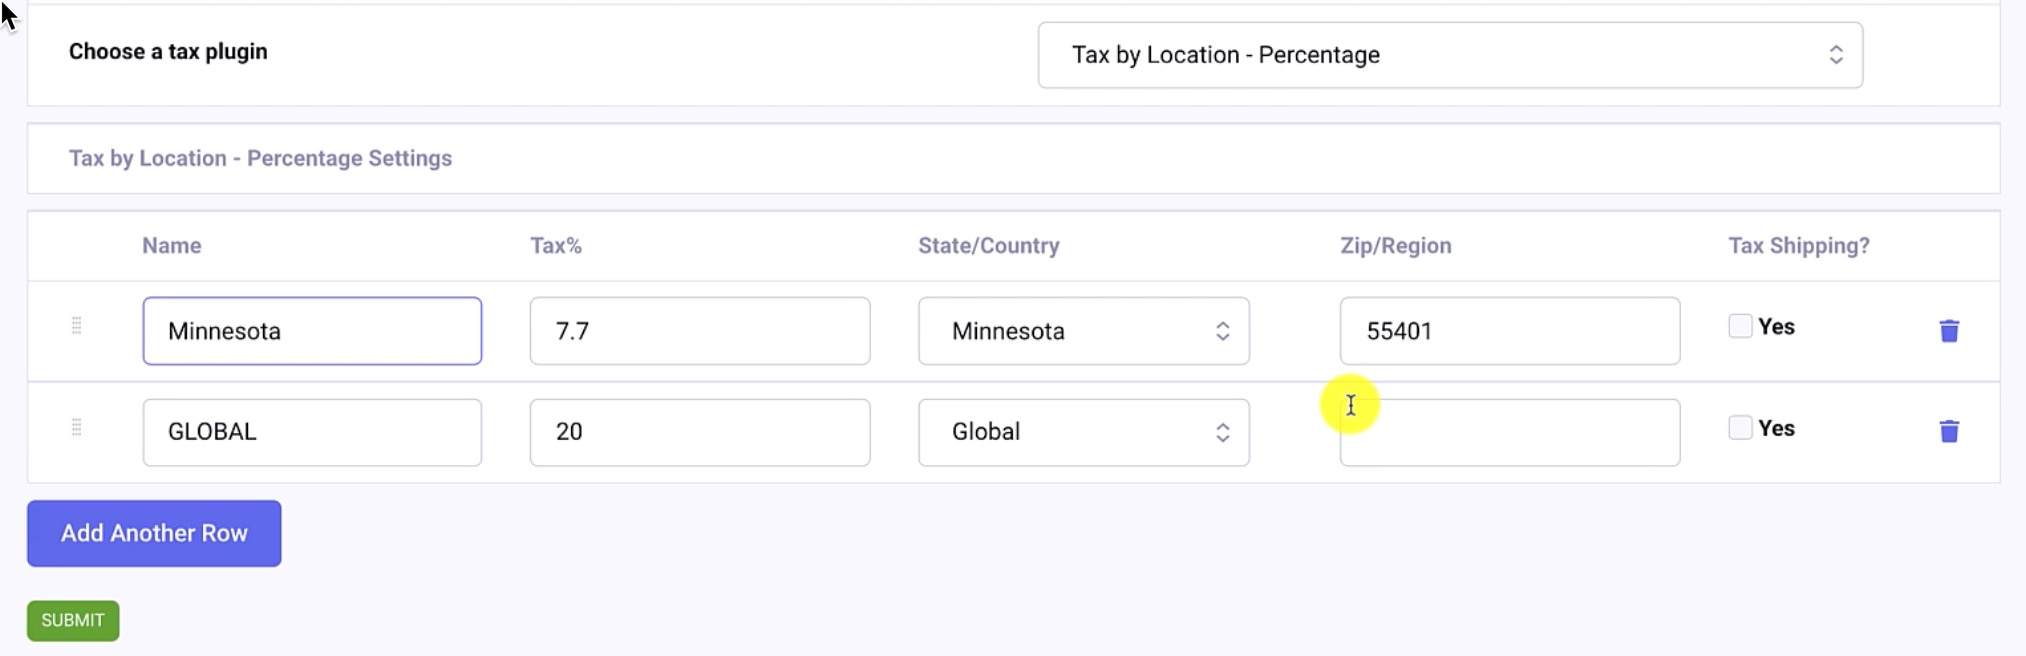
Click Submit. Taxes are done! Add an item to your cart on the frontend and give it a try!
Now that our shipping and tax are behaving, I’ll look at the payment gateways. Within CartThrob, navigate to Payments, and focus on the first menu, Choose your primary payment gateway. I’m using the Stripe plugin developer mode. (Stripe and Authorize are the gateways I use the most. I prefer Stripe because it’s just easier to test compared to Authorize or Paypal)
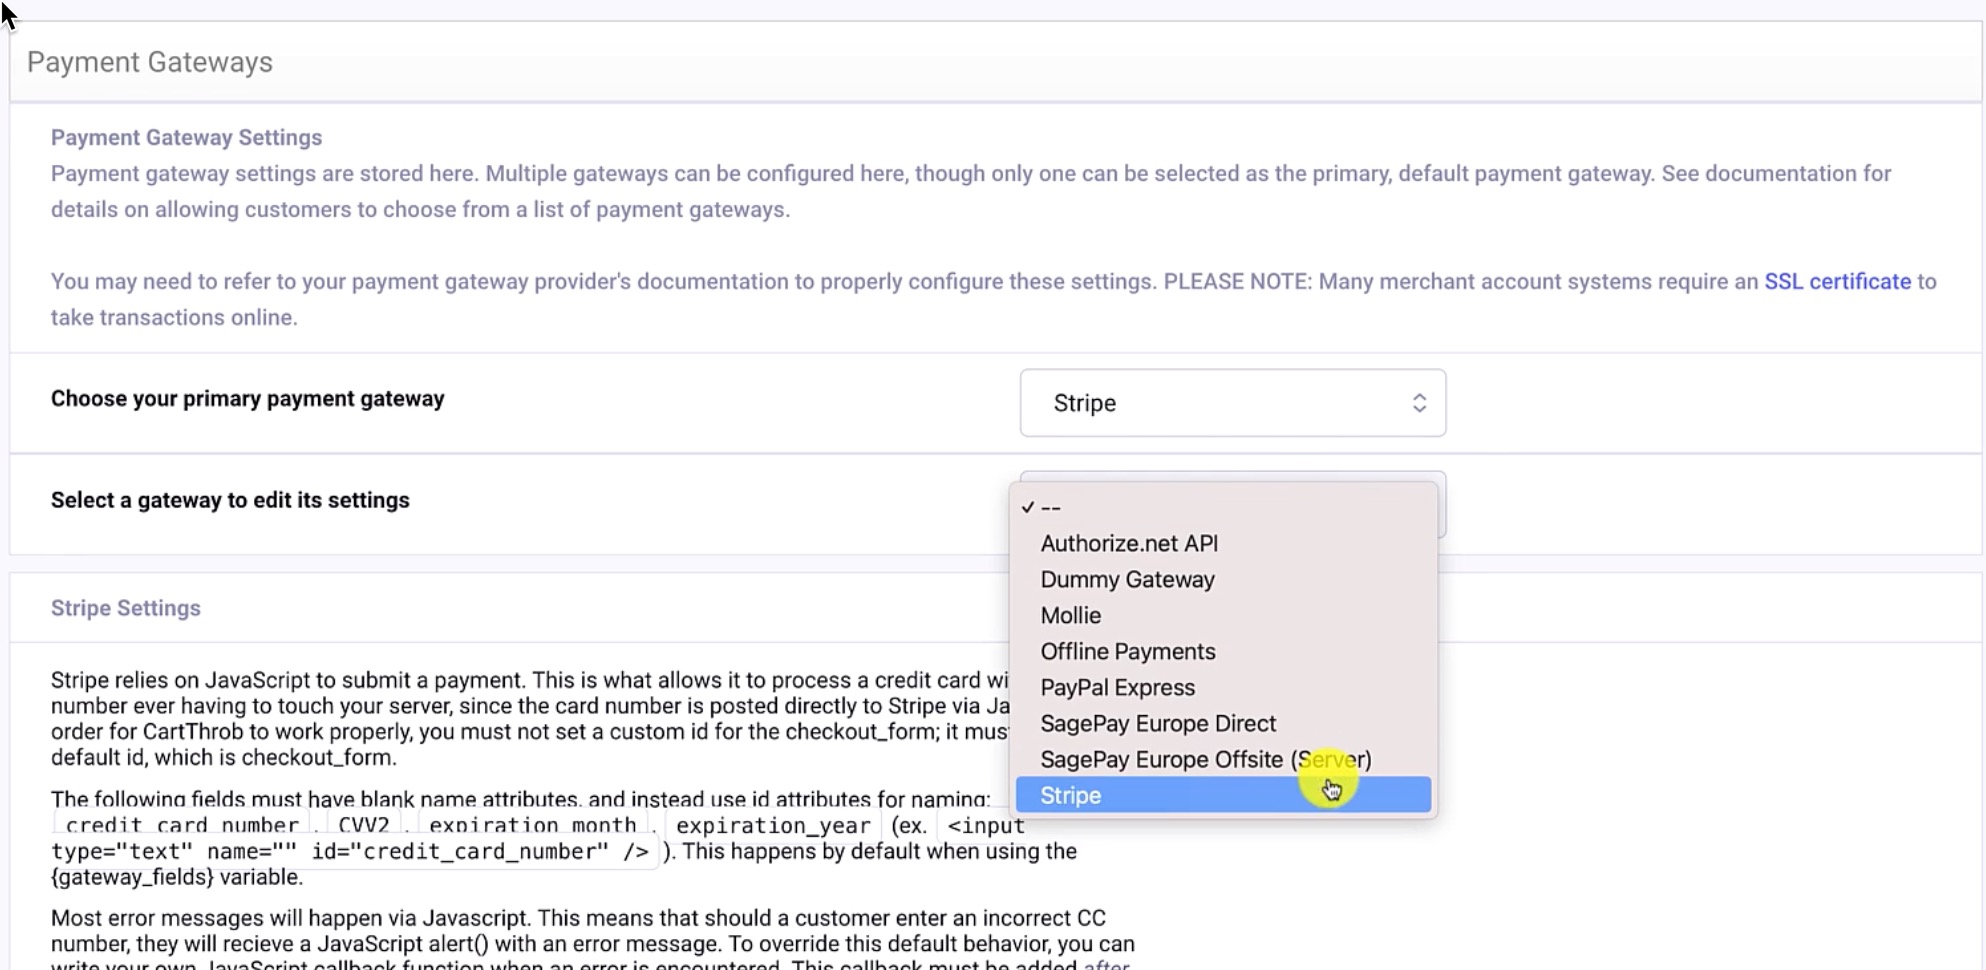
You can choose the various gateways that CartThrob has available. The first select menu is showing you what gateway is chosen, the second is giving you the chance to edit that gateway’s settings. (the settings will appear below, without a page reload, upon making this selection)
Below is where I have my test modes selected, and I have my Test Mode API key (secret), and Test Mode API key (publishable) that I configured within my Stripe account.

Everything else I can leave as-is. Click Submit to save the changes.
Now we can actually complete an order! At the bottom of my checkout page, I’m using the default Stripe test number, 4242 4242 4242 4242, providing any CVV code and a valid expiration date.
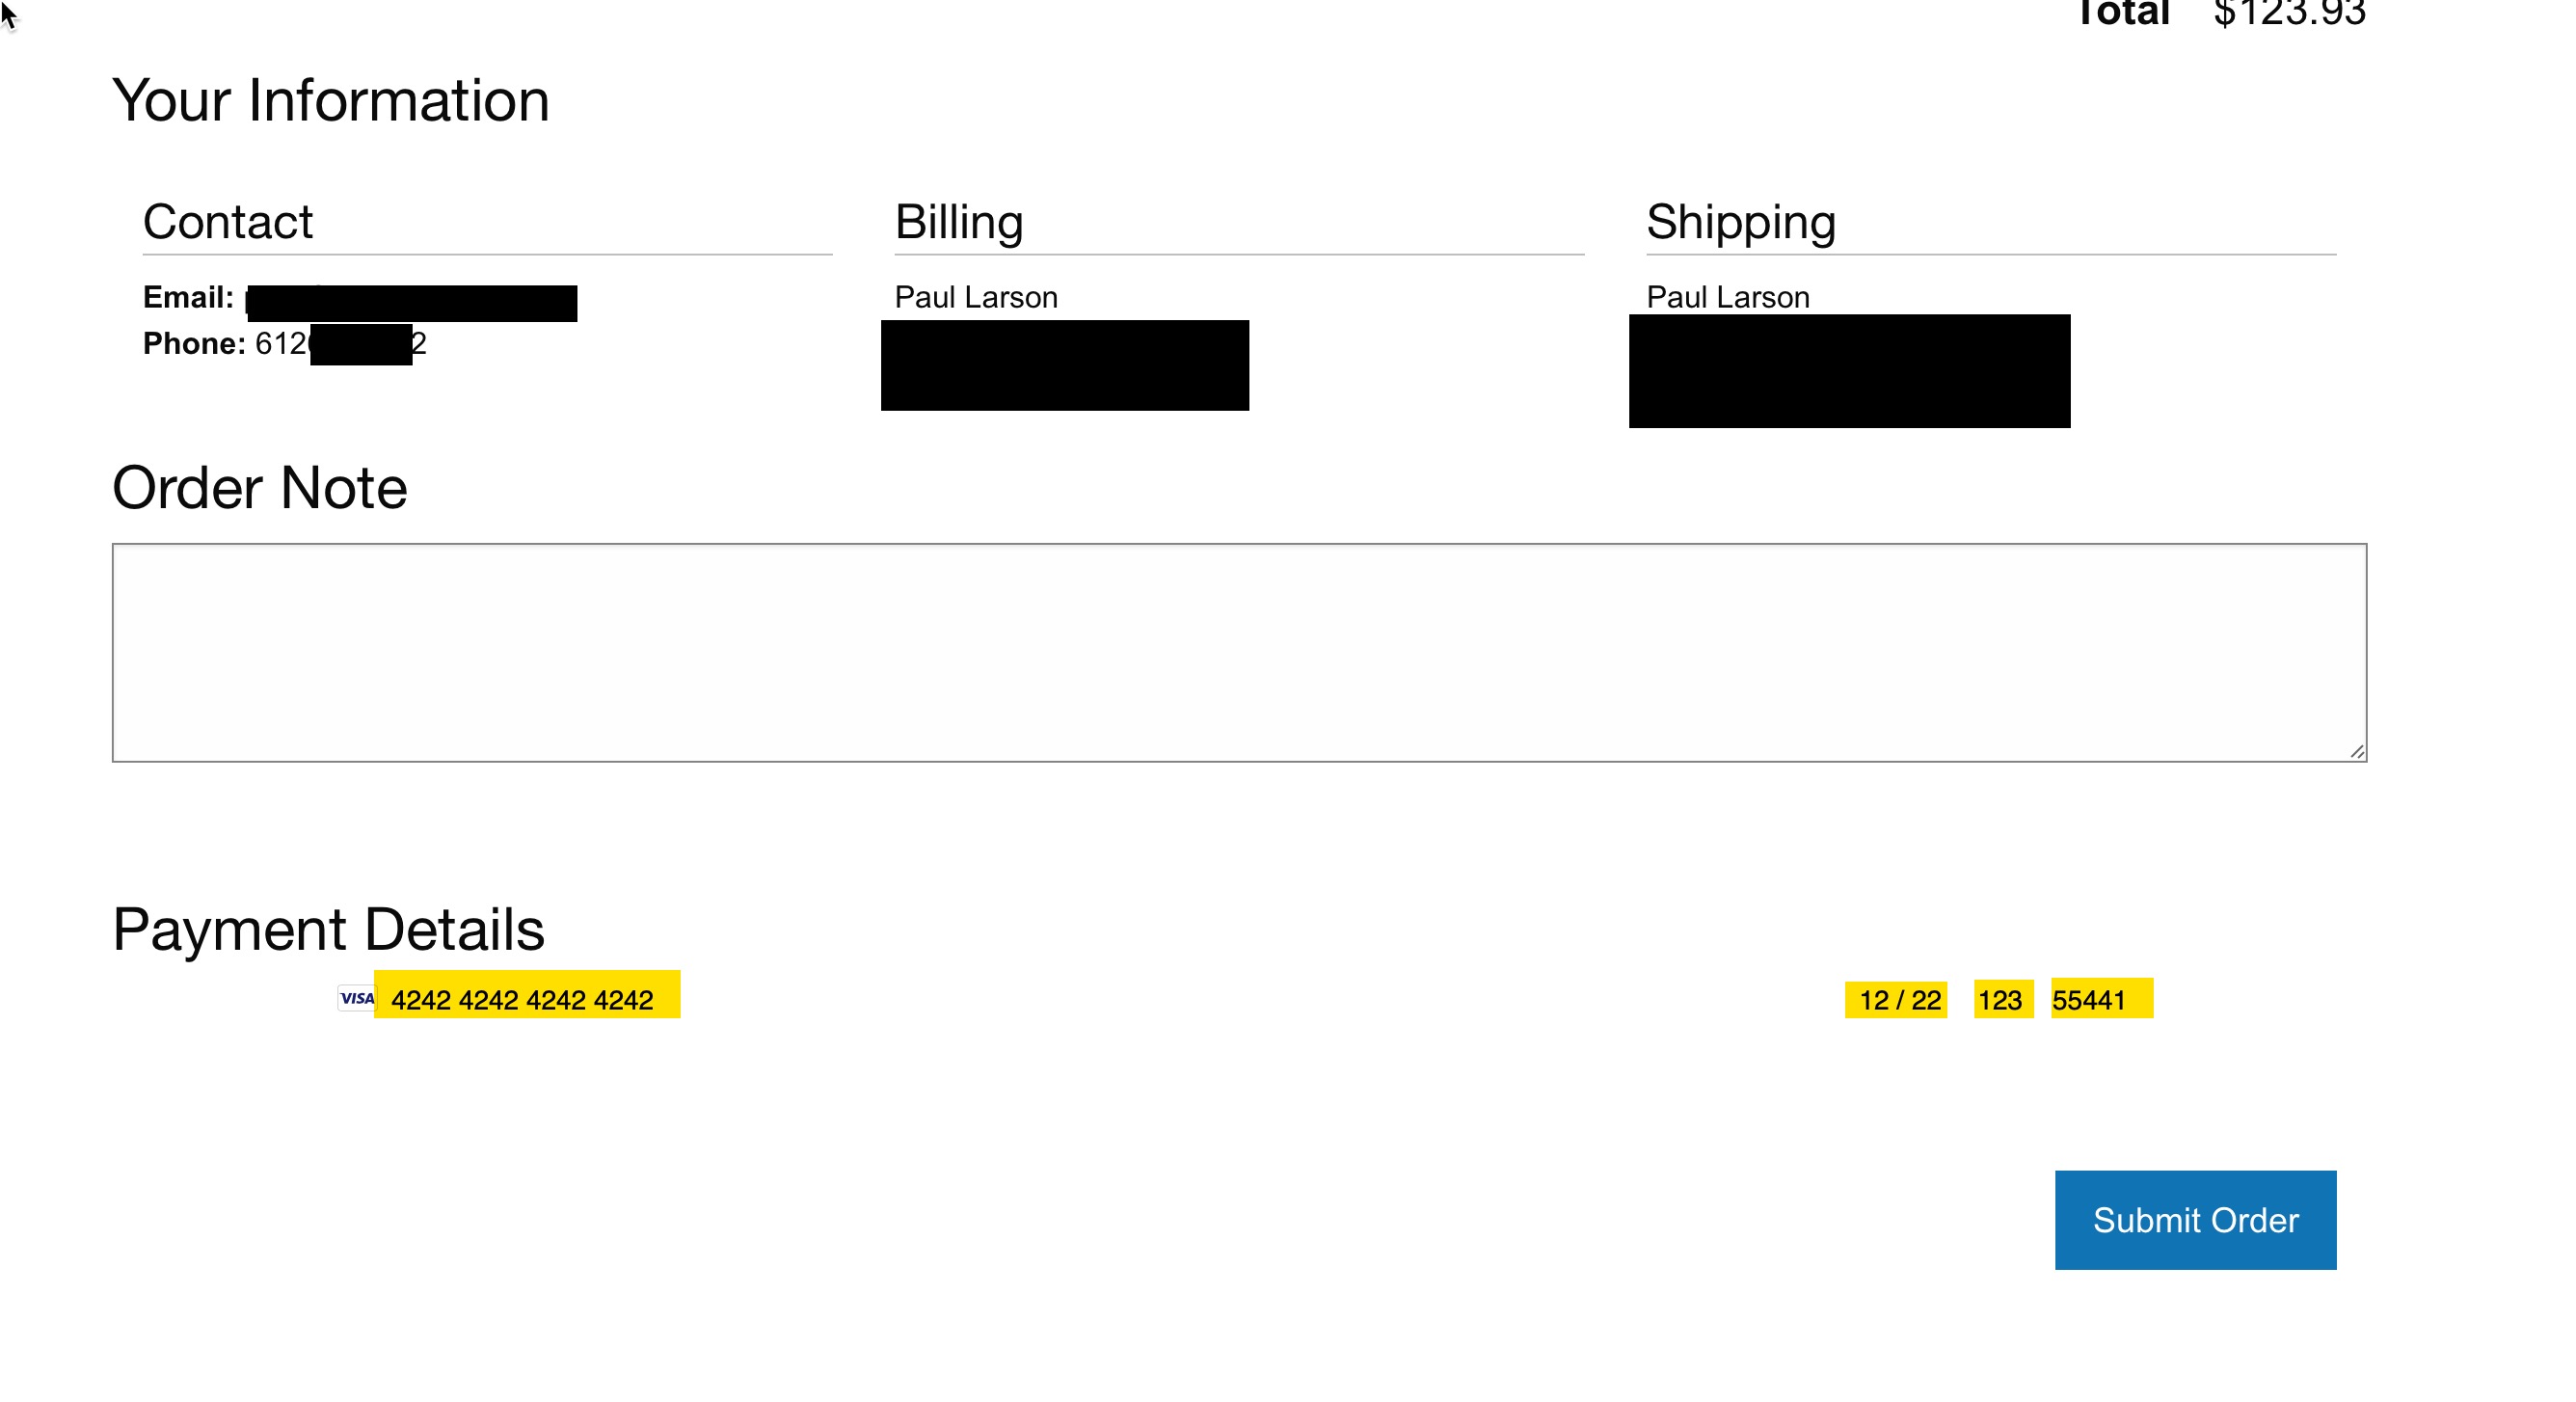
Our test order was hopefully successful! Head over to Stripe (or your gateway), and view the appropriate Dashboard for test orders to confirm.
Have questions or comments about this course? Be sure to join the discussion and post in the ExpressionEngine Forums!
We have most of the puzzle pieces of a working store in place. Next we’ll quickly review Notification setup and Order Management within CartThrob. Navigate to the Notifications tab.
Starting at the top of the page with the Log email? setting; I typically don’t log email unless it’s a troubleshooting situation. When enabled, it writes debug info to a CartThrob database table.
We are going to setup two email notifications. The first notification is intended for the customer, while the second is intended for the store owner.
In the CartThrob settings, the first block is what we’ll use for the Customer notification. CartThrob likely created a few of these email configuration blocks by default.
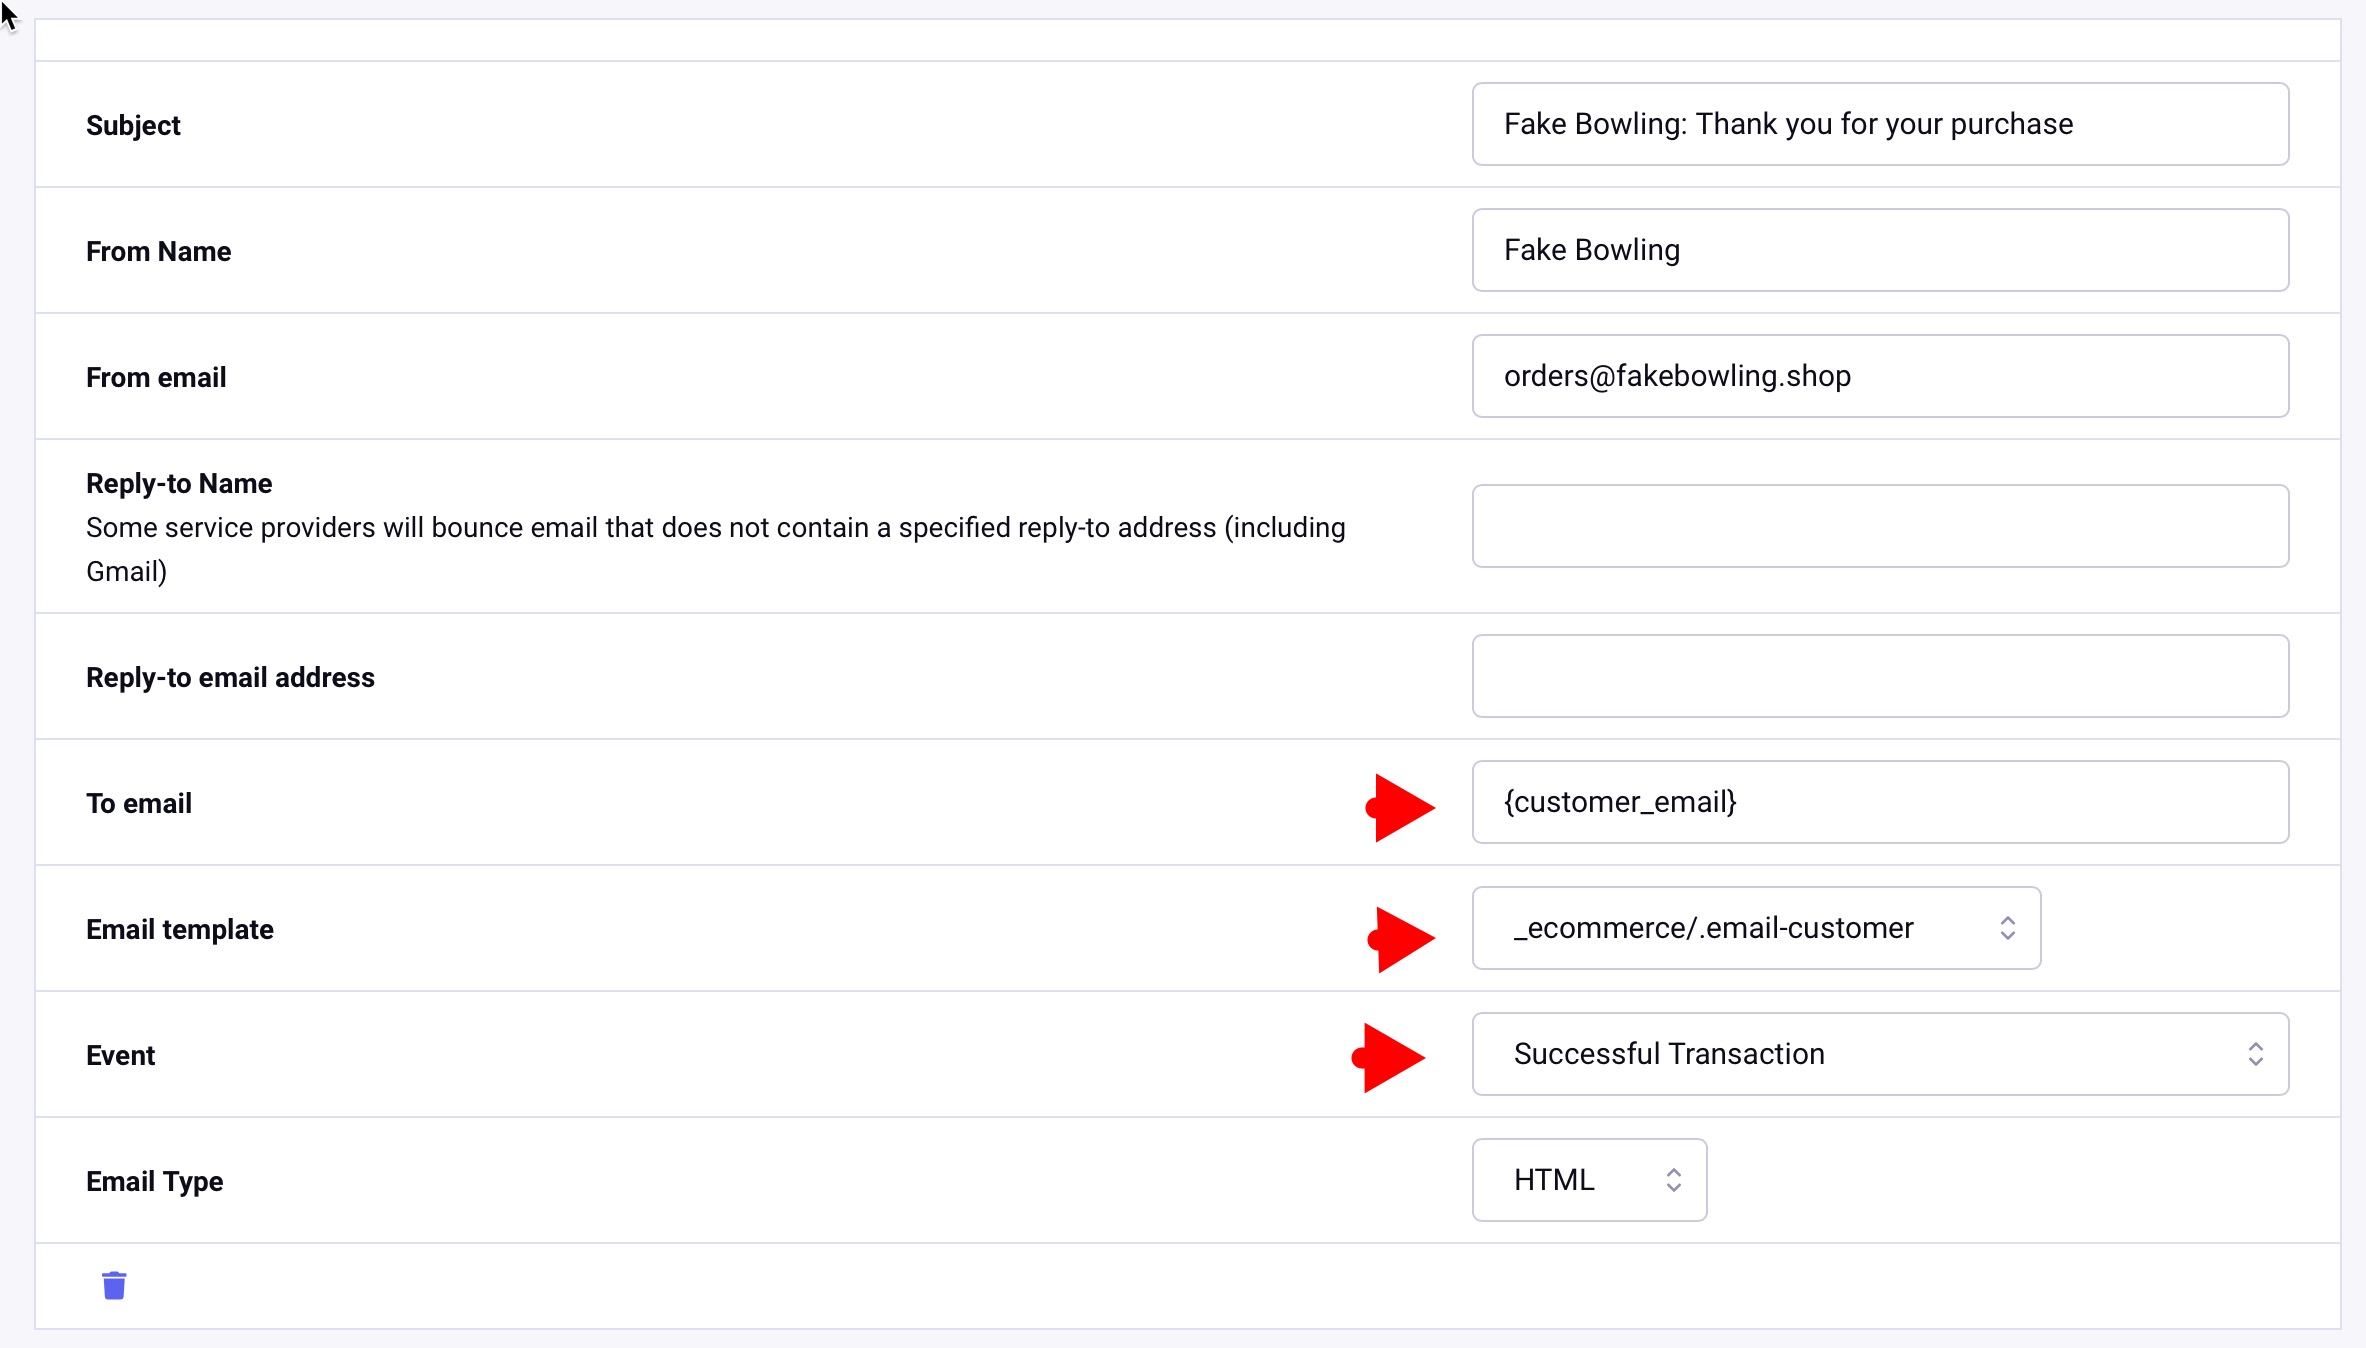
Everything is pretty self-explanatory here. The To email address is dynamically assigned from the order itself using the ExpressionEngine variable.
Next, the Email template needs to point to a standard ExpressionEngine template, in our case a fairly basic HTML table template geared for email delivery.
The Event setting is used to match a CartThrob event that must be triggered to send this email. In this case, a successful transaction.
We are ready to move on to the next email block for the store owner. The setup is nearly identical, only differing in subject line, recipient, and email template. The Event setting remains as “Successful Transaction,” which means two emails are sent by CartThrob for each successful order. Marked in yellow, below, are the subtle differences in the owner email compared to customer
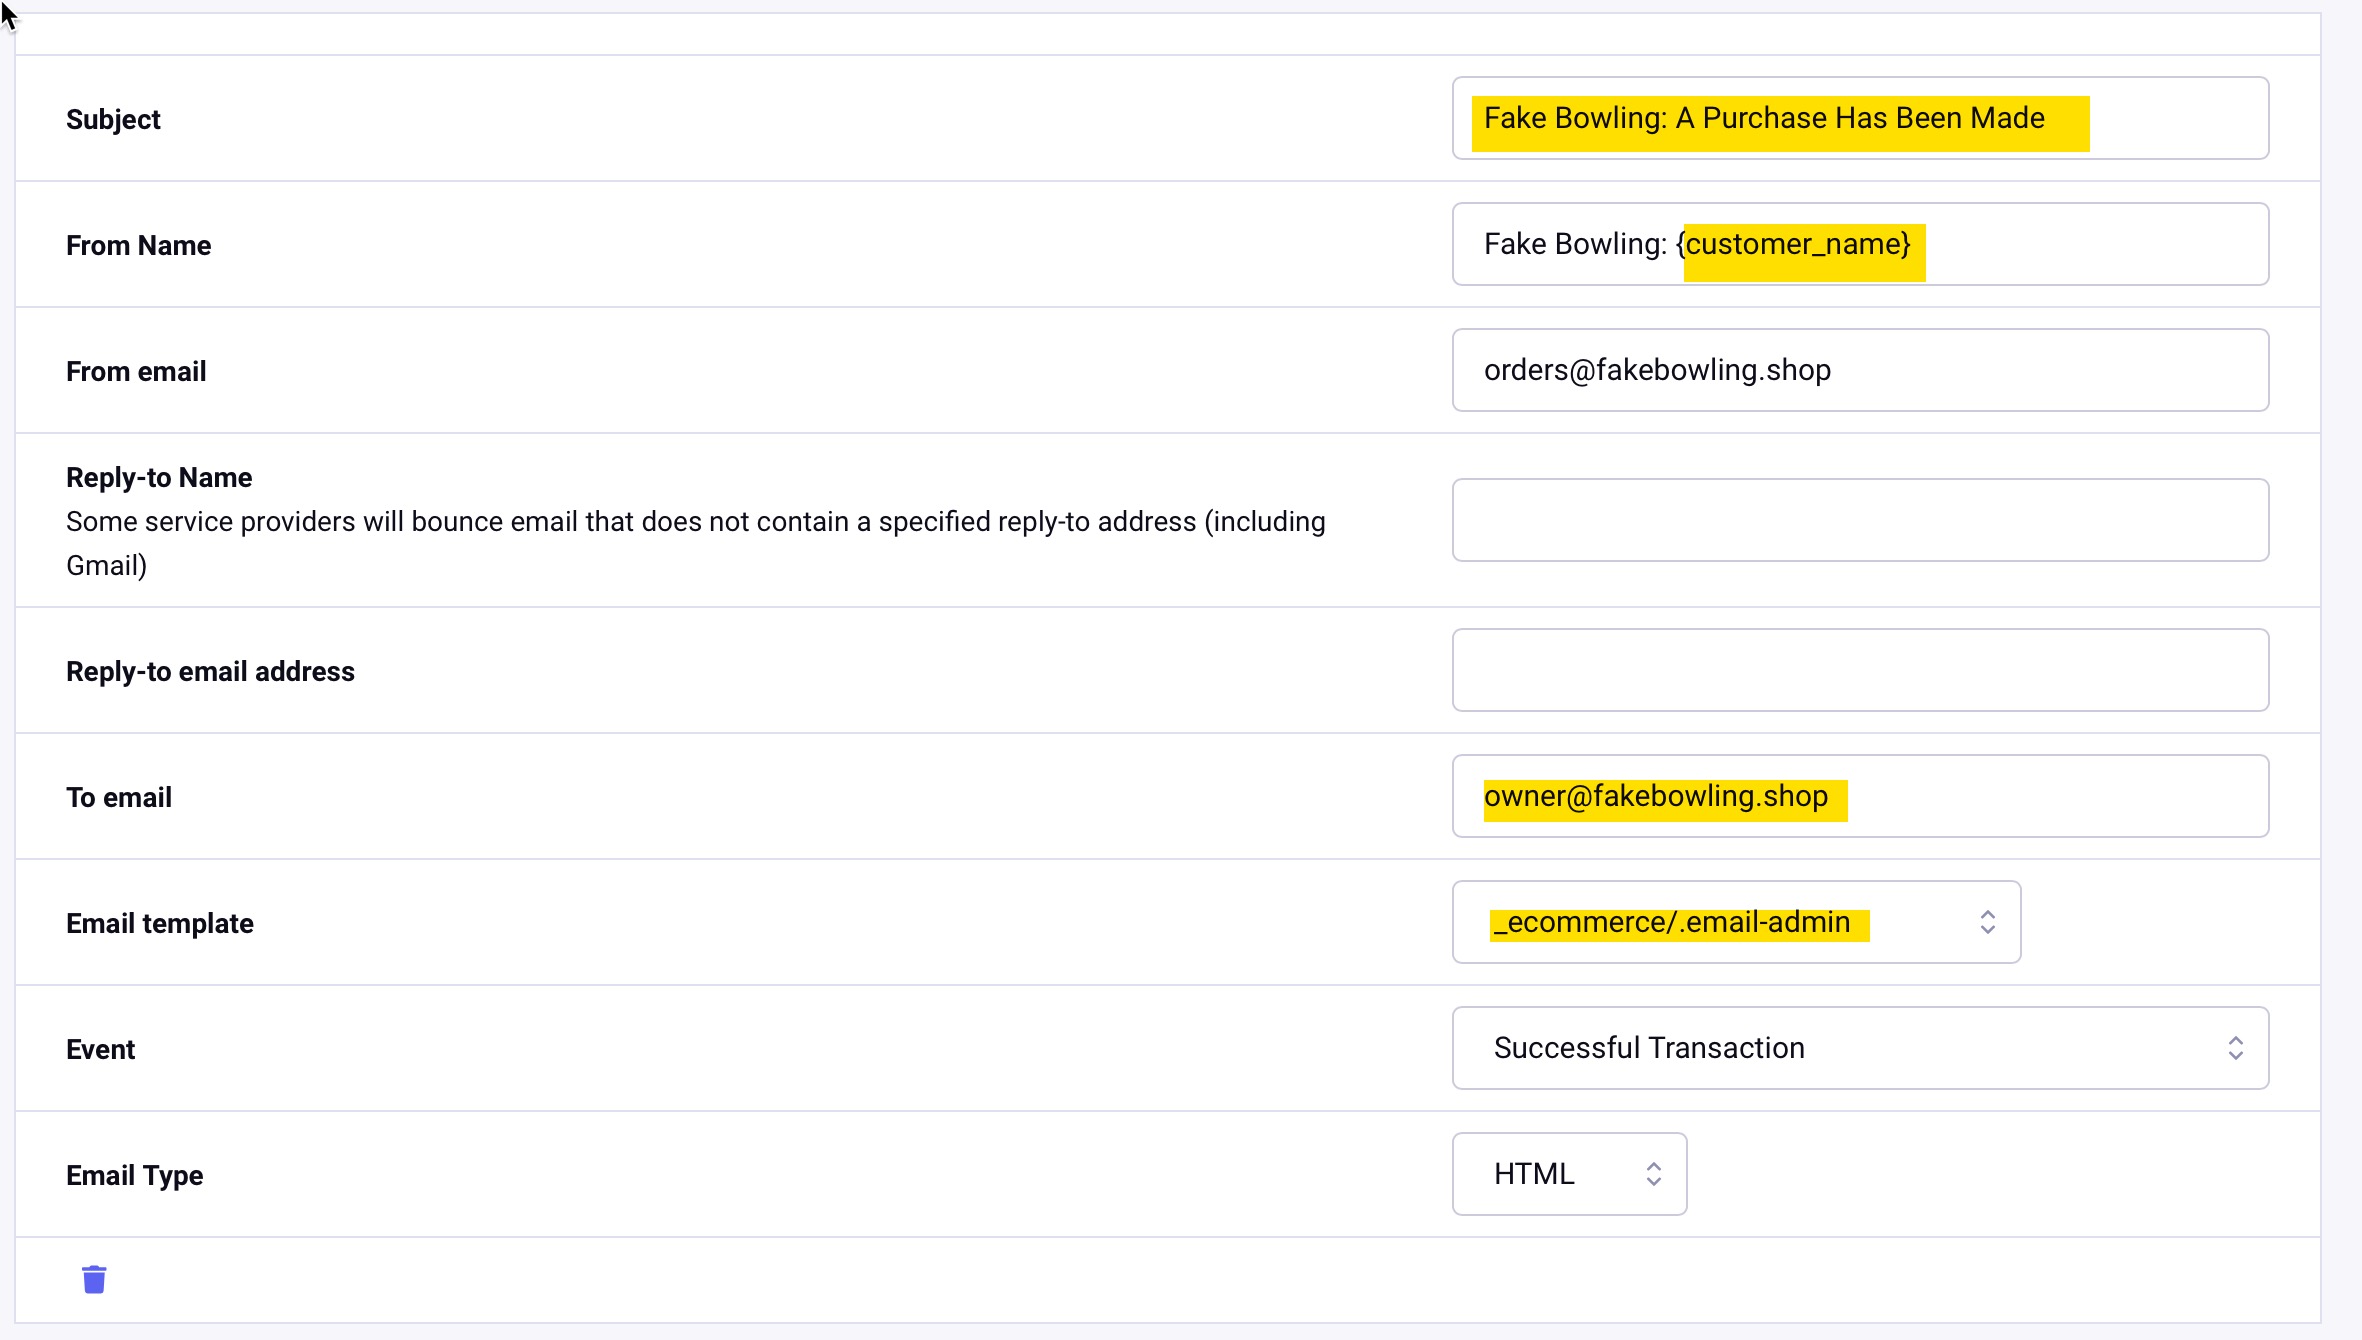
On the frontend, we’re ready to submit a test order to test the notifications. I’ll add a couple of items to my cart, even specifying an order note. Here is what the email notification looks like to the customer:
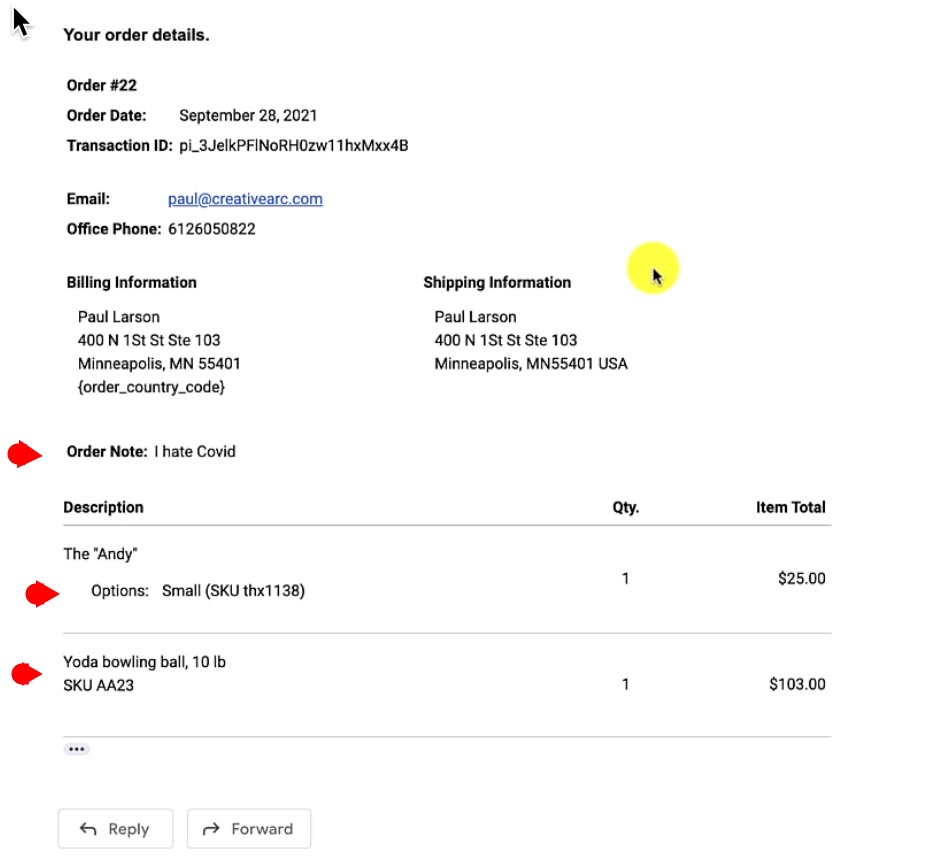
Where does CartThrob store all this?
If you remember when we used that installation function within the CartThrob Installation Tab, it created the Coupon Codes and the Orders Channels.
The Orders Channel looks like a standard ExpressionEngine channel with the title being the order number, and then the statuses that we have assigned to the channel.
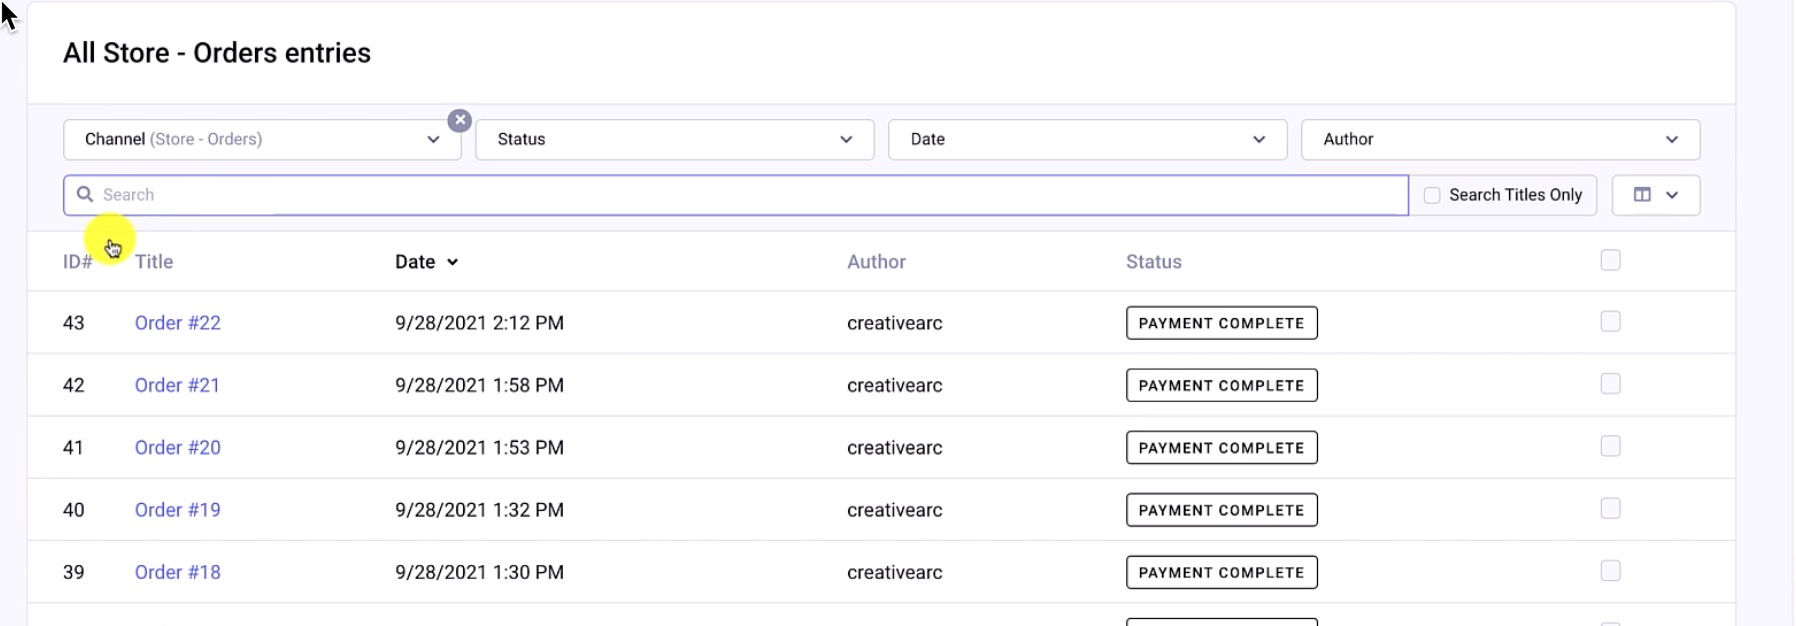
If I look through a sample Order entry, it’s pretty standard; just a lot of custom fields. In this case, the actual line items for the order appear on the order items CartThrob field.
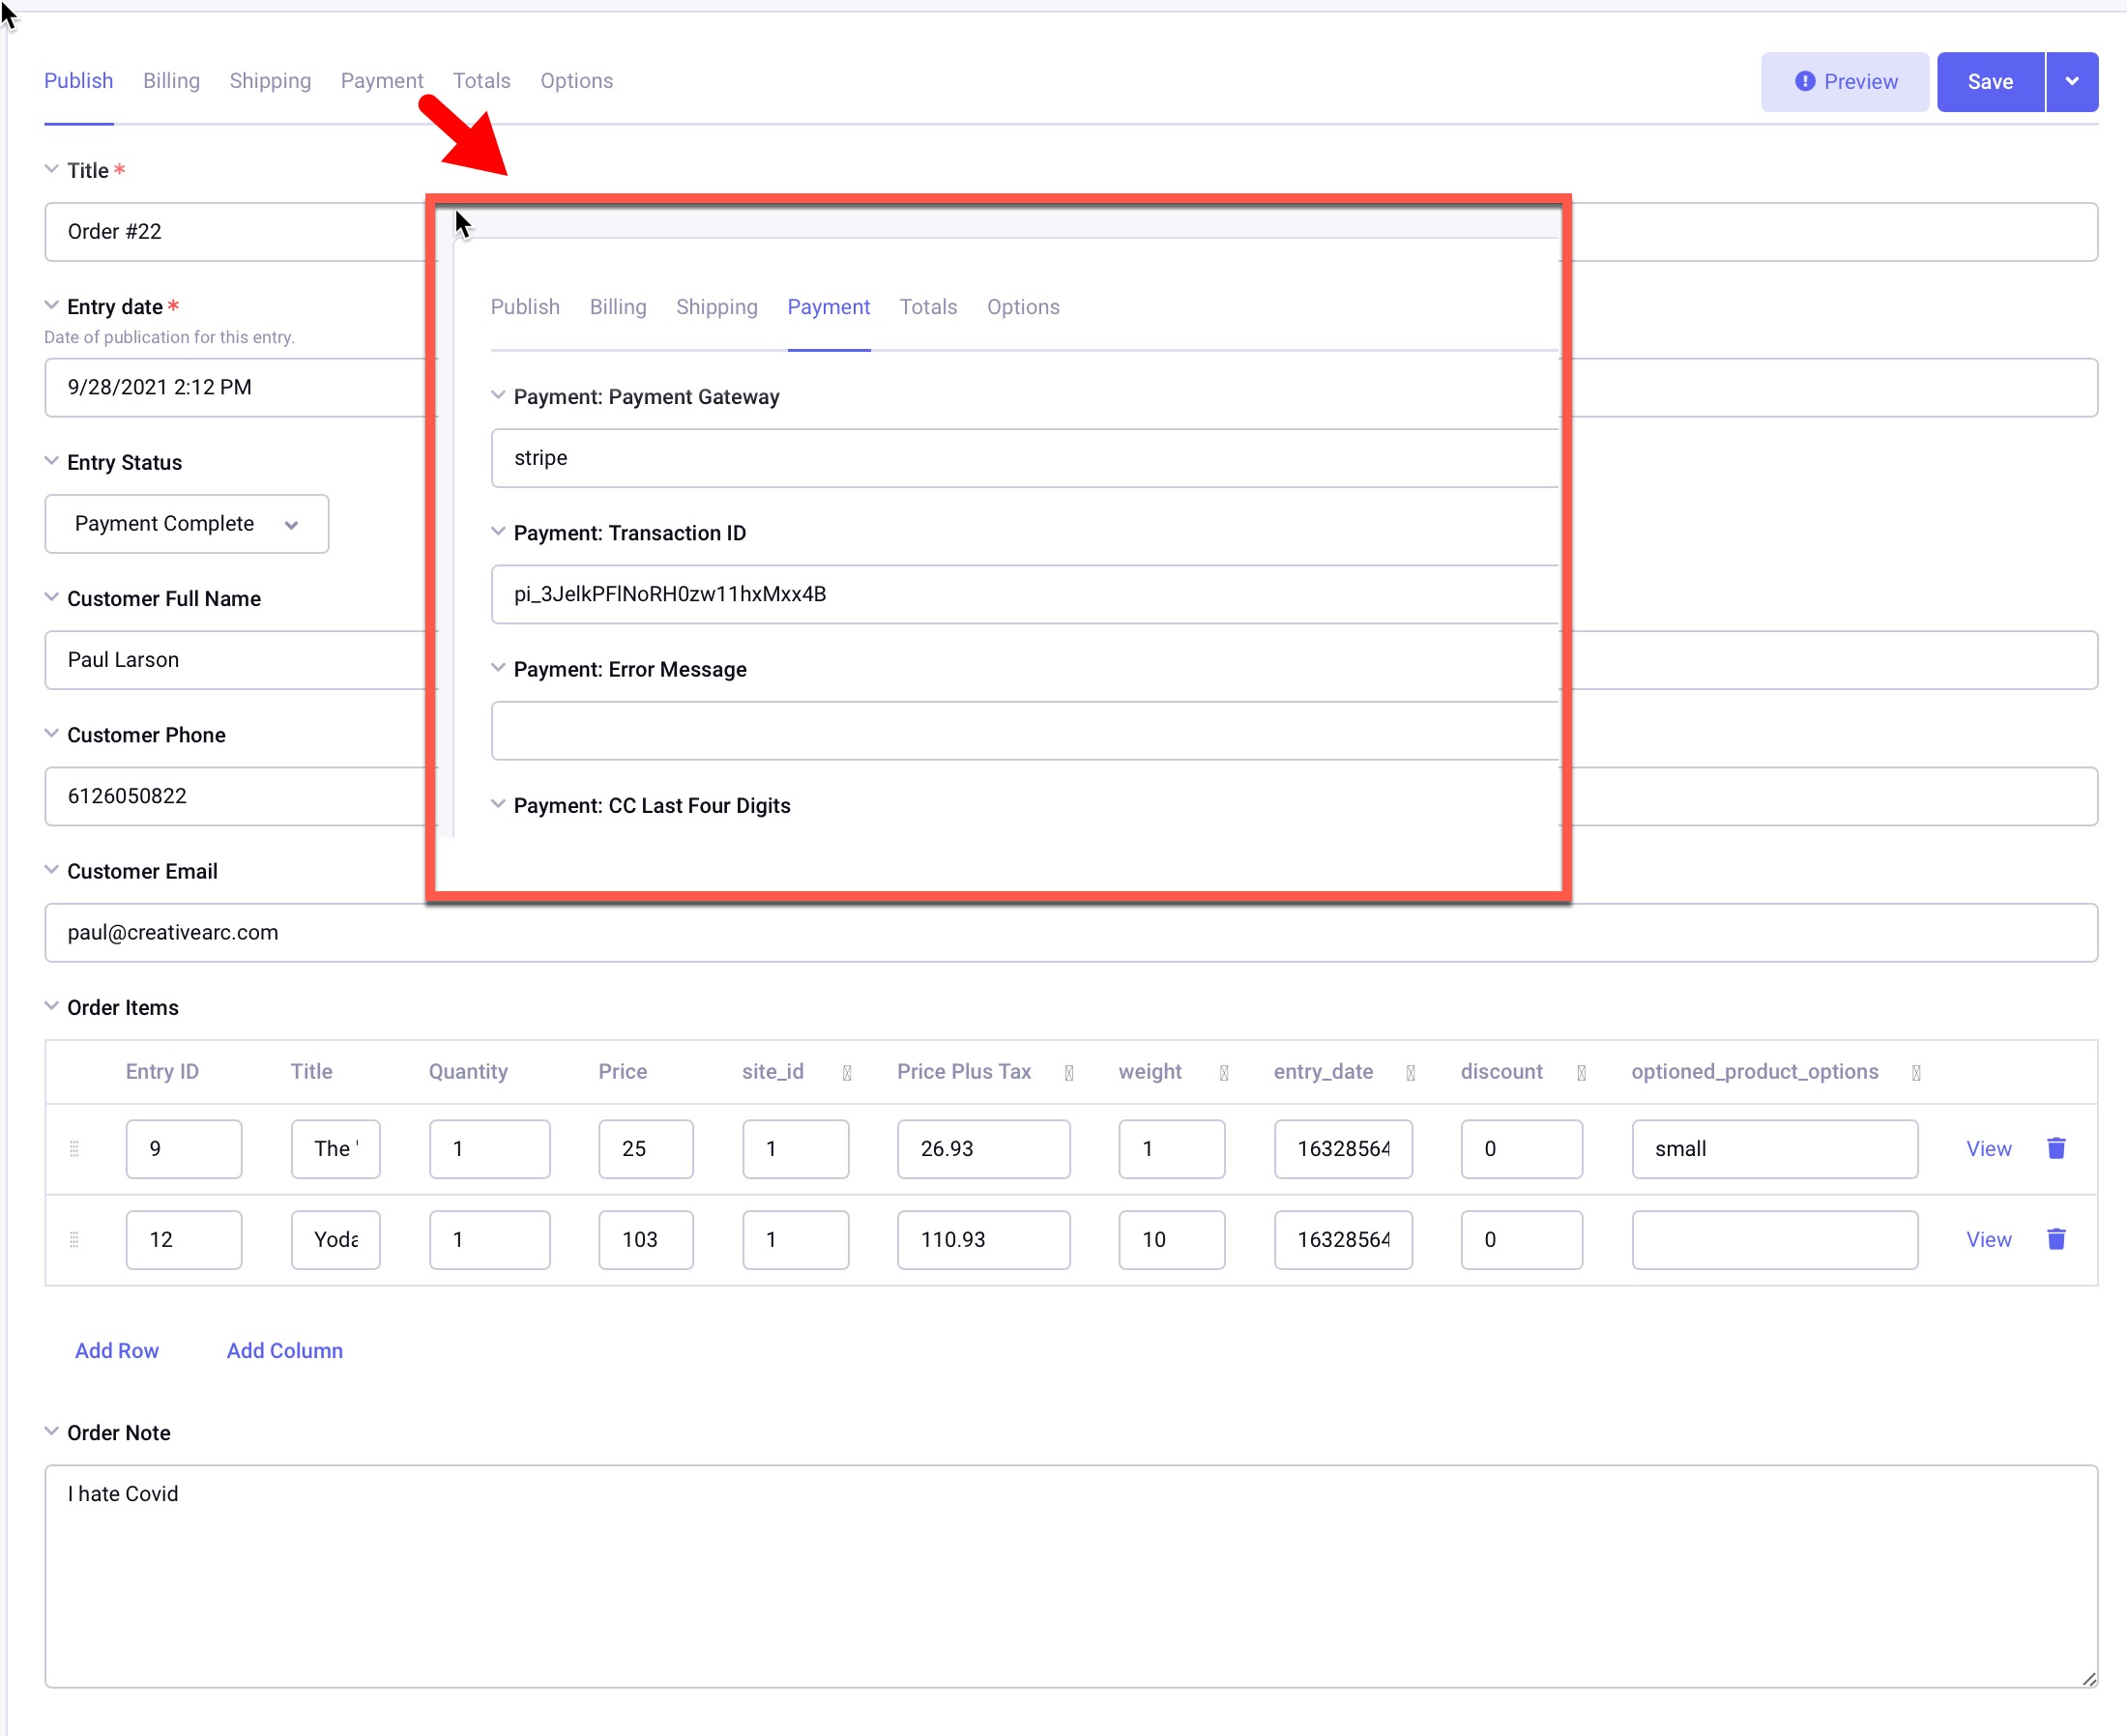
The expected order and customer data is found in the entry fields. Note the layout tabs that capture the billing, shipping payment. It’s all here in the ExpressionEngine Entry!
The CartThrob order manager is a separate Add-On; you can add both to your ExpressionEngine control panel menu manager as you see fit.
Within Order Manager, you’ll have basic reports around order totals by month, product reports, etc.
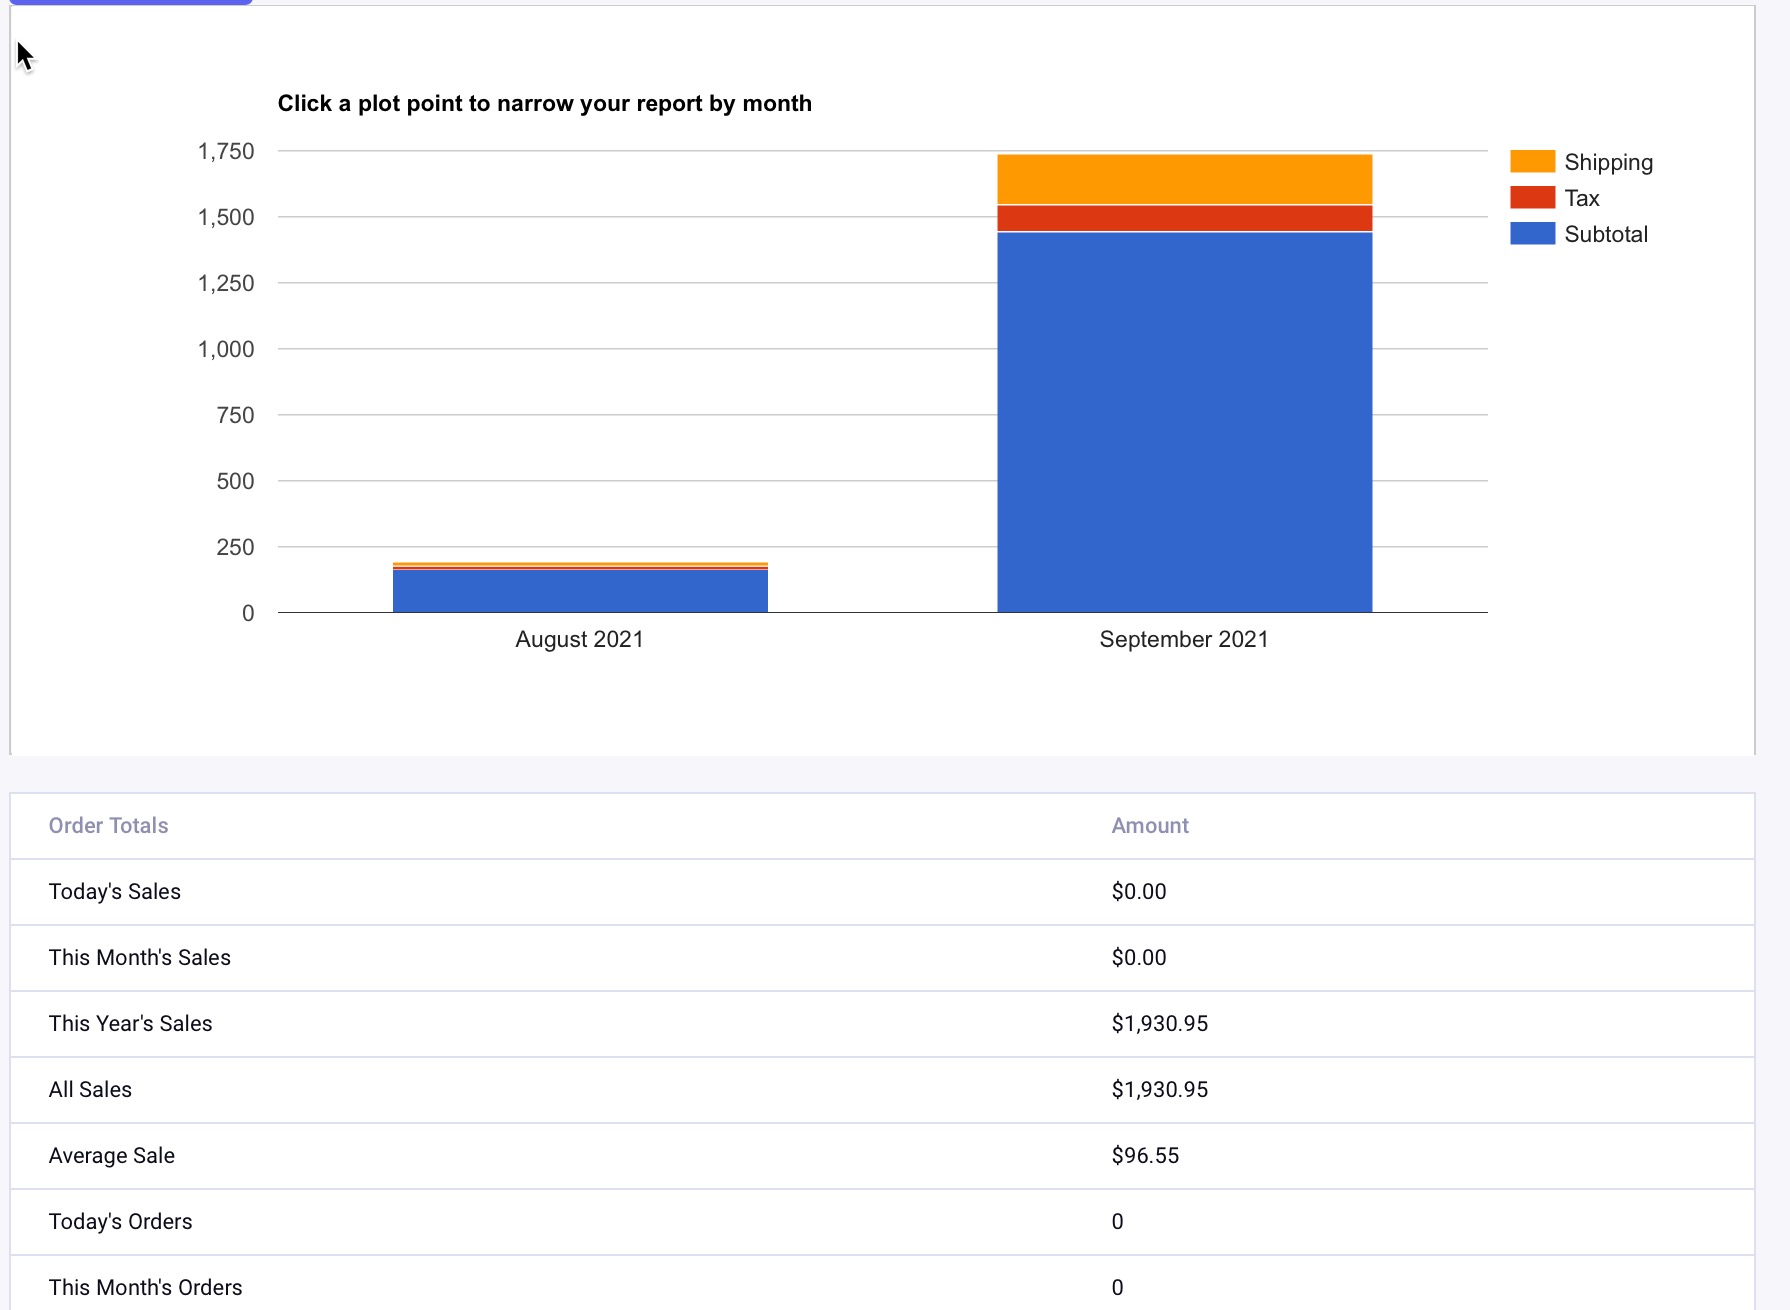
Within Order Manager, the Orders menu appears above the Reports. I’m just going to look at a single order I just made. It looks like an ExpressionEngine channel entries interface but it is slightly different, supplementing with some CartThrob-specific functionality.
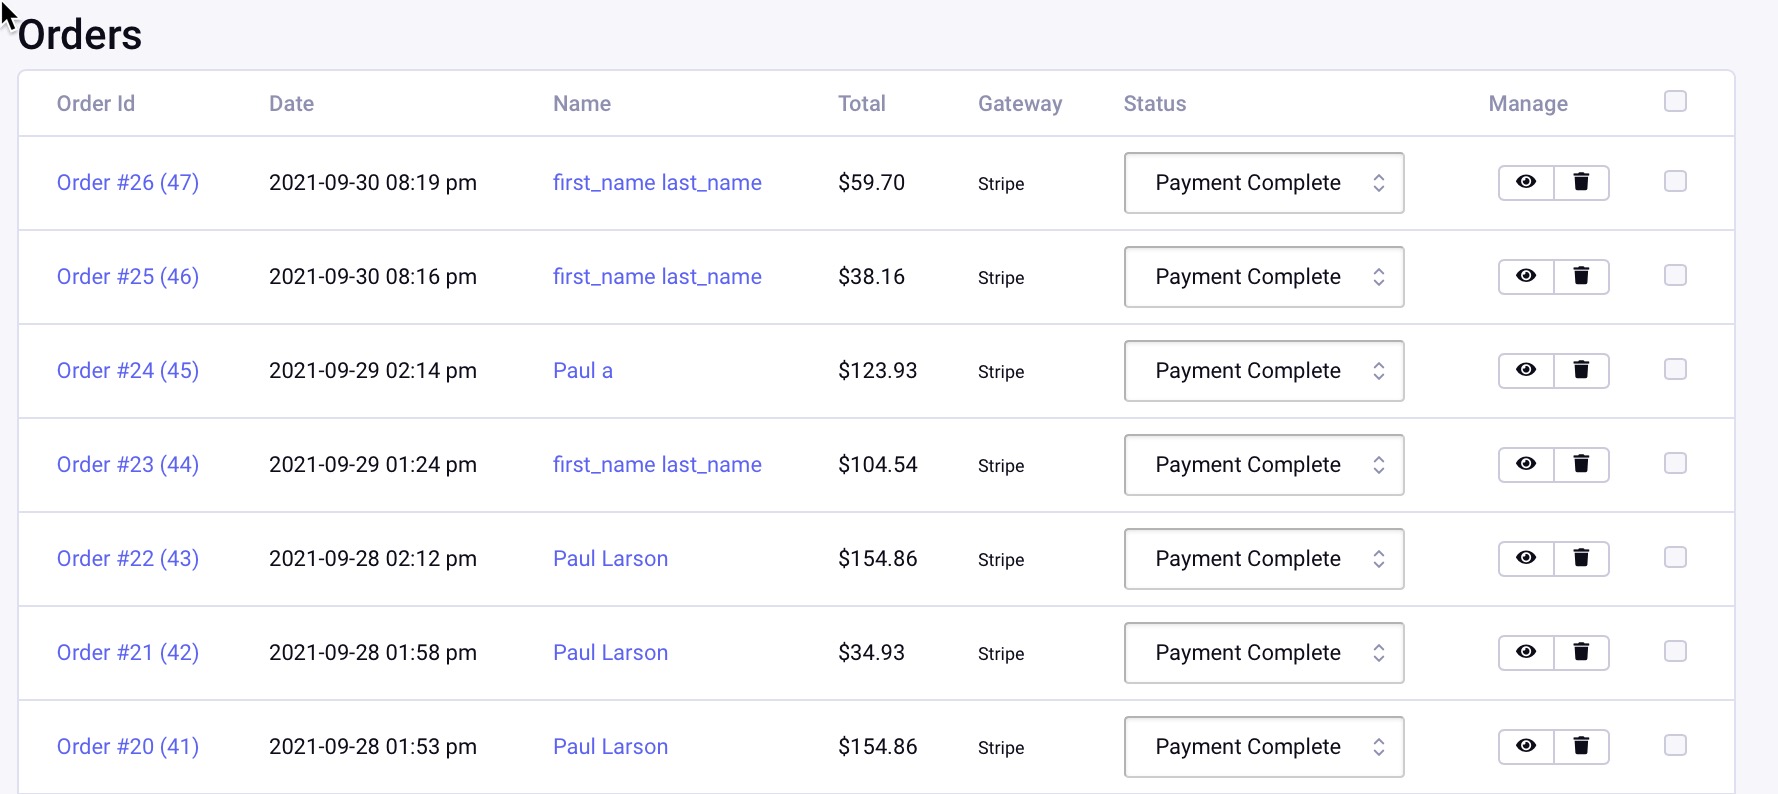
Click on a test entry and you’ll see the contents of this order, with functions for deleting the order, re-sending the order notification, or issuing a tracking number.
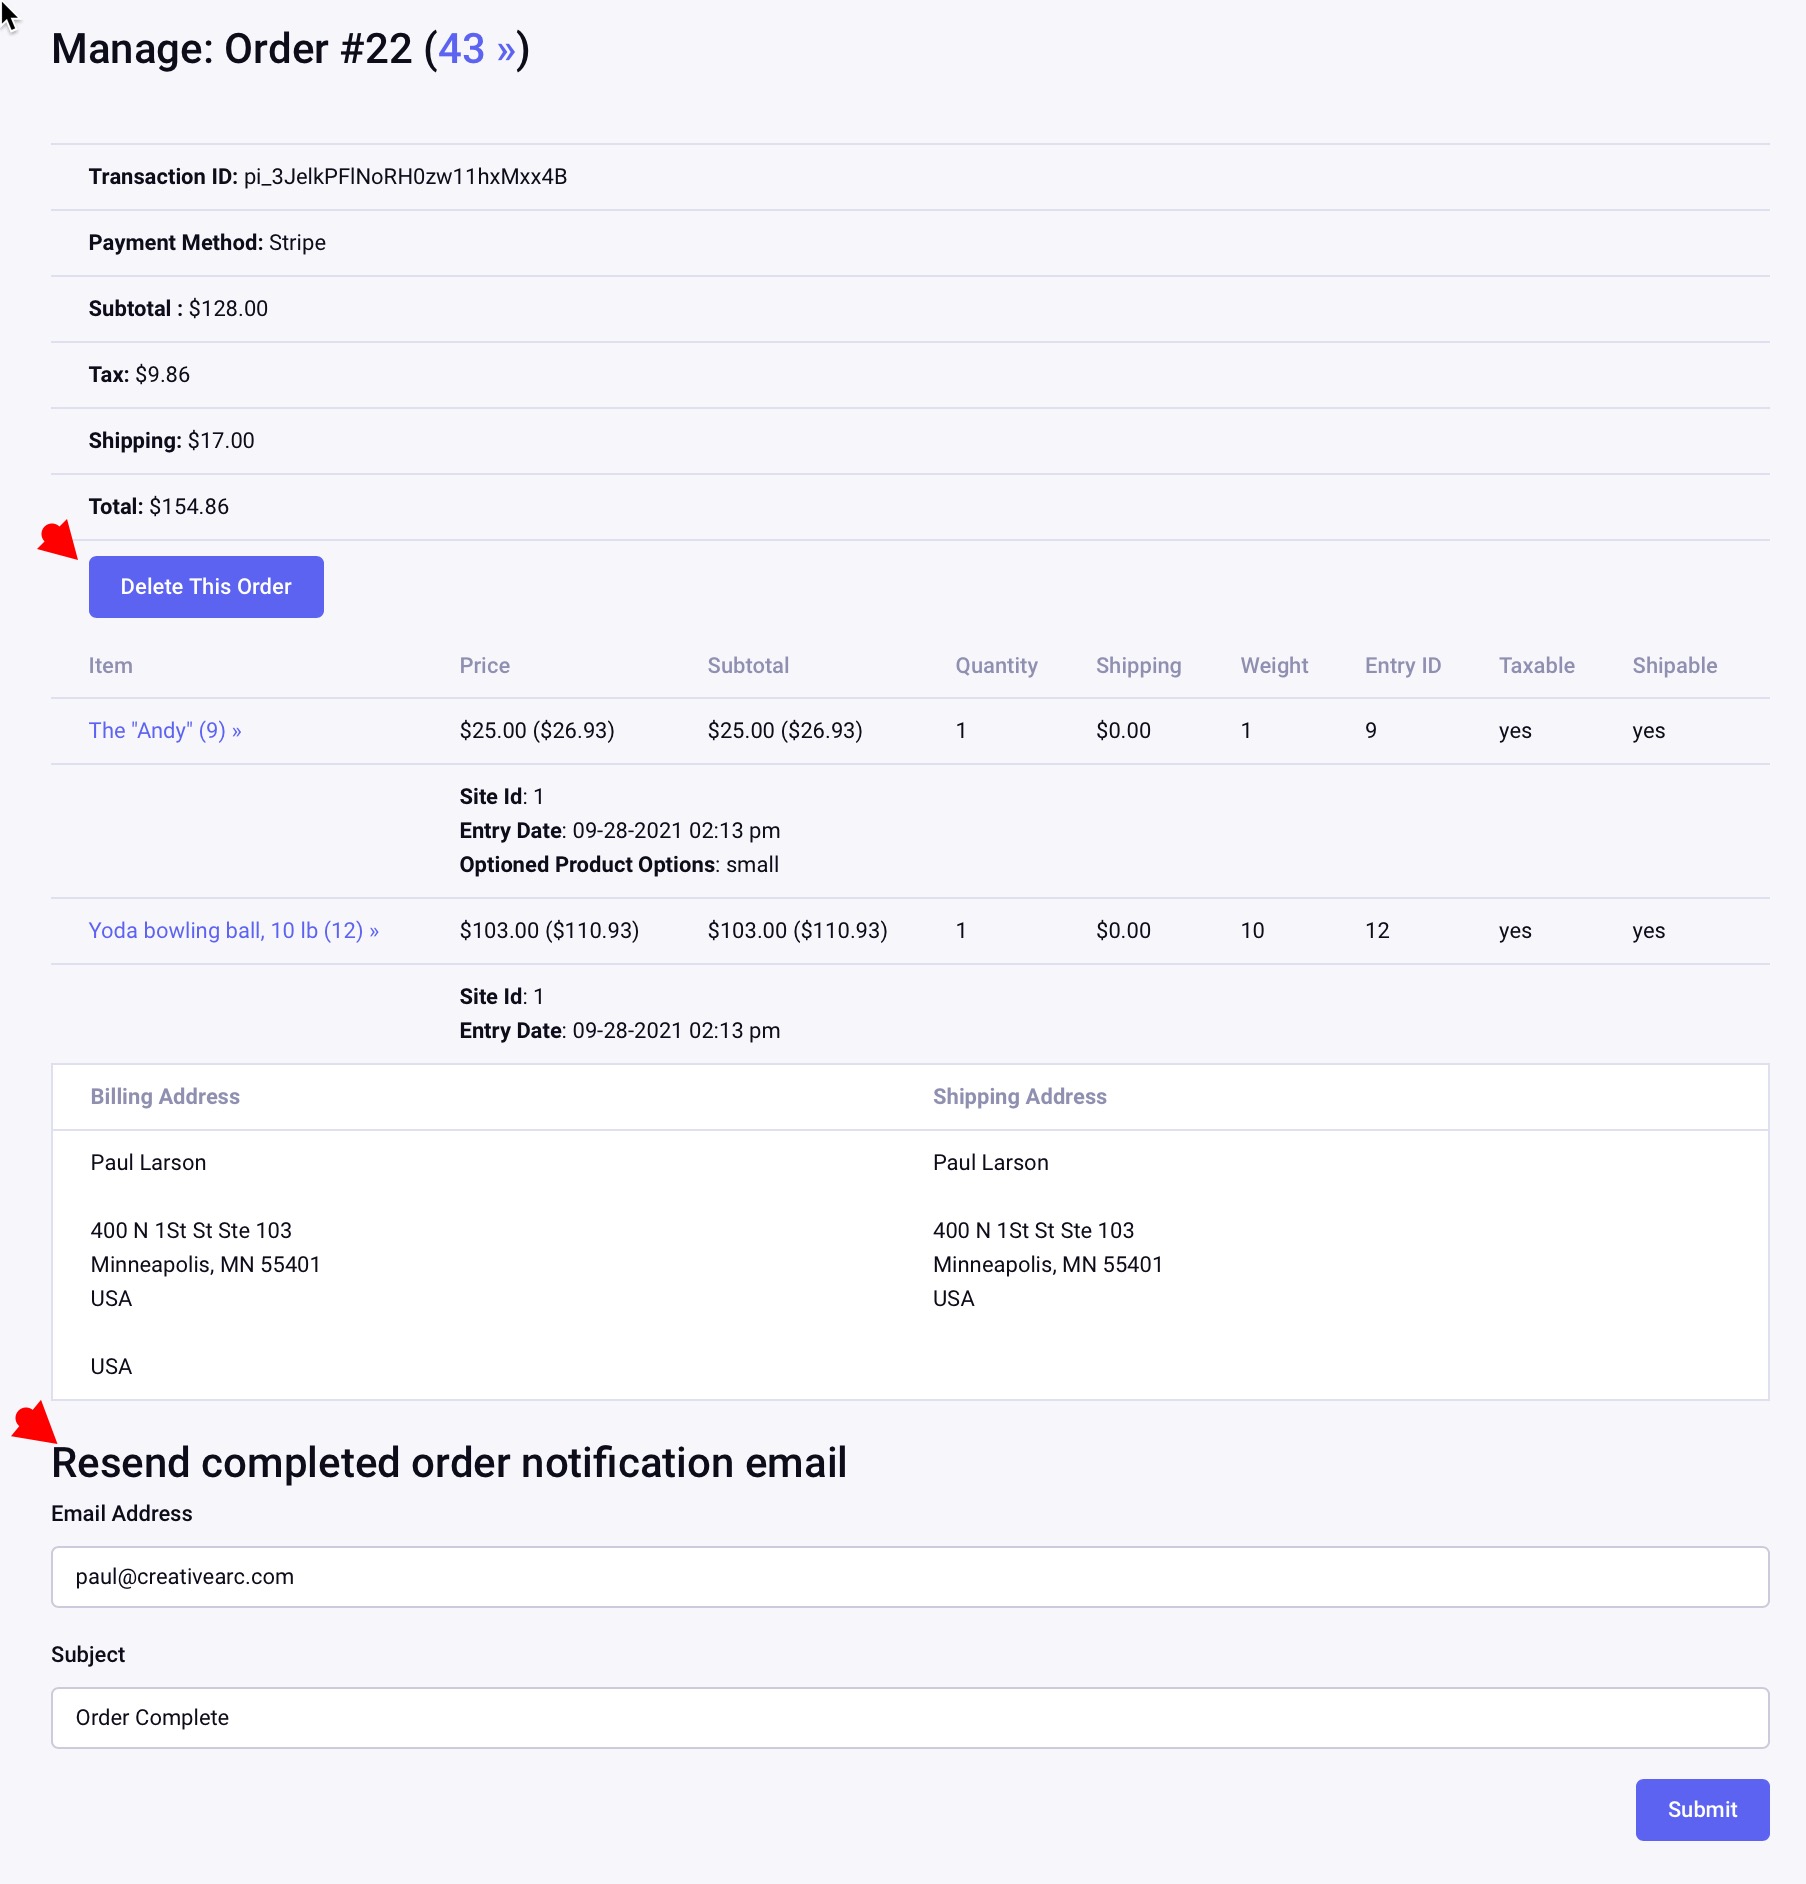
This concludes our tutorial of the CartThrob setup and frontend review. On to our final installment to cover Templates!
Have questions or comments about this course? Be sure to join the discussion and post in the ExpressionEngine Forums!
To introduce the templates, I want to show how we have our checkout steps configured.
We use the popular Structure add-on to manage the content in our FakeBowling.shop, which has very few Structure pages including “Your Cart,” “Your information,” “Shipping options.” etc, which are tied to the steps of the checkout process as customers progress through their order.
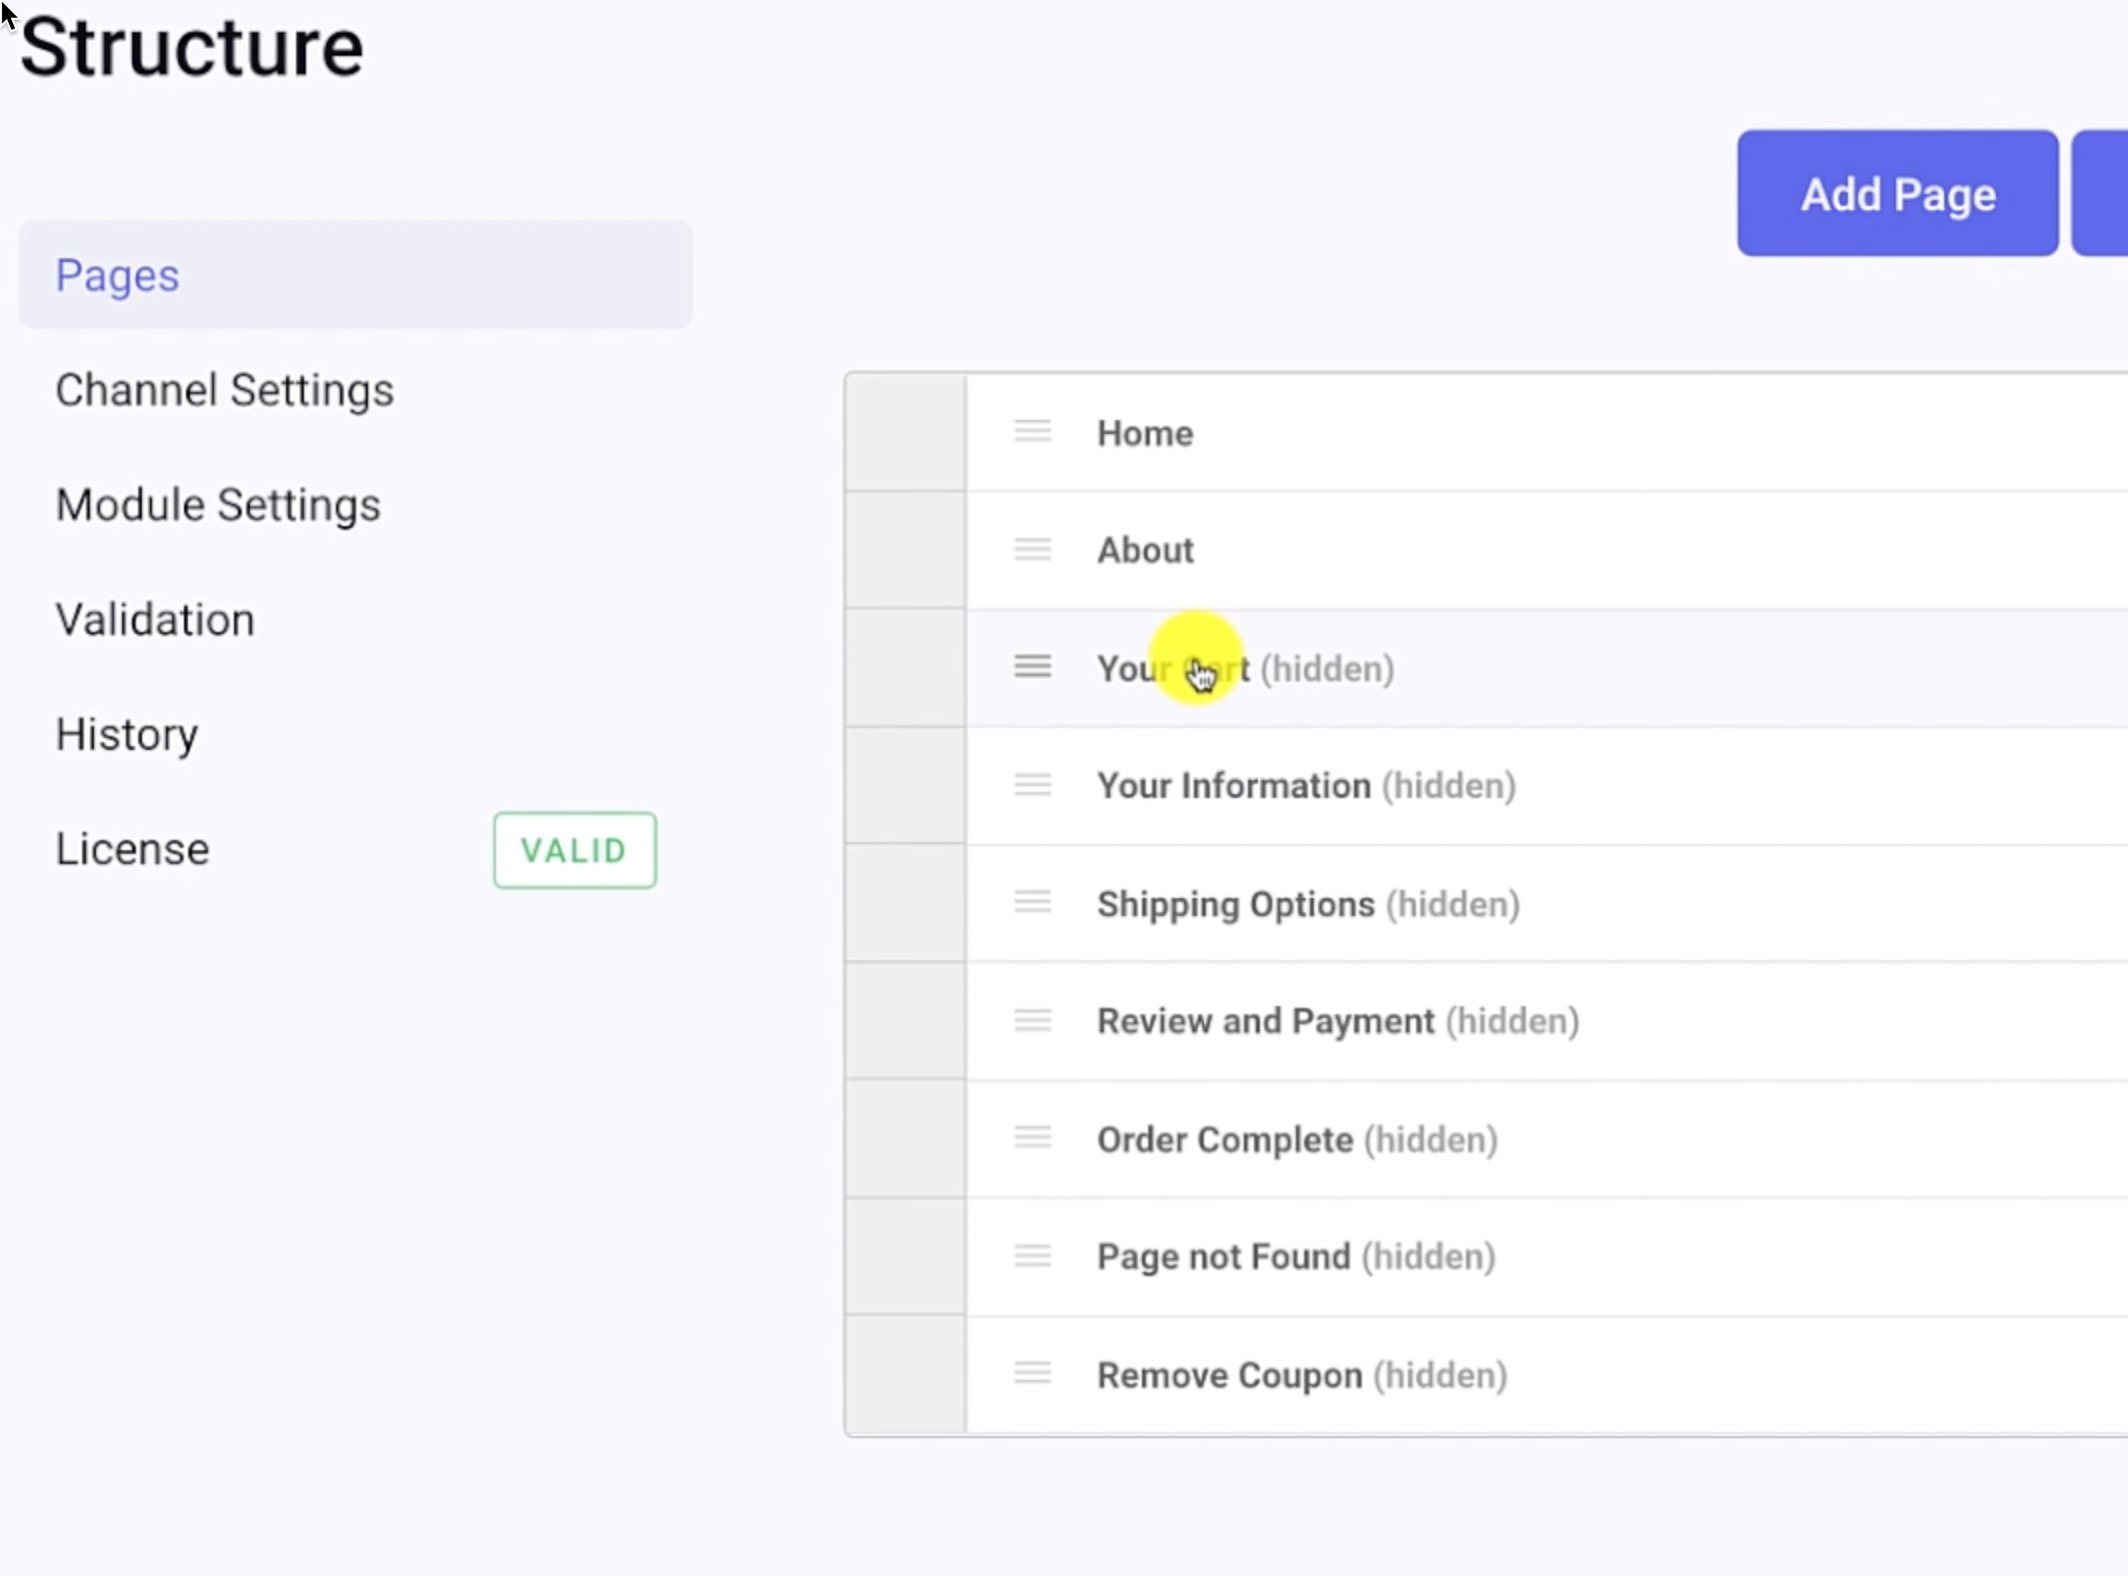
If you look at one of these entries, it’s a blank, placeholder page for with a Structure setting pointing it to our template: main/ecommerce.
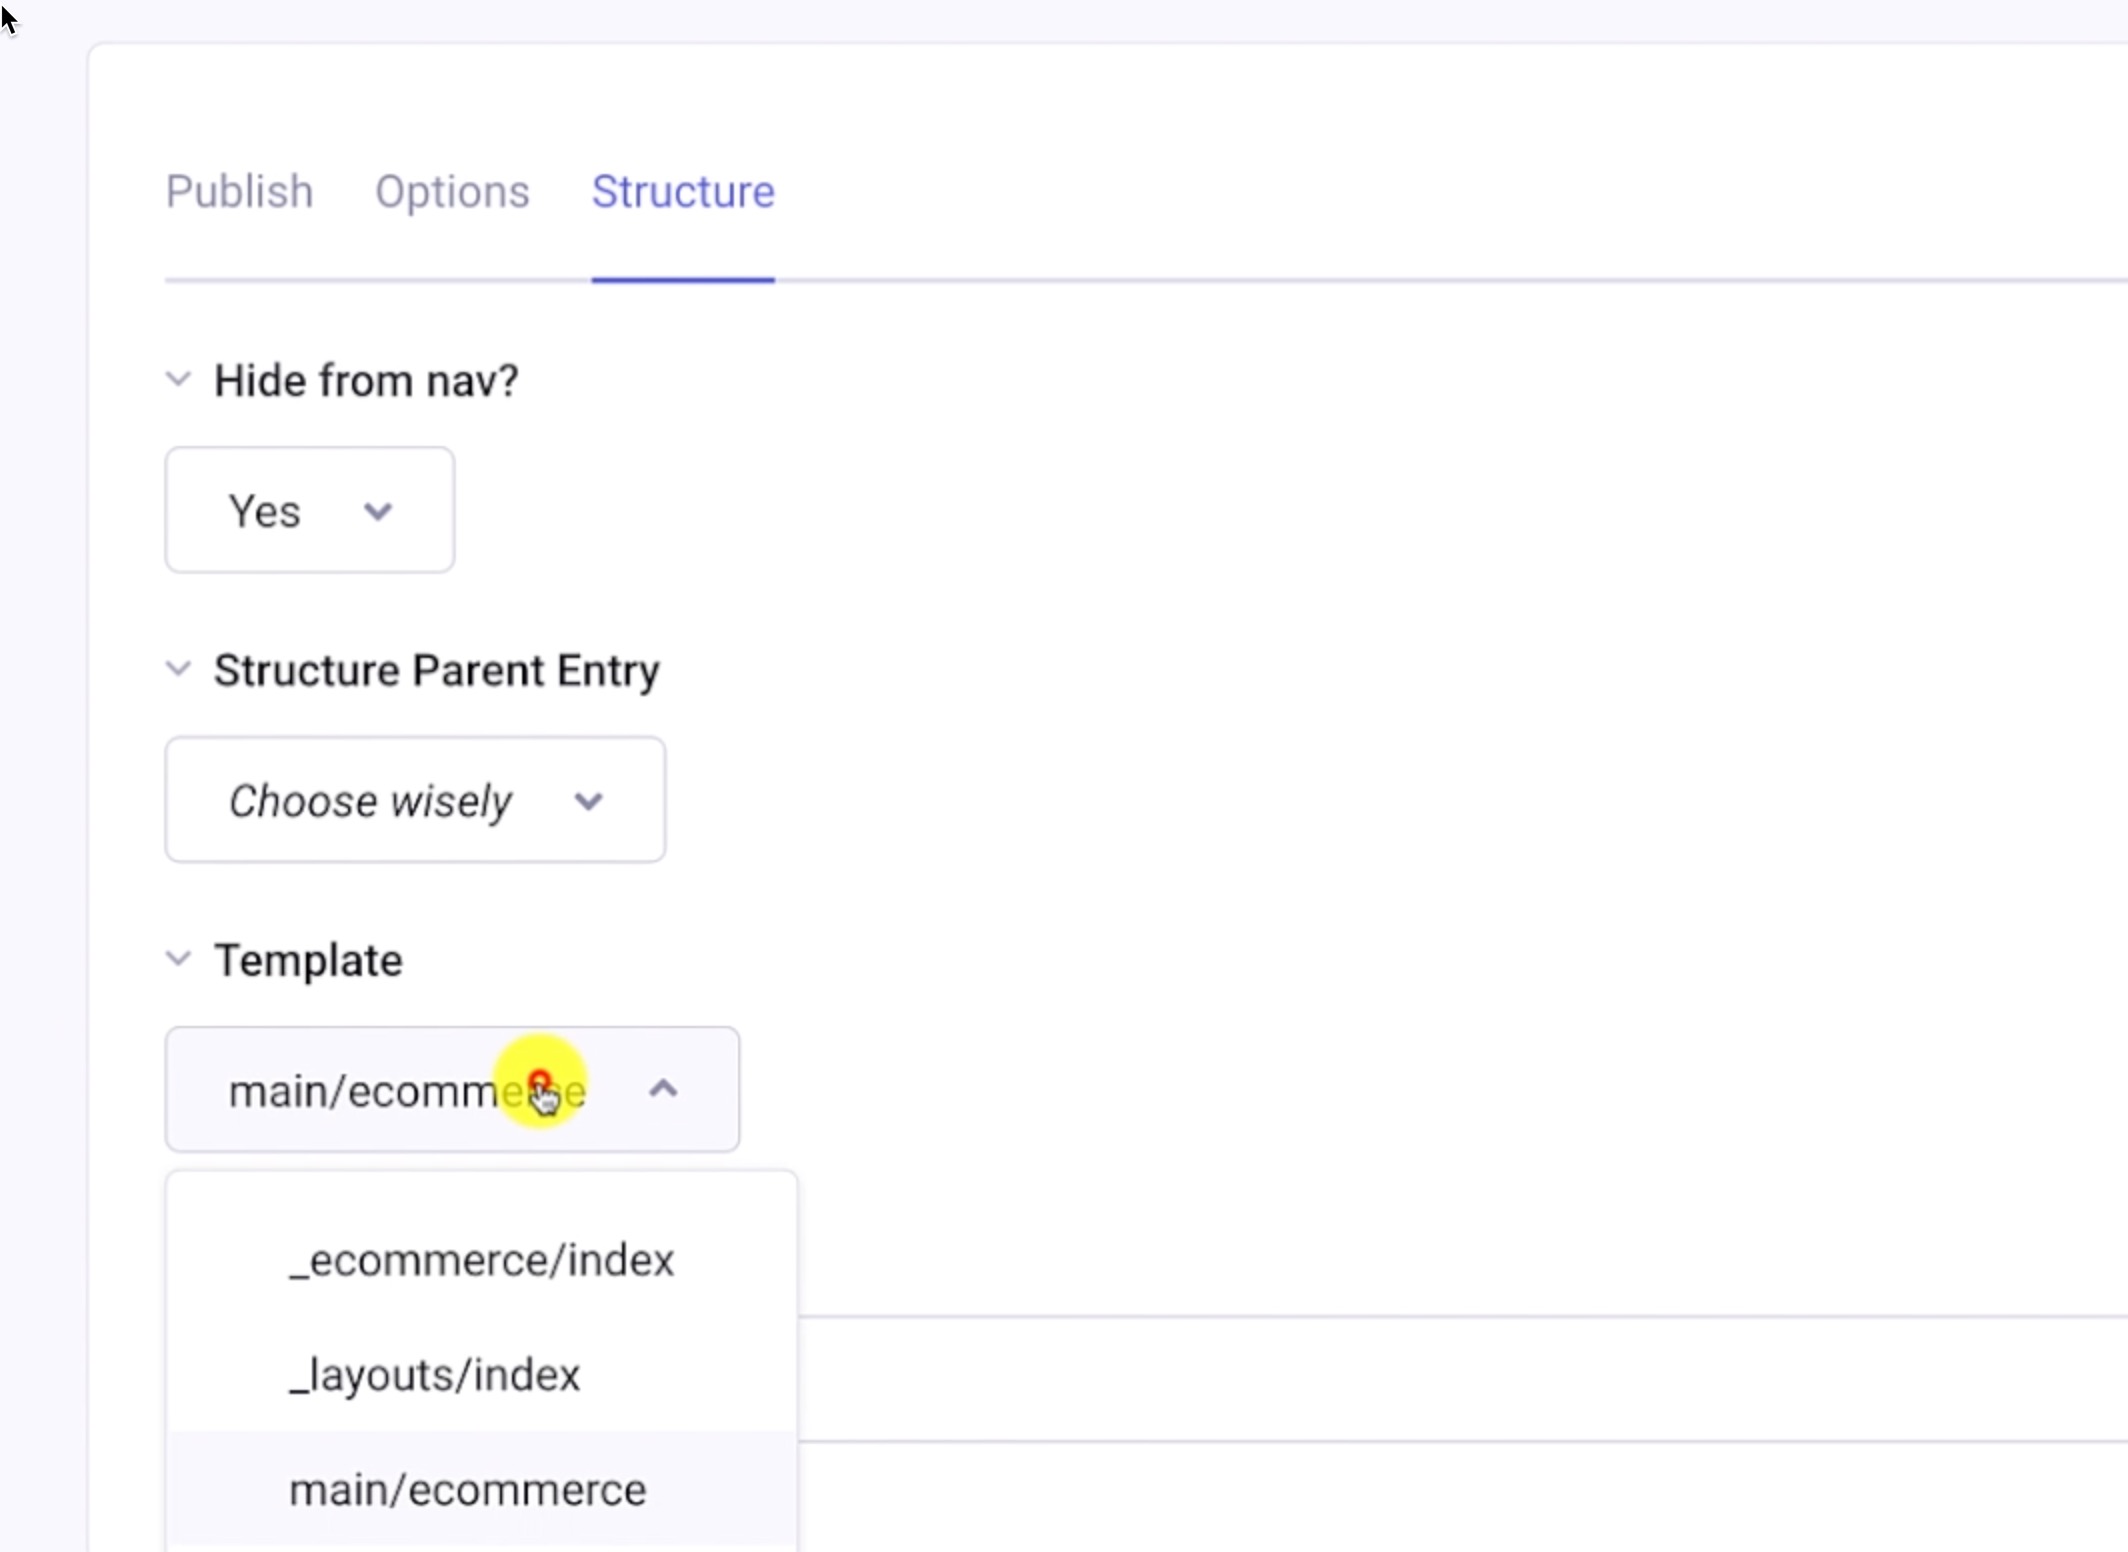
In our template groups, you’ll see the ecommerce template, which through a series of embeds looks at the segment of the URL, and then loads the appropriate template code. In other words, we simply pair the Structure page relating to a step in the checkout process to the appropriate master ecommerce template for our site.
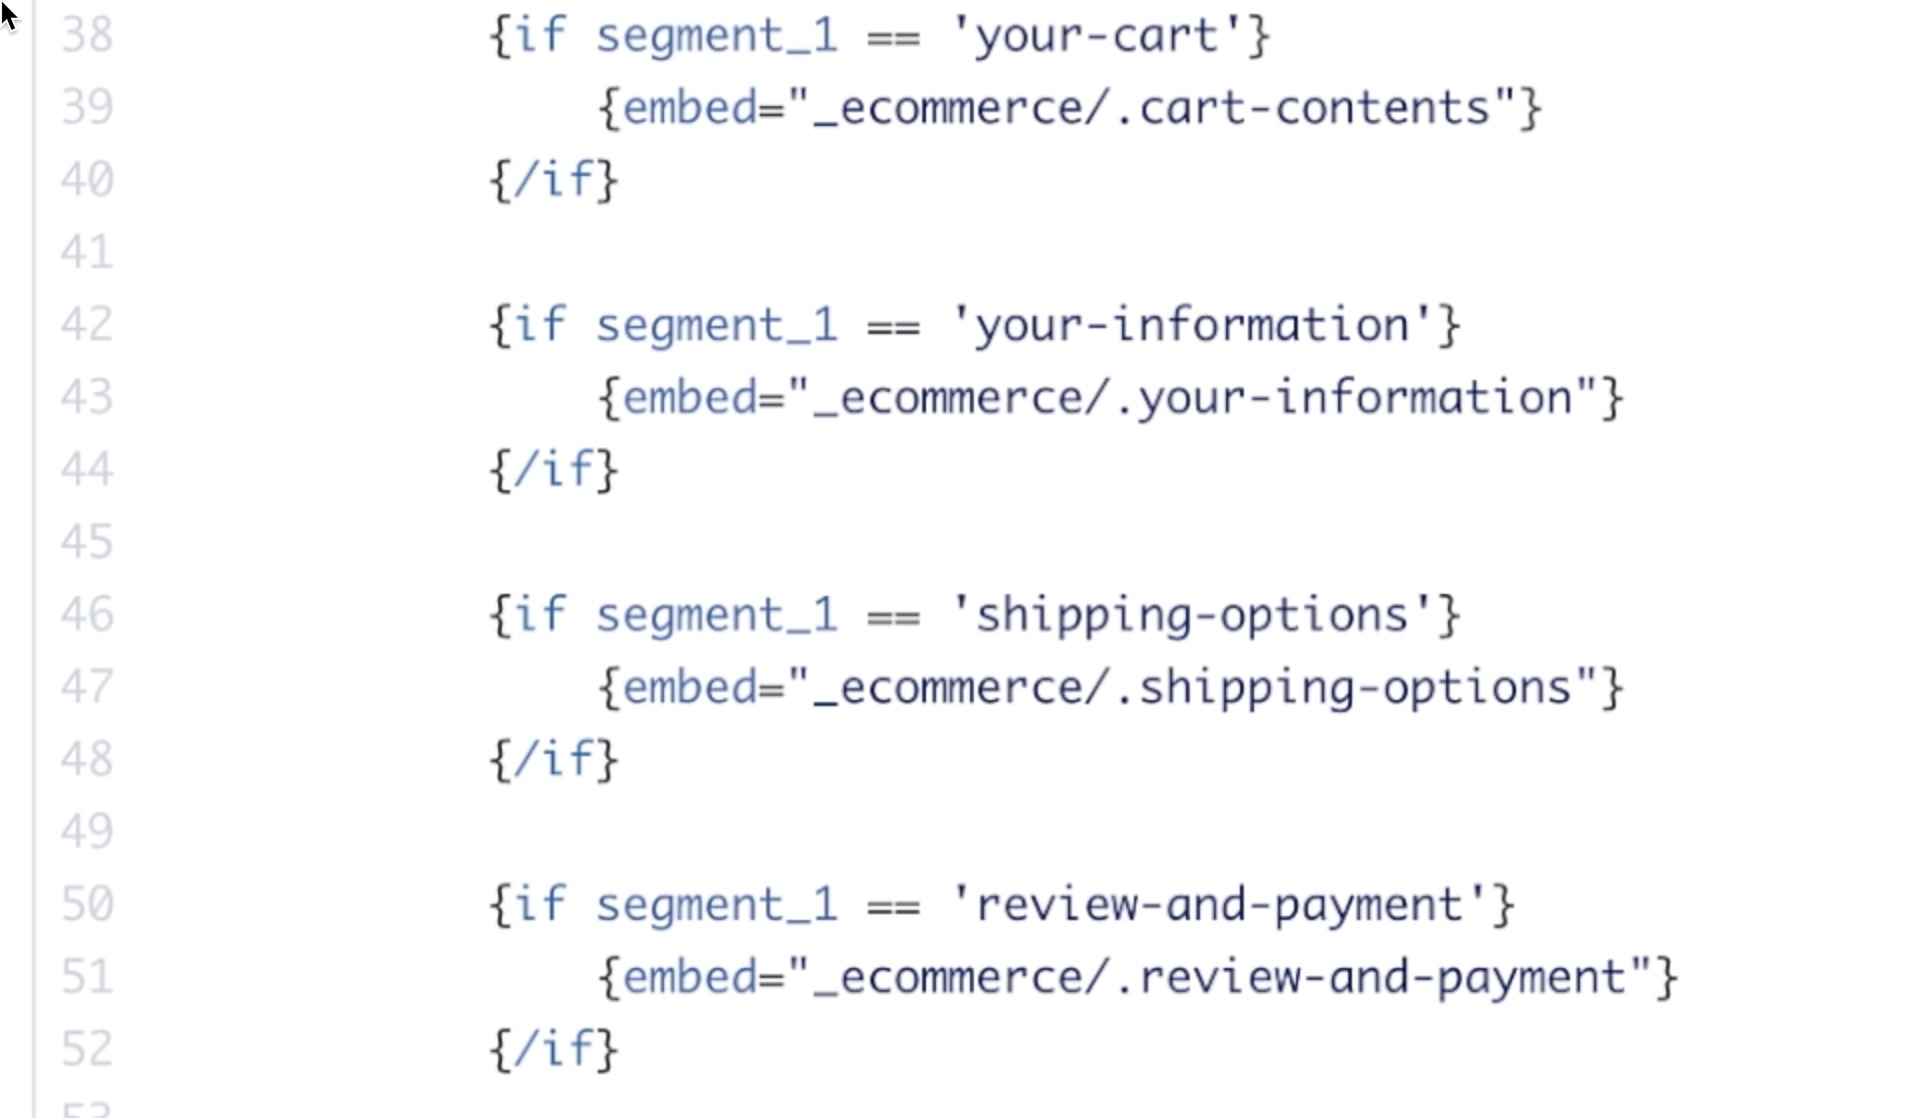
Those embeds intern call a series of hidden templates within a template group called _e-commerce with template code for all the conditions and situations that come up during a checkout.
The CartThrob documentation is the best resource for all available tags, but I’ll focus on those used in our Fakebowling.Shop example. Let’s look at a few key (not all) templates from the list above, in the order that they would be encountered during our 5-step customer checkout.
The first logical action to consider in any shopping cart is adding a product to the cart. Sounds like a job for {exp:cartthrob:add_to_cart_form}.
Notes about this block of code: We are in an entry template, within an {exp:channel:entries} loop. Note the return=”/your-cart” parameter, which will post the form submission and send is into the first segment of our cart journey. Note another loop inside {exp:cartthrob:add_to_cart_form}, {exp:cartthrob:item_options entry_id="{entry_id}"}. Any options for that product (size, color) will be displayed such that they can be selected in the form. If there are no options, no problem! The customer can simply specify a quantity and click ‘Add to Cart’.
{exp:cartthrob:add_to_cart_form
return="/your-cart"
id="addToCartForm"
autocomplete="off"
entry_id="{entry_id}"
}
<div class="productAddToCart">
{exp:cartthrob:item_options entry_id="{entry_id}"}
<div class="formField">
<div><label class="addToCartFormRowLabel">{option_label}</label></div>
<div>
{select}
<option {selected} value="{option_value}">{option_name} {if sku} (SKU: {sku}){/if} {option_price}</option>
{/select}
</div>
</div>
{/exp:cartthrob:item_options}
<div class="formField">
<div><label class="required" for="quantity">Quantity</label></div>
<div><input id="quantity" name="quantity" required="required" type="text" value="1" style="max-width: 100px;"></div>
</div>
<input class="button expanded" type="submit" value="Add to Cart" />
</div>
<div>
{/exp:cartthrob:add_to_cart_form}
The item is now in your cart, and the product page sent us to /your-cart, where we see our cart contents on display (to be edited or confirmed).
Notes about this block of code: We are displaying the cart contents within an {exp:cartthrob:update_cart_form} tag pair. Why? Well, if the customer wants to change quantities or delete an item entirely, we’ll be able to furnish those changes to CartThrob. If no changes are needed in the cart, this tag simply won’t be submitted.
After update_cart_form, the power {exp:cartthrob:cart_items_info} makes an appearance. From the CartThrob docs, “The cart_items_info tag works similar to the channel entries module, and is intended to print out the contents of the customer’s cart.” Finally, another loop of {exp:cartthrob:item_options} to display any chosen options.
{exp:cartthrob:update_cart_form
return="/your-cart"
id="updateCartForm"
name="updateCartForm"}
{exp:cartthrob:cart_items_info}
<div class="cartRow">
<div class="cartItemImage">
{embed="_ecommerce/.product-image" entry_id="{entry_id}"}
</div>
<div class="cartItemDescription">
<h4>{title}</h4>
{exp:cartthrob:item_options entry_id="{entry_id}" row_id="{row_id}"}
<div class="formField cartItemOption">
<div><label class="cartOptionsLabel">{option_label}:</label></div>
<div>
{select}
<option {selected} value="{option_value}">{option_name} {if sku} (SKU: {sku}){/if} {option_price}</option>
{/select}
</div>
</div>
{/exp:cartthrob:item_options}
</div>
<div class="cartItemQuantity">
<input id="quantity_{row_id}" name="quantity[{row_id}]" required="required" type="text" value="{quantity}">
</div>
<div class="cartItemTotal">
{item_subtotal}
</div>
<div class="cartItemRemove">
<label><input name="delete[{row_id}]" type="checkbox">Remove</label>
</div>
</div>
{/exp:cartthrob:cart_items_info}
<div class="cartPageButtons">
<input class="button" type="submit" value="Update Cart">
<a href="/your-information" class="button">Continue</a>
</div>
{/exp:cartthrob:update_cart_form}
I’m not going to make any edits to my cart, so I’ll click the Continue button, which is a simple HTML button linking to the next step in the process, /your-information.
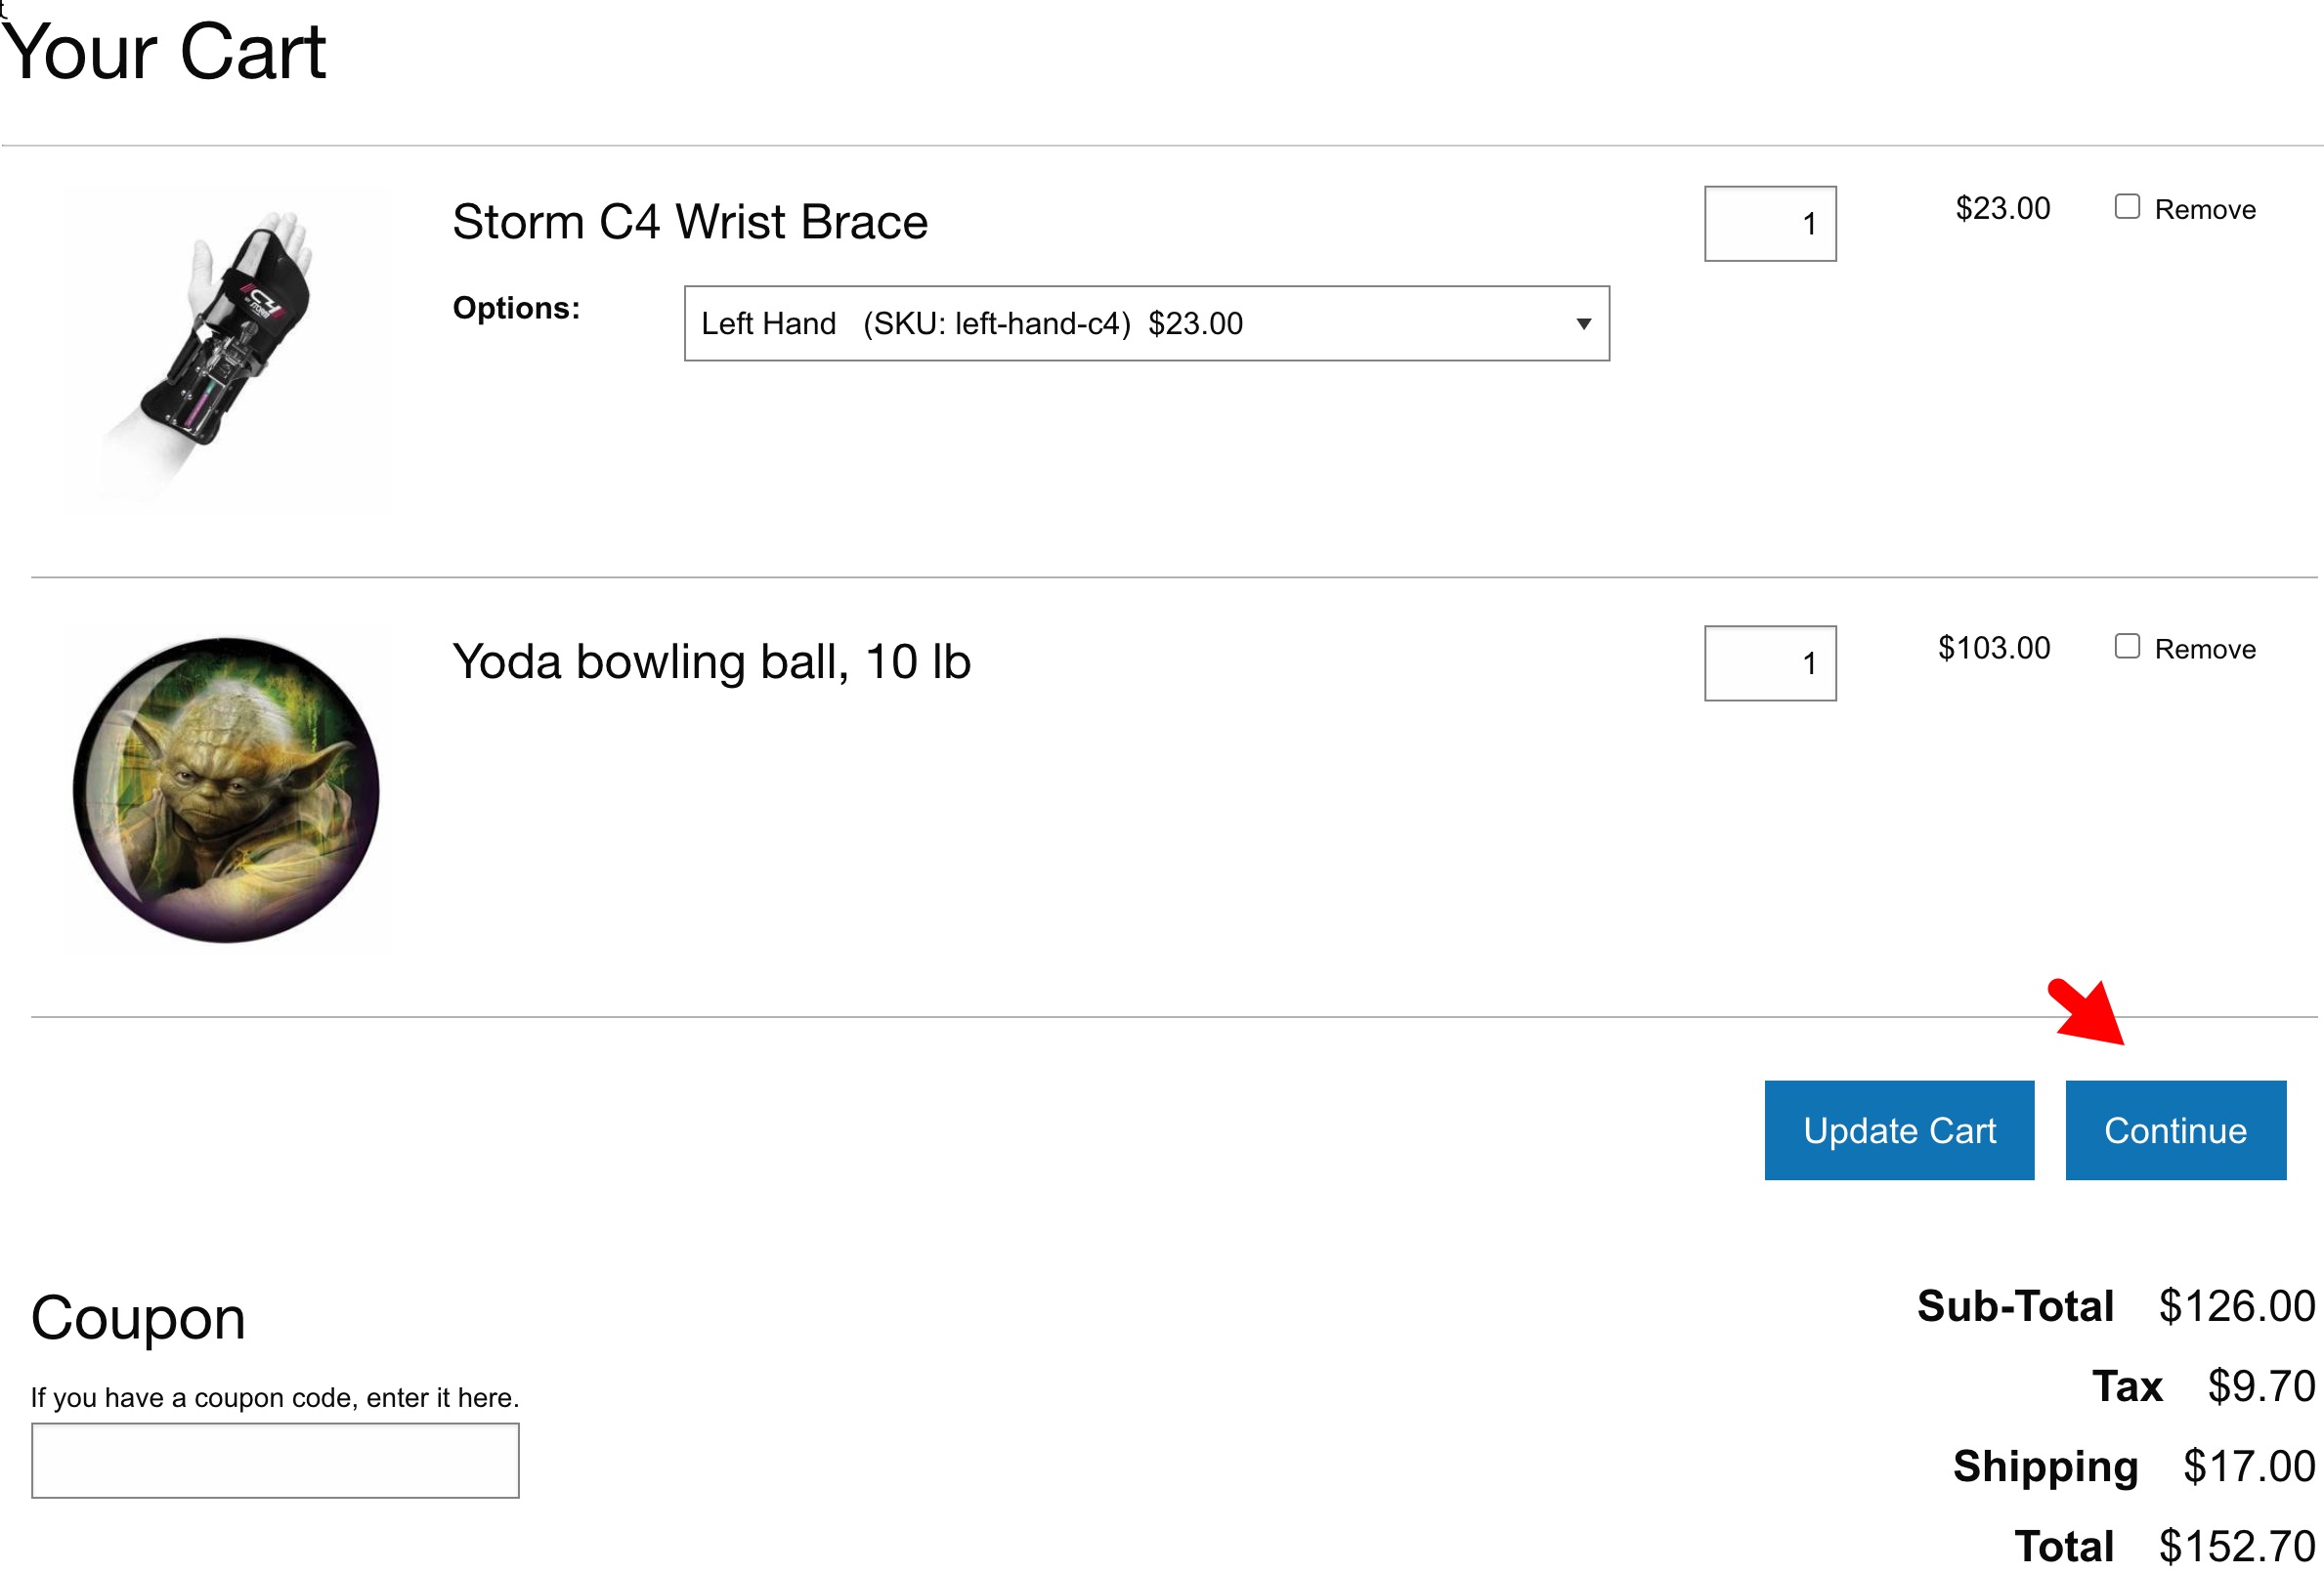
These particular tags are very robust and have many parameters. In our checkout, we present both a Billing and Shipping address to the customer and give them a chance to adjust either before they continue.
Notes about this block of code: I redacted several repetitive address fields to not confuse the CartThrob logic that is at play. We need to wrap the bulk of the template in a {exp:cartthrob:customer_info} tag to access the stored address information (should they have a member profile, for example). Within the next tag layer is a {save_customer_info_form} which will take the address information and post it to the form.
From the CartThrob docs:
exp:cartthrob:customer_info: “This tag pair provides a simple method of accessing customer data that has been saved to SESSION* using save_customer_info_form or update_cart_form”
exp:cartthrob:save_customer_info_form: allows “you to save customer info during your customers visit to simplify the creation of a multi-page checkout.”
{exp:cartthrob:customer_info}

    {exp:cartthrob:save_customer_info_form
        return="/shipping-options"
        id="customerInfoForm"
        required="first_name|last_name|address|city|state|zip|country_code|shipping_first_name|shipping_last_name|shipping_address|shipping_city|shipping_state|shipping_zip|shipping_country_code"
        error_handling="inline"}

        <div class="cartFieldGroup">
            <div>
                <label for="email_address" class="required">Email</label>
                <input id="email_address" name="email_address" required="required" type="email" value="{email_address}">
                {if error:email_address}<br><span class="error">{error:email_address}</span>{/if}
            </div>
            <div>
                <label for="phone" class="required">Phone</label>
                <input id="phone" name="phone" required="required" type="tel" value="{phone}">
                {if error:phone}<br><span class="error">{error:phone}</span>{/if}
            </div>
        </div>

        <div class="ecommerceBlocks">
            <div>

                <div class="cartFieldGroup">
                    <h3>Billing Information</h3>

                    <div>
                        <label for="first_name" class="required">First Name</label>
                        <input id="first_name" name="first_name" required="required" type="text" value="{first_name}">
                        {if error:first_name}<br><span class="error">{error:first_name}</span>{/if}
                    </div>
                    ... hidden ...
                    <div>
                        <label for="zip" class="required">Zip</label>
                        <input id="zip" name="zip" required="required" type="text" value="{zip}">
                        {if error:zip}<br><span class="error">{error:zip}</span>{/if}
                    </div>
                    <input name="country_code" type="hidden" value="USA">
                </div>

            </div>
            <div>

                <div class="cartFieldGroup">
                    <h3>Shipping Information <a href="#" id="copyBillingInfo">Copy billing</a></h3>

                    <div>
                        <label for="shipping_first_name" class="required">First Name</label>
                        <input id="shipping_first_name" name="shipping_first_name" required="required" type="text" value="{shipping_first_name}">
                        {if error:shipping_first_name}<br><span class="error">{error:shipping_first_name}</span>{/if}
                    </div>
                    ... hidden ...
                    <div>
                        <label for="shipping_zip" class="required">Zip</label>
                        <input id="shipping_zip" name="shipping_zip" required="required" type="text" value="{shipping_zip}">
                        {if error:shipping_zip}<br><span class="error">{error:shipping_zip}</span>{/if}
                    </div>
                    <input name="shipping_country_code" type="hidden" value="USA">
                </div>

            </div>

        </div>

        <div class="cartPageButtons">
            <input type="submit" value="Continue" class="button">
        </div>

    {/exp:cartthrob:save_customer_info_form}

{/exp:cartthrob:customer_info}
I’ve specified my Billing and Shipping info, so I’m ready to click Continue to progress to /shipping-options.
Our shipping setup for Fakebowling.shop is very. Since we used the By Weight - Threshold plugin, there’s nothing for the customer to select. We display the calculated amount with a simple one-liner.
Your calculated shipping cost is: <strong>{exp:cartthrob:cart_shipping}</strong>
Need something more robust? Shipping so simple is the above example is pretty rare. Below is a snippet to demonstrate how live rates calculation might be used.
Notes: the exp:cartthrob:get_live_rates_form has a return value to send the customer to the final page in the checkout process, /review-and-payment. Key tags:
get_shipping_options: “This tag pair outputs available shipping options. For instance, it will return available options used in conjunction with the shipping plugin called “Customer Selectable Flat Rates”. The information it returns varies by shipping plugin.”
liverates_price: Calculated value of the chosen liverates shipping plugin ({price} variable with liverates_ variable prefix)
{exp:cartthrob:get_live_rates_form shipping_mode="shop" id="shippingOptions" return="/review-and-payment"}
<div class="cartFieldsetWrapper">
<div class="cartFieldGroup">
<div>
<div class="cartFieldGroupLabel"><label for="shipping_option">Shipping Method</label></div>
<p class="required">Required</p>
</div>
<div>
<div class="formRow">
<div class="formField">
<div>
<fieldset>
<legend>Shipping Options</legend>
{exp:cartthrob:get_shipping_options variable_prefix="liverates_"}
{if liverates_rate_short_name == 'ups'}
<label for="{liverates_rate_short_name}"><input id="{liverates_rate_short_name}" name="shipping_option" value="{liverates_rate_short_name}" type="radio" checked="checked" required="required"> {liverates_rate_title}</label><br><br>
{if error_message}{error_message}{/if}
{if:else}
<label for="{liverates_rate_short_name}"><input id="{liverates_rate_short_name}" name="shipping_option" value="{liverates_rate_short_name}" type="radio" {liverates_selected} required="required"> {liverates_rate_title} ({liverates_price})</label><br>
{if error_message}{error_message}{/if}
{/if}
{/exp:cartthrob:get_shipping_options}
</fieldset>
{/if}
</div>
</div>
</div>
</div>
</div>
</div>
<div class="cartPageButtons">
<span></span>
<button type="submit" form="shippingOptions" value="Review & Payment" class="button bigCartButton"><span>Proceed to Review & Payment</span></button>
</div>
{/exp:cartthrob:get_live_rates_form}
We’ve now confirmed cart contents, addresses, and shipping, and we’re ready to submit our order!
{exp:cartthrob:checkout_form}: No surprise here; this important tag “outputs a checkout form, gathers values for payment processing and initiates processing & payments.”
{gateway_fields}: “Use the “gateway_fields” variable to automatically output all required and optional fields used by your selected payment gateway.” (You can override and handle these form inputs manually, as we often do).
Notes: Just a few parameters for our store, setting the return URL (/order-complete) and setting the gateway value of stripe. We offer an order_note field that is a standard ExpressionEngine field, but CartThrob looks for that name specifically. “You add custom data to entire orders in the checkout_form. If you have a custom field in your orders channel named order_notes”.
{exp:cartthrob:checkout_form
    return="/order-complete"
    secure_action="yes"
    id="checkout_form"
    gateway="stripe"
    }

    <h3>Order Note</h3>
    <textarea name="order_note" cols="75" rows="4"></textarea><br><br>

    {gateway_fields}

    <h3>Payment Details</h3>

    <div id="checkout_form_gateway_fields">
        <div class="control-group" style="margin:auto;width:80%">
            <!-- placeholder for card elements -->
            <div id="card-element"></div>
        </div>
    </div><br><br>

    <div class="cartPageButtons">
        <input class="button" type="submit" value="Submit Order">
    </div>

{/exp:cartthrob:checkout_form}
We have what we need! All that remains is the final Submit Order action, and we’ll hopefully:
CartThrob is a mature, robust ecommerce platform. Coupled with ExpressionEngine, one can build stores of high complexity, but it’s well-suited for smaller stores as well.
Like ExpressionEngine, CartThrob is built to be customized. That also means it can feel a little “bare” to a beginner. It doesn’t roll out the red carpet to guide you through all the steps of the store build, but when you have command of the template tags, you can scale the features of your store pretty quickly. ERP integration and inventory sync, APIs, and all manner of communication with other systems are possible.
We only scratched the surface of what is possible with CartThrob, but hopefully this walkthrough has you well on your way!
I’ll reiterate that Greg Crane developed these example templates, and the general configuration covered in this walkthrough is from his own successful store builds.
Please download our example templates to follow the steps of our walkthrough. Download Templates
Have questions or comments about this course? Be sure to join the discussion and post in the ExpressionEngine Forums!
In this video course we’re going to walk through basic usage of the ExpressionEngine Command Line Interface (CLI)
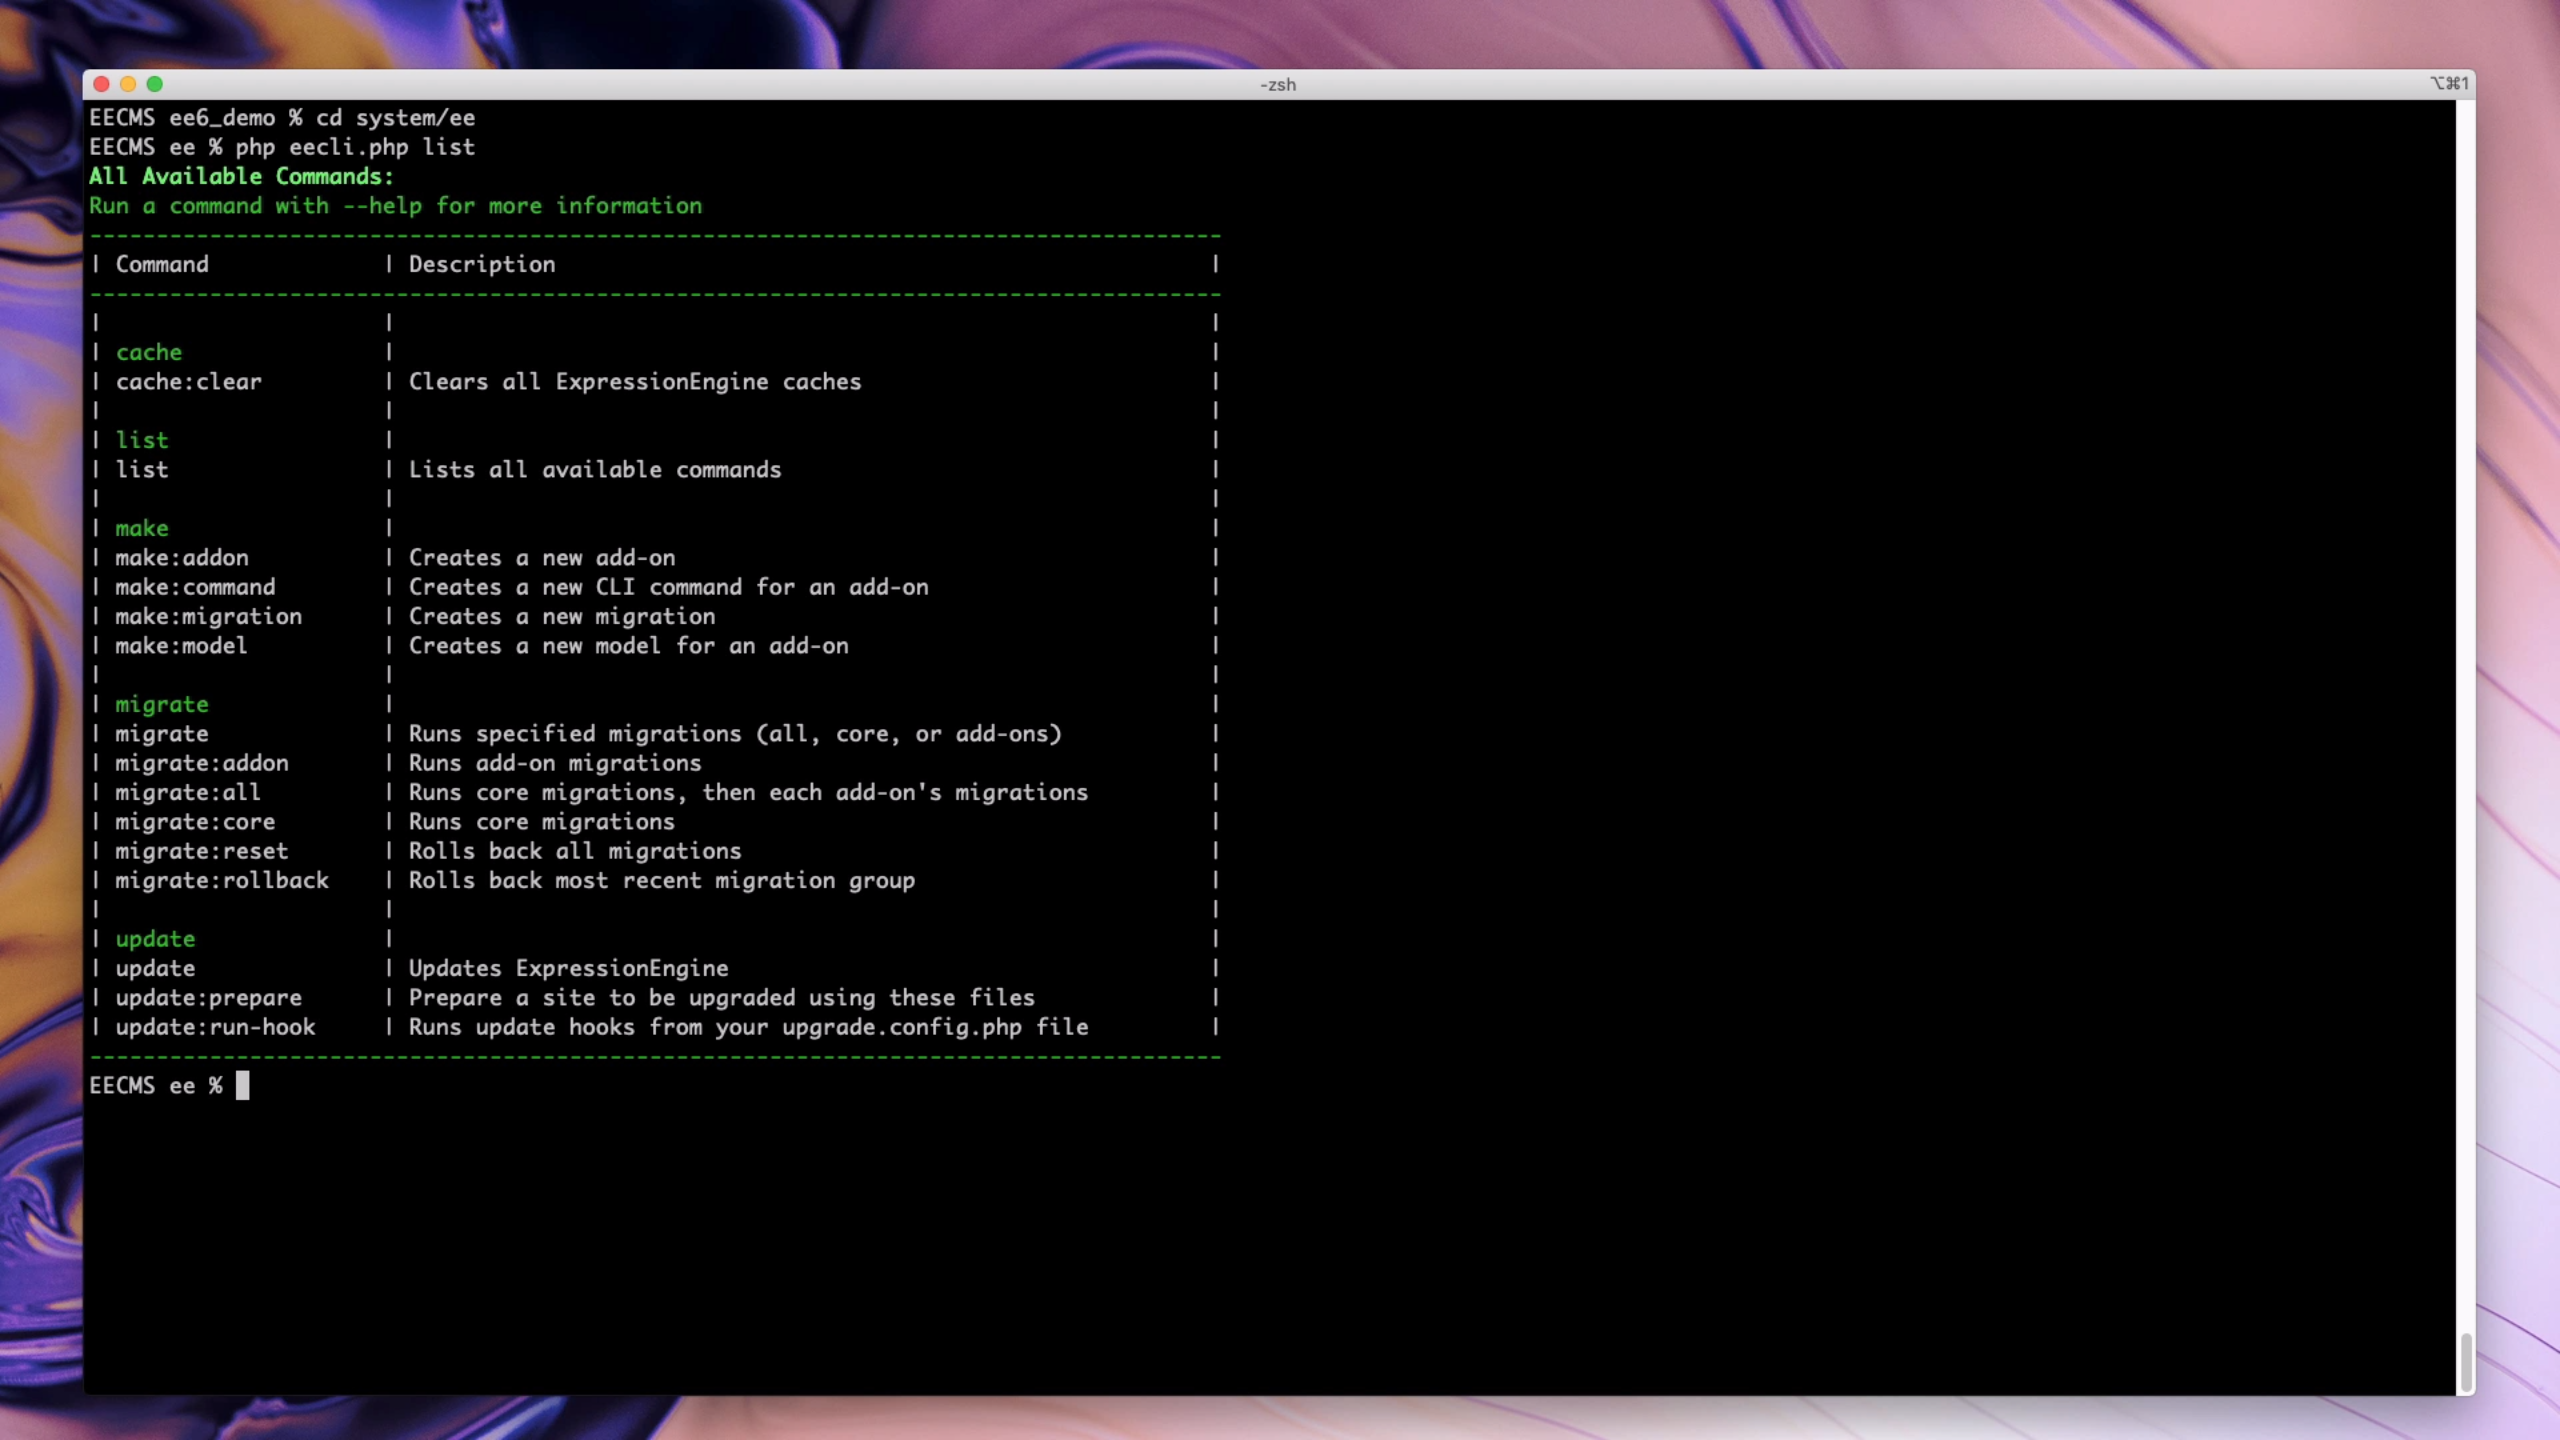
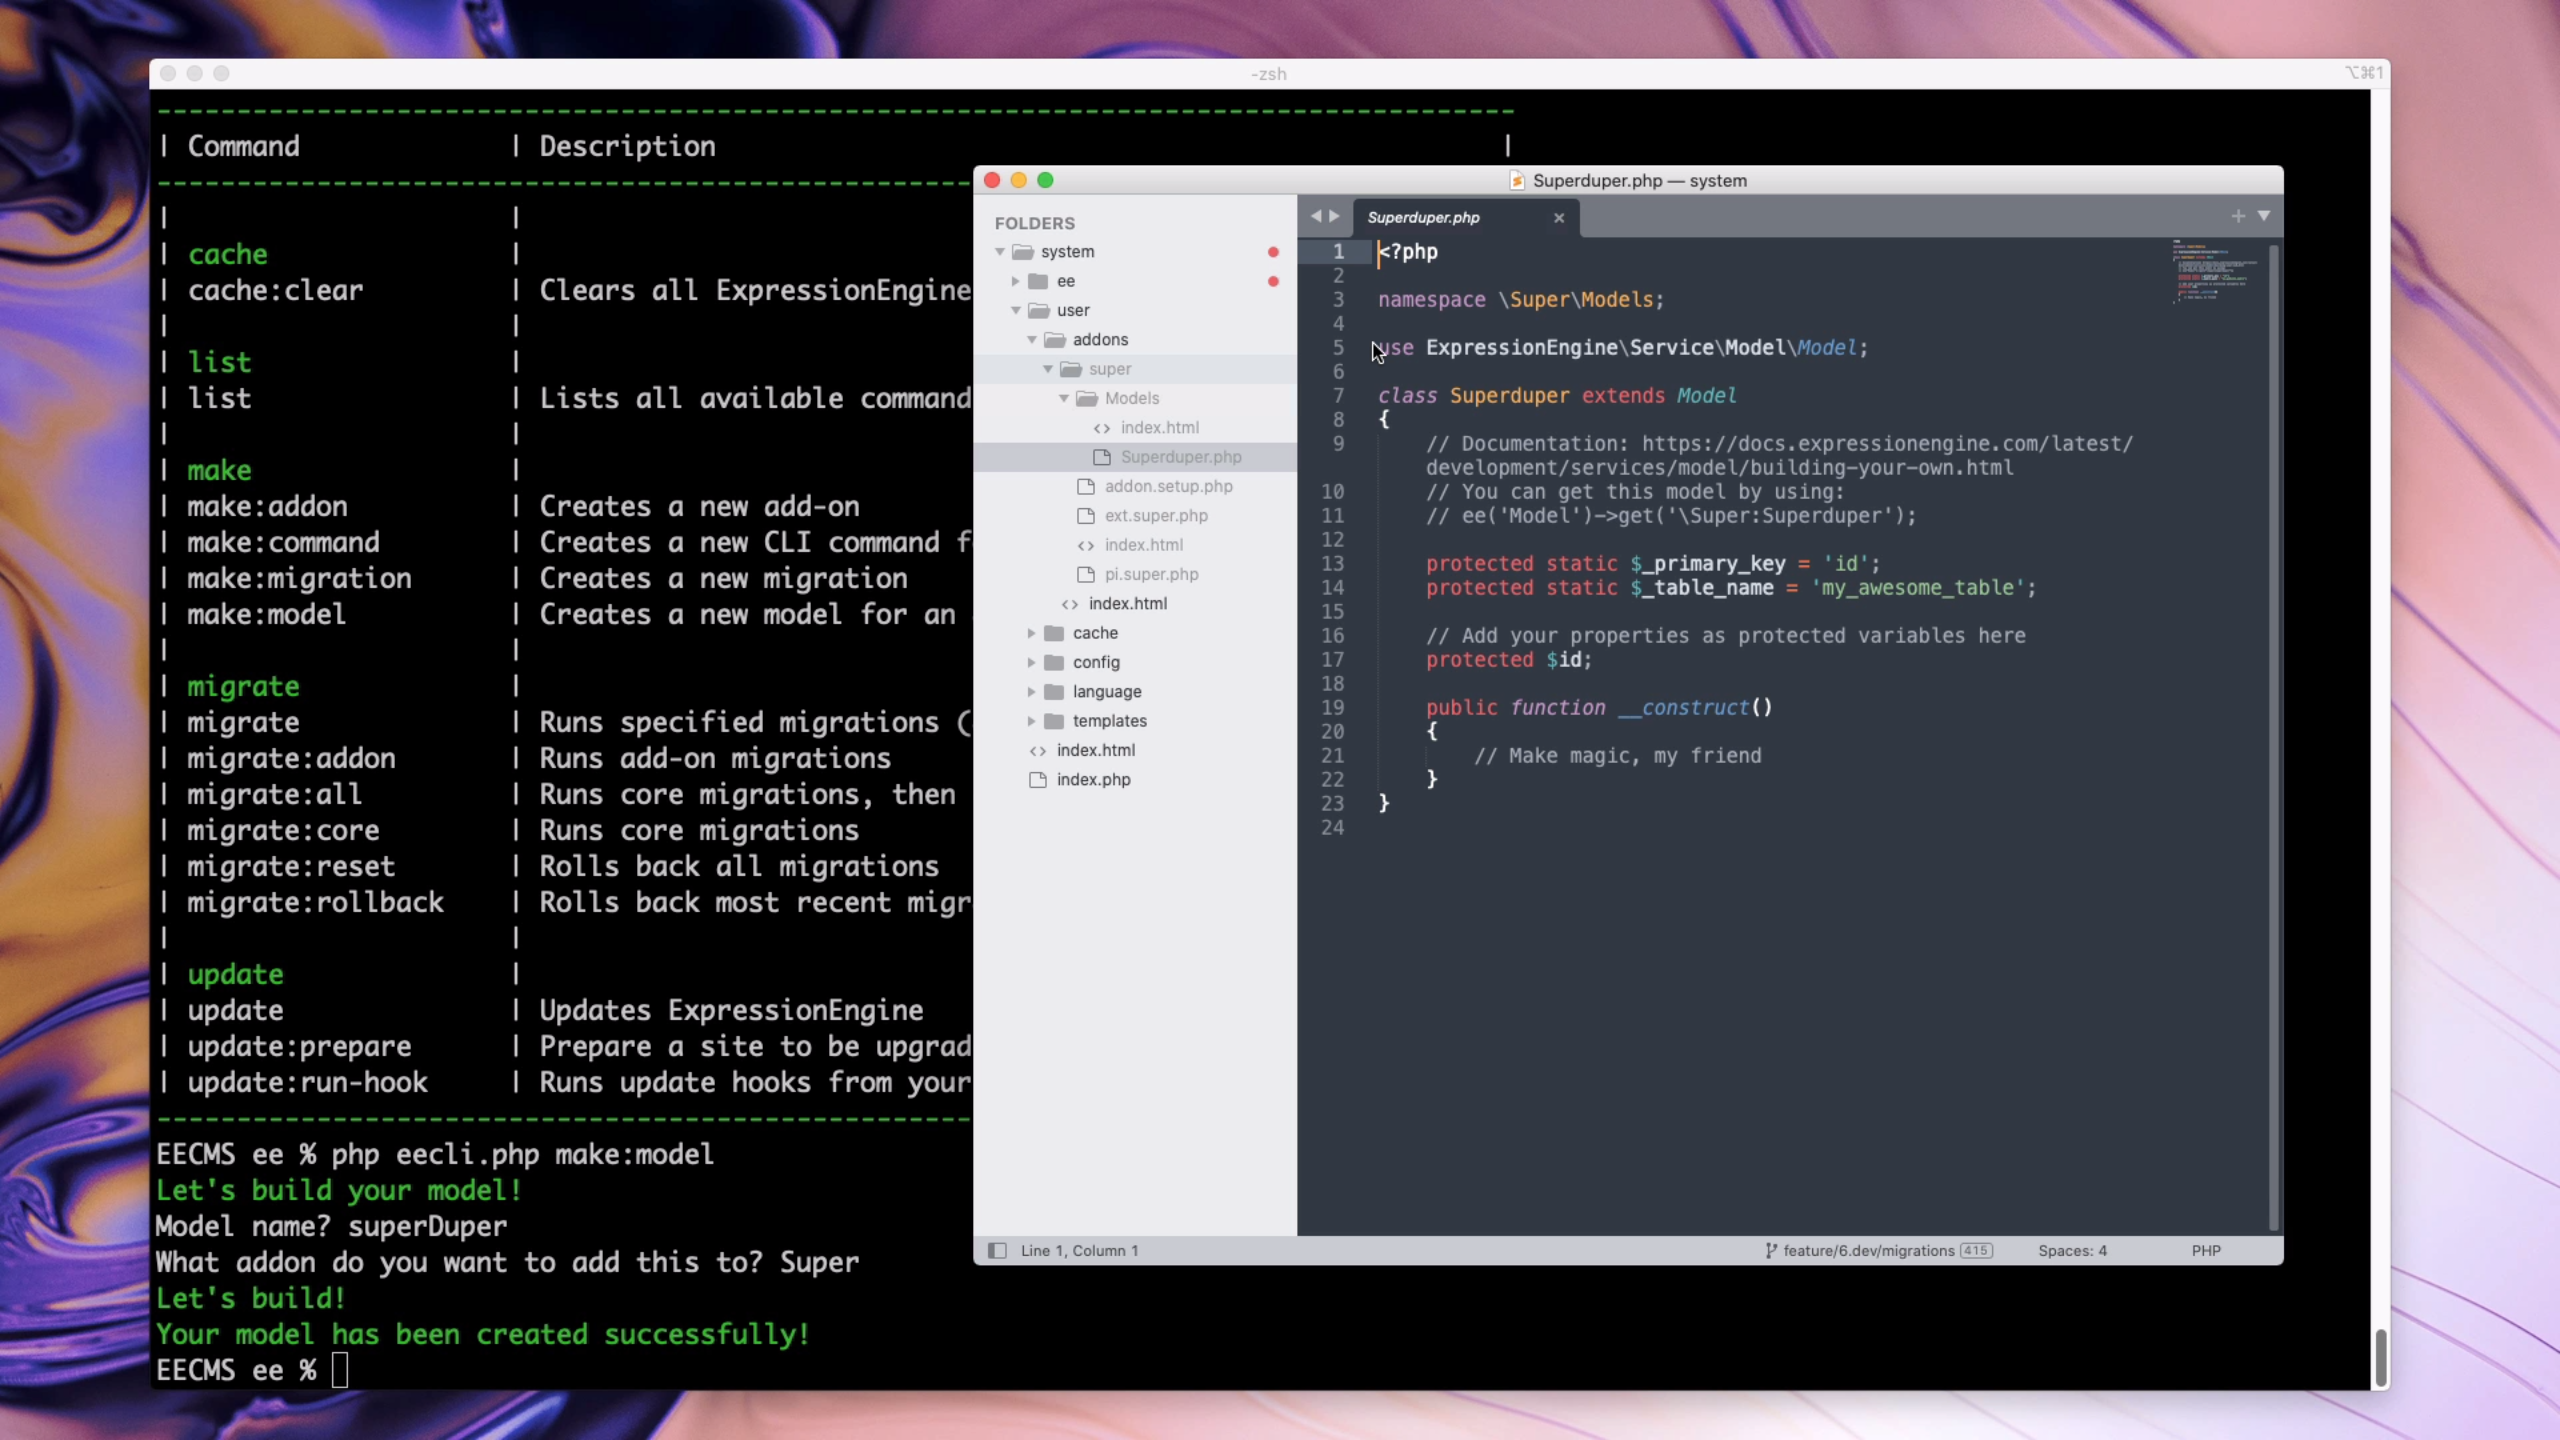
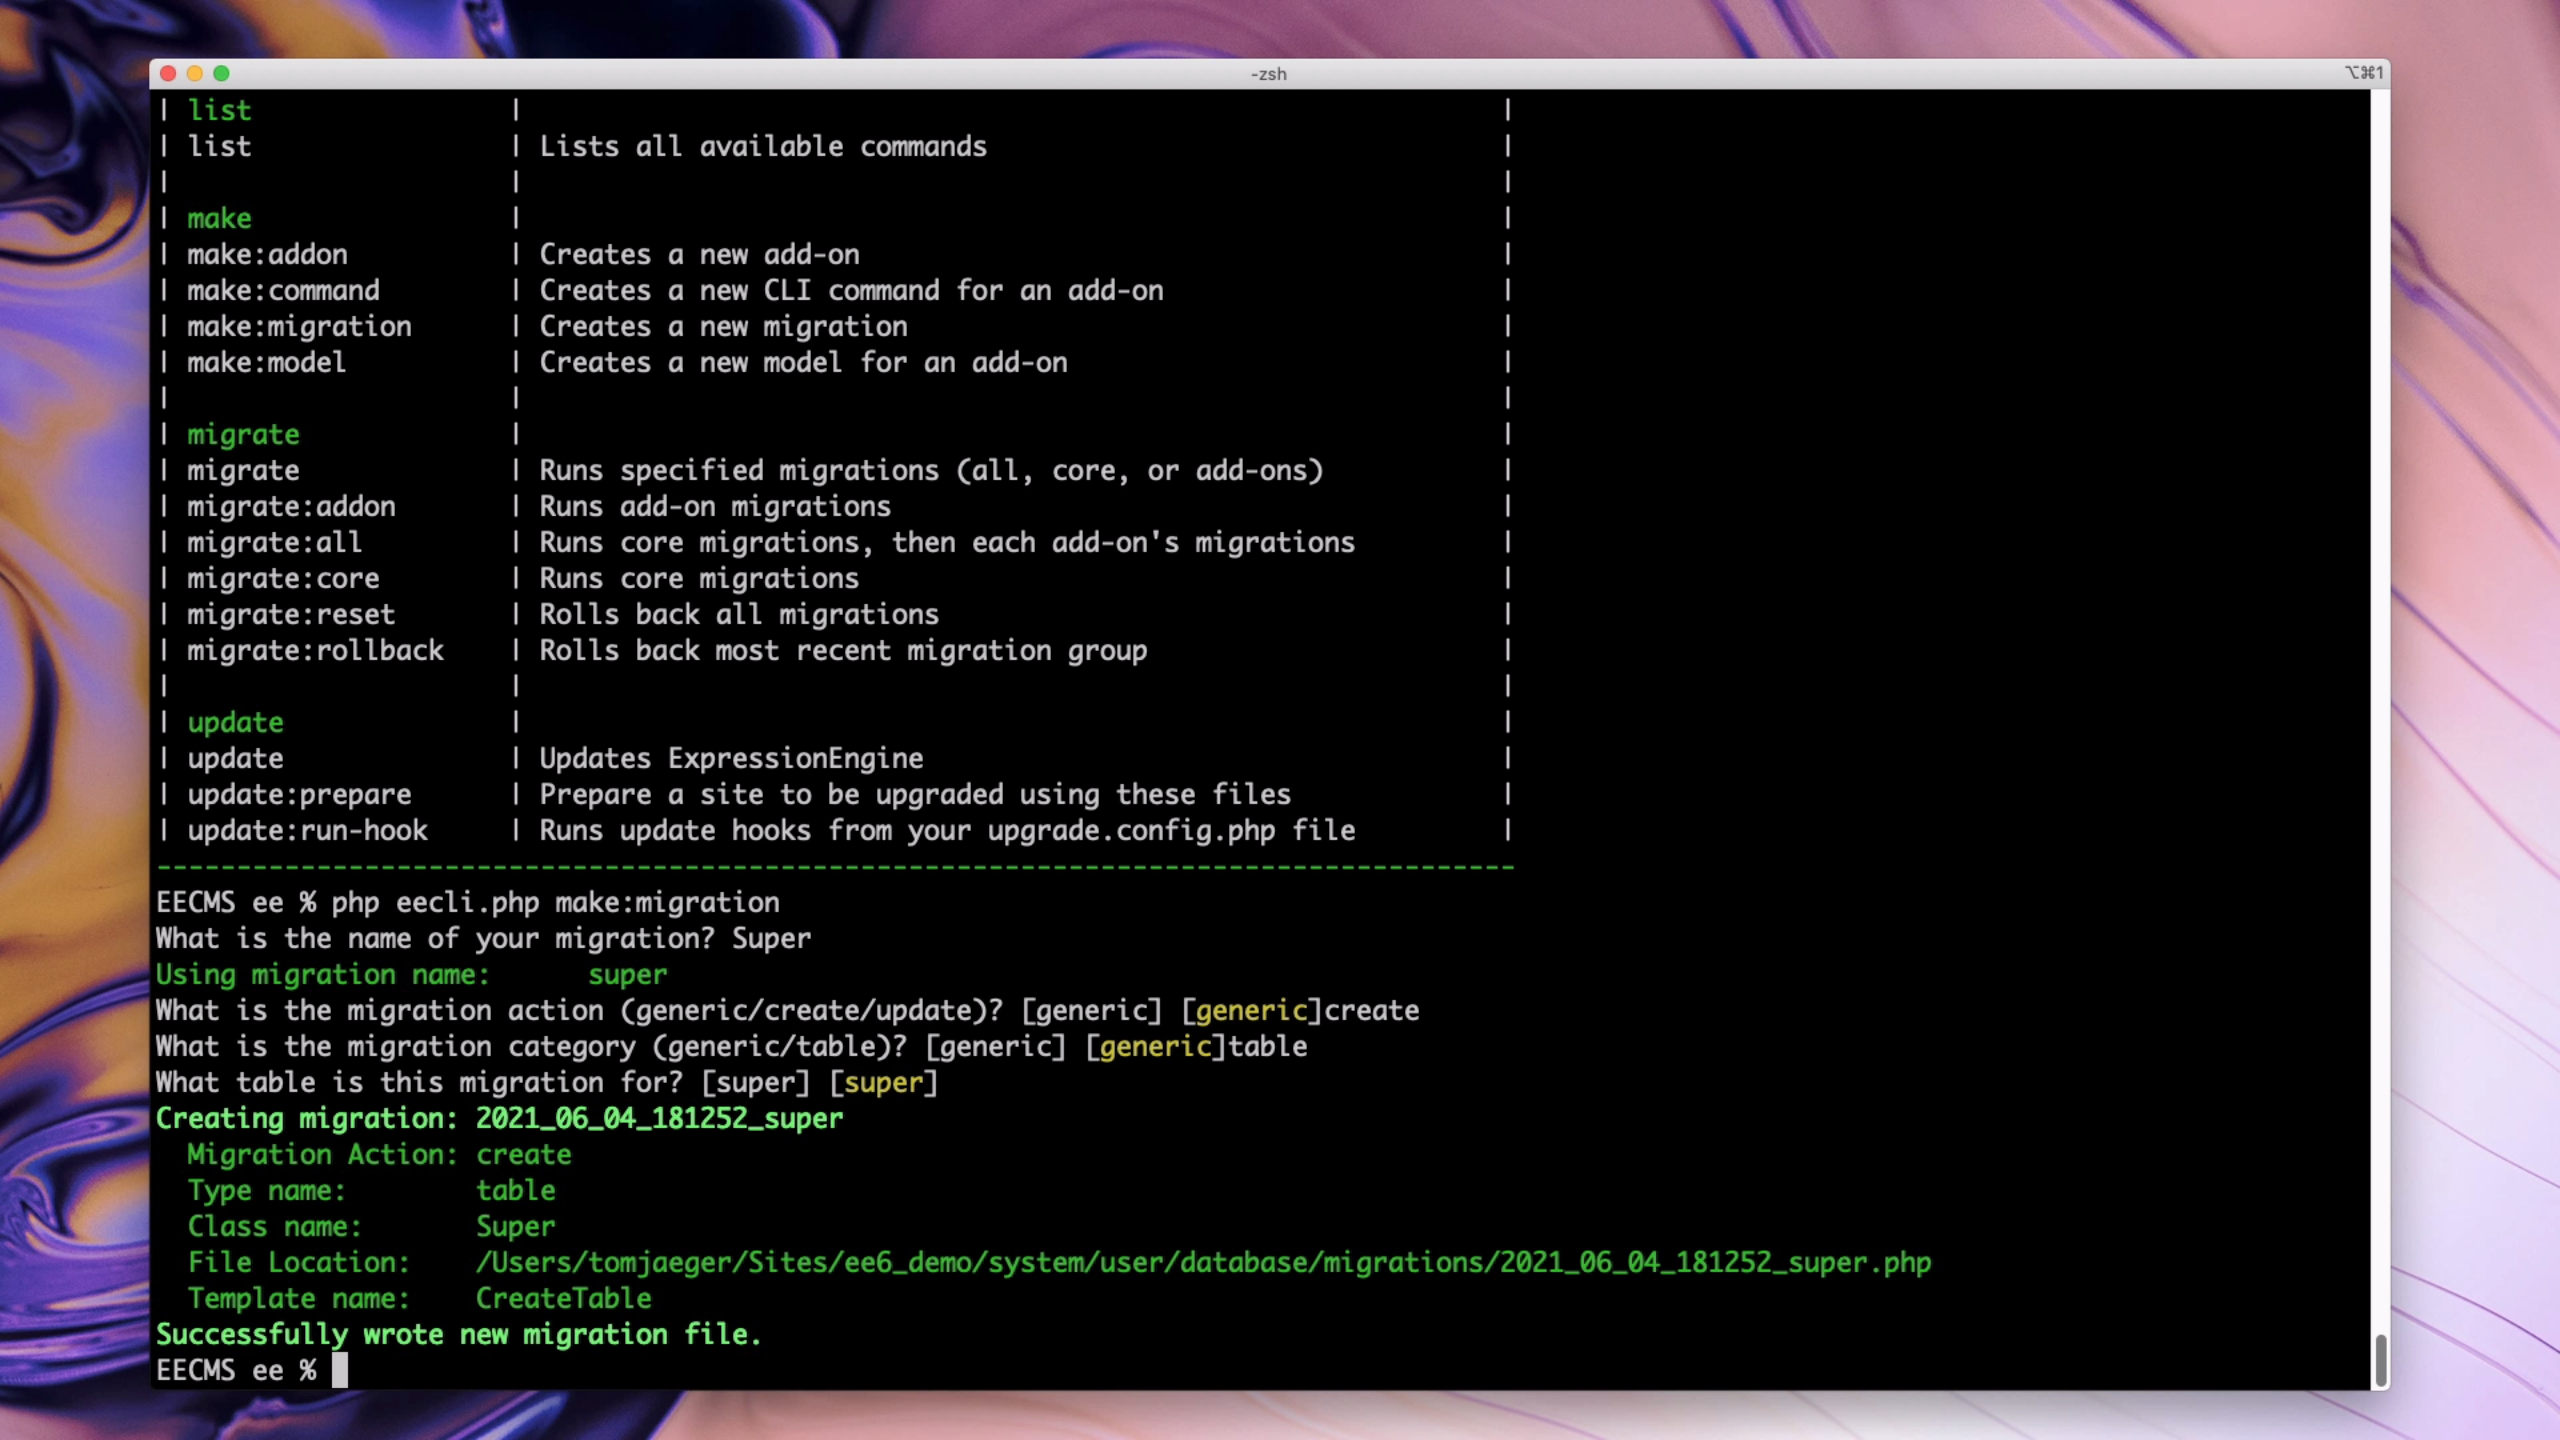
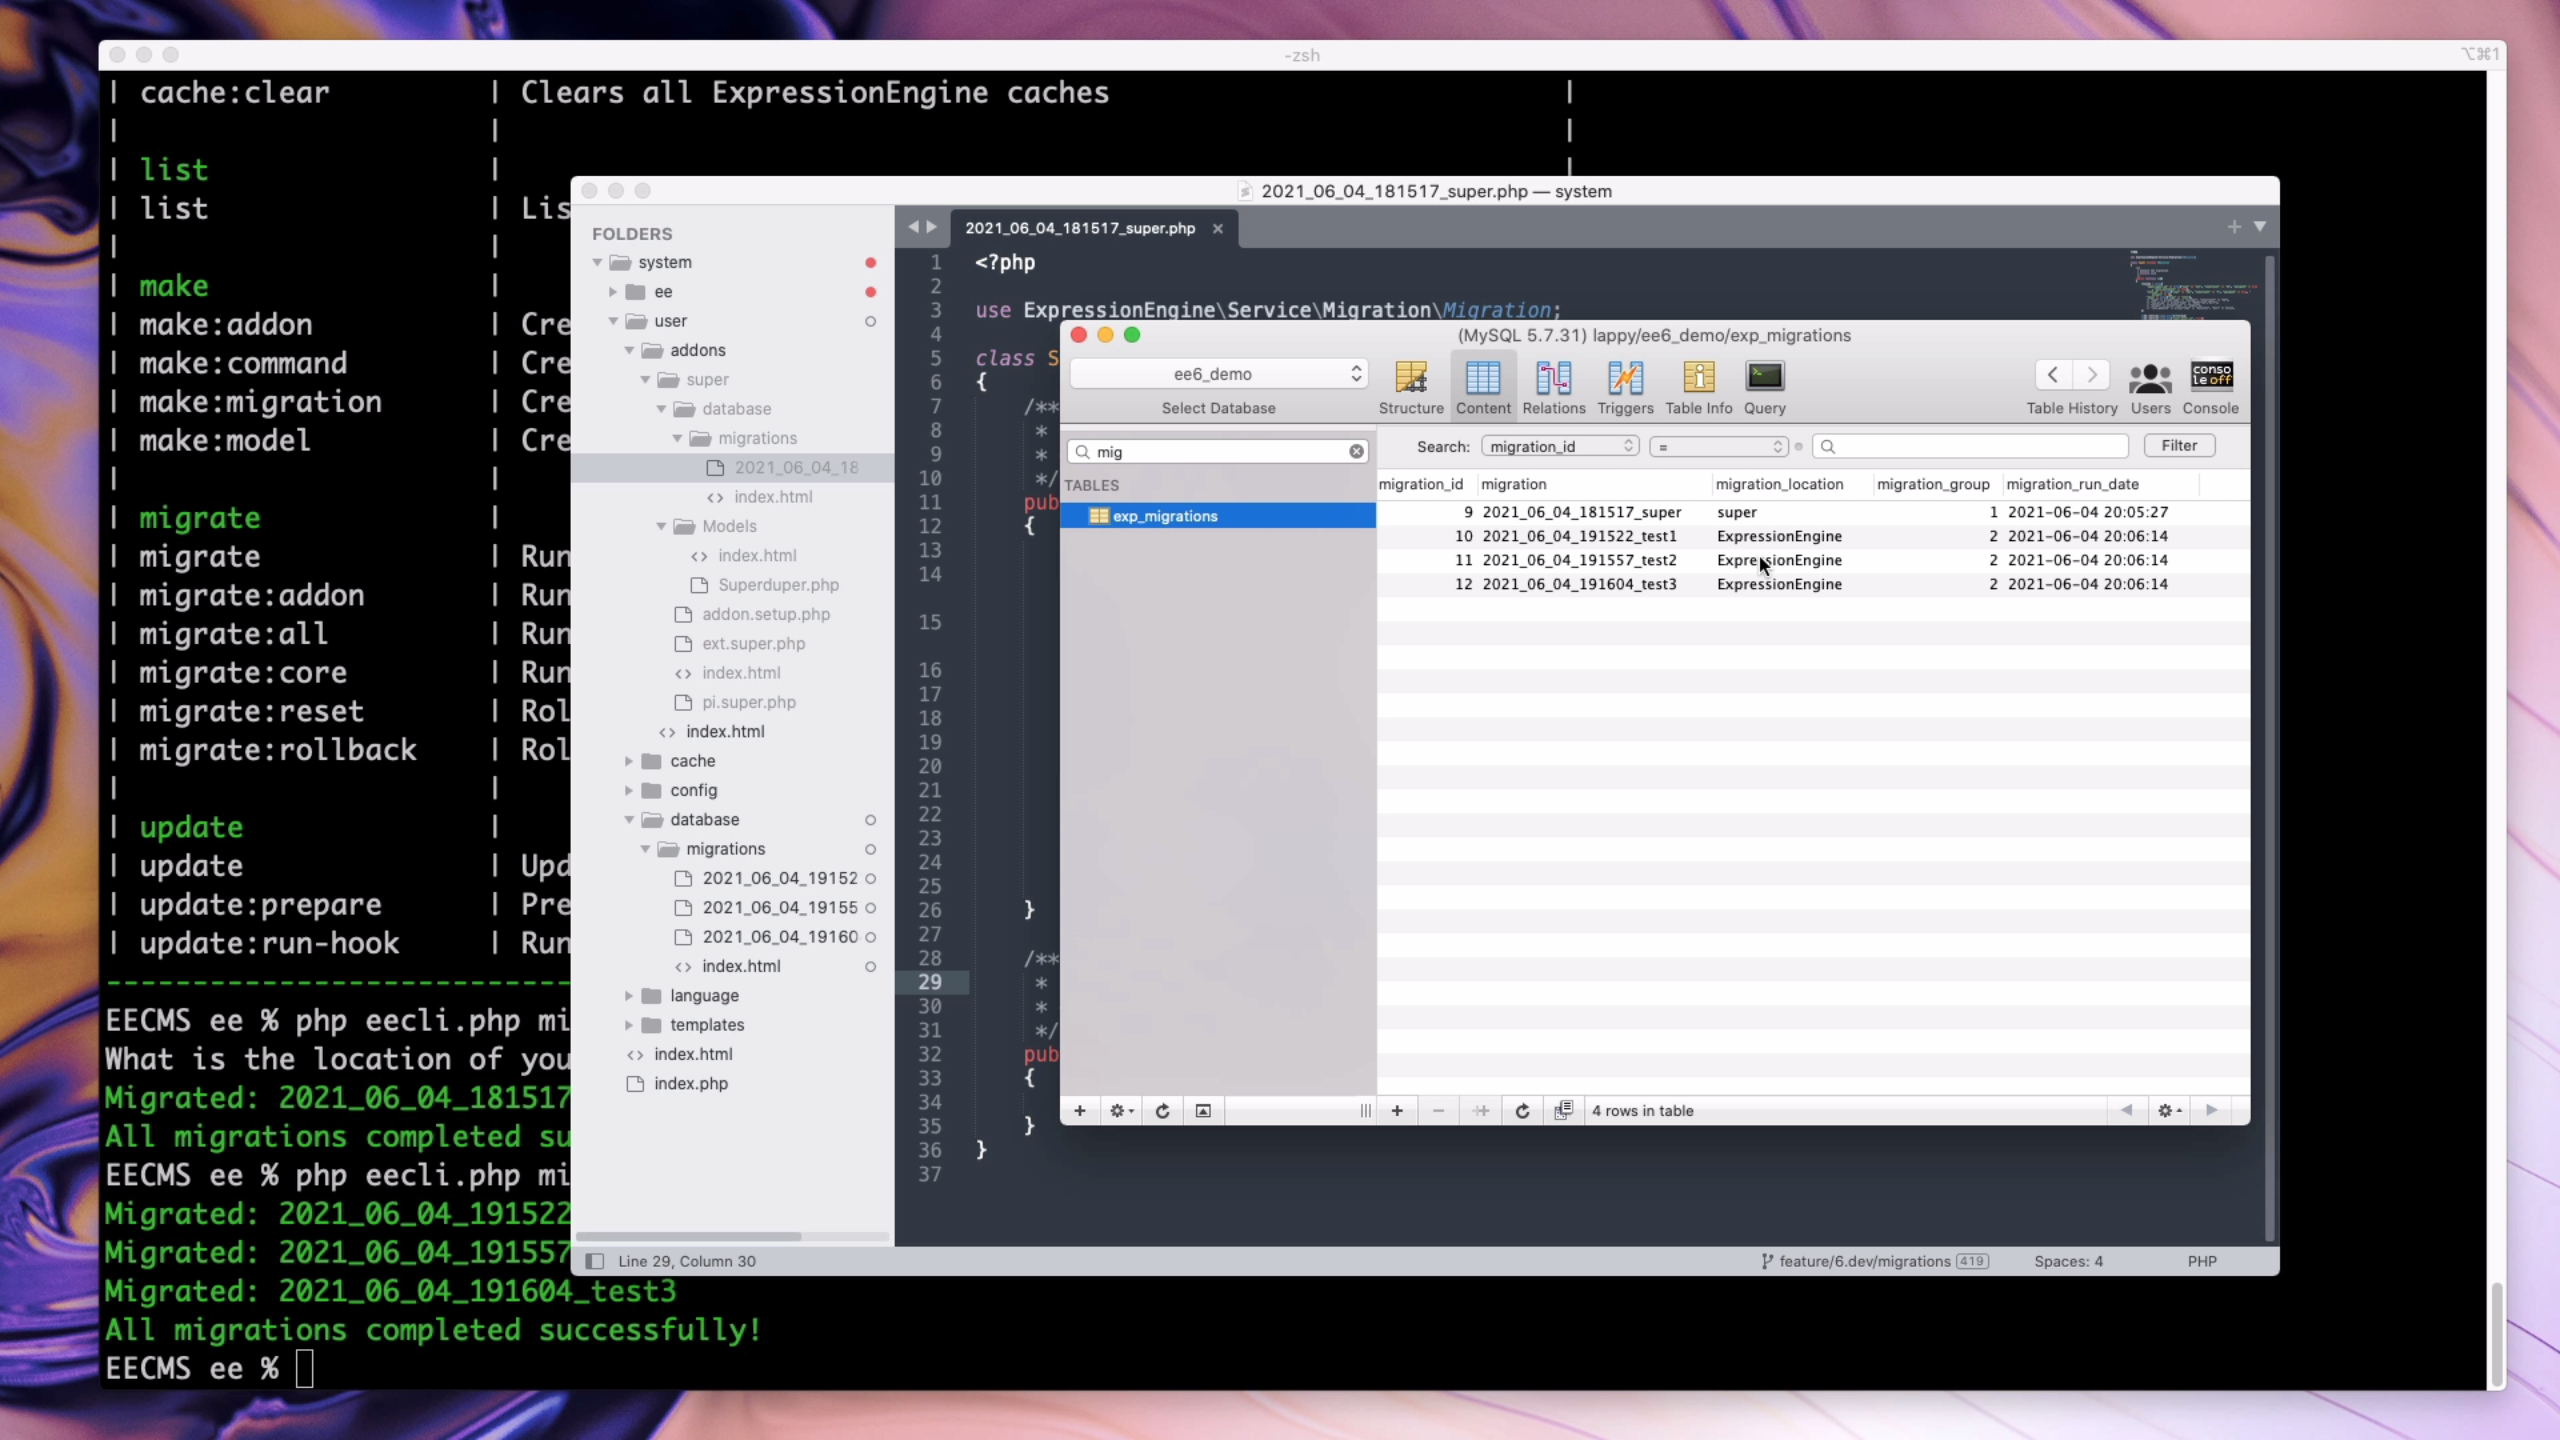
In this video, we will start with a site freshly upgraded from ExpressionEngine 2 and we’ll talk about how to install ExpressionEngine Pro. We will also give a quick overview of EE Pro and highlight a few of the new features.
In Parts 1 and 2 of this series, we set up a search feature on our site where users could search and filter entries, and results were displayed on the page via AJAX. To wrap up our search experience for our users, we're going to add another helpful feature: favorites.
Favorites can be implemented in many forms, such as a favorites list, a wish list, a "save for later" list, or many other variations. For our example, we're simply going to allow the user to just have one favorites list to which they can add their favorite add-ons. To accomplish this, we're going to use EEHarbor's Favorites add-on and some AJAX techniques which we just learned in Part 2.
Building on what we've learned, this feature has a few requirements:
Great! Let's get started
Favorites is a pretty robust add-on that allows users to save their favorite entries, create favorite lists, show the most popular entries on a website, and much more. In this article, we're only going to use a small percentage of Favorites' features. Let's get started by installing and configuring the add-on.
That's actually all you need to do for our needs. No need to create a collection or anything else.
Now we're going to jump right into the thick of it. Using the amazing AJAX skills we learned in Part 2, we're going to allow users to save their favorites. To do this, we're going to give them a familiar-looking icon that is commonly recognized as a favorite icon, a heart. When the entry is a favorite, the heart icon will be solid in color (  ). When the entry is not a favorite, the heart icon will just be an outline (
  ).
).
We're going to add the heart icon to our {partial_search_results} partial.
Current version of the partial from Part 2: https://raw.githubusercontent.com/ops-andy/eeu-search-favorite-tutorial/main/04-partial_search_results
Couple of notes:
<div id="header" class="flex">
    <img alt="addon icon" class="rounded-md border-2 border-gray-300" style="width:100px;height:100px;" src="{add_on_icon}"/>
    <div id="body" class="flex flex-col ml-5">
        <h4 id="name" class="text-xl font-semibold mb-2">{title}</h4>
        <button class="w-1">
            {!-- notice that we're using the class "favorite-toggle" so we can query this element in the DOM later on --}
            <i class="far fa-heart favorite-toggle"></i>
        </button>
        <p id="job" class="text-gray-800 mt-2">{add_on_description:limit characters='100'}</p>
        <div class="flex mt-5">
            <p class="ml-3">
                {if add_on_price == '0'}
                    Free
                {if:else}
                    <sup>$</sup>{add_on_price}
                {/if}
            </p>
        </div>
    </div>
</div>
<style> element in your template or through an included CSS file.
.fa-heart {
    background: 0 0;
    color: #ba1f3b;
    padding: 4px;
    cursor: pointer;
}
addon-card.
<div class=" flex flex-col my-1 px-1 w-full md:w-1/2 lg:my-4 lg:px-4 lg:w-1/3 addon-card">
    <div class="max-w-2xl bg-white border-2 border-gray-300 p-5 rounded-md tracking-wide shadow-lg flex-1">
    ...
    </div>
</div>
Link To Current Template Code:
addons/index: https://raw.githubusercontent.com/ops-andy/eeu-search-favorite-tutorial/main/9a-addons-index.html{partial_search_results}: https://raw.githubusercontent.com/ops-andy/eeu-search-favorite-tutorial/main/9-partial-search-results.htmlNext, let's bind an event listener to our heart button. When clicked, we'll add the class "active" and display a solid color heart. When clicked again, the heart will go back to just an outline.
We're eventually going to bind to the form's submit event to the heart icon, but it's good practice as we build on the concept to start small and refactor. So we'll start by binding to the click event.
We already have some JavaScript from our previous article that we are calling on the DOMContentLoaded event. We also know that, similar to our pagination, this event binding will have to take place every time we load new content to the DOM (think about the AJAX responses). Therefore we're going to put this in its own function and then call that function as needed.
If user clicks heart and entry is not in favorites
    entry is added to their favorites list
    heart icon is filled in with color
If user clicks heart and entry is already in their favorites
    entry is removed from their favorites
    heart icons color is removed leaving an outline
Since we're just focusing on the click event, we will not worry about adding the favorites list just yet.
//addClicktoFavoritesToggle
//toggles favorited items
//must be called AFTER ajax calls are complete.
function addClicktoFavoritesToggle () {
    //find all buttons in our add-on cards
    favoriteToggles = document.querySelectorAll('.addon-card button');

    favoriteToggles.forEach(favToggle => {
        favToggle.addEventListener('click', event => {
            var favHeart = favToggle.querySelector('.favorite-toggle');

            //We are using Font-awesome style prefixes to switch between the regular style ("far") and the solid style ("fas")
            //remove font-awesome classes, then add respective classes
            favHeart.classList.remove('fas');
            favHeart.classList.remove('far');

            //if the heart is already active then switch back to the outline only (regular) style.
            if (favHeart.classList.contains('active')) {
                favHeart.classList.remove('active');
                favHeart.classList.add('far');
            }else{
                favHeart.classList.add('active');
                favHeart.classList.add('fas');
            }
        });
    });
}
DOMContentLoaded event to call our new function after results are loaded.
//on load create AJAX request
document.addEventListener('DOMContentLoaded', event =>{

    //submit the response with fetch()
    fetch(baseUrl() + "/ajax/addon-results")
        // take our response and get the HTML we really want
        .then(response => {
            return response.text();
            })
        // take our HTML and replace the contents of our #addon-results element
        .then(data => {
            resultsTarget.innerHTML = data;
            paginationLinks();

            //call our new function
            addClicktoFavoritesToggle();
        });
});
If all went as planned, your heart icons should now switch between the regular and solid styles when you click on them.
There are two main actions that we want to be able to do with Favorites:
Special Notes:
{exp:favorites:info} only shows favorites for the currently logged-in member. Therefore if you are not logged in, you will not see the Favorites form (our heart icon).{exp:favorites:info} inside of template tags that use pagination can cause issues. Thus we will be using the disable_pagination="yes" parameter.
According to the docs, to create a form that will allow a user to add an entry to their favorites, we need to use the {exp:favorites:form} tag, and to remove an entry from a list of Favorites, we use the {exp:favorites:edit} tag.
That's great if you're going to have different templates that display favorites vs non-favorites. However, for our needs, we need to flip-flop between an add-to favorites form and a remove-from favorites form in the same place and without reloading the page. Let's pseudo-code this:
On page load
If entry is already in favorites
    display edit tag with a solid heart
If entry is not in favorites
    display form tag with an outlined heart
{exp:favorites:info} tag: https://eeharbor.com/favorites/documentation/form#examples. So next we apply this to our {partial_search_results} partial.
First, here is just the code for the heart button and our Favorites form.
{!--favorites:info list info about an entry --}
{exp:favorites:info
    entry_id="{entry_id}"
}
    {!-- display the edit form if an entry is found in Favorites --}
    {exp:favorites:edit
        favorite_id="{favorites:favorite_id}"
        return="add-ons"
    }
        {!-- tells the edit form we want to delete the entry from favorites --}
        <input type="hidden" name="delete" value="yes">
        <input type="hidden" name="entry-id" value="{entry_id}">
        <button class="w-1" type="submit" value="Remove">
            <i class="fas fa-heart favorite-toggle active"></i>
        </button>
    {/exp:favorites:edit}

    {!-- if no entry is found in favorites, then it's not in a favorites list yet
    Thus display the favorites:form tag --}
    {if favorites:no_results}
        {exp:favorites:form
            entry_id="{entry_id}"
            return="add-ons"
        }
        <input type="hidden" name="entry-id" value="{entry_id}">
            <button class="w-1" type="submit" value="Add">
                <i class="far fa-heart favorite-toggle"></i>
            </button>
        {/exp:favorites:form}

    {/if}
{/exp:favorites:info}
Now combine that with the rest of our entry listing in {partial_search_results}
<div class="max-w-2xl bg-white border-2 border-gray-300 p-5 rounded-md tracking-wide shadow-lg flex-1">
    <div id="header" class="flex">
        <img alt="addon icon" class="rounded-md border-2 border-gray-300" style="width:100px;height:100px;" src="{add_on_icon}"/>
        <div id="body" class="flex flex-col ml-5">
            <h4 id="name" class="text-xl font-semibold mb-2">{title}</h4>
            {exp:favorites:info
                    entry_id="{entry_id}"
                    disable_pagination="yes"
                }
                    {exp:favorites:edit
                        favorite_id="{favorites:favorite_id}"
                        return="add-ons"
                    }
                        <input type="hidden" name="delete" value="yes">
                        <input type="hidden" name="entry-id" value="{entry_id}">
                        <button class="w-1" type="submit" value="Remove">
                            <i class="fas fa-heart favorite-toggle active"></i>
                        </button>
                    {/exp:favorites:edit}
                    {if favorites:no_results}
                        {exp:favorites:form
                            entry_id="{entry_id}"
                            return="add-ons"
                        }
                        <input type="hidden" name="entry-id" value="{entry_id}">
                            <button class="w-1" type="submit" value="Add">
                                <i class="far fa-heart favorite-toggle"></i>
                            </button>
                        {/exp:favorites:form}

                    {/if}
                {/exp:favorites:info}
            <p id="job" class="text-gray-800 mt-2">{add_on_description:limit characters='100'}</p>
            <div class="flex mt-5">
                <p class="ml-3">
                    {if add_on_price == '0'}
                        Free
                    {if:else}
                        <sup>$</sup>{add_on_price}
                    {/if}
                </p>
            </div>
        </div>
    </div>
</div>
Link To Current Template Code:
Key Concepts
{exp:favorites:info} https://eeharbor.com/favorites/documentation/info{exp:favorites:form} https://eeharbor.com/favorites/documentation/form{exp:favorites:edit} https://eeharbor.com/favorites/documentation/edit
If user clicks heart and entry is not in favorites
    entry is added to their favorites list
    heart icon is filled in with color
    Favorites form changes from form tag to edit tag
If user clicks heart and entry is already in their favorites
    entry is removed from their favorites
    heart icons color is removed leaving an outline
    Favorites form changes from edit tag to form tag.
This is all good, except we just have template tags to work with, and we can't reload template tags without reloading the page. Therefore we have to manipulate the DOM and change the form manually.
To accomplish this, we will create the Favorites form in another template, then use AJAX to call out to that form each time a heart icon is clicked. This will render the respective Favorites tag in the other template and allow us to replace the form in our entry with the output of the other template. I promise that it sounds more confusing than it really is.
Note: The first time I did this, I tried to just change the inputs and properties of the form on the fly. However, Favorites writes data to the database and then looks for that data when updating entries. Thus, we actually need to re-render the template tag for everything to work properly, and that is why using another template is the best method.
We now understand a little more about what work we have to do. Let's roll up our sleeves and get started.
First, we're going to update our click event listener from above. We now are dealing with a form element (rendered by the Favorites template tags). This means that a click event won't cut it anymore. Similar to what we did to Low Search forms in previous lessons, we now need to hijack the form and submit it via AJAX.
click event to capture the form submission and prevent the default form action which would redirect the user to another page on success.
//addClicktoFavoritesToggle
//toggles favorited items
//must be called AFTER ajax calls are complete.
function addClicktoFavoritesToggle () {
    //notice we now are updating our selector to find the form, not the button
    favoriteToggles = document.querySelectorAll('.addon-card form');

    favoriteToggles.forEach(favToggle => {
        favToggle.addEventListener('submit', event => {
            //stop the user from being directed to the add-on page
            event.preventDefault();

            var favHeart = favToggle.querySelector('.favorite-toggle');

            //We are using Font-awesome style prefixes to switch between the regular style ("far") and the solid style ("fas")
            //remove font-awesome classes, then add respective classes
            favHeart.classList.remove('fas');
            favHeart.classList.remove('far');

            //if the heart is already active then switch back to the outline only (regular) style.
            if (favHeart.classList.contains('active')) {
                favHeart.classList.remove('active');
                favHeart.classList.add('far');
            }else{
                favHeart.classList.add('active');
                favHeart.classList.add('fas');
            }
        });
    });
}
formData()
//addClicktoFavoritesToggle
//toggles favorited items
//must be called AFTER ajax calls are complete.
function addClicktoFavoritesToggle () {
    favoriteToggles = document.querySelectorAll('.addon-card form');

    favoriteToggles.forEach(favToggle => {
        favToggle.addEventListener('submit', event => {

            //stop the user from being directed to the add-on page
            event.preventDefault();

            var favHeart = favToggle.querySelector('.favorite-toggle');

            //make the ajax request to favorite the entry
            var formData = new FormData(favToggle);
            fetch(favToggle.action, {
                method: 'post',
                body: formData
            })
            .then(response => {
                return response.text();
                })
            .then(data => {

                favHeart.classList.remove('fas');
                favHeart.classList.remove('far');

                //if the heart is already active then switch back to the outline only (regular) style.
                if (favHeart.classList.contains('active')) {
                    favHeart.classList.remove('active');
                    favHeart.classList.add('far');
                }else{
                    favHeart.classList.add('active');
                    favHeart.classList.add('fas');
                }
            });
        });
    });
}
This is good, except every click is just either continually adding to Favorites or removing from favorites (which will cause errors) depending on what the initial state of the form was. This is because we are not updating the form on successful AJAX responses.
So now, we'll create our secret weapon, a Favorites form-only template. This template will render our heart icon and form based on the current status of a given entry. We'll grab the output of that form and replace the current form in the DOM.
We'll call this template addon-favorites-form and put it in our "ajax" template group. This will allow us to access the template via the URL: /ajax/addon-favorites-form
{exp:favorites:info
    entry_id="{segment_3}"
    disable_pagination="yes"
}
    {exp:favorites:edit
        favorite_id="{favorites:favorite_id}"
        return="add-ons"
    }
        <input type="hidden" name="entry-id" value="{segment_3}">
        <input type="hidden" name="delete" value="yes">
        <button type="submit" value="Remove">
            <i class="fas fa-heart favorite-toggle active"></i>
        </button>
    {/exp:favorites:edit}
    {if favorites:no_results}
        {exp:favorites:form
            entry_id="{segment_3}"
            return="add-ons"
        }
        <input type="hidden" name="entry-id" value="{segment_3}">
            <button type="submit" value="Add">
                <i class="far fa-heart favorite-toggle"></i>
            </button>
        {/exp:favorites:form}

    {/if}
{/exp:favorites:info}
As you can probably tell, this is the same form our results initially load with.
//addClicktoFavoritesToggle
//toggles favorited items
//must be called AFTER ajax calls are complete.
function addClicktoFavoritesToggle() {
    favoriteToggles = document.querySelectorAll('.addon-card form');

    favoriteToggles.forEach(favToggle => {
        favToggle.addEventListener('submit', event => {

            //stop the user from being directed to the add-on page
            event.preventDefault();

            var favHeart = favToggle.querySelector('.favorite-toggle');

            //make the ajax request to favorite the entry
            var formData = new FormData(favToggle);
            fetch(favToggle.action, {
                method: 'post',
                body: formData
            })
            .then(response => {
                return response.text();
                })
            .then(data => {

                favHeart.classList.remove('fas');
                favHeart.classList.remove('far');

                //if the heart is already active then switch back to the outline only (regular) style.
                if (favHeart.classList.contains('active')) {
                    favHeart.classList.remove('active');
                    favHeart.classList.add('far');
                }else{
                    favHeart.classList.add('active');
                    favHeart.classList.add('fas');
                }
                    //here we're grabbing the entry-id from the form's input
                    var entry = favToggle.querySelector('input[name="entry-id"]').value;

                    //submit an AJAX request to our new form template
                    fetch('/ajax/addon-favorites-form/'+entry)
                        .then (response => {
                            return response.text();
                        })
                        .then (data => {

                            //now that we have a response. let's delete our current form and replace it with
                            //the html in our response

                            //we're about to delete the form we clicked on so we need
                            //another point of reference. This will select the <h4> previous
                            //to the form element
                            var formPositionSibling = favToggle.previousElementSibling;

                            //now lets remove our current form from the DOM
                            formPositionSibling.parentNode.removeChild(favToggle);

                            //next we insert our form from the AJAX response immediately
                            // after our <h4> element.
                            formPositionSibling.insertAdjacentHTML('afterend',data);

                            //the form is new to the DOM, so we need to make sure The
                            // the new form's submit event has an event listener as well.
                            addClicktoFavoritesToggle();
                        });
                });
        });
    });
}
addClicktoFavoritesToggle();
Link To Current Template Code:
addons/index template: https://raw.githubusercontent.com/ops-andy/eeu-search-favorite-tutorial/main/13-addons-index{partial_search_results}: https://raw.githubusercontent.com/ops-andy/eeu-search-favorite-tutorial/main/13-partial-search-results{addon-favorites-form}: https://raw.githubusercontent.com/ops-andy/eeu-search-favorite-tutorial/main/13-addon-favorites-formFantastic! You should now be able to load your page, click your heart icons to favorite/unfavorite entries, and click through searches and pagination with your favorites still saved. All this while remaining on the same page and no screen refreshes.
Creating a template to display all of a user's favorite entries isn't really that hard. Favorites provides the {exp:favorites:entries} tag which makes listing these entries super easy. Of course, we don't want the user to have to navigate to a new URL, so we will use some more AJAX. Let's jump right in.
To keep ourselves DRY, we'd rather not repeat all the code we have in the {partial_search_results} partial. So we need to make one adjustment: moving our {if low_search_no_results} conditional from {partial_search_results} to our ajax/addon-results template. You can figure out where it goes, or check out the link
{exp:favorites:entries
    limit='999'
    paginate='bottom'
    status="not closed"
}

    {!-- if no results, let the user know --}
         {if no_results}
                <div class="alert alert--empty">No add-ons have been added to your favorites.</div>
            {/if}


        {partial_search_results}


{/exp:favorites:entries}
partial_search_functions partial where the rest of the sidebar lives.
div class="container my-12 mx-auto px-4 md:px-12 w-2 inline-block align-top">

    <a href="ajax/addon-favorites" id="see-all-favorites">View My Favorites</a>
    <hr>

    <div class="font-bold">Search All Add-Ons</div>

    ...
function showFavoriteResults() {
    //get results for users favorites
    document.getElementById("see-all-favorites").addEventListener('click', event => {
        //stop the user from being redirected
        event.preventDefault();
        fetch(document.getElementById("see-all-favorites").href)
        .then(response =>{
            return response.text();
        })
        .then(data => {
            resultsTarget.innerHTML = data;
            paginationLinks();
            addClicktoFavoritesToggle();
        });
    });
}
Be sure to add a call to our new function in our DOMContentLoaded event listener.
Link To Current Template Code:
addons/index template: https://raw.githubusercontent.com/ops-andy/eeu-search-favorite-tutorial/main/14-addons-index.htmlajax/addon-favorites template: https://raw.githubusercontent.com/ops-andy/eeu-search-favorite-tutorial/main/14-addon-favorites.html{partial_search_functions}: https://raw.githubusercontent.com/ops-andy/eeu-search-favorite-tutorial/main/14-partial-search-functions.htmlKey Concepts
{exp:favorites:entries} https://eeharbor.com/favorites/documentation/entriesThat's it! You should now have a fully working favorites form on each entry as well as a link that allows the user to see all their favorites
If you've followed all three parts of this series then congratulations! Here is a link to the final templates folder: https://github.com/ops-andy/eeu-search-favorite-tutorial/tree/main/final_template_folder.
There's still more you can do though! On expressionengine.com, we have a sidebar component that shows a user's 5 most recent favorited entries. There are also several JavaScript functions that could be combined to be a little more DRY. Same thing with templates. What else do you think would improve the user's experience, make our site more performant, or add clarity to the code?
Let me hear about how you implement this or new ways to do the same thing! I'd love to hear from you as we help grow the community together!
In Part 1 of this series, we set up our data in ExpressionEngine, installed Low Search, and created templates allowing our users to search and filter entries.
In this article, we're going to pick up where we left off as we improve the user's experience and begin introducing AJAX.
With AJAX, we'll have 2 goals:
Notes:
Since we're going to use AJAX to request data from our templates and then populate the DOM with the data from those templates, we no longer need a landing page and a separate results page. Our users will navigate to /addons and will remain at that URL throughout their searching. To accomplish this, we're going to have to do a little moving and refactoring of templates to keep things nice and organized.
addons/index template to handle responses from our AJAX calls
/ajax/addon-results and will be the URL we'll use when making AJAX requests to get search results.
ajax/addon-results template.
if this is a request for initial set of results
    then send initial results set back

if this is a request for search results
    read the query string and send back results of the search

if this is a pagination request
    then send back next page of results based on current results
Great, we've got the start of a plan. The next step is to determine how the template will know what we're requesting. Personally I like to do this with URL segments. So let's plan out our segments next.
/ajax/addon-results/ajax/addon-results/[encoded query string]P[page number] in the URL. Therefore, our URL will look like /ajax/addon-results/P[page number]/ajax/addon-results/[encoded query string]/P[page number]
Now, we have our plan for the template and the URLs that will be used to access our template. Let's update our template from pseudo-code, to fill in the URLs. We'll go ahead and start using template code and comments here.
Note that Low Search results tag natively knows how to handle pagination, so we don't have to write separate conditionals for those.
{if segment_3 =="" || segment_3~"#^P(\d+)$#"}
    {!-- this would match /ajax/addon-results and /ajax/addon-results/P[page number]--}

    {!-- @TODO: then send initial results set back or next page of initial results--}

{if:else}
    {!--
    this would match both /ajax/addon-results/[encoded query string] and /ajax/addon-results/[encoded query string]/P[page number]
        since Low Search results tag natively knows how to handle pagination we don't need to catch pagination separately here.
    --}

    {!-- @TODO: read the query string and send back results of the search or the next page from the results --}
{/if}
{exp:low_search:result} tags. addons/index template.
{if segment_3 =="" || segment_3~"#^P(\d+)$#"}
    {!-- this would match /ajax/addon-results and /ajax/addon-results/P[page number]--}

    {exp:low_search:results
        channel='add_on_store'
        limit='4'
        paginate='bottom'
    }

...
For our second opening tag, we again just need to use the opening tag from our current /addons/results template.
{if segment_3 =="" || segment_3~"#^P(\d+)$#"}
    {!-- this would match /ajax/addon-results and /ajax/addon-results/P[page number]--}

    {exp:low_search:results
        channel='add_on_store'
        limit='4'
        paginate='bottom'
    }

{if:else}
    {!--
    this would match both /ajax/addon-results/[encoded query string] and /ajax/addon-results/[encoded query string]/P[page number]
        since Low Search results tag natively knows how to handle pagination we don't need to catch pagination separately here.
    --}

    {exp:low_search:results
        channel='add_on_store'
        limit='4'
        paginate='bottom'
        keywords:mode='all'
        keywords:loose='both'
        collection='add_on_store'
        query='{segment_3}'
        dynamic_parameters='orderby|sort'

    }
{/if}


{!--
    @TODO send back HTML for results. This will include the cards and the pagination
--}


{/exp:low_search:results}
ajax/addon-results template.
{if segment_3 =="" || segment_3~"#^P(\d+)$#"}
    {!-- this would match /ajax/addon-results and /ajax/addon-results/P[page number]--}

    {exp:low_search:results
        channel='add_on_store'
        limit='4'
        paginate='bottom'
    }

{if:else}
    {!--
    this would match both /ajax/addon-results/[encoded query string] and /ajax/addon-results/[encoded query string]/P[page number]
        since Low Search results tag natively knows how to handle pagination we don't need to catch pagination separately here.
    --}

    {exp:low_search:results
        channel='add_on_store'
        limit='4'
        paginate='bottom'
        keywords:mode='all'
        keywords:loose='both'
        collection='add_on_store'
        query='{segment_3}'
        dynamic_parameters='orderby|sort'

    }
{/if}


{partial_search_results}


{/exp:low_search:results}
Link To Current Template Code:
ajax/addon-results: https://raw.githubusercontent.com/ops-andy/eeu-search-favorite-tutorial/main/08-ajax-results-template.html
Key Concepts
Now that we have our search results code in one template we can go ahead and delete our addons/results template and clear out some of our addons/index template.
addons/results template.addons/index template where our results live, so we are just going to use that. Go ahead and delete the {exp:low_search:results} tag pair and everything in between.
{layout='layouts/_html-wrapper'}
{partial_search_functions}

<div class="container my-12 mx-auto px-4 md:px-12 w-10 inline-block align-top">
    <div class="flex flex-wrap -mx-1 lg:-mx-4">
        {!-- this will be populated by AJAX --}
    </div>
</div>
{layout='layouts/_html-wrapper'}
{partial_search_functions}

<div class="container my-12 mx-auto px-4 md:px-12 w-10 inline-block align-top">
    <div class="flex flex-wrap -mx-1 lg:-mx-4 id="addon-results">
        {!-- this will be populated by AJAX --}
    </div>
</div>
{partial_search_functions} partial.
/addons/results since we deleted that template. Instead, we want to go ahead and tell it to submit to our new template ajax/addon-results. Low Search will use that param to create the action property of the form, which we will in turn use for our AJAX requests.
{exp:low_search:form
    result_page="ajax/addon-results"
    form_id="addon_filter"
    query="{segment_3}"
}
Link To Current Template Code:
addons/index template: https://github.com/ops-andy/eeu-search-favorite-tutorial/blob/main/8a-addons-index.html{partial_search_functions} partial: https://raw.githubusercontent.com/ops-andy/eeu-search-favorite-tutorial/main/8a-partial_search_functions.html
Voilà, we now have our templates prepped and ready for some AJAX.
Now that we have our templates ready, we can write our JavaScript that will be used to trigger the AJAX requests and handle the responses.
Note that you can either write this JavaScript to a separate .js file (just make sure you include it in your HTML) or you can just place it in your /addons/index template. For our purposes, I'm just including it in our template.
As always, let's start by thinking through what we need our JavaScript to do with some pseudo-code.
{!-- when /addons page is first loaded --}
when the search page is first loaded
    request initial results set

{!-- handle search functions --}
if user types a keyword and presses enter/return on keyboard
    submit search results and return data

if user selects a sort order
    submit search results and return data

if user selects a Compatibility option
    submit search results and return data

if user selects a category option
    submit search results and return data

{!-- AJAX request --}
when called, submit AJAX request to passed in URL
    if AJAX is successful, populate response in the element with an ID of "addon-results".
Now that we have our plan, let's get to work.
<script>
    //on load create AJAX request
    // get response from AJAX and populate #addon-results element
</script>
<script>
    //we're going to need the baseURL for several things here
    function baseUrl() {
        return location.protocol + '//' + location.hostname + (location.port ? ':' + location.port: '');
    }
    const resultsTarget = document.getElementById("addon-results");
    const rp = baseUrl() + '/ajax/addon-results';

    //on load create AJAX request
    // get response from AJAX and populate #addon-results element
</script>
fetch() method to submit our form data via a POST request.
<script>
    //we're going to need the baseURL for several things here
    function baseUrl() {
        return location.protocol + '//' + location.hostname + (location.port ? ':' + location.port: '');
    }
    const resultsTarget = document.getElementById("addon-results");
    const rp = baseUrl() + '/ajax/addon-results';

    //on load create AJAX request
    document.addEventListener('DOMContentLoaded', event =>{
    fetch(baseUrl() + "/ajax/addon-results")
        // get response from AJAX and populate #addon-results element
        });
    });

</script>
ajax/addon-results template.
<script>
    //we're going to need the baseURL for several things here
    function baseUrl() {
        return location.protocol + '//' + location.hostname + (location.port ? ':' + location.port: '');
    }
    const resultsTarget = document.getElementById("addon-results");
    const rp = baseUrl() + '/ajax/addon-results'

    //on load create AJAX request
    document.addEventListener('DOMContentLoaded', event =>{

        //submit the response with fetch()
        fetch(baseUrl() + "/ajax/addon-results")
            // take our response and get the HTML we really want
            .then(response => {
                return response.text();
                })
            // take our HTML and replace the contents of our #addon-results element
            .then(data => {
                resultsTarget.innerHTML = data;
            });
    });

</script>
Great! At this point, you should be able to load your /addons page and get an initial set of results. If all goes well, your /addons page shouldn't look any different in the browser than it did after Part 1.
There's still more work to do though, so let's keep going
Link To Current Template Code:
ajax/addon-results: https://raw.githubusercontent.com/ops-andy/eeu-search-favorite-tutorial/main/09-onload-addons-page.html
While our /addons page looks good there are a few issues. Mainly that if you submit the search form, it tries to navigate to the page ajax/addon-results/[encoded query]. Let's fix that by hijacking the form and getting the data via AJAX.
We know that we want the form to submit via AJAX whenever a search function is updated and not reload the page. To do that, we'll need to bind an event listener to each element in our search functions section, and fire an AJAX request each time they are changed. We also need to prevent the form from submitting on its own (which would then redirect the user to a separate page in the browser.
Note: Continue to add this code wherever you were including the JavaScript from above (either in a separate .js file or in the addons/index template like I am ).
Let's see what that looks like.
<script>
    // ... continuing JS from above

    function ajaxFormSubmit () {
        //get the form data
        //submit the data via AJAX
        //return the results
    }
</script>
addon_filter.
<script>
    // ... continuing JS from above
    function ajaxFormSubmit () {
        //get the form data
        var searchForm = document.getElementById("addon_filter");
        //submit the data via AJAX
        //return the results
    }
</script>
<script>
    // ... continuing JS from above
    function ajaxFormSubmit () {
        //get the form data
        var searchForm = document.getElementById("addon_filter");
        var formData = new FormData(searchForm);

        //submit the data via AJAX
        //return the results
    }
</script>
fetch() again to submit our form data via a POST request.
<script>
    // ... continuing JS from above
    function ajaxFormSubmit () {
        //get the form data
        var searchForm = document.getElementById("addon_filter");
        var formData = new FormData(searchForm);

        //submit the data via AJAX
        fetch(searchForm.action, {
            method: 'post',
            body: formData
        })
        //return the results
    }
</script>
ajax/addon-results template.
<script>
    // ... continuing JS from above
    function ajaxFormSubmit () {
        //get the form data
        var searchForm = document.getElementById("addon_filter");
        var formData = new FormData(searchForm);

        //submit the data via AJAX. Since we updated the results page of our Low Search parameters, fetch() will use that action url to fetch the data.
        fetch(searchForm.action, {
            method: 'post',
            body: formData
        })
        // take our response and get the HTML we really want
        .then(response => {
            return response.text();
        })
        // take our HTML and replace the contents of our #addon-results element
        .then(data =>{
            resultsTarget.innerHTML = data;
        })
    }
</script>
ajaxFormSubmit() function to allow the user to submit the search form without being redirected.change event listener to each element.
<script>
    //fire search form when sorting filters are updated
    document.getElementById("searchResultsSortSelect").addEventListener('change', event => {
        ajaxFormSubmit();
    });
</script>
submit action. We're going to prevent the default action (which is to redirect the user to a results page), and run our ajaxFormSubmit() function.
<script>
    // catch any submit events on our search form.
    document.getElementById("addon_filter").addEventListener('submit', event =>{
        // prevent the default action
        event.preventDefault();

        //submit the form via our function
        ajaxFormSubmit();
    });
</script>
{partial_search_functions} partial and update our JavaScript to submit the form when checkboxes are clicked.
<script>
    const filterAccordions = document.querySelectorAll('.filter-accordion');
    filterAccordions.forEach(filterAccordions =>{
        let filterCheckbox = filterAccordions.querySelectorAll('[data-action-uncheck]');

        filterCheckbox.forEach(filterBox => {
            filterBox.addEventListener('change', event => {
                var showAllFilter = filterBox.getAttribute("data-action-uncheck");
                document.getElementById(showAllFilter).checked = false;

                //submit the search form now
                ajaxFormSubmit();
            })
        })
    });
</script>
{partial_search_functions} partial we'll update the event triggered when a "Show All" box is checked.
<script>
    function showAll(cn,cbId){
        if (document.getElementById(cbId).checked){
            var cbarray = document.getElementsByName(cn);
            for(var i = 0; i < cbarray.length; i++){
                if (cbarray[i] != document.getElementById(cbId)){
                    cbarray[i].checked = false;
                }
            }
            //submit the search form now
            ajaxFormSubmit();
        }
    }
</script>
Link To Current Template Code:
{partial_search_functions} partial: https://raw.githubusercontent.com/ops-andy/eeu-search-favorite-tutorial/main/10-partial_search_functions.htmladdons/index template: https://raw.githubusercontent.com/ops-andy/eeu-search-favorite-tutorial/main/11-addons-index.htmlKey Concepts
JS Event Listenershttps://www.w3schools.com/js/js_htmldom_eventlistener.aspfetch()https://developer.mozilla.org/.../fetchEvent.preventDefault()https://developer.mozilla.org/en-US/.../preventDefaultAt this point, you should be able to see search results populate on your page as you change search inputs. However, if you try to click on the pagination, you'll notice that the user is redirected to the ajax/addon-results template.
If you haven't figured it out, this is because the pagination still thinks it's being rendered at /ajax/addon-results URL. Instead, we've asked JavaScript to reach out to that URL, grab the contents, and insert the HTML on our page.
There are probably several ways to handle this. To keep things simple and just use what we're given, I like to simply bind an event to the pagination links that will again make an AJAX request when a user clicks one of the links.
One last thing before we start writing code. It's important to understand event listeners and loading new content into the DOM. Typically, you would write an event listener and bind it to whatever elements on the page you want to (e.g., our submit event listener that we're binding to the search form). Typically these listeners are bound once the DOM has loaded. However, when working with AJAX, content is being loaded after the DOMContentLoaded event takes place. So, if we want to bind a click event listener to our pagination links, we need to bind that after the pagination is loaded. We also need to bind that event every time that new content is loaded into our DOM (i.e., every time we get a response from our AJAX request).
With that being said, let's get started by writing a function we can call every time we load new content (specifically new pagination links). We'll continue to add this to the JavaScript in our addons/index template.
<script>
    //must be called AFTER ajax loads
    function paginationLinks() {
        //find all pagination links
        // when the links are clicked
            // -> do not redirect the user
            // -> grab the page link url and fetch the contents of that URL using AJAX
            // -> replace the contents of our #addon-results container with the next page of results
    }
</script>
<script>
    //paginationLinks
    //adds event listener to pagination
    //must be called AFTER ajax loads
    function paginationLinks() {
        //find all pagination links
        document.querySelectorAll('.pagination__page').forEach(pageLink => {

            //bind the click event to each pagination link
            pageLink.addEventListener('click', (event) => {

                //prevent the default action (following the link to another page)
                event.preventDefault();

                //grab the link from the pagination link
                var pageUrl = pageLink.href;

                //fetch the contents of the pagination link URL
                fetch(pageUrl)
                    .then(response => {
                        return response.text();
                    })
                    .then(data => {
                        resultsTarget.innerHTML = data;

                        //since new data is loaded, we need to bind this event to new pagination links every time. No, this does not cause a loop.
                        paginationLinks();
                    });


            })
        });
    }
</script>
paginationLinks() function after we get our AJAX responses. We've already done this above when we load pages. However we still need to do this after our initial search results and after we submit the search form.
ajaxFormSubmit() function
<script>
    function ajaxFormSubmit () {
        ...
        .then(response => {
            return response.text();
        })
        .then(data =>{
            resultsTarget.innerHTML = data;
            paginationLinks();
        })
    }
</script>
<script>
document.addEventListener('DOMContentLoaded', event =>{
    ...
        .then(data => {
            ...
            paginationLinks();
        });
});
</script>
Congrats! At this point you should have a fully functioning search page that retrieves results using AJAX.
Link To Current Template Code:
addons/index template: https://raw.githubusercontent.com/ops-andy/eeu-search-favorite-tutorial/main/12-addons-idex.htmlIn Part 3 of this series, we're going to continue updating our search feature by allowing users to select results as their "favorites". This will help users easily find items they search for often.
If that doesn't interest you, then your journey can still continue. Here's a few other items to consider with what we've done in these first two parts:
fetch(). Consider condensing those into one reusable function to make your JS even more DRY
Good luck, and never hesitate to reach out if you have any questions!
This is a three-part series on how we have built the searching/filtering and Favorites feature in our own Add-on Store. While we're not going to build the exact same thing, the basic logic and template code will be very similar.
Notes:
I'm a big fan of architecting my solution before writing code. This can be done with pseudo-code or with flowcharts. In this example, the flow is pretty straightforward:
The first step is to, of course, set up our channel and data in ExpressionEngine.
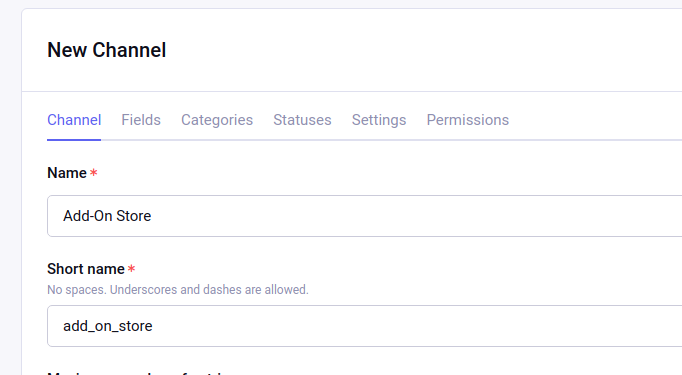
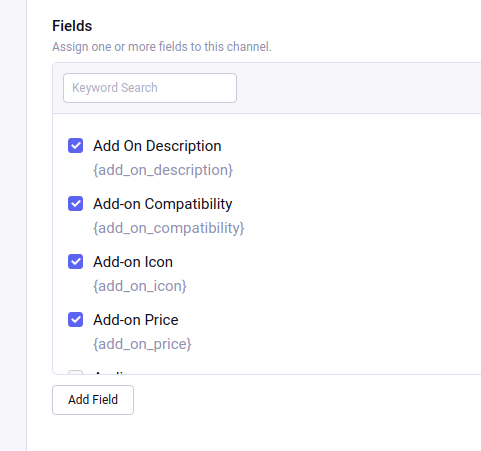


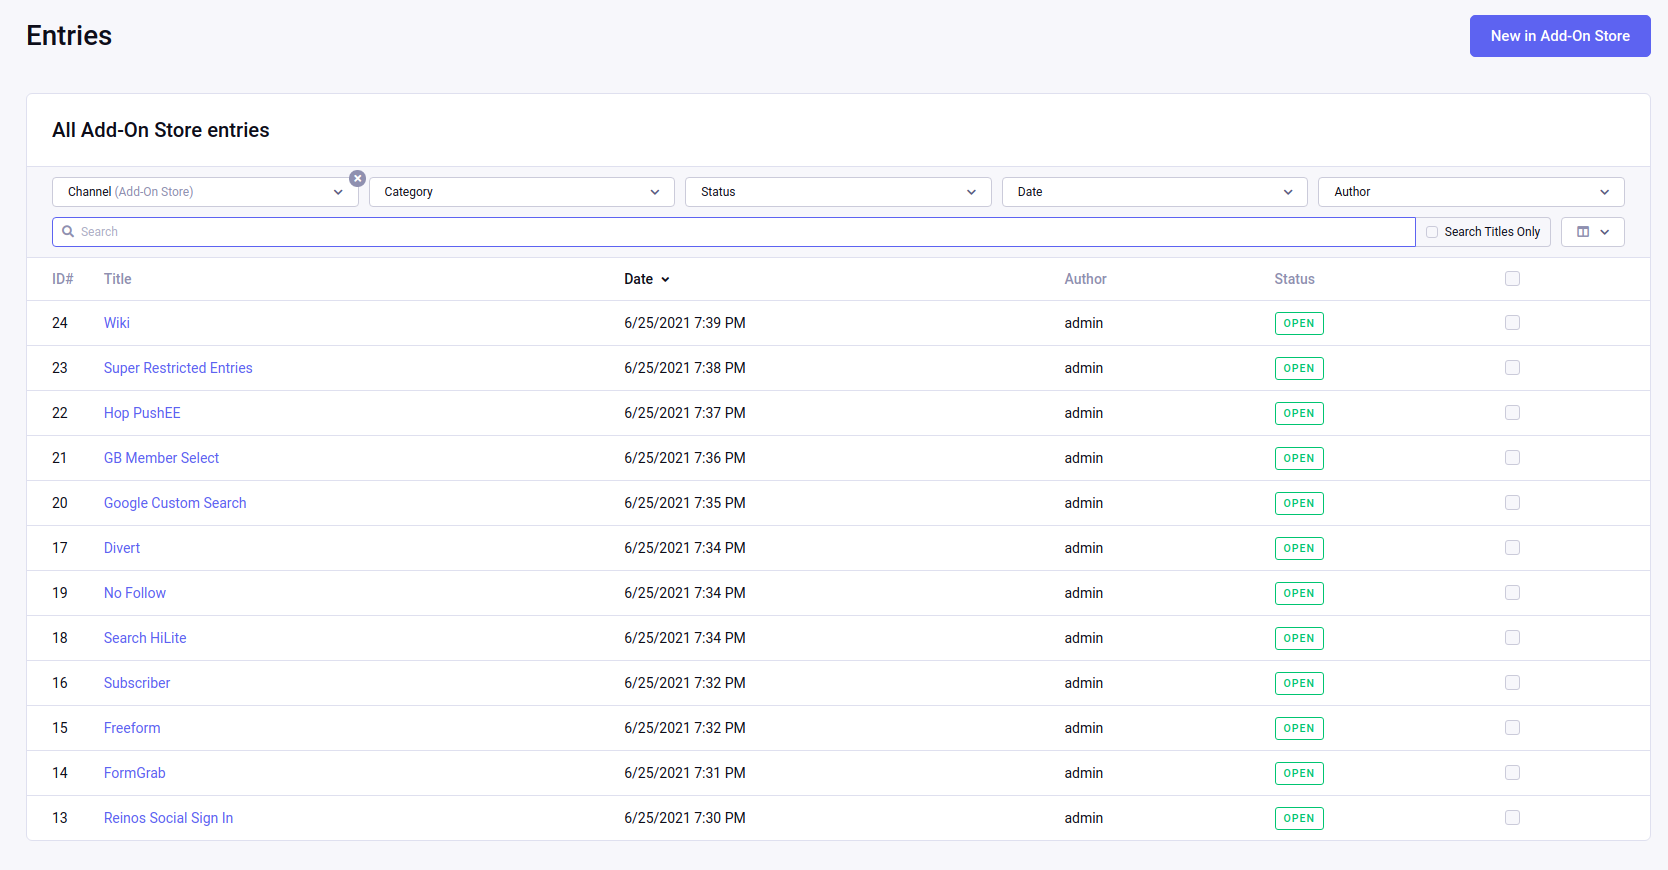
For this to work as expected, we need to first download and install Low Search and then update some settings.

Key Concepts
Now we're ready to connect everything together in the templates. This could be done with one template, but I'll let you figure that out on your own if you so desire. To make this tutorial easier to follow we are going to use two separate templates:
/addons)/addons/results )To start, the users will land on a page which will present them with an initial set of results.
Since we're using the default theme that comes with ExpressionEngine, we will use the html-wrapper template included with the theme. Remember that when using layouts, the {layout ...} tag should always come first in your template.
{layout='layouts/_html-wrapper'}
We'll first use a Low Search results tag pair to show an initial set of results. You can also just simply use a native {exp:channel:entries}. However, for now, we'll use {exp:low_search:results} to keep everything in Low Search and make it easier to break this up into reusable components in following lessons.
    {exp:low_search:results
        channel='add_on_store' //only show entries from the addon store
        limit='4' // limiting results to only 4 per page
        paginate="bottom" // show pagniation at the bottom of the results
    }
{if low_search_no_results} conditional .
{!-- if no results, let the user know --}
{if low_search_no_results}
    <div class="alert alert--empty">No Add-ons</div>
{/if}
{!-- the card used to display the add-on information --}
{!-- Tailwind card component source: https://tailwindcomponents.com/component/quote-card-with-image-1 --}
    <div class=" flex flex-col my-1 px-1 w-full md:w-1/2 lg:my-4 lg:px-4 lg:w-1/3">
        <div class="max-w-2xl bg-white border-2 border-gray-300 p-5 rounded-md tracking-wide shadow-lg flex-1">
                <div id="header" class="flex">
                    <img alt="addon icon" class="rounded-md border-2 border-gray-300" style="width:100px;height:100px;" src="{add_on_icon}"/>
                    <div id="body" class="flex flex-col ml-5">
                        <h4 id="name" class="text-xl font-semibold mb-2">{title}</h4>
                        <p id="job" class="text-gray-800 mt-2">{add_on_description:limit characters='100'}</p>
                        <div class="flex mt-5">
                        <p class="ml-3">
                            {if add_on_price == '0'}
                                Free
                            {if:else}
                                <sup>$</sup>{add_on_price}
                            {/if}
                        </p>
                    </div>
                </div>
            </div>
        </div>
    </div>
low_search_results tag pair, we want to include our pagination code, just like you would for native ExpressionEngine channel:entries
{paginate}
    <div class="container py-2">
        <nav class="block">
            <ul class="flex pl-0 rounded list-none flex-wrap">
                {pagination_links}
                    {first_page}
                    <li>
                        <a href="{pagination_url}" class="first:ml-0 text-xs font-semibold flex w-8 h-8 mx-1 p-0 rounded-full items-center justify-center leading-tight relative border border-solid border-blue-500 {if current_page}text-white bg-blue-500{if:else}bg-white text-blue-500{/if}" style="width:30px;">
                        {pagination_page_number}
                        </a>
                    </li>
                    {/first_page}

                    {page}
                    <li>
                        <a href="{pagination_url}" class="first:ml-0 text-xs font-semibold flex w-8 h-8 mx-1 p-0 rounded-full items-center justify-center leading-tight relative border border-solid border-blue-500 {if current_page}text-white bg-blue-500{if:else}bg-white text-blue-500{/if}" style="width:30px;">
                        {pagination_page_number}
                        </a>
                    </li>
                    {/page}

                    {last_page}
                    <li>
                        <a href="{pagination_url}" class="first:ml-0 text-xs font-semibold flex w-8 h-8 mx-1 p-0 rounded-full items-center justify-center leading-tight relative border border-solid border-blue-500 {if current_page}text-white bg-blue-500{if:else}bg-white text-blue-500{/if}" style="width:30px;">
                        {pagination_page_number}
                        </a>
                    </li>
                    {/last_page}
                {/pagination_links}
            </ul>
        </nav>
    </div>
{/paginate}
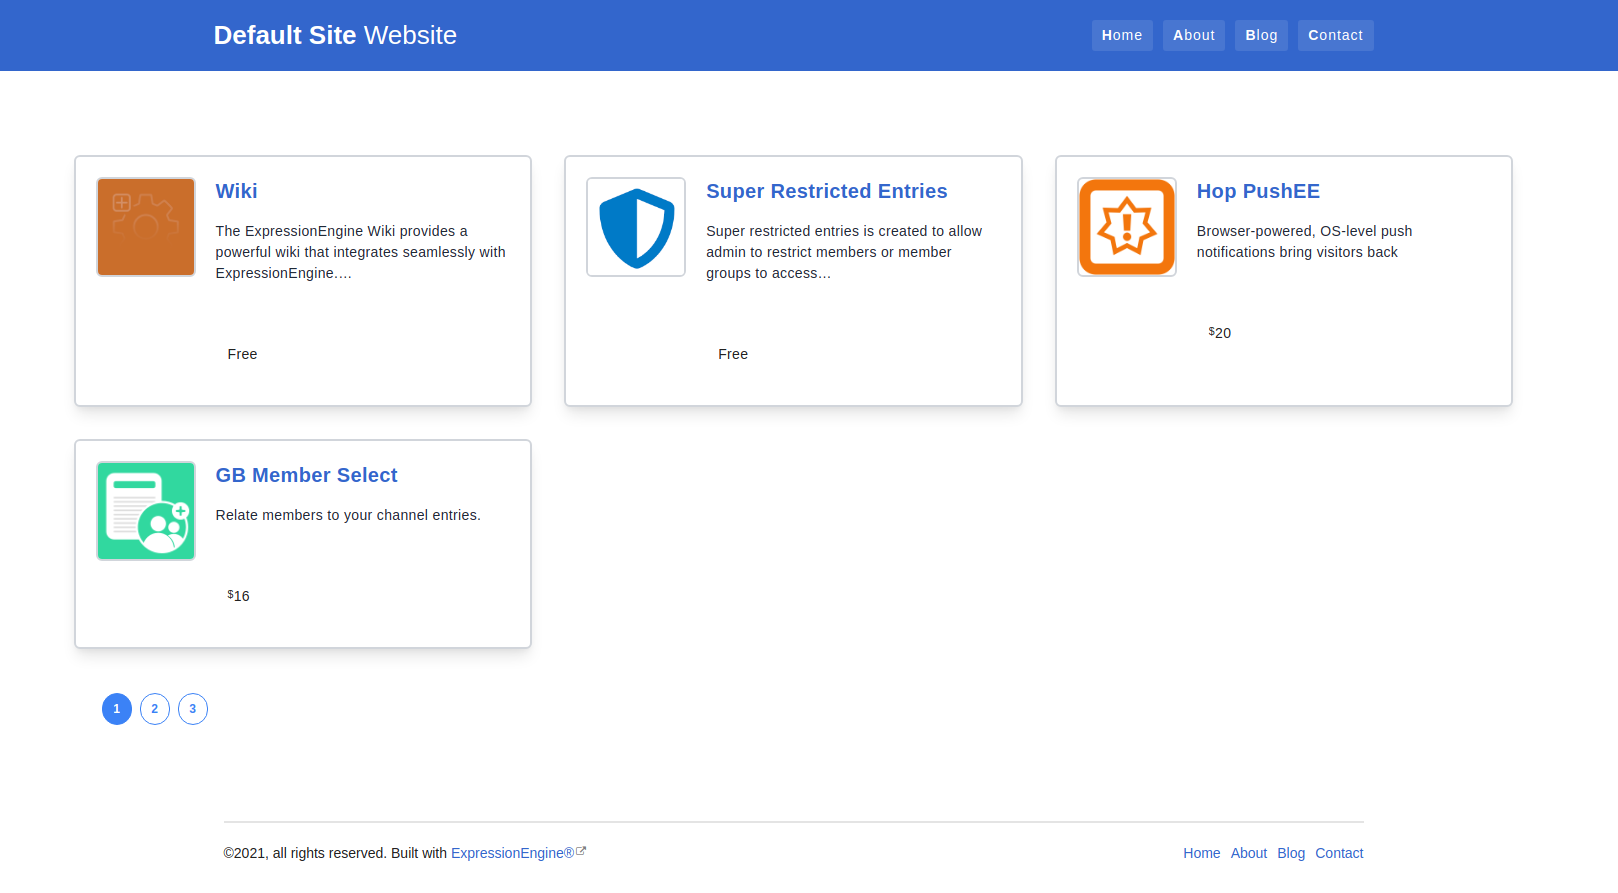
Link To Current Template Code:
addons/index: https://raw.githubusercontent.com/ops-andy/eeu-search-favorite-tutorial/main/01-search-landing-page.html
Key Concepts
{no_results} conditional. https://gotolow.com/.../tags#search-tag-variablesNow that we have our initial results set let's add our search functions. To do this, we'll split the page into two columns (search functions and results).
Our goals for the search functionality are:
{exp:low_search:form} tag to open a search form with Low Search.
{exp:low_search:form
    result_page="addons/results" //where users will be taken after submitting the search
    form_id="addon_filter" //an ID to identify this form
    query="{segment_3}"
}
<input
    type="text"
    name="keywords" //important for Low Search to recognize this as a keyword search
    class="search-input__input"
    placeholder="Search Add-Ons"
    >
orderby_sort filter.
<select name="orderby_sort" class="filter-bar__item" id="searchResultsSortSelect">
    {!--  <option value="name-az">Sort By</option>  --}
    <option value="date|desc">Newest</option>
    <option value="date|asc">Oldest</option>
    <option value="edit_date|desc">Recently Updated</option>
    <option value="title|asc">Name: A–Z</option>
    <option value="title|desc">Name: Z–A</option>
</select>
search:add_on_compatibility[]
<ul
    class="sidebar__list" id="addon-compatibility-filters"
    >
    <li>
        <input
            type="checkbox"
            name="show-all-compatibility"
            id="show-all-compatibility"
            data-action="show-all-compatibility"
            onclick="showAll('search:add_on_compatibility[]',this.id)"
            value=""
            />
        <label for="show-all-compatibility">Show All</label>
    </li>
    <li>
        <input
            type="checkbox"
            name="search:add_on_compatibility[]"
            data-action-uncheck="show-all-compatibility"
            id="EE6"
            value="6"
            />
        <label for="EE6">EE 6</label>
    </li>
    <li>
        <input
            type="checkbox"
            name="search:add_on_compatibility[]"
            data-action-uncheck="show-all-compatibility"
            id="EE5"
            value="5"
            />
        <label for="EE5">EE 5</label>
    </li>
    <li>
        <input
            type="checkbox"
            name="search:add_on_compatibility[]"
            data-action-uncheck="show-all-compatibility"
            id="EE4"
            value="4"
            />
        <label for="EE4">EE 4</label>
    </li>
    <li>
        <input
            type="checkbox"
            name="search:add_on_compatibility[]"
            data-action-uncheck="show-all-compatibility"
            id="EE3"
            value="3"
            />
        <label for="EE3">EE 3</label>
    </li>
    <li>
        <input
            type="checkbox"
            name="search:add_on_compatibility[]"
            data-action-uncheck="show-all-compatibility"
            id="EE2"
            value="2"
            />
        <label for="EE2">EE 2</label>
    </li>
    <li>
        <input
            type="checkbox"
            name="search:add_on_compatibility[]"
            data-action-uncheck="show-all-compatibility""
            id="EE1"
            value="1"
            />
        <label for="EE1">EE 1</label>
    </li>

</ul>
</div>
If we want to show add-ons that are compatible with any version, then we need to make sure search:add_on_compatibility[] array is blank. To ensure that, we'll use some JavaScript when the user clicks on "Show All".
For "Show All" input, we'll add an onclick property:
    <li>
        <input
            type="checkbox"
            name="show-all-compatibility"
            id="show-all-compatibility"
            data-action="show-all-compatibility"
            onclick="showAll('search:add_on_compatibility[]',this.id)"
            value=""
            />
        <label for="show-all-compatibility">Show All</label>
    </li>
//uncheck all boxes with given name when box with specified ID is checked
function showAll(cn,cbId){
    //we're calling this when a checkbox is clicked. So we first need to see
    //if this action is checking or unchecking the checkbox
    if (document.getElementById(cbId).checked){
        //let's get all the elements with the same name attribute we passed in
        var cbarray = document.getElementsByName(cn);

        //for each page element we find we're going to uncheck those boxes.
        for(var i = 0; i < cbarray.length; i++){
            if (cbarray[i] != document.getElementById(cbId)){
                cbarray[i].checked = false;
            }
        }

    }
}
// when the dom loads, we're going to bind a change event listener to each
// element that matches our query.
const filterAccordions = document.querySelectorAll('.filter-accordion');
filterAccordions.forEach(filterAccordions =>{
    let filterCheckbox = filterAccordions.querySelectorAll('[data-action-uncheck]');

    filterCheckbox.forEach(filterBox => {
        filterBox.addEventListener('change', event => {
            var showAllFilter = filterBox.getAttribute("data-action-uncheck");

            //uncheck the matching Show All checkbox
            document.getElementById(showAllFilter).checked = false;
        })
    })
});
{channel:categories} tag to list all categories used in the "Add-On Store" channel combined with the Low Search Categories filter:
<ul
    class="sidebar__list"
    id="addon-category-filter"
    >
    <li>
        <input
            type="checkbox"
            name="category[]"
            id="show-all-categories"
            onclick="showAll('category[]',this.id)"
            value=""
            />
        <label for="show-all-categories">Show All</label>
        </li>
    {exp:channel:categories channel='add_on_store' parent_only='yes' style='linear' show_empty='no' status='not closed'}
        <li>
            <input
                type="checkbox"
                name="category[]"
                id="{category_url_title}"
                data-action-uncheck="show-all-categories"
                value="{category_id}"
                />
            <label for="{category_url_title}">{category_name}</label>
        </li>
    {/exp:channel:categories}
</ul>
<button type="submit" class="bg-blue-500 hover:bg-blue-700 text-white font-bold py-2 px-4 rounded">Submit</button>
inline-block to align these two columns. This will give us a template like so:
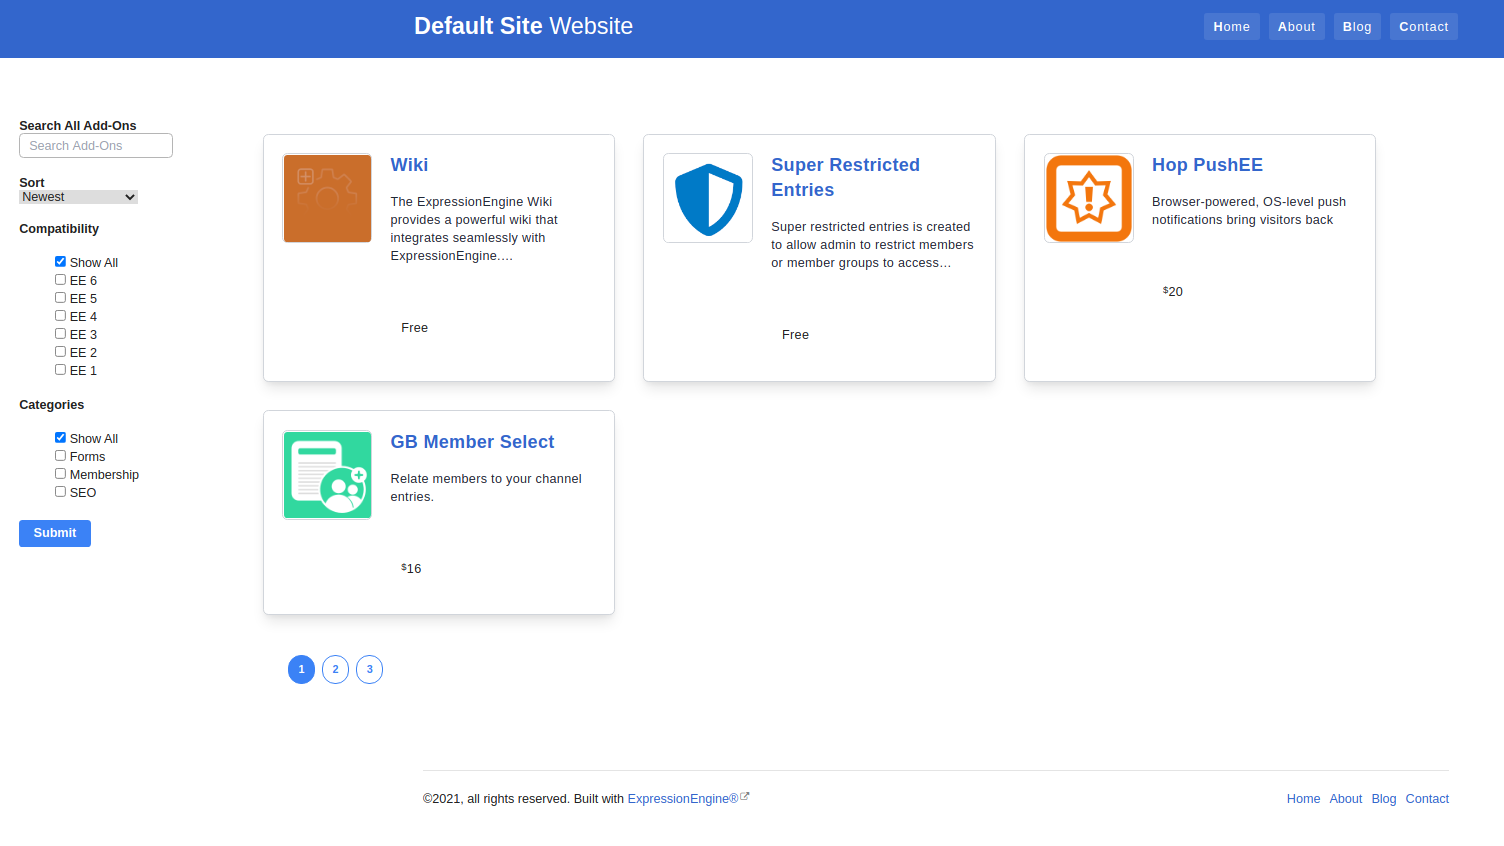
Link To Current Template Code:
Updated addons/index with search functions: https://raw.githubusercontent.com/ops-andy/eeu-search-favorite-tutorial/main/01-search-landing-page-with-functions.html
Key Concepts
orderby_sort Filter: https://gotolow.com/...#orderby-sort[] to the end of the name attribute: https://gotolow.com/...#field-search-4Now that we have a landing page with an initial set of results and search functions in place, we need a new template to show the search results. Since this page is going to look much like the landing page, we should move some of our components to template partials so they are easy to reuse and we follow DRY principals.
Looking at our page so far, there are two parts that can easily be broken into components:
The Search functions are going to be the same on each page.
While the {exp:low_search:results} opening tag will be different, the template code inside of the {exp:low_search:results} will also be the same.
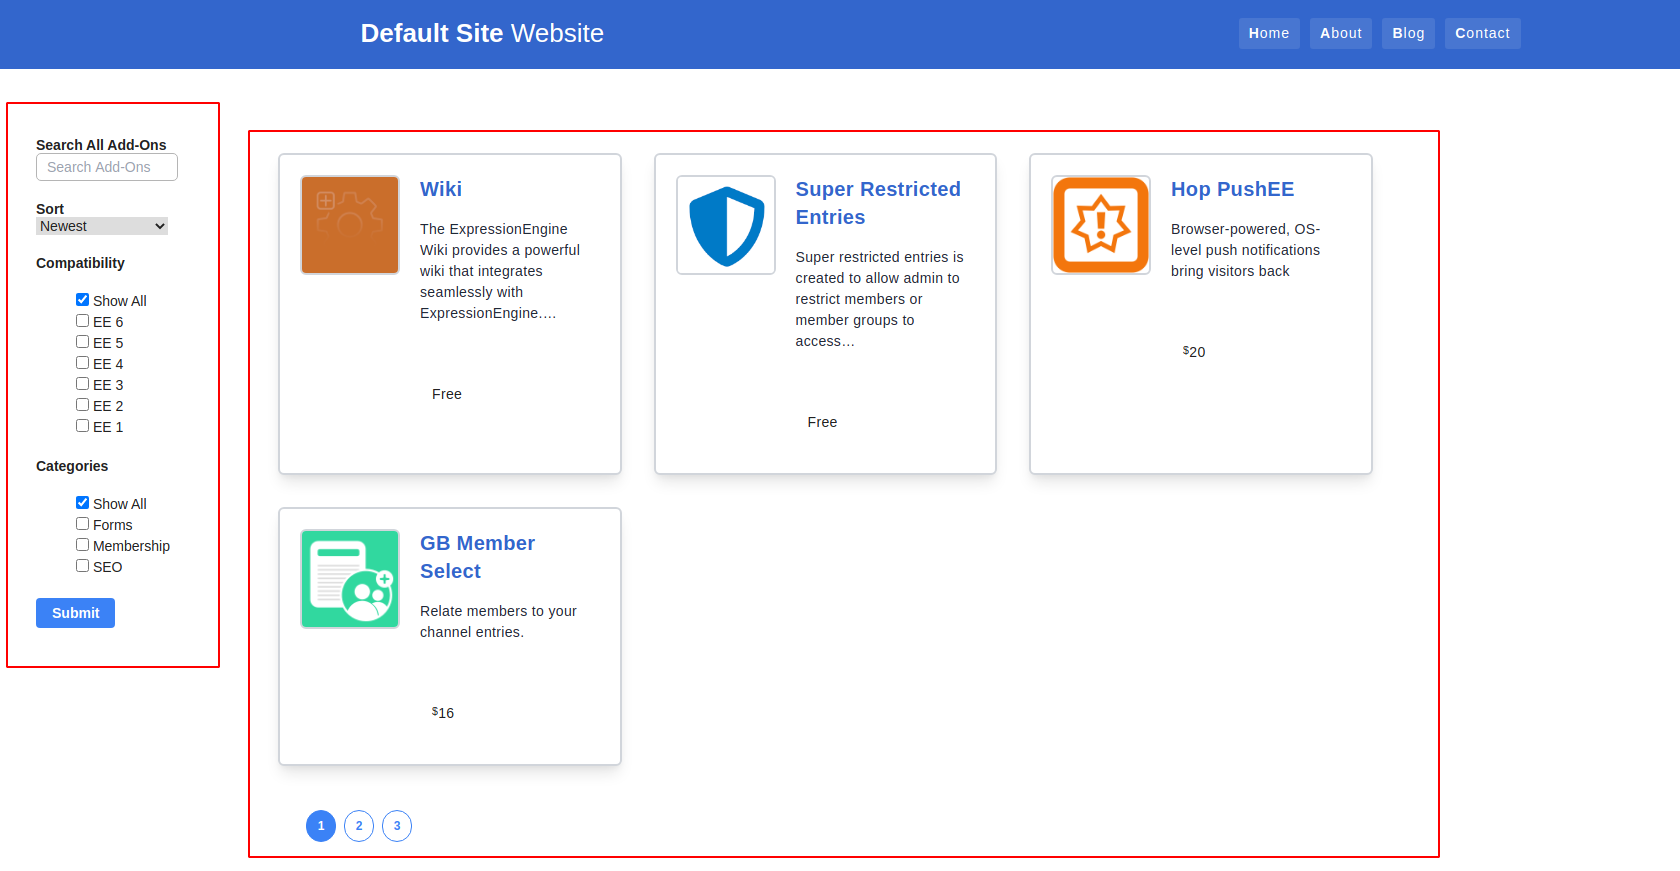
_partials/partial_search_functionspartial_search_functions partial to ensure the proper JavaScript is always available when needed.addons/index template with the template tag {partial_search_functions}{exp:low_search:results} to a new partial: _partials/partial_search_results.addons/index template with the template tag {partial_search_results}.Link To Current Template Code:
{partial_search_functions}: https://github.com/ops-andy/eeu-search-favorite-tutorial/blob/main/03-partial_search_functions.html{partial_search_results}:https://github.com/ops-andy/eeu-search-favorite-tutorial/blob/main/04-partial_search_resultsRefactoring our landing page brings the template from 290 lines to just 17.
New landing page (addons/index):
{layout='layouts/_html-wrapper'}
{partial_search_functions}

<div class="container my-12 mx-auto px-4 md:px-12 w-10 inline-block align-top">
    <div class="flex flex-wrap -mx-1 lg:-mx-4">
    {!-- Low Search tag pair to display initial set of results--}
    {exp:low_search:results
        channel='add_on_store'
        limit='4'
        paginate="bottom"
    }

        {partial_search_results}

    {/exp:low_search:results}
    </div>
</div>
Link To Current Template Code:
Refactored addons/index template: https://github.com/ops-andy/eeu-search-favorite-tutorial/blob/main/05-new_landing_page.html
Now that we have our code nicely broken out and we're staying DRY, let's quickly make our results page.
addons/index as a new template named addons/results.exp:low_search:results tag in our new template:
keywords parameters allows us control how results are filtered using the keyword input.collection parameter tells Low Search what collection to use in conjunction with our keyword input.query parameter tells Low Search where the query string from the search is found in the URLdynamic_parameters allows us to submit a sort order to the results tagOur opening tag in the results template will now look like the following:
    {exp:low_search:results
    channel='add_on_store'
    limit='4'
    paginate="bottom"
    keywords:mode="all"
    keywords:loose="both"
    collection="add_on_store"
    query="{segment_3}"
    dynamic_parameters='orderby|sort'
    }
At this point, our results template should work as expected.
Current Results Page:
{layout='layouts/_html-wrapper'}
{partial_search_functions}

<div class="container my-12 mx-auto px-4 md:px-12 w-10 inline-block align-top">
    <div class="flex flex-wrap -mx-1 lg:-mx-4">
    {!-- Low Search tag pair to display initial set of results--}
       {exp:low_search:results
        channel='add_on_store'
        limit='4'
        paginate="bottom"
        keywords:mode="all"
        keywords:loose="both"
        collection="add_on_store"
        query="{segment_3}"
        dynamic_parameters='orderby|sort'

        }

        {partial_search_results}

    {/exp:low_search:results}
    </div>
</div>
Link To Current Template Code:
addons/results: https://github.com/ops-andy/eeu-search-favorite-tutorial/blob/main/06-results_page.html
Everything is working good as it is now. However, after a user submits a search, all values from their search are cleared from the search functions. To retain this, Low Search gives us a few tags to use.
Keywords: {if low_search_keywords}value="{low_search_keywords}"{/if} will give a value to our keyword search input if there is a keyword in the search query.
<input
  type="text"
  name="keywords"
  class="search-input__input"
  placeholder="Search Add-Ons"
  {if low_search_keywords}value="{low_search_keywords}"{/if}
>
Sort: {if low_search_orderby_sort =="edit_date|desc"}selected{/if}
option value="date|desc" {if low_search_orderby_sort =="date|desc"}selected{/if}>Newest</option>
Compatibility: {if low_search_search:add_on_compatibility *="6"}checked{/if}
{if low_search_search:add_on_compatibility *="6"}checked{/if}
Categories: {if low_search_category ~ '/\b'.category_id.'\b/'} checked{/if}
{if low_search_category ~ '/\b'.category_id.'\b/'} checked{/if}
Link To Current Template Code:
Search functions partial updated with tags to retain search values:: https://github.com/ops-andy/eeu-search-favorite-tutorial/blob/main/07-search_functions_refactored.html
At this point, we should have 2 templates and 2 template partials. When put together allows a user to search and filter our add-on entries.
In Part 2, we'll take this to the next by adding AJAX which will automatically submit searches when search function elements change and load the results on the page without refreshing the page or navigating to a new URL.
Link To Final Template Code:
addons/index: https://github.com/ops-andy/eeu-search-favorite-tutorial/blob/main/05-new_landing_page.htmladdons/results: https://github.com/ops-andy/eeu-search-favorite-tutorial/blob/main/06-results_page.html{partial_search_functions}: https://github.com/ops-andy/eeu-search-favorite-tutorial/blob/main/03-partial_search_functions.html{partial_search_results}: https://github.com/ops-andy/eeu-search-favorite-tutorial/blob/main/05-new_landing_page.htmlNeed to give your client’s order management staff a cleaner and simpler way to process website orders? The Channel Form tools in ExpressionEngine can open up a whole new set of options when it comes to processing order data controlled by EE.
Whilst the user interface in ExpressionEngine is very easy to use, managing order data within ExpressionEngine itself can be overwhelming and confusing for the average user, so we like to give clients some additional external screens to manage website content and data, to make life a little easier or even to achieve something not currently possible within EE itself.
We use Channel Forms to build custom-designed Dashboards, to help clients:
Jumping in and out of editing Entries within ExpressionEngine is fine, and the Order Manager tools provided by the EE ecommerce plugins, such as CartThrob, are getting better all the time, but sometimes it’s necessary to provide simpler day-to-day tools.
An Ecommerce Order Manager Dashboard, arranges all the Order Entries from a specified Orders Channel into a standalone frontend and just presents the basic order info in a single view, so you can easily process the orders. This helps improve order processing efficiency and helps prevent any data from being accidentally edited, prior to Shipping.
In this screenshot, you can see an Order Manager Dashboard displaying all the most recent orders for a website selling soap products. This includes key data such as customer name, customer location, total amount, date/time, order number, and the order status.

You can see it simply list all the orders with the latest at the top, with a “View” button to display an invoice or packing sheet, and a Status change dropdown menu with Update button. The Order Number button on the left, links through to an Edit screen, but I wont cover that functionality here.
The main code used to output this information, which is styled using the Bootstrap CSS framework, is as follows:
{exp:channel:entries channel="orders" status="Paid|Printed|Shipped" dynamic="no" orderby="date" sort="desc"}
{exp:channel:form channel="{channel_short_name}" entry_id="{entry_id}" return="dashboard"}
<div class="row">
<div class="col-md-1"><a href="{url_title_path="edit"}">{title}</a></div>
<div class="col-md-2">
<strong>{order_billing_first_name} {order_billing_last_name}</strong>
<span>{order_billing_city}<br>{order_billing_zip}</span>
</div>
<div class="col-md-1">£ {order_total}</div>
<div class="col-md-2">{entry_date format="%D %j<sup>%S</sup> %M %Y<span>%g:%i %a</span>"}</div>
<div class="col-md-1">{status}</div>
<div class="col-md-1"><a href="{url_title_path="view"}" target="_blank">View</a></div>
{if status == “Paid”}
<div class="col-md-3">
{status_menu}<select name="status">{select_options}</select>{/status_menu}
<button type="submit">Update</button>
</div>
{/if}
</div>
{/exp:channel:form}
{/exp:channel:entries}
You can see this code mostly just outputs data already stored in the database, but there is a simple Status dropdown menu and Update button, which will submit the Channel Form to change the order status from ‘Paid’ to ‘Shipped’, or whatever you like.
However, I find there is a need for more data on this Dashboard and for a little more logic, to give this screen more features.
In the following screenshot, this is how the Dashboard looks if we introduce more options for each Order’s row.

Each order summary row now includes:
Additionally, there are separate screens available to list orders of a specific Status, such as “Awaiting Payment” or “Failed”. These use essentially the same {exp:channel:entries} code loop, but have the required Status set in the Parameters.
To achieve this added functionality, the main code is now as follows:
{exp:channel:entries channel="orders" status="Paid|Printed|Shipped" dynamic="no" orderby="date" sort="desc"}
{exp:channel:form channel="{channel_short_name}" entry_id="{entry_id}" return="dashboard"}
<div class="row">
<div class="col-md-1"><a href="{url_title_path="edit"}">{title}</a></div>
<div class="col-md-2">
<strong>{order_billing_first_name} {order_billing_last_name}</strong>
<span>{order_billing_city}<br>{order_billing_zip}</span>
</div>
<div class="col-md-1">
£ {order_total}
<span>{order_payment_gateway}</span>
</div>
<div class="col-md-2">{entry_date format="%D %j<sup>%S</sup> %M %Y<span>%g:%i %a</span>"}</div>
<div class="col-md-1">{status}</div>
<div class="col-md-1"><a href="{url_title_path="view"}" target="_blank">View</a></div>
{if status == "Paid"}
<div class="col-md-3">
<input type="hidden" name="status" value="Printed" />
<button type="submit">Printed</button>
</div>
{if:elseif status == "Printed"}
<div class="col-md-2">
<input type="text" name="order_shipping_tracking" id="order_shipping_tracking" value="" placeholder="Tracking No" />
{field:order_shipping_notracking}
</div>
<div class="col-md-2">
<input type="hidden" name="status" value="Shipped" />
<button type="submit">Shipped</button>
</div>
{if:elseif status == "Shipped"}
<div class="col-md-2">
{if order_shipping_tracking}{order_shipping_tracking}
{if:else}Shipped without tracking{/if}
</div>
{/if}
</div>
{/exp:channel:form}
{/exp:channel:entries}
The small amount of logic {if}{if:else}{/if} used with the Entry Status, is just there to output the desired content or form field, depending on the current Status of the order. Used alongside the submit button and a hidden Status field, the order’s Status can be changed with a single click.
This is just the tip of the iceberg, where Dashboards and Channel Forms are concerned. There are so many other options and uses, that they can be utilised for, to help in so many situations.
With this Order Manager Dashboard, for example, I have also provided the following features and functions:
Have a go yourself and see how useful they can be. And, of course, if you get stuck, you can always check out the EE Docs for help with Channel Forms or reach out to the community for help!
The Channel Form tools in ExpressionEngine can open up a whole new set of options for website owners, content managers and end-users alike.
Whilst the user interface in ExpressionEngine is very easy to use, it’s sometimes nice to give your clients (or yourself) some additional screens to manage website content and data, to make life a little easier or to achieve something not currently possible within EE itself.
We use Channel Forms to build custom-designed Dashboards, to help clients:
When trying to manage your site’s SEO strategy - or just trying to make sure you’re spreading your target key phrases out nicely across all your content - a bird’s eye view of the pages is a really beneficial way of slotting the right key phrases into the right place.
Jumping in and out of editing Entries within ExpressionEngine is fine, but being able to take a further ‘step back’ from your content, helps to get some perspective on what needs improving.
An SEO Management Dashboard, arranges all the Entries from specific Channels into a different screen and presents everything in a single view, so you can easily compare Entries against each other. This helps to focus on spreading the SEO-love across all your META tags and key page content, whilst keeping everything visible in one place.
In this screenshot, you can see an SEO Dashboard displaying all the most relevant SEO tags for a website selling soap products. This includes the page heading, sub-heading, META Title and META Description, along with the Entry ID.

You can see how easy it is to find gaps and opportunities in the content - sometimes there are big holes and sometimes there are auto-generated content blocks (highlighted with an *), which could possibly be better written by hand.
The main code used to output this information, which is styled using the Bootstrap CSS framework, is as follows:
{exp:channel:entries channel="collections" dynamic="no"}
    <div class="row">
        <div class="col-md-1"><a href="{site_url}system/index.php?/cp/publish/edit/entry/{entry_id}">{entry_id}</a></div>
        <div class="col-md-2">{title}</div>
        <div class="col-md-3">{collection-subheading}</div>
        <div class="col-md-3">{if collection-meta-title}{collection-meta-title}{if:else}* {title} Collection from Posh Soaps{/if}</div>
        <div class="col-md-3">{if collection-meta-description}{collection-meta-description}{if:else}* {collection-subheading}{/if}</div>
    </div>
{/exp:channel:entries}
Although this example doesn’t use a Channel Form, it does provide the visual overview. The Entry ID is linked back to the Edit Entry screen in EE, so the site manager can quickly jump to where the modifications are required.
What would be nice, however, is if the Entries could be edited without leaving the Dashboard itself.
In the following screenshot, this is how the Dashboard looks if we introduce the Channel Form functionality to each Entry’s row.

It now possible to edit an Entry’s content for each displayed Field, all from one screen. Where there is content missing, either just the empty form field is displayed, or the auto-generated content, so the user can see what’s currently being output on the site’s live frontend.
To achieve this added functionality, the main code is now as follows:
{exp:channel:entries channel="collections" dynamic="no"}
    {exp:channel:form channel="{channel_short_name}" entry_id="{entry_id}" return="seo/{segment_2}"}
        <div class="row">
            <div class="col-md-1"><a href="{site_url}system/index.php?/cp/publish/edit/entry/{entry_id}">{entry_id}</a></div>
            <div class="col-md-2"><input type="text" name="title" value="{title}" /></div>
            <div class="col-md-2">{field:collection-subheading}</div>
            <div class="col-md-3">
                {if collection-meta-title}<textarea name="collection-meta-title">{collection-meta-title}</textarea>
                {if:else}
                    <p>* {title} Collection from Posh Soaps</p>
                    <textarea name="collection-meta-title"></textarea>
                {/if}
            </div>
            <div class="col-md-3">
                {if collection-meta-description}<textarea name="collection-meta-description">{collection-meta-description}</textarea>
                {if:else}
                    <p>* {collection-subheading}</p>
                    <textarea name="collection-meta-description"></textarea>
                {/if}
            </div>
            <div class="col-md-1"><button type="submit">Update</button></div>
        </div>
    {/exp:channel:form}
{/exp:channel:entries}
Here you can see there a couple of methods used to output the editable Fields.
A manual method has be used for the Entry Title, META Title and META Description. However the Sub Heading Field, has been output using the {field:my_field_name} notation which will generate all the code automatically.
Then there is a simple Submit button, which will submit the Channel Form and update the database.
The small amount of logic {if}{if:else}{/if} used with the META Title and META Description fields, are just to help aid the user. If there is content available, then it just outputs the editable field. But if there is no data, then it outputs the auto-generated content along with the empty form field, so it can be added.
This just the tip of the iceberg, where Dashboards and Channel Forms are concerned. There are so many other options and uses, that they can utilised for, to help in so many situations.
Have a go yourself and see how useful they can be. And, of course, if you get stuck, you can always check out the EE Docs for help with Channel Forms or reach out to the community for help!
For your business to succeed online today, you have to enlist the help of Google. Your Google rank will likely determine the likelihood of someone visiting your business or finding your product online. There are over 4.5 billion Google searches each day, and the number is steadily increasing.
It is no longer an option to create a website, throw it on the internet, and expect people to find you. In that case, your site will fall to the last page of google. To rank, you have to use Google’s SEO guidelines.
As consumers ourselves, and as digital marketing professionals, we spend hours pouring over strategies to help our customers succeed in SEO. We take the time to learn best practices and scour Google for updates and changes to their policies and ranking factors. SEO is a landscape that changes significantly every six months to a year.
In this blog, we’ll discuss some of SEO’s trends as well as trending directions. You can use this knowledge to help improve your website’s SEO and rank in 2021.
Google has been moving in this direction for a long time, but now they say that user experience will weigh more than it has in the past. In essence, how user-friendly your website is will count towards your ranking position overall score on search engines.
Users aka “people” in 2020 want their information quick, accessible, and well, user-friendly. Take some time to audit your website, and ask these questions:
Google is working hard to get people the information they want, and they want it to be as easy as possible. We worry a lot about aesthetics, but functionality is much more critical. You might forego that video plugin to make your site more simple. The more user-friendly your website is, the more Google will reward you with search visibility.
Google My Business is going to continue to be essential to local search efforts. If people are searching for a business like yours in your area, your Google My Business profile must be up to date, accurate, and helpful.
People expect to see photos, business details, phone numbers, reviews, services, prices, addresses, and business hours. The more information, the better. People expect to know what they’re getting themselves into before ever leaving the couch. These profiles need to be updated continually.
Google is paroling for high-quality content, and that will continue. You may have heard the phrase “content is king,” and nothing is more accurate. Websites with high-quality, thoughtful, useful content are getting rewarded.
No one wants to be directed to a website that knows some of their answers, but instead one that knows all of their answers. People want to hear from experts! So if you are an expert in your field or industry, try to produce high-quality content and resonate with people.
Marketing experts have coined the term– 10x Content Pillar Pages, and these are pages that provide 10x the quality of content as most other pages. If you can, strive to produce these kinds of pages in your area of expertise. These are the kinds of pages that you bookmark for future use.
According to TechCrunch, “Smart devices like the Amazon Echo, Google Home, and Sonos One will be installed in a majority – that is, 55 percent – of U.S. households by the year 2022. By that time, over 70 million households will have at least one of these smart speakers in their home, and the total number of installed devices will top 175 million.”
So we hope you like your Alexa, because voice-enabled devices are the future! To keep up with the audio questions in search, you have to consider the way people talk. For example, someone might ask Siri, “how do I change my tire?” but type “change tire.” Voice search tends to favor long strings of words.
You might be noticing that many ads are coming in the form of videos on your social media platforms. Video is only expected to rise and grow. And more and more, we see amateur video production, because people like to see authentic people giving their real experiences. If you aren’t creating video yet, it might be time to consider it.
Google started showing “featured snippets” back in 2017, and since they’ve stolen the spotlight. When you search for something in Google, an answer appears without you having to click on a website – that’s a featured snippet.
By having a featured snippet, you’ll steal Google’s top spot and get lots of traffic. So optimizing your website to include key phrases and questions is also essential. An excellent way to look for featured snippets is under the suggestions that Google shows, the “people also ask” feature.
These snippets quickly answer a question, show a how-to guide, or give information. Consider trying to rank for some featured snippets in your industry.
If you navigate to a website, and the page isn’t loading, what do you do? You close out the page or navigate back to search. People do not have the patience for slow websites.
Web speed is increasing worldwide, and phones are moving towards 5G. So at this point, two seconds is too slow.
You can test your website’s speed here. Slow pages mean no business. Try to optimize all of your pages for speed, and don’t compensate for cool plugins or video features.
Google is a brilliant engine fueled by artificial intelligence and machine learning, and it’s getting increasingly good at figuring out what we were “trying to say.” You’ve likely noticed your search getting better and better in the last few years.
The search engine is trying to read between the lines and get you to the answer as quickly as possible. Humans sometimes spell things wrong and don’t string the words together correctly. Based on the time of day or geographic location, Google can use its algorithms to assist you in your quest for information.
Google is adapting to our move towards conversational questions that seem more natural to us. The intent is redefining the marketing funnel, and Google is no longer looking for short keywords, but instead useful key phrases that help people get where they want to go.
The situation in 2020 with COVID has exposed many businesses’ weak spots, and it has shown us all how vital web presence is. We saw Google make many adjustments to help out with the COVID crisis; they started favoring government and official websites. They even temporarily stopped the Google Review feature from helping businesses in times of crisis.
Knowing what we know now, it is crucial to have a plan ready for the next time a pandemic or disaster hits. We all need communication plans that are easy to manipulate and change. And we need to be able to update our websites quickly and easily, and we need to share accurate and helpful information. We hope these insights were valuable!

It goes without saying that we are living through difficult times (and that is putting it mildly) with the COVID-19 pandemic. First, we hope all of you reading this are healthy and safe and we sincerely wish that to continue.
Here at Tunnel 7 we remain open. We are now working from home offices but are able to keep in touch with co-workers and clients alike through Skype, our video conferencing line and the good old phone. Over the past week we have been working with a number of clients helping them to get through in few different ways.
During this time when things are changing rapidly, being able to get news out to your customers and clients quickly is very important. Many of the websites that we have built have a global alert notification built in (for example, Finck & Perras Insurance) that allows you to quickly get the word out to your website users.
We’re also helping to add this feature to sites that don’t currently have it and will continue to do so.
With all of the changes lately, we know many of you are having to quickly shift how you do business and in some cases, change what you’re offering your clients and customers altogether.
Given the shift away from in-person gatherings to virtual spaces, we’ve been helping clients leverage their websites by adding sections for online trainings. This allows for the easy upload of video and other multimedia files, allowing clients to continue to conduct business and keep revenue coming in.
If you’re like us, you’re navigating a lot of information being thrown at you daily right now. You’re also probably working hard to create effective messaging and to keep up with content on your website, social media and other platforms. We have been helping clients with this, writing updates and other related content to ensure continuity.
For those businesses that remain open it is important to keep your daily workload as normal as possible. We’re keeping up with current marketing trends and are managing clients’ marketing campaigns across multiple platforms. We’re also supporting clients in making necessary adjustments to their marketing strategies.
Like all of you, we don’t know what the future holds but we are taking pride in the work that we do and the support that we are able to offer clients. That feels really good right now. If there is anything we can help you with, please don’t hesitate to reach out.
It is a bit cliché, but together we will get through this.

First and foremost, we hope you’re all doing well out there, navigating these challenging times. We’re sending our very best wishes to you, your families and your communities.
We know that a lot of businesses and nonprofits are thinking about new ways of utilizing their online resources right now and we wanted to take a minute to talk about landing pages.
For those of you who are already running digital marketing campaigns, you’re probably already familiar with landing pages. For those who aren’t, these are the pages you land on after clicking on a digital ad.
They’re pages on your website (or pages built and hosted through a third-party platform) that have the look and feel of your site, but have a simplified navigation and are meant to keep users focused on taking a specific action. The idea is that landing pages can be built quickly, that they communicate a specific message and encourage a specific action from your website users.

Berkshire Choral International’s website has a landing page channel which allows them to create landing pages as needed for marketing campaigns.
Well-built landing pages are effective. They generally have higher conversion rates than regular pages on your website. You can also build them quickly which makes creating unique pages for your different marketing efforts a breeze.
For businesses and nonprofits (especially those that have had to close their doors), you may want to use landing pages to encourage users to:
Many of our clients already have a landing page channel built into their websites. We encourage you to make good use of it right now. For clients who don’t, it’s a relatively simple thing for us to add to your site.
There are also third-party landing page platforms available which we can get set up for you. And if you’re not sure which route to take (website vs third-party platform) we can talk through some of the pros and cons of each with you.
As always, we want to help you get the most out of your online presence and landing pages are a very helpful tool to have in your toolkit during this time.


On the web today, there are more attack vectors than ever before. Keeping your site secure is incredibly important, doubly so if your site accepts credit card payments. Hackers these days aren’t just taking sites down or stealing data, now you must also deal with ransomware, hijacked domain names, and hidden cryptocurrency miners, just to name a few new threats. At Hop Studios, we take your site’s security very seriously, and as part of that, one of the services we offer is a full-site security audit.
This audit covers the basics like cycling sensitive passwords and ensuring that your site is secured with an SSL certificate, as well as more complex topics, such as ensuring that third-party plug-ins on your site can be trusted, and keeping your site compliant with up-to-date Payment Card Industry Data Security Standards (PCI DSS).
Here are a few security tips that we share quite often, some of which you can likely address yourself, and others that we would be delighted to take on for you!
This is a big one, so of course it’s first in the list. If you’re not backing up your site files and databases, you could find yourself in real trouble! Regular site backups are critical, and not only to restore from in case of a site failure. Backups can also save you from ransomware attacks, which is when hackers lock you out of your own site and hold it hostage.
We implore all of our clients to have a reliable and tested backup system in place. The best backups are always offsite, or at least on a different server!
Regularly changing the password to sensitive services is critical to your site security. We recommend going one step further and using a password manager such as 1Password or LastPass to generate passwords for you. Generated passwords more secure, and PCI DSS requires that you not only change your password every 90 days but also prevents you from using any of the last four passwords you’ve used. Generated passwords ensure this happens.

Even if you’re not familiar with the word CAPTCHA, you’ve no doubt seen one of those forms that require you to type in a certain word or click on all the pictures of ducks before you can hit the submit button. That box is a CAPTCHA, and it’s designed to stop automated form submissions. Hackers use programs to submit to your forms over and over again, sometimes hundreds of times per minute, in an attempt to gain access to your system or collect valid email addresses.
Aside from blocking automated hacking attempts (and as a bonus benefit) CAPTCHAs block out a majority of email spam, which means they also help protect you from nefarious phishing attempts. And honestly, the less spam of any kind the better in our opinion.
On the more technical side, it’s important to ensure that your processes comply with PCI DSS section 6.3 requirements. That long section title up there is pulled directly from PCI DSS and essentially means that security measures should be addressed all throughout the development process. Developers should be trained to know what to do to maintain healthy levels of security, and the code itself should be audited and tested to meet PCI requirements. Typically code auditing is done through automated scans, though at times it is required to investigate some modules manually. This section of the PCI requirements covers a broad range of material and is often overlooked!
You may already be aware that in Chrome, Edge, and most others browsers, an unsecured site will show either a grey box or a “Not Secure” warning next to the URL in the browser. What you may not have noticed is that in the current Chrome, this grey warning will change to a bright red warning if text is entered into ANY input field on the site. This applies not only to forms with personal information such as credit cards, but also to simple search boxes as well. Even if your site does not collect any personal information, you still risk alarming visitors if your site is not properly secured.
A properly installed SSL certificate is more than just a lock icon next to the website address bar. It’s actually promising three things to your users.
Spam links are generally not an immediate priority when beginning a content strategy workflow. They emerge as a factor when a domain’s authority appears to be artificially low. When Moz scores you as having more spam links than your competition, for instance, it’s time to take a look. What is there to do about other webmasters linking to you and trying to enhance their reputation by tanking yours? Not much, but Google does have a disavow process that’s easy to use that could improve your domain authority score overnight. Let’s take you through it.


With a newly working disavow.txt and artificially-low domain authority, your website’s domain may see an improvement in domain authority without invasive development projects or content overhauls. It may be a relatively quick way to do your website ranking a huge favor.
‘Content strategy’ is probably a term that you’ve heard thrown around, but it’s a broad, sweeping concept that web developers, marketers and designers approach from a multitude of equally important angles. Content strategy is the intentional planning of content for a specific audience in order to achieve a specific goal (usually to attract and convert that audience into consistent followers, customers or both).
On a website, this includes everything from the hidden, back-end structure of the site to the words and graphics you see on the page. If you’re doing it right, then your content strategy puts thought and purpose into each and every one of these areas that impact your website’s success:
To get the most out of your content strategy, take a three-step approach to developing, implementing and reporting back on its success:
For a website, the greatest value of content strategy is to create a series of informed decisions over time in order to improve the site’s standing in search engines and with its users. Intentional, goal-driven web development, marketing and UX/UI can help organizations expand their online presence, acquire new customers and see dramatic growth.
When it comes to creating a content strategy to begin with, the decisions to change, update and add content get their foundations from analytical data about the website. Many decisions are abstracted from this, however, involving attached significance to events, and sometimes hunches and opinions. This is where the data’s interpreter really matters.

Unlike classic SEO, which focuses on page structure and the HTML side of legibility in order to deliver improved organic results in search engines, content strategy acknowledges that newer algorithm updates primarily favor page content for ranking keywords while structural standards need to be met.
You can calculate how well your pages are doing, in part, from perceived satisfaction metrics, like bounce rate, in top-ranking content. It’s not just a mathematically solid presentation, it turns out, but also whether the user thinks so, too. A solid content strategy should therefore include new and original content that feature a healthy spread of keywords and key phrases, as well as consistent housekeeping and improvements to existing content alongside the classic SEO standards.
While there’s a bit of legwork involved in doing this, doing it consistently has advantages that are well worth the effort:
You’ll want to roll out big, strategic content changes to your website gradually. Here are two reasons why:
Step-by-step adjustment and modification is how this is done. It keeps your provider sane, and it allows for a story to unfold from what we started with, and where your goals are directing us. First this, then this, then this; without the ability to think about where we are going in a narrative, all we have are disparate, unrelated facts that are unnecessarily difficult to relate and talk about.
Narrative is key to keeping a strategy organized and understood, which is critical for all stakeholders and us to be on the same page.
I originally used the moblog when I was in Lithuania adopting our son Darius. This was in 2007, and in that part of Europe widespread internet wasn’t common outside of a hotel or an internet cafe. So while my wife and I were going through the adoption process, doing some sightseeing here and there, we would blog to our family and friends via the moblog, writing ourselves emails on our antiquated smartphones.
The emails would stay in the outbox our phone, and when we were back to an internet connection, the messages would send to a predefined email inbox (e.g. [email protected]).
We had a private ExpressionEngine blog for our adoption journey which, employing the moblog, would parse the message content and import into channel entries defaulting to “Draft” status. We would then log into the website backend to review the messages of the day and make final tweaks before publishing.
In this niche use case it was perfect. I always thought more useful applications would emerge, particularly for our website customers, but this hadn’t been the case until recently.
At Creative Arc, we have used Basecamp as a project management system for a very long time, long enough where we’re not really keen to switch even though there are compelling alternatives.
E-mail communication is a huge part of serving clients for any agency. Most of our customers respond to our project messages by logging in to Basecamp, or by replying to Basecamp threads directly in their e-mail client. A sizable portion of our contacts don’t (or won’t) use Basecamp for a variety of reasons, instead writing us direct e-mails.
Unfortunately, when emails are filling our inboxes, they might not get the prompt attention they deserve because our entire team does not have visiblity. So, I’m often faced with posting or pasting a customer’s email back into Basecamp so we have access to it as a team. As a one-off, it’s not that much work. But when it’s a dozen occurences every day, it gets unwieldy pretty quickly.
This continual struggle of coralling client emails led me to consider the Moblog again. If ExpressionEngine could collect the e-mail content, we would be able to get that content to the proper projects in Basecamp. The basic steps are as follows:
Let’s get started! (the following image examples are current as of ExpressionEngine 6.0.3, June 2021)
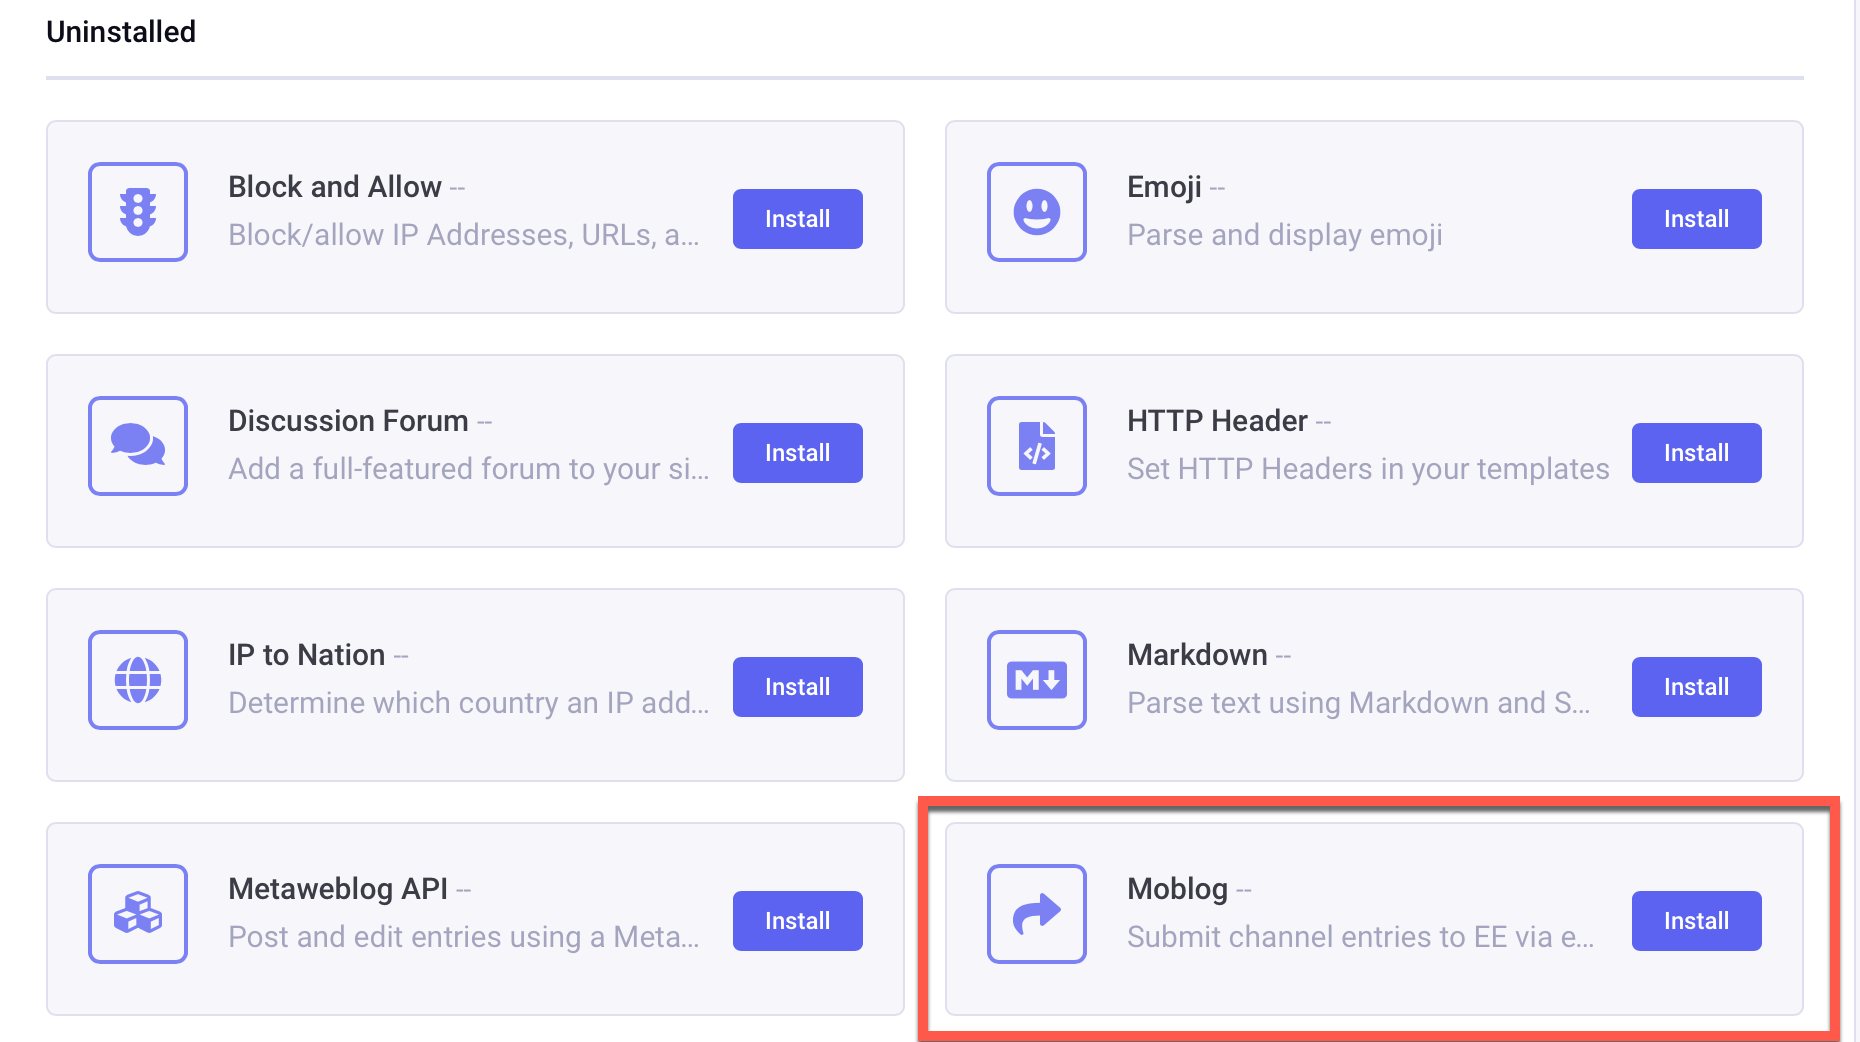
This is self-explanatory, but you should absolutely limit allowed senders. So in our case, we limit submissions to emails originating from our company in the moblog settings (“Valid ‘From’ Emails for Moblog”). More on that later.
You shouldn’t need many fields; the Title of the entry will default to the email subject. A body field should suffice, unless you want file fields for email attachments.
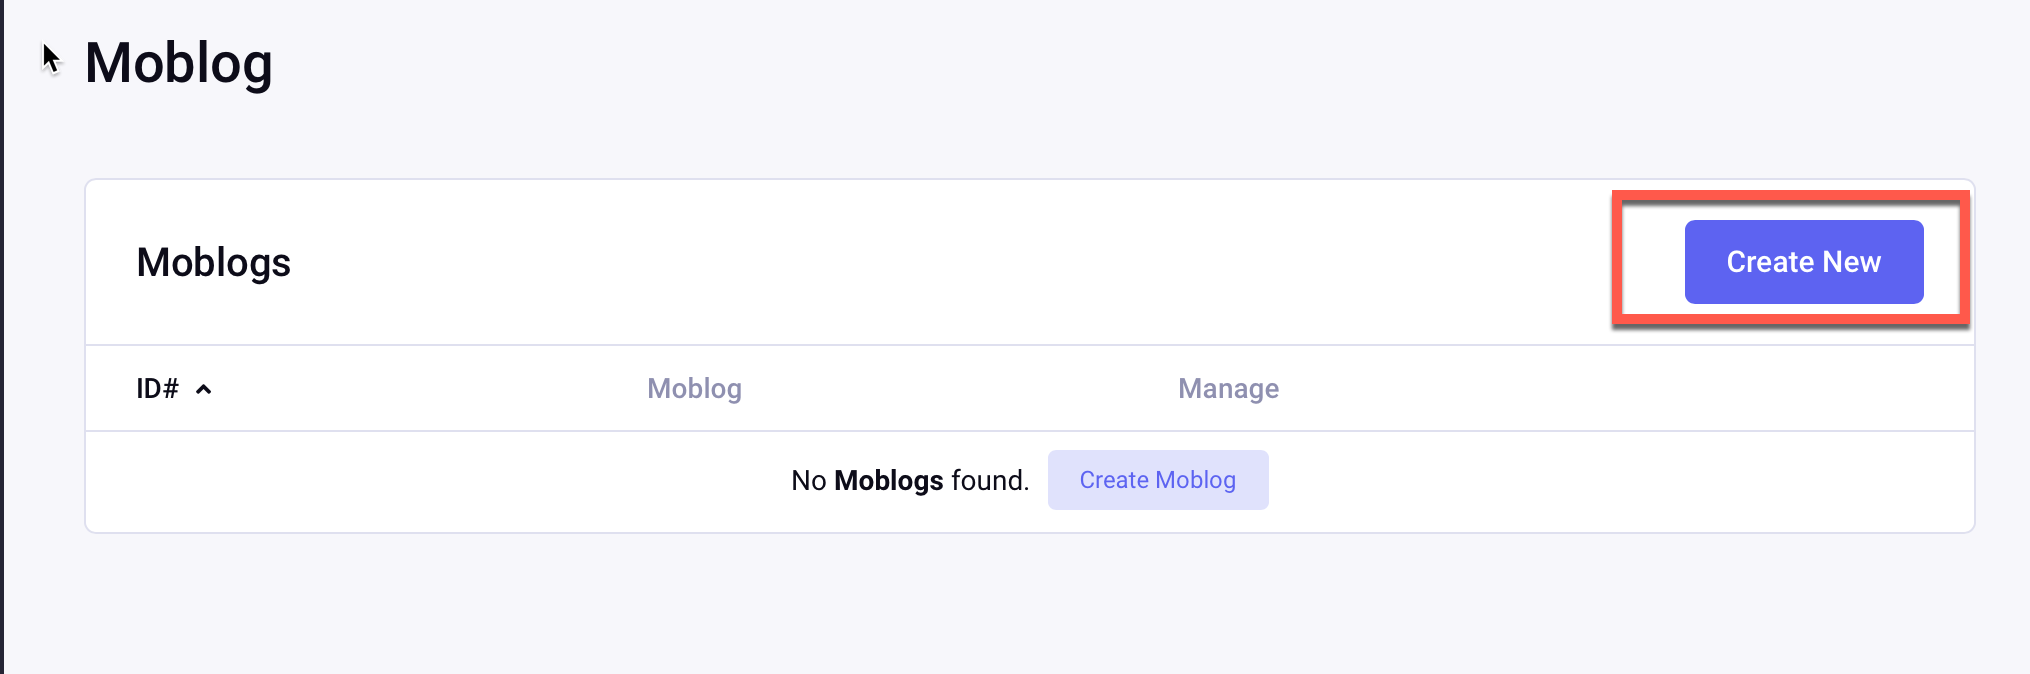
Navigate to the Moblog addon in the ExpressionEngine backend. The settings are self-explanatory to any seasoned EE developer. Below is an example of what we use. The Moblog documentation can point you to the specifics.
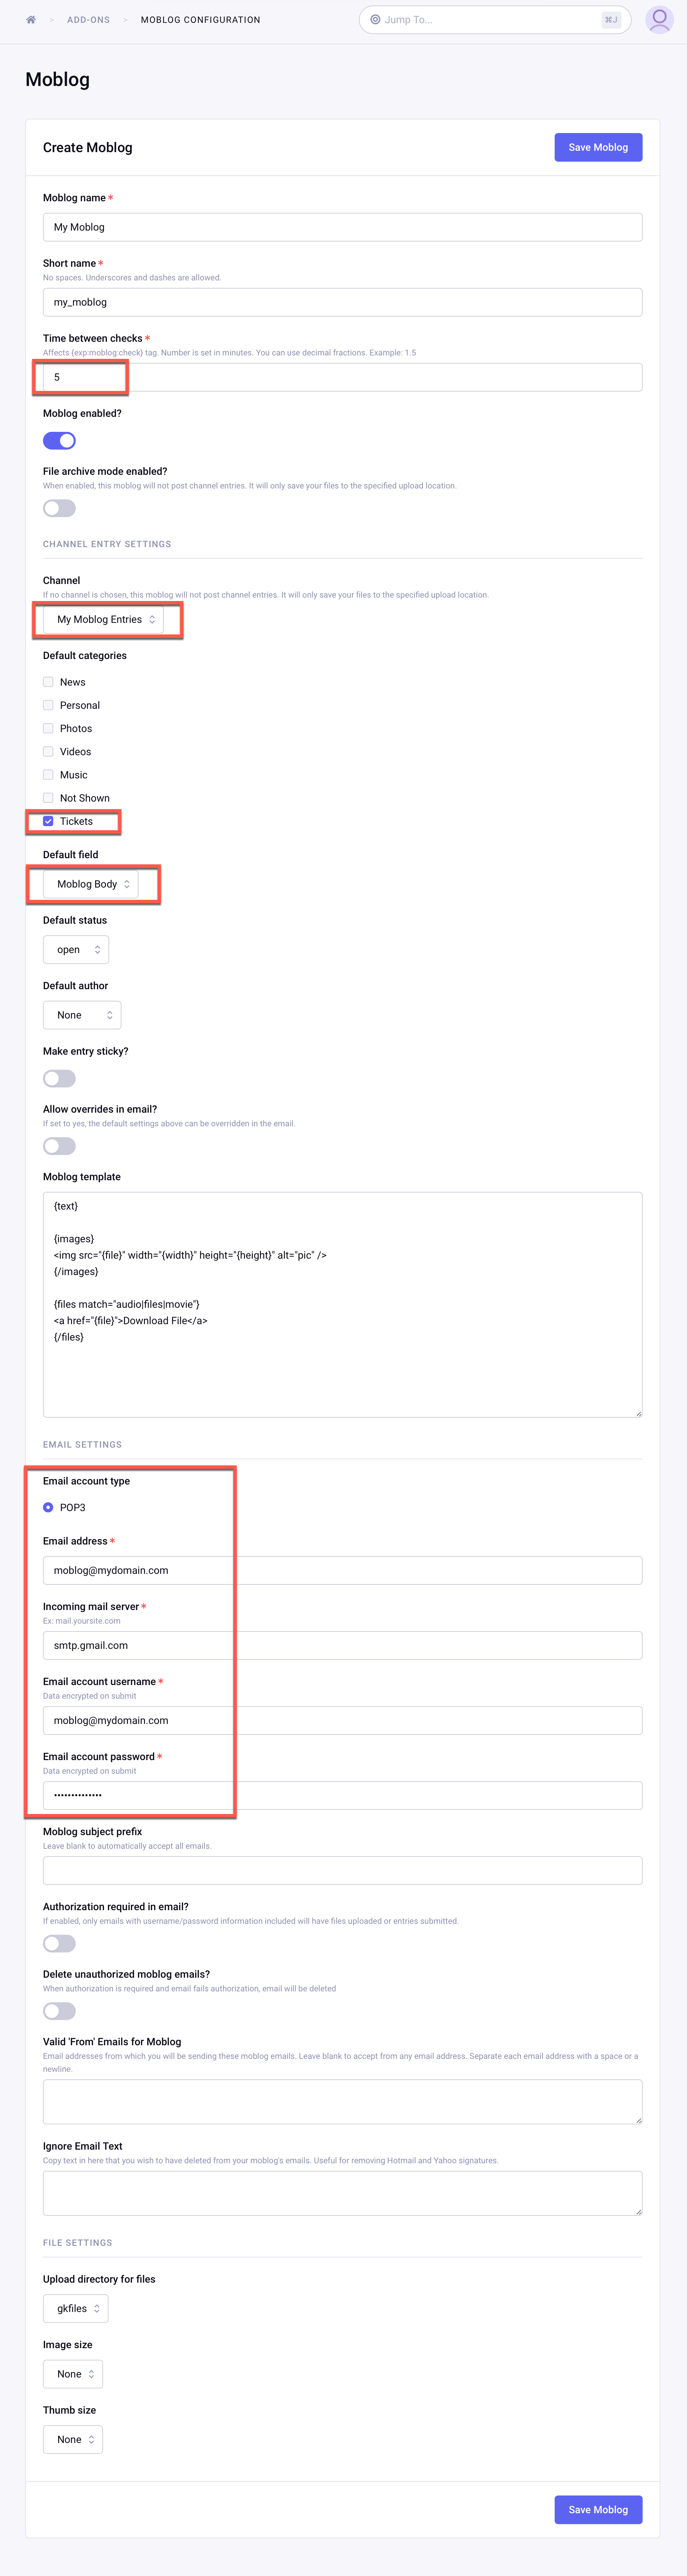
The configuration gives you several useful options. You have to define the email address and server credentials for ExpressionEngine to be able to retrieve the messages. You can decide if you want to handle file attachments and also whether or not entries stay in draft mode or go directly to publish.
In our case, we used Gmail which was nice because it allowed me to restrict receiving messages from only particular accounts. This allows us to limit Moblog entries being created by our own company domain.
Let’s see if our configuration worked. Write a basic email with a minimal Subject and Body, addressed to your Moblog email address ([email protected]).
Navigate to the Moblog module in the EE backend and click “check now.”
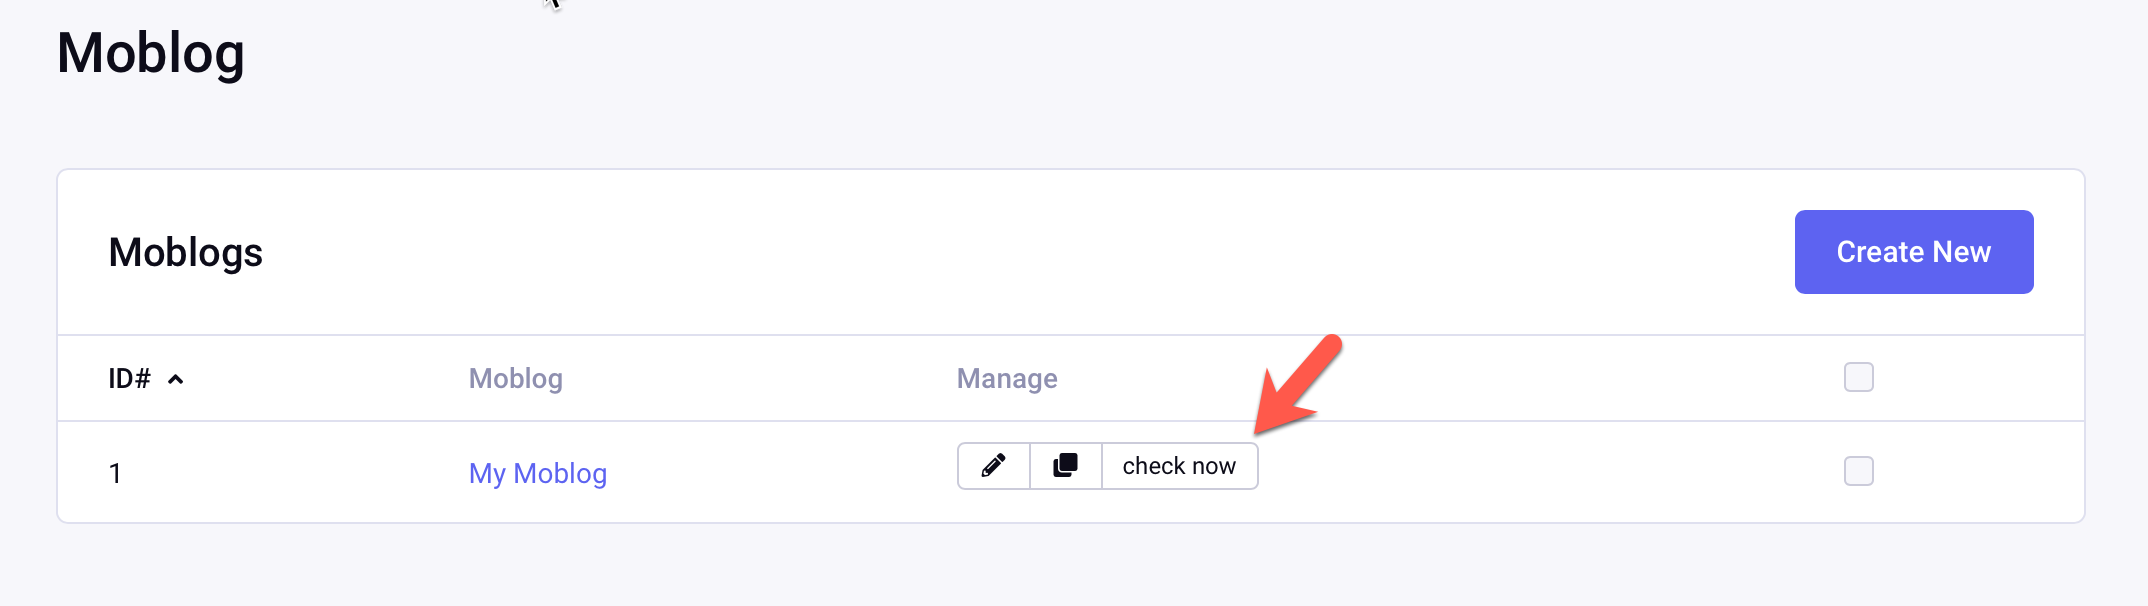
Ideally, the Moblog will report that no new emails could be found, or that it had success retrieving:
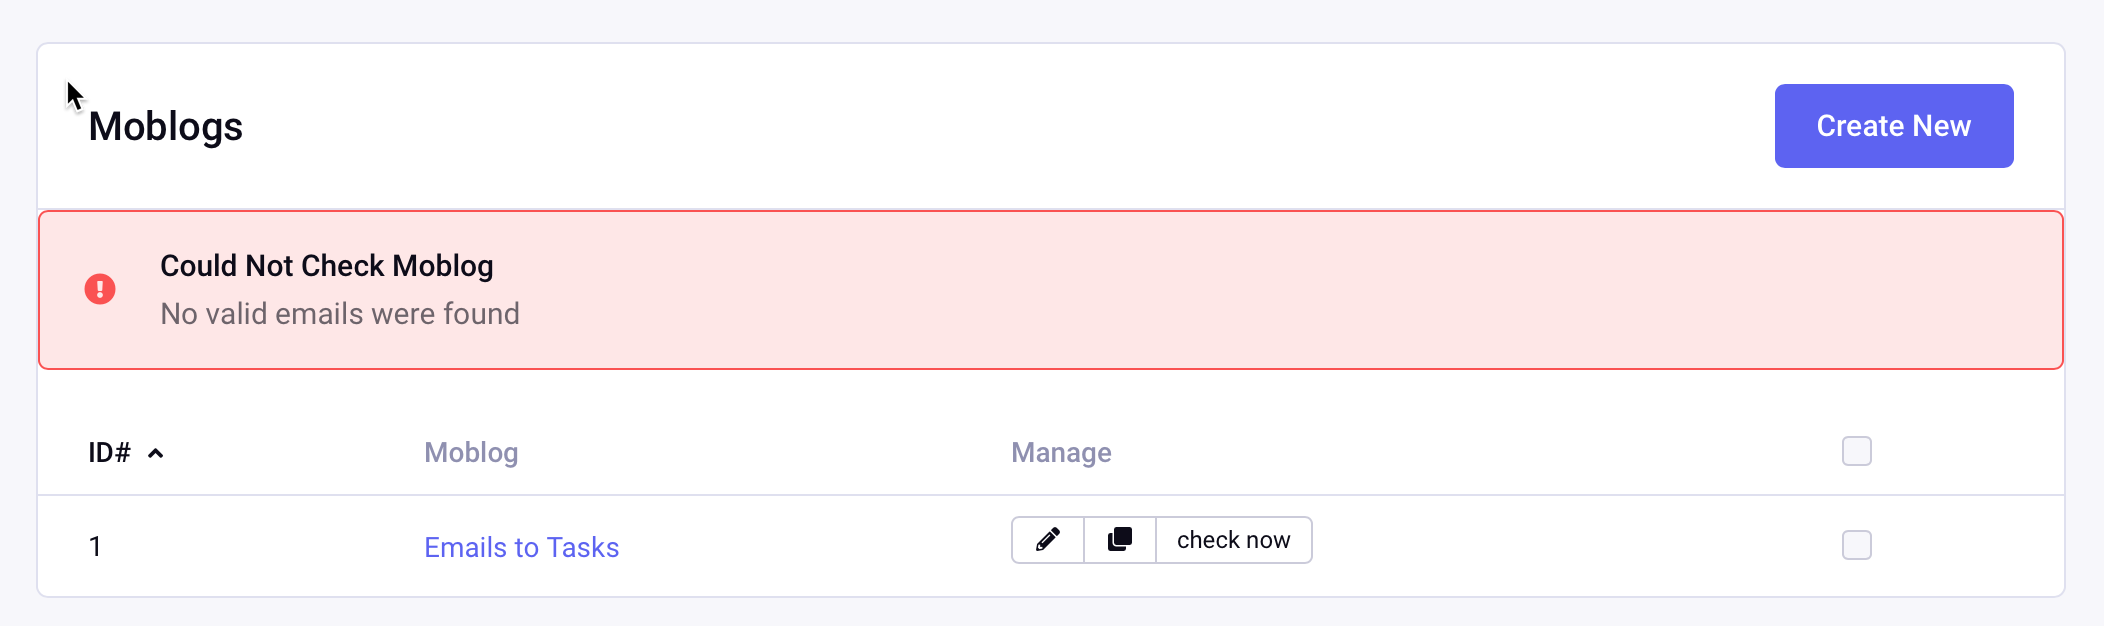
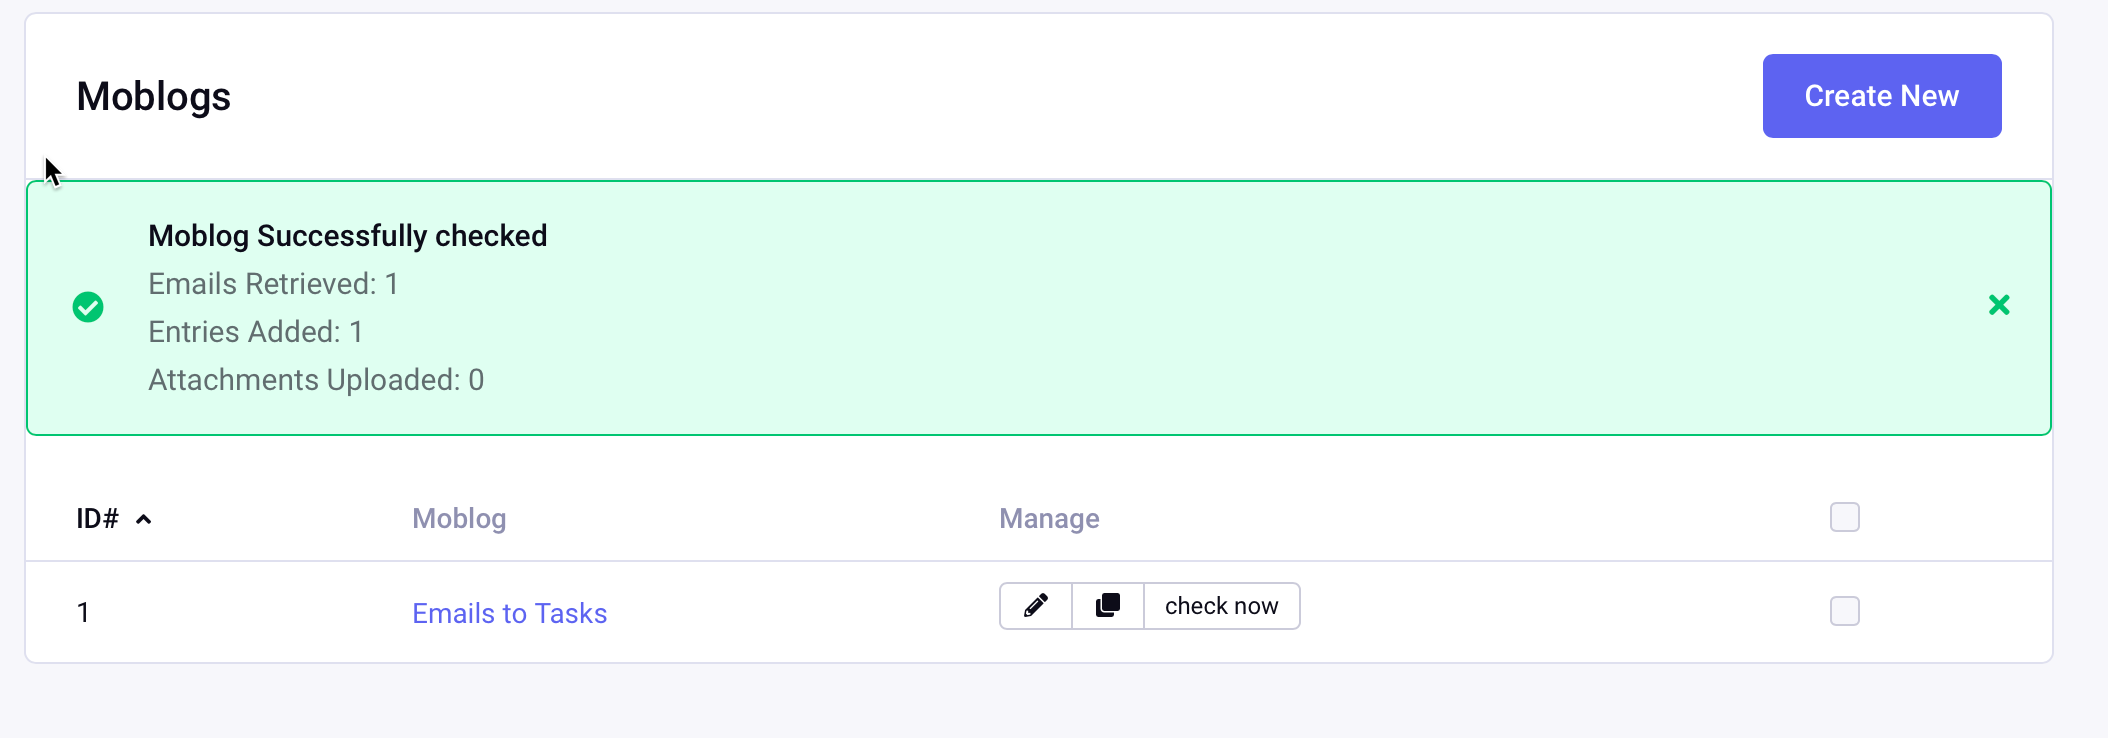
Navigate to your Moblog channel, and you’ll see the content that was just imported from your email.
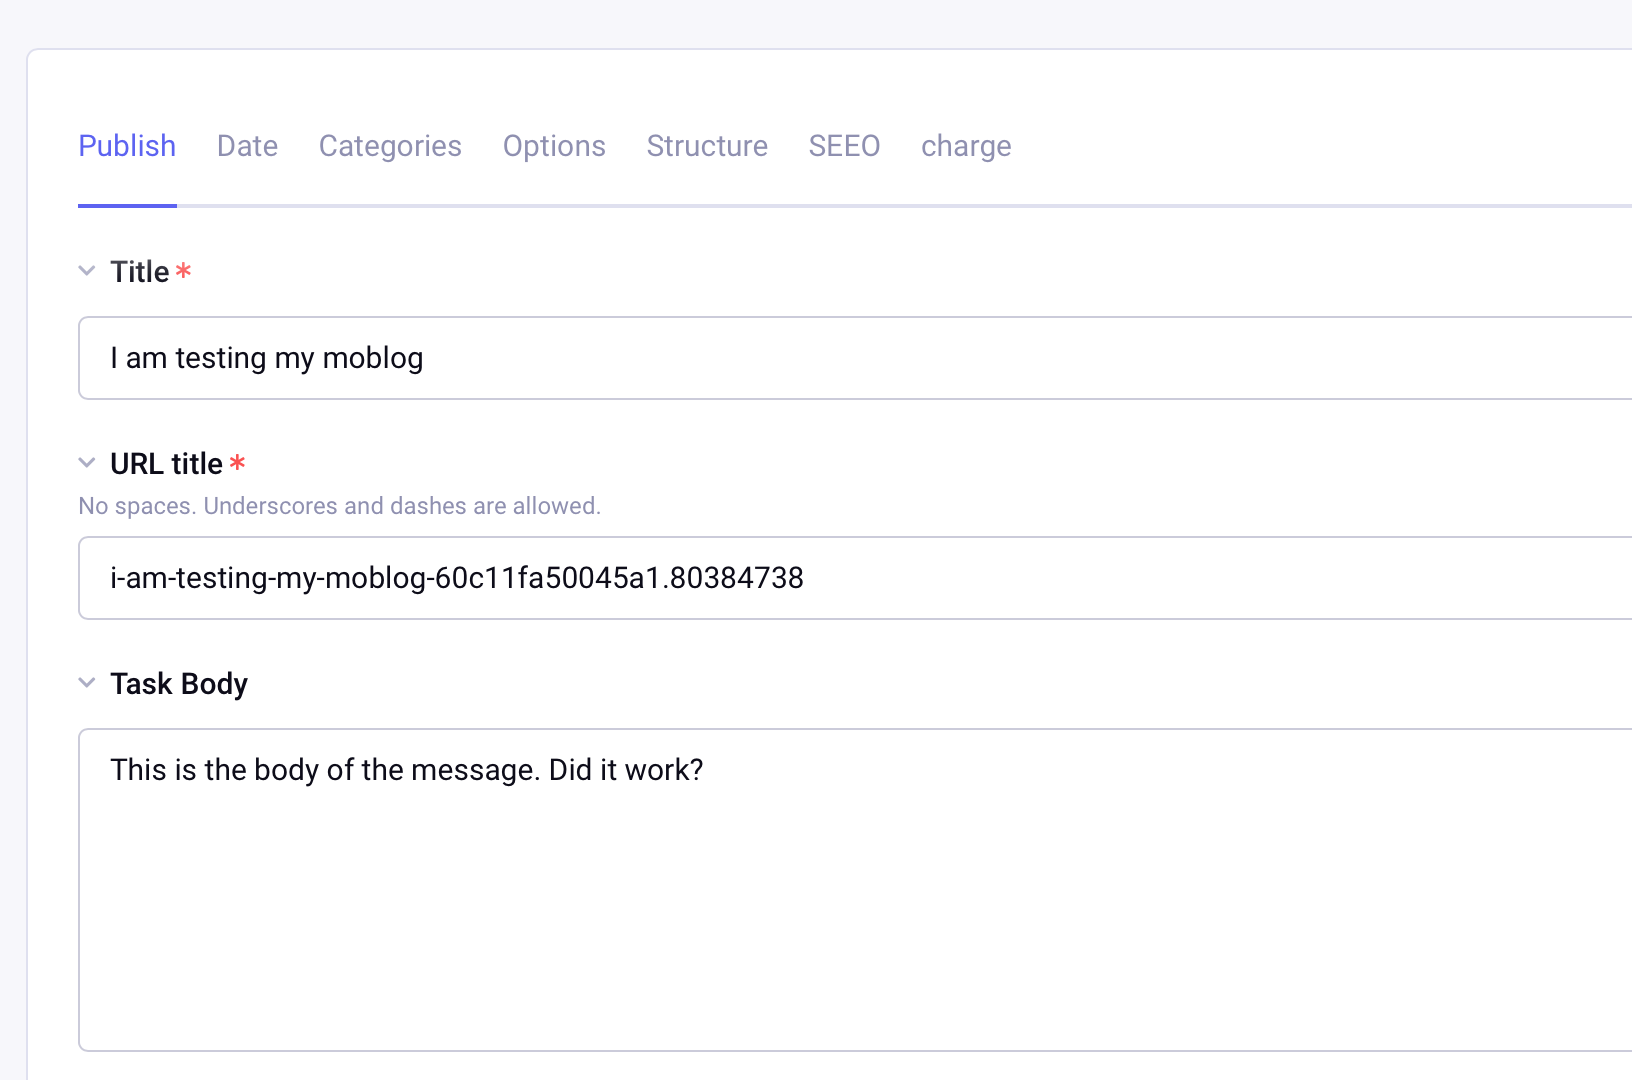
The Moblog needs a URL that we can use with a cron job using curl or wget.
Create a template, such is mydomain.com/my_moblog/check. A one-liner wins the day!
{exp:moblog:check silent="no" which="emails_to_tasks"}
Then, a simple crontab (I chose 5 minute interval) to hit the URL and trigger the Moblock check-email process.
*/5 * * * * curl -s ‘https://mydomain.com/my_moblog/check’ > /dev/null;
If you simply need a basic Moblog, you’re done! For an example of taking it further, please read on.
Remember, our goal is to corral one-off emails from customers and get them back into Basecamp. The Moblog succeeded in retrieving the emails and saving them as channel entries. Next, we need to get the content to Basecamp.
The code snippet below is a fairly basic Channel Form. The form loops through the entries that have been imported into our Moblog channel, and our EE templates present a basic interface we’ll use to tell Basecamp what to do with the content: namely, are we posting a new thread? A ToDo? And who are the asignees and recipients?
{exp:channel:entries channel="et_email_to_task_channel" dynamic="no" status="not Submitted"}
{if count==1}
<div class="postions-list constrainedContent clearFix">
    <ul>
        {/if}


        <li class="position">
            {exp:channel:form channel="et_email_to_task_channel" return="tasks" entry_id="{entry_id}"}
            <div class="row{if count==1} active{/if}">
                <div>
                    <div class="header">Subject</div>
                    <div class="interior"> <textarea name="task_subject" type="text" cols="50" rows="2">{title}</textarea>
                    </div>
                </div>
                <div>
                    <div class="header">Body</div>
                    <div class="interior">
                        <textarea name="task_body"  value="{task_body}" cols="50" rows="4">{task_body}..</textarea>
                    </div>
                </div>
                <div>
                    <div class="header">From</div>
                    <div class="interior">{task_from}
                    </div>
                </div>
                <div>
                    <div class="header">Date/Entry ID</div>
                    <div class="interior">{entry_date format="%M %d, %Y - %g:%i %A"} / {entry_id}
                    </div>
                </div>

            </div>

            <div class="row {if count==1} active{/if}">
                <div>
                    <div class="interior">
                        <select {if count==1}  name="task_project" id="task_project" class="project_list" {/if}>
                        <option value="">Select</option>
                        </select>
                    </div>
                </div>
                <div>
                    <div class="interior">
                        <select {if count==1} name="task_list" id="task_list" class="project_todo_list" {/if}>
                        <option value="">Select ToDo List</option>
                        </select>
                    </div>
                </div>
                <div>
                    <div class="interior">

                        <h3>Create ToDo?</h3><br>
                        <input type="checkbox" name="category[]" id="categories" class="create-todo" value="2">Yep<br><br>

                        Assign to:<br>
                        <input type="radio" name="todo_assignee" value="193399">Luke <br>
                        <input type="radio" name="todo_assignee" value="13932451">Han <br>
                        <input type="radio" name="todo_assignee" value="193357">Lando<br>
                        <input type="radio" name="todo_assignee" value="193676">Leia <br>
                        <input type="radio" name="todo_assignee" value="193086">Chewbacca <br>

                    </div>
                </div>
                <div>
                    <div class="interior">
                        <h3>Create Message?</h3><br>
                        <input type="checkbox" name="category[]" id="categories" class="create-message" value="1">Yep<br><br>
                        {if count==1}
                        <div class="notification">
                            Notify:<br>
                            <input type="checkbox" name="task_notification_list[]" value="193399">Luke<br>
                            <input type="checkbox" name="task_notification_list[]" value="13932451">Han<br>
                            <input type="checkbox" name="task_notification_list[]" value="193357">Lando<br>
                            <input type="checkbox" name="task_notification_list[]" value="193676">Leia<br>
                            <input type="checkbox" name="task_notification_list[]" value="193086">Chewbacca<br>
                        </div>
                        {/if}
                    </div>
                </div>
            </div>

            {if count==1}
            <div class="submit-box">
                Send to Basecamp, or ignore?<br>
                <select name="status" id="status">
                    <option value="Submitted">Submit</option>
                    <option value="closed">Ignore</option>
                </select>
                <br>
                <button class="submit" type="submit" value="Submit">Submit</button>
            </div>
            {/if}
            {/exp:channel:form}
        </li>
        {if count==total_results}
    </ul>
</div>
{/if}
{/exp:channel:entries}
The rendered HTML looks something like this:
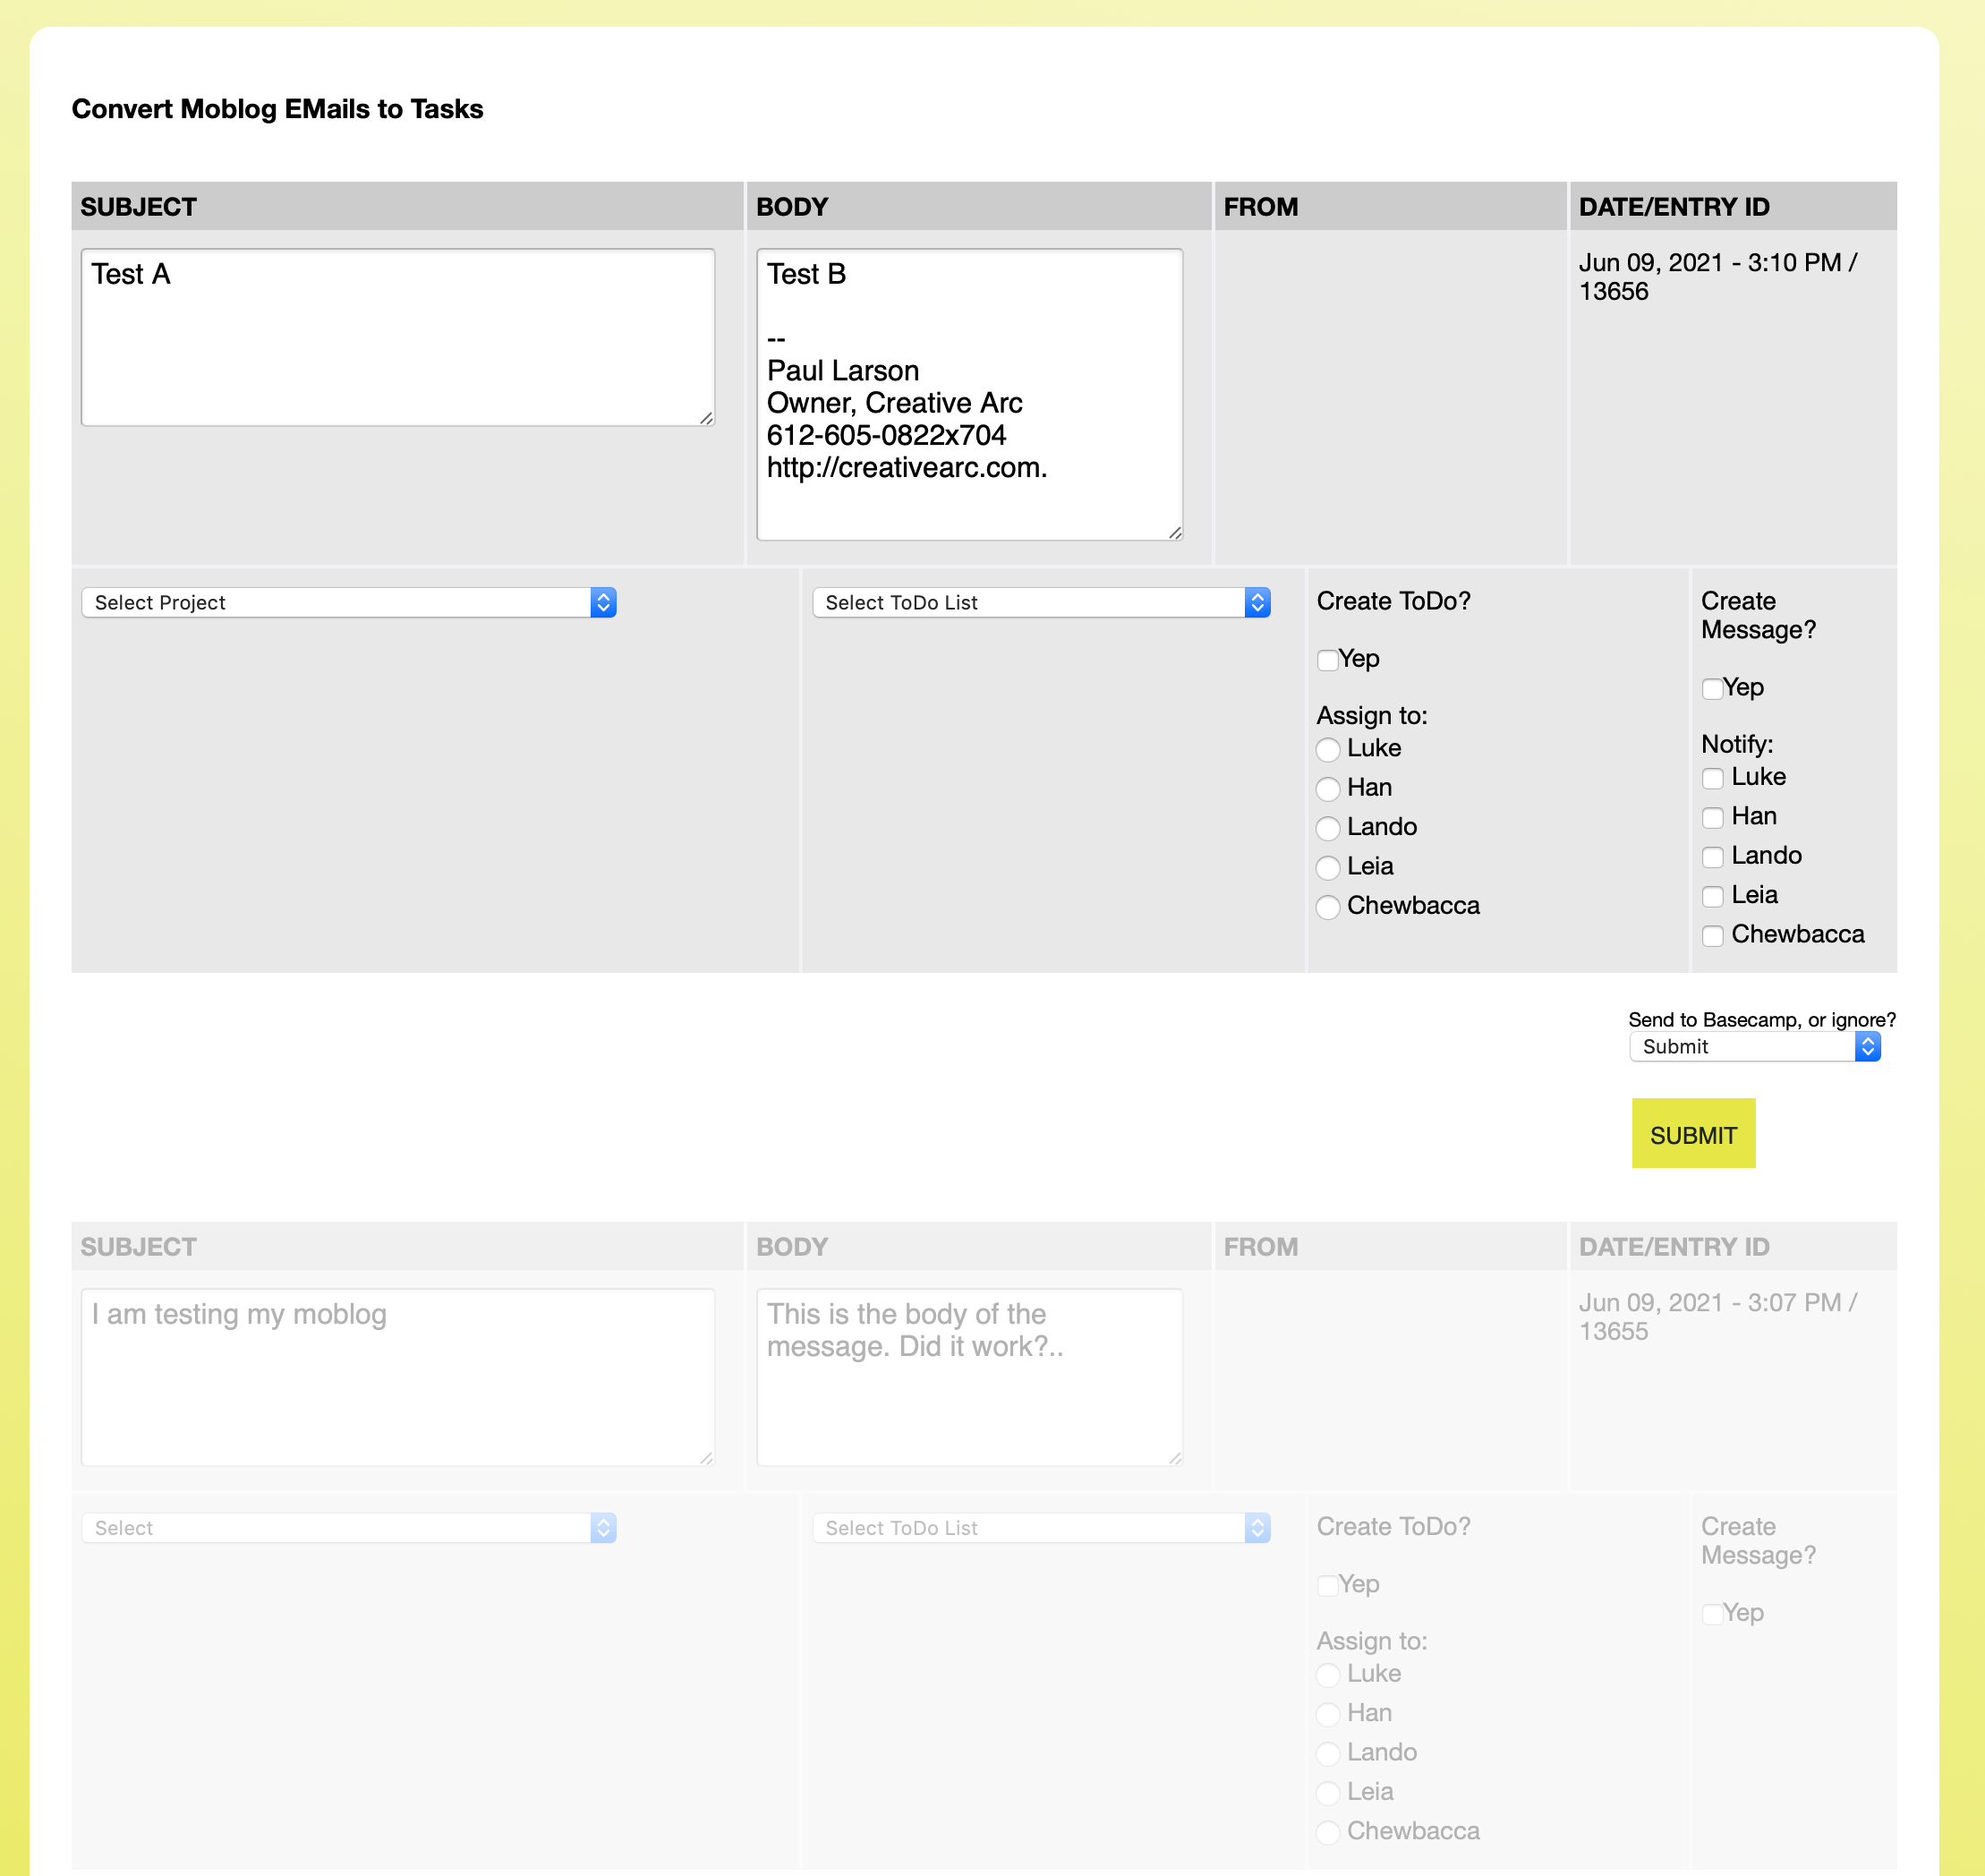
Key functions of this Channel Form: we can select a project, such as ACME Construction, then choose to post the message content to a particular ToDo list, and/or create a Basecamp thread, while assigning individuals as recipients or todo assignees. Upon submitting the form, the channel entries are fed to another template that is easy for the Basecamp API to process, which we detail below.
In this example, the only piece created outside of ExpressionEngine was a little bit of middleware in the way of a shell script. This could be PHP, an ExpressionEngine addon, however you want to handle it. The Basecamp API is too much to cover here, but the process of using the Moblog to get email content into an EE channel proved to be the biggest step.
I won’t get into the specifics of the shell script because it’s fairly convoluted, but it is limited to a few fairly basic Basecamp API calls.
curl -u [email protected]:myApiKey -H 'Content-Type: application/json' -H 'User-Agent: mydomainBashScripts ([email protected])' -d '{ "content": "<span style="color:red">{title}</span>", "due_at": "{entry_date format="%Y-%m-%d"}", "assignee": { "id": {person_id}, "type": "Person" } }' https://basecamp.com/8675309/api/v1/projects/{task_project}/todolists/{task_list}/todos.json;
In this curl statement, note the EE template tags of title, {person_id}, entry_date, and {task_project}. The shell script is simply looping through the output from the Moblog channel, running the necessary curl command in each case.
We have found this to be an immensely useful tool, because we can use the systems we are familiar with (namely Basecamp) without having to abandon them for a new system that might do more than we need. ExpressionEngine and the Moblog provided a great way of filling this tiny void that keeps client communication in front of our team where it needs to be.
We put together this one-page ExpressionEngine parse order reference guide (version 1.0.1 2021/04/28) for anyone to download and print out.
We also gave a presentation at the EEConf Spring Summit in 2021. https://youtu.be/l7wPeYrbGg8
The slide deck is also available if you’re interested in reliving the talk 🤔 .
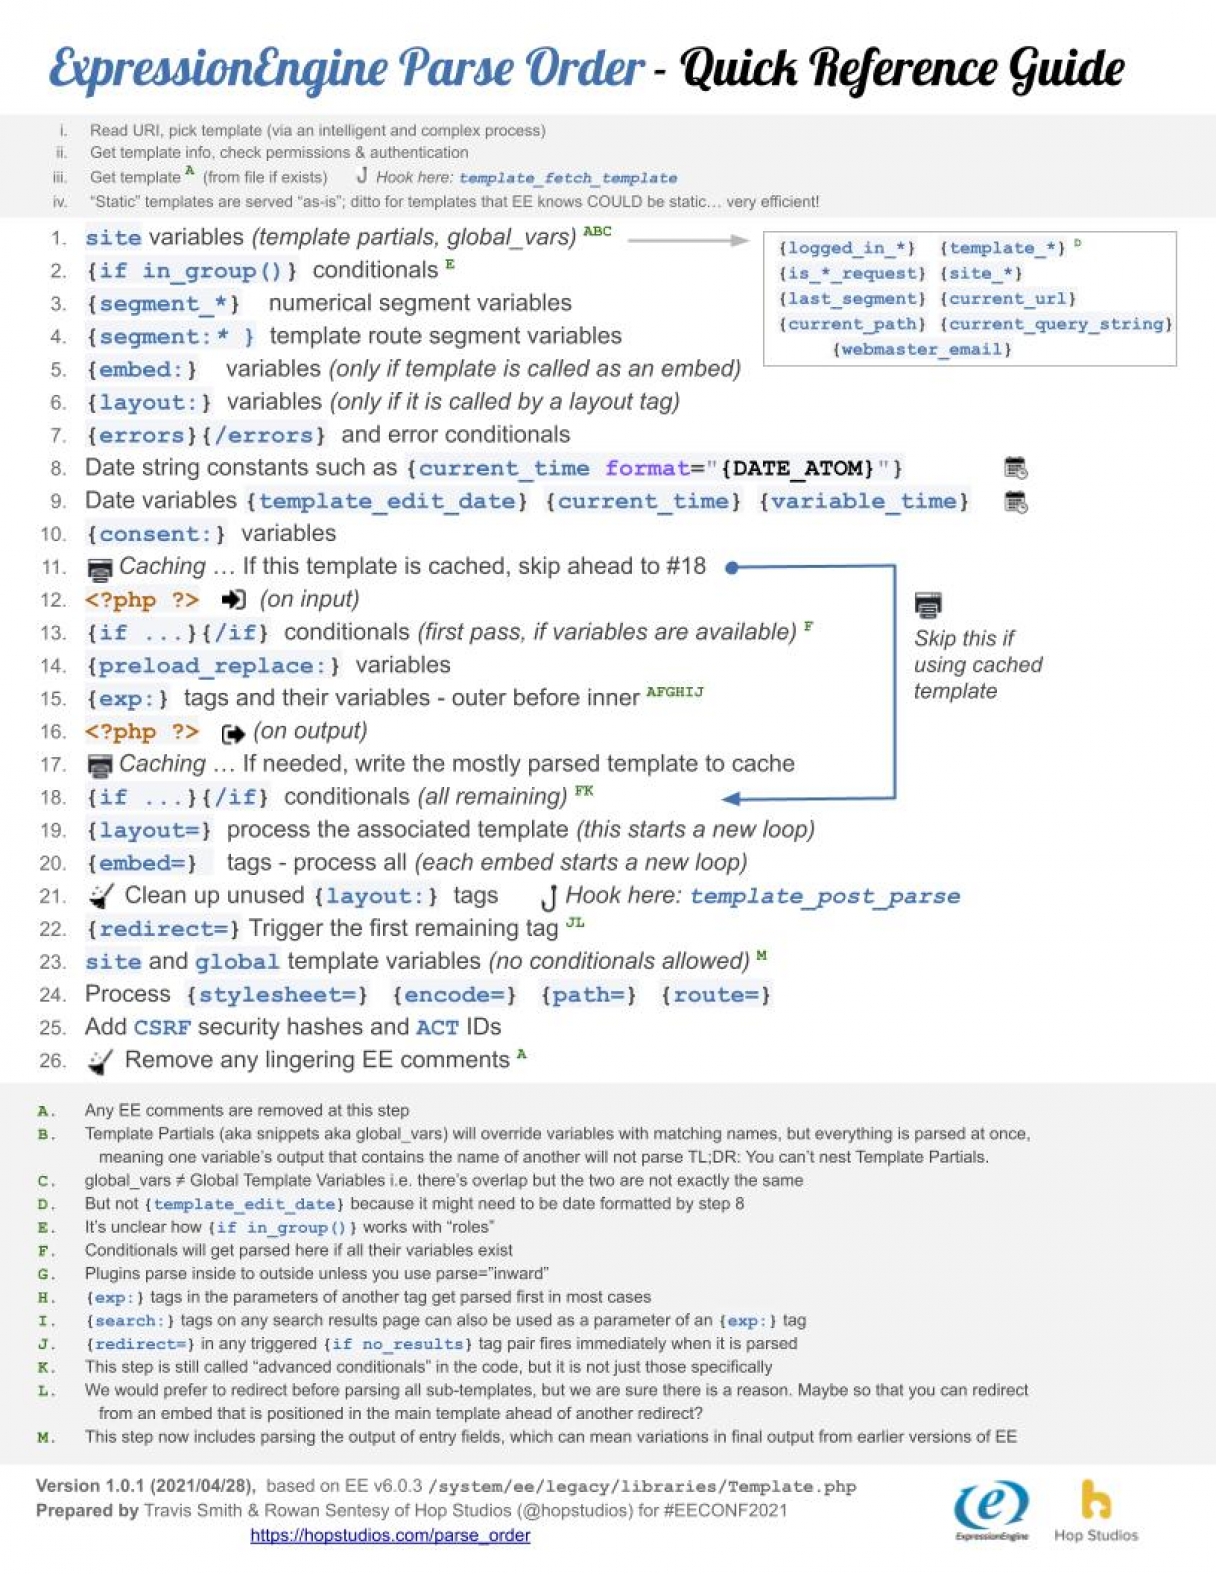
When I first started in web development (and I’m about to age myself seriously), this meant creating sites on Geocities with very crude styling, and, in my case, lots of <blink> and <marquee> tags. It meant creating Myspace profile themes to bring a splash of flair to my mall emo self.

Things have changed quite a bit!
Nowadays, it is a vital skill to know how to write your styles and scripts with modern methods, which means learning how to use asset compiling to make sure your code is clean and works well with your project.
Although there are a thousand different options out there, my favorite has been using Laravel Mix and Webpack. And while we are mentioning another project here, Mix and Webpack are easy drop-in options for your next ExpressionEngine project!
There is nothing wrong with building straight CSS or JavaScript files. It works perfectly fine, and allows you to build in a familiar way.
But there are some core reasons to move from writing and wrapping up your own code to running it through a compiler.
CSS is great, but what about modern building processes like PostCSS or SASS/SCSS? Or what if you want to build your JavaScript with modern ES6 or beyond? Browsers don’t work well with modern methods. Running your assets through a compiler also allows for them to be transpiled down to methods and modes that your users’ browsers can understand.
Let’s say you want to split up your styles into a modular setup, to better help you and other developers on the project find the style they need. Or you want to split your Vue components out into their respective component files. But, you also don’t want your HTML to bring in 30,000 files.
Using an asset compiler allows you to pair down all of your assets into a few files. In our case, we can put a thousand styles files and a million JS components, and we’ll still bring in only two optimized files to our ExpressionEngine site.
Your Google page speed is vital to your site being both SEO and user friendly, but it will get punished for having resources that are not minimized. Mix allows you to uglify and minify your assets when you are ready to build for production, so that your users get a better user experience and you look like a rockstar!
You’ll want to make sure you have the most up-to-date versions of Node and either NPM or Yarn before proceeding. For the examples below, I’ll be using npm.
Run npm init if you don’t already have a package.json file in your root. You’ll be asked a number of questions to set it up.
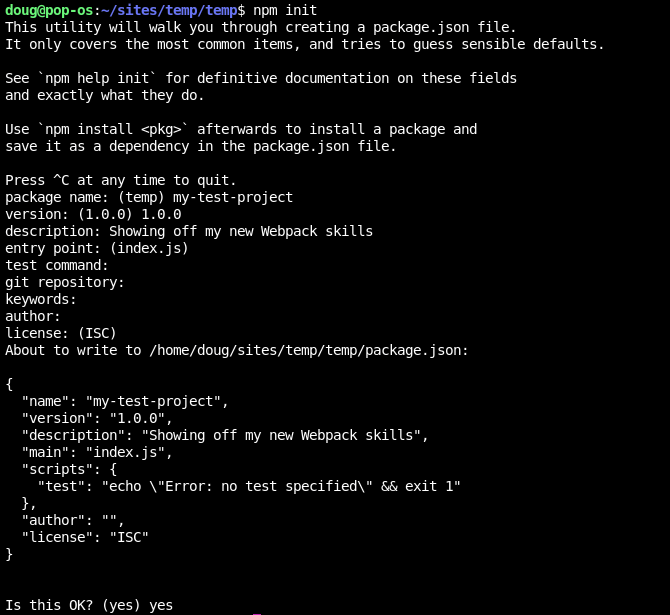
Then, in the root of your web project, you’re going to install Mix and Webpack as dev dependencies.
npm install --save-dev laravel-mix webpack webpack-cli
This will create a package.json file in your root directory with a few other dependencies. (NOTE: This won’t install all of Laravel or anything like that).
In the scripts section of your package.json file, you’ll want to create a few scripts that you can run to compile your assets.
"scripts": {
    "dev": "npm run development",
    "development": "cross-env NODE_ENV=development node_modules/webpack/bin/webpack.js --progress --config=node_modules/laravel-mix/setup/webpack.config.js",
    "watch": "npm run development -- --watch",
    "watch-poll": "npm run watch -- --watch-poll",
    "hot": "cross-env NODE_ENV=development node_modules/webpack-dev-server/bin/webpack-dev-server.js --inline --hot --config=node_modules/laravel-mix/setup/webpack.config.js",
    "prod": "npm run production",
    "production": "cross-env NODE_ENV=production node_modules/webpack/bin/webpack.js --no-progress --config=node_modules/laravel-mix/setup/webpack.config.js"
}
These are some standard scripts that will allow you to compile your assets in a super simple way:
- dev / development compiles your assets without uglifying and minimizing. It also enables any debugging in dependencies you may be using.
- prod / production compiles and applies any uglification you may be using.
- watch runs dev and watches for any changes, so you can live reload your files.
Now, we need to set up Webpack and our root folders.
In the root of your project, create a directory called resources. This will be where your new CSS and JS files will live. Create a folder for each of these in your resources, so you have a place for each.
- resources
  - css (or scss if you want)
    - main.css (or main.scss)
  - js
    - main.js
These folders will be where the files you will work on will live.
So my entire project looked like this:
my-project
  - public
    - images
    - themes
  - resources
    - scss
      - main.scss
    - js
      - main.js
  - system (where all of the EE files live)
(It’s always recommended to move your system folder out of your webroot. In this example, my webroot is the public folder)
Then, in the root of your project, we’ll create a webpack.mix.js file, which will act as the configuration for our project. This is where we tell Mix how to build out our assets, when to uglify, or set up other dependencies that are run when your assets are being built. For this project, my webpack.mix.js file looked like this:
const mix = require('laravel-mix');

mix.js('resources/js/main.js', 'public/js')
    .sass('resources/scss/main.scss', 'public/css');
This is a base setup that does two things:
Take all of my JavaScript files that are processed through resources/js/main.js and compile them to public/js/main.js.
Take all of my styles that are processed through resources/css/main.css and compile them to `public/css/
We’ll also need to add our styles and scripts to our site. This will differ depending on how you are building your site. Assuming you are using ExpressionEngine’s template layouts, you may have a layout file that looks like this.
<!DOCTYPE html>
<html class="no-js" lang="en">
<head>
    <meta charset="utf-8">
    <meta name="viewport" content="width=device-width, initial-scale=1">
    <title>My Site</title>
    {!-- Our Compiled Styles --}
    <link rel="stylesheet" href="/css/main.css">
</head>

<body>
    {layout:contents}
    {!-- Our Compiled Scripts --}
    <script src="/js/main.js" async></script>
</body>
</html>
The hard part is over! Now, we can run npm run watch to start compiling our files!
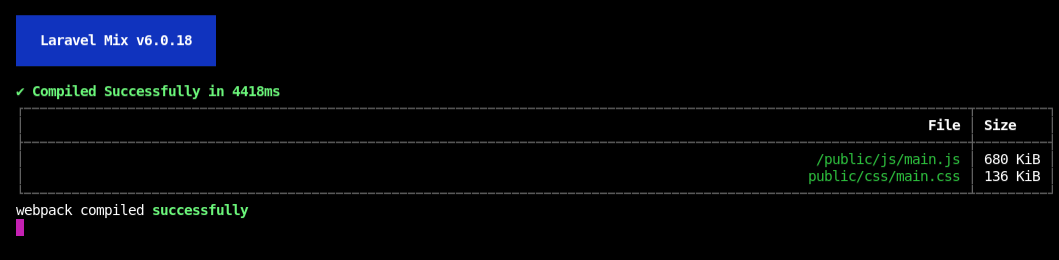
This will begin taking what is in your resources directory, run them through the magic of Webpack and Mix, and build out your files!
Spam, the bane of everyone’s lives. Worst of all, clients get unhappy if their ExpressionEngine powered forms let endless spam through, and it can reflect on you as the developer (rightly or wrongly).
ExpressionEngine’s inbuilt CAPTCHA isn’t always effective so you often have to reach for 3rd party addons to stop the tide of “amazing” offers and other junk. Addons like Snaptcha and Freeform do a good job weeding out spam submissions but you have to fork out a bit of cash for them. That’s not a bad thing because you’re supporting developers, but what if your budget is stretched and you need a quick fix?
Fortunately, it’s easy to add a simple “honeypot” field to the form and use server-side filtering to stop spam email from being delivered to your inbox.
Let’s take a simple example form:
{exp:email:contact_form user_recipients="false" recipients="[email protected]" charset="utf-8"}

  <label for="subject">Subject</label>
  <input type="text" id="subject" name="subject" value="">

  <label for="name">Name</label>
  <input type="text" id="name" name="name" value="">

  <label for="from">Email address</label>
  <input type="email" id="from" name="from" value="">

  <label for="message">Message</label>
  <textarea id="message" name="message"></textarea>

  <button type="submit">Send</button>

{/exp:email:contact_form}
A spammers paradise!
To add the honeypot field we need to tweak two things:
name parameter value for each field you want in the email body to message[] (note the addition of brackets to the value, EE needs this)div container with some CSS to hide it offscreen so real people won’t see it. Note that the name parameter also has a value of message[].<div style="position:absolute;left:-999em;">
<label><input type="checkbox" name="message[]" value="ABC123"></label>
</div>
Here’s an updated version of the form with the tweaks:
{exp:email:contact_form user_recipients="false" recipients="[email protected]" charset="utf-8"}
<label for="subject">Subject</label>
<input type="text" id="subject" name="subject" value="">
<label for="name">Name</label>
<input type="text" id="name" name="name" value="">
<label for="from">Email address</label>
<input type="email" id="from" name="from" value="">
<!-- modified message field -->
<label for="message">Message</label>
<textarea id="message" name="message[]"></textarea>
<button type="submit">Send</button>
<!-- honeypot field -->
<div style="position:absolute;left:-999em;">
  <label><input type="checkbox" name="message[]" value="ABC123"></label>
</div>
{/exp:email:contact_form}
When a spam bot comes along it will most likely tick the hidden checkbox, thus passing the value (ABC123) into the email body.
At this stage spam email will still get to your inbox, so the last piece of the puzzle is to add some server-side email filtering that looks for the value “ABC123” in the email body. Set up a filter on your server or in your email provider’s settings to delete any emails that contain the string “ABC123”.
Job done, you should notice a drop in the amount of spam you get from the form.
A few points worth noting:
I’ve tried this approach on a few sites and it seems to eliminate most spam from forms, and clients are happier! It’s not a perfect method by any means but as a free, quick, and easy way to reduce spam it might help you out.
So you need a page of questions and answers with an optional Table of Contents (TOC)? This technique could be used for a FAQ or LFAQ section, a help document, or a step by step guide to do something.
In this tutorial, I’ll be using Grid and Radio Buttons custom fields.

Create a new Grid Field
qa for short)Field name: Questions & answers
Field short name: qa
Now create two column fields inside the Grid field, a Text field for the question, and a Textarea or RTE field for the answer:
Grid column type: Text Input
Grid column name: Question
Grid column short name: qa_question
Grid column type: Textarea
Grid column name: Answer
Grid column short name: qa_answer
In the real world, you’d probably want to make both columns required because one is useless without the other!
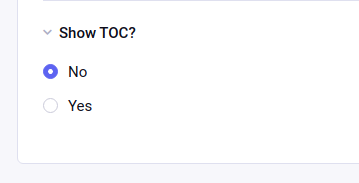
Depending on the circumstances, you may want to allow authors to enable or disable the TOC. Your questions and answers would still show as normal.
To do this, I’ll add a separate Radio Buttons field with Yes/No options (you can use a Select or Toggle field if you like, though the template tag syntax for Toggle is slightly different).
Create a new Radio Buttons or Select field:
Field name: Show TOC?
Field short name: qa_show
Add yes/no options, I prefer to use “Value/Label pairs” for setting options so I can control the wording:
Value: no
Label: No
Value: yes
Label: Yes
Note that the first value/label in your list of options is always the default for new entries.
Assign your Q&A grid and “On/Off” fields to a channel and publish some test content.
To create the link text, I’m using just the question name qa_question. To create the anchor links, I’m using the grids’ row_id appended with the string goto so they’re valid and unique.
{!-- only display if "Show TOC?" field is set to yes --}
{if qa_show == "yes"}

    <h2 id="top">Table of contents</h2>

    <ol>
        {!-- loop through the questions --}
        {qa}
          <li><a href="#goto{qa:row_id}">{qa:qa_question}</a></li>
        {/qa}
    </ol>

{/if}
Here I’ve assigned the grid row_id ID to the question heading for the anchor link target. I’ve also added a “back” link that takes you back to the table of contents.
{qa}
    <h2 id="goto{qa:row_id}">{qa:qa_question}</h2>
    {qa:qa_answer}
    <p><a href="#toc">Back to TOC</a></p>
{/qa}
{exp:channel:entries channel="mychannel"}

  <h1>{title}</h1>

  {!-- show the toc? --}
  {if qa_show == "yes"}

    <h2 id="top">Table of contents</h2>
    <ol>
        {!-- loop through the questions--}
        {qa}
        <li><a href="#goto{qa:row_id}">{qa:qa_question}</a></li>
        {/qa}
    </ol>

  {/if}

  {!-- loop through the answers --}
  {qa}
    <h2 id="goto{qa:row_id}">{qa:qa_question}</h2>
    {qa:qa_answer}
    <p><a href="#toc">Back to TOC</a></p>
  {/qa}

{/exp:channel:entries}
This article is intended as a gentle introduction to ExpressionEngine conditionals to give the reader an idea of how they work using real-world examples.
They allow you to compare or evaluate one piece of information against another and optionally show a response based on the result.
Conditionals generally work on the result being true or false - in essence, you’re asking a question to get an answer.
You can compare any variable or value available in ExpressionEngine, including global variables, channel entry fields, member fields, and your own custom values.
Here’s a non-exhaustive list of things you can evaluate either singly or one versus the other:
There are near infinite uses, but some common ones are:
<div></div>Conditional tags are always wrapped in {if}{/if} tags - just like regular HTML tags. You add values you want to evaluate and provide the answer based on the result.
Here are a few very simplistic examples showing you how evaluation logic works:
{if sky}Yes the sky exists!{/if}
{if sky is blue}It's day time{/if}
{if sky is black}It's night time{/if}
{if sky is NOT blue}It's night time{/if}
{if sky is NOT black}It's day time{/if}
See how we’re comparing the sky and its color then providing an answer for each variation? Note how there’s more than one way to provide the same answer (“is” and “is NOT”). The actual answer can be anything you want, even no answer at all.
{if logged_in}
Hello customer
{/if}
What this does is check if the visitor has logged in to your site.
Let’s expand that a bit more…
{if logged_in}
Hello customer
{if:else}
Please login
{/if}
What we’re now doing is getting two possible values.
So “if” the first value is true do that, “else” do the other.
Your entries are made up of several custom and core fields such as Title, Entry date, Status, and so on. You can evaluate any of these in a conditional, some are a little more complicated than others, but the logic is the same.
Let’s say you have a field for a blog excerpt contained in a div element. Your template code may look like this:
<div class="row">
{blog_excerpt}
</div>
The only problem here; if the excerpt field is blank, the page will have an empty div element in it; you won’t want that!
To solve this, you can use a conditional to only show the div if the excerpt exists:
{if blog_excerpt}
<div class="row">
{blog_excerpt}
</div>
{/if}
So “if” the excerpt exists, then show it, otherwise do nothing. In other words, the
divelements will only show if the excerpt exists.
Let’s expand that by providing a fallback message:
{if blog_excerpt}
<div class="row">
{blog_excerpt}
</div>
{if:else}
The author hasn't written an excerpt
{/if}
So “if” the excerpt exists, show it, “else” show the message.
Date variables in ExpressionEngine allow you to format a display date however you need.
In this example, I’m using the 3 letter code for day of the week, Mon, Tue, Wed, etc. referenced by the %D format value. The current_time tag outputs, you can probably guess, the current time, as in right now.
The idea here is to show a message on a specific day, in this case, a Sunday:
{if "{current_time format='%D'}" == "Sun"}
Sorry we're closed today
{/if}
What this does is compare the current day of the week {current_time format="%D"} to a target day value of “Sun”(day). If the answer is true (if today is Sunday) show the message, otherwise do nothing. The == value is shorthand for “is equal to.”
Note that here we have to wrap the current_time tag in double quotes because it’s a tag inside another tag.
Say you have a URL like https://example.com/blog/post/my-blog-post, then “blog” is segment 1, “post” is segment 2, and “my-blog-post” is segment 3 (See the docs for more on URL Segments ).
Here’s a couple of examples:
{if segment_1 == "blog"}This is the blog.{/if}
{if segment_2 == "post"}You're reading a blog post.{/if}
{if segment_1 == "about-us"}Why not read our blog?{/if}
{if segment_1 == ""}This must the home page.{/if}
Say you have a contact form page at https://example.com/contact and your success page is at https://example.com/contact/thanks - you can run a conditional on segment_2 (thanks) to show a success message in the same template:
{if segment_2 == "thanks"}
Thanks for getting in touch!
{/if}
<form>
...contact form fields
</form>
Let’s say you wanted to add a class to an element but only in the /blog section. You could do something like this:
<body{if segment_1 == "blog"} class="blog"{/if}>
Would output as this (if the segment matched):
<body class="blog">
You could also append a new class name to an existing one like this:
<body class="body{if segment_1 == 'blog'} blog{/if}">
The result:
<body class="body blog">
You can use conditionals to do simple calculations based on numbers. ExpressionEngine entries make available variables for:
count (a running count of the entries being displayed, so the first entry will be “1”, the third entry would be “3”)total_results (the total number of entries being displayed)You want to mark the first or second item:
{if count == 1}
This is the first one
{/if}
{if count == 2}
This is the second one
{/if}
You want to mark the last item:
{if count == total_results}
This is the last one
{/if}
You can combine these when you need to output some HTML before and after your content:
{if count == 1}
<div class="row">
{/if}
Content...
{if count == total_results}
</div>
{/if}
These allow you to compare things but in different ways. You can test for things that exist or don’t exist, less than or more than, and even look for specific words or phrases.
So far I’ve only used the == operator (equal to) in my examples. Here are a few more ways to compare values:
{if blog_exerpt != ""}The excerpt is not empty{/if}
Where != “” is asking if the field is not empty - not equals blank.
{if blog_exerpt == ""}The excerpt is empty{/if}
Where == “” is asking if the field is empty - equals blank.
{if blog_exerpt *= "Tom"}The excerpt mentions Tom{/if}
Where *= is asking if the text contains the word “Tom.”
{if product_stock < 10}Low stock{/if}
Where < is asking if the value is less than 10.
{if product_stock > 10}We have loads in stock{/if}
Where > is asking if the value is more than 10.
There are many operators available for you to use. A full list is available in the documentation.
If your conditional tag doesn’t work, here are a few things to check:
{/if} ?If you still have problems, it’s always worth posting on the EECMS Slack channel or the ExpressionEengine forums. An experienced eye will usually help you solve it.
Conditionals can be hard to get your head around at first but stick with it. As soon as it clicks, you’ll find they can be incredibly powerful tools to help you create dynamic site content.
This tutorial is intended to be an introduction to building in ExpressionEngine (or just “EE”) for those new to the platform. We’ll cover the basics as we build a simple Portfolio style website using different methods, fieldtypes, etc. There are many ways to build sites in ExpressionEngine and many add-ons to help with this. However, in this tutorial, I’ll only be using native EE functionality. If you are ready to extend your ExpressionEngine build, then there is a vibrant community that offers add-ons to extend functionality far beyond what we’re going to cover here.

Good documentation is the foundation of good software and your contributions can help make good documentation great.
If you’re an ExpressionEngine user, then you have something to add. There is always room for more examples, clarifications, corrections, and updates. Jump in and make a pull request or give us a heads up by reporting an issue. Since the docs are all in markdown formatting and updates should be pretty straightforward.
Contributing to the docs requires a basic understanding of Git. Here’s an overview of the workflow
6.dev branch of the ExpressionEngine public repository.All of the source files exist under docs/ and is where you will add new documentation or modify existing documentation. We recommend working from feature branches and making pull requests to the #.dev branch of this repo (See Branches below).
Suggesting a change is easy and there is no way you’ll mess up the public repo.
Start by forking the repository, the new branch you create is the one you’ll do your work in.
Once you have your new branch, confirm you’re actually in it! If you haven’t already, make sure you’ve read though the style guide. Then make your changes inside of your feature branch.
Push your changes to your fork of the repository, and when you’re done, send us a pull request.
We’ll take a look at your pull request, make sure everything looks alright, ask for any needed changes, and then merge it into the main code.
| Branch | Purpose |
| ------ | ------- |
| #.x | Currently released and published version.
| #.dev | Updates for the next version of ExpressionEngine (current version is the default branch). Does not exist for previous versions. |
** replace `#` with the current version of ExpressionEngine or version you wish to target.
Recommended branch names are namespaced and unique, e.g.:
feature/my-feature-slugbug/bug-description-slugWhile some updates are easy and can just be done in markdown without much review, others require a review of what the updates will actually look like when published to the docs. To review changes, you’ll need to build the docs locally. This requires a little bit of setup but is not overly complicated if you’re already familiar with front-end build tools.
Building the docs requires Node and npm.
In the root of the repository, install all the dependencies:
npm install
To build the docs:
npm run build
To dynamically rebuild on any file changes:
npm run watch
The documentation css and js files are located under theme/assets-src.
To build the theme assets, run npm run buildAssets. You can also dynamically rebuild the assets when a file changes: npm run watchAssets.
As with anything else, if you have any trouble building the docs let us know and we’d be happy to help.
Please read the style guide for samples and convention standards used in the ExpressionEngine user guide.
Want to help but a little daunted by the idea of making a pull request? We still want to hear from you. You can report errors in the documentation as issues in the github repo. Just remember, the more detailed the report, the more likely someone will be able to make improvements.
Most importantly, THANK YOU! Thank you for caring about the community and wanting to help. ExpressionEngine is open source and has always been successful because of our community. Let us know if you have any problems with the docs or anything else and we’ll be happy to help.
Mailgun’s SMTP Relay service is a quick an easy way to have ExpressionEngine transactional emails handled through a dedicated email provider. There’s just one tiny glitch you need to be aware of. The line ending setting needs to be changed from the default \n to \r\n. That’s it. Everything else is self-evident. But in case it’s not…
In your Mailgun account, go to the Overview for your domain. In my case, I just have their default sandbox domain. You’re going to select ‘SMTP’ as your mail option and the required settings, including username and password, will be revealed.
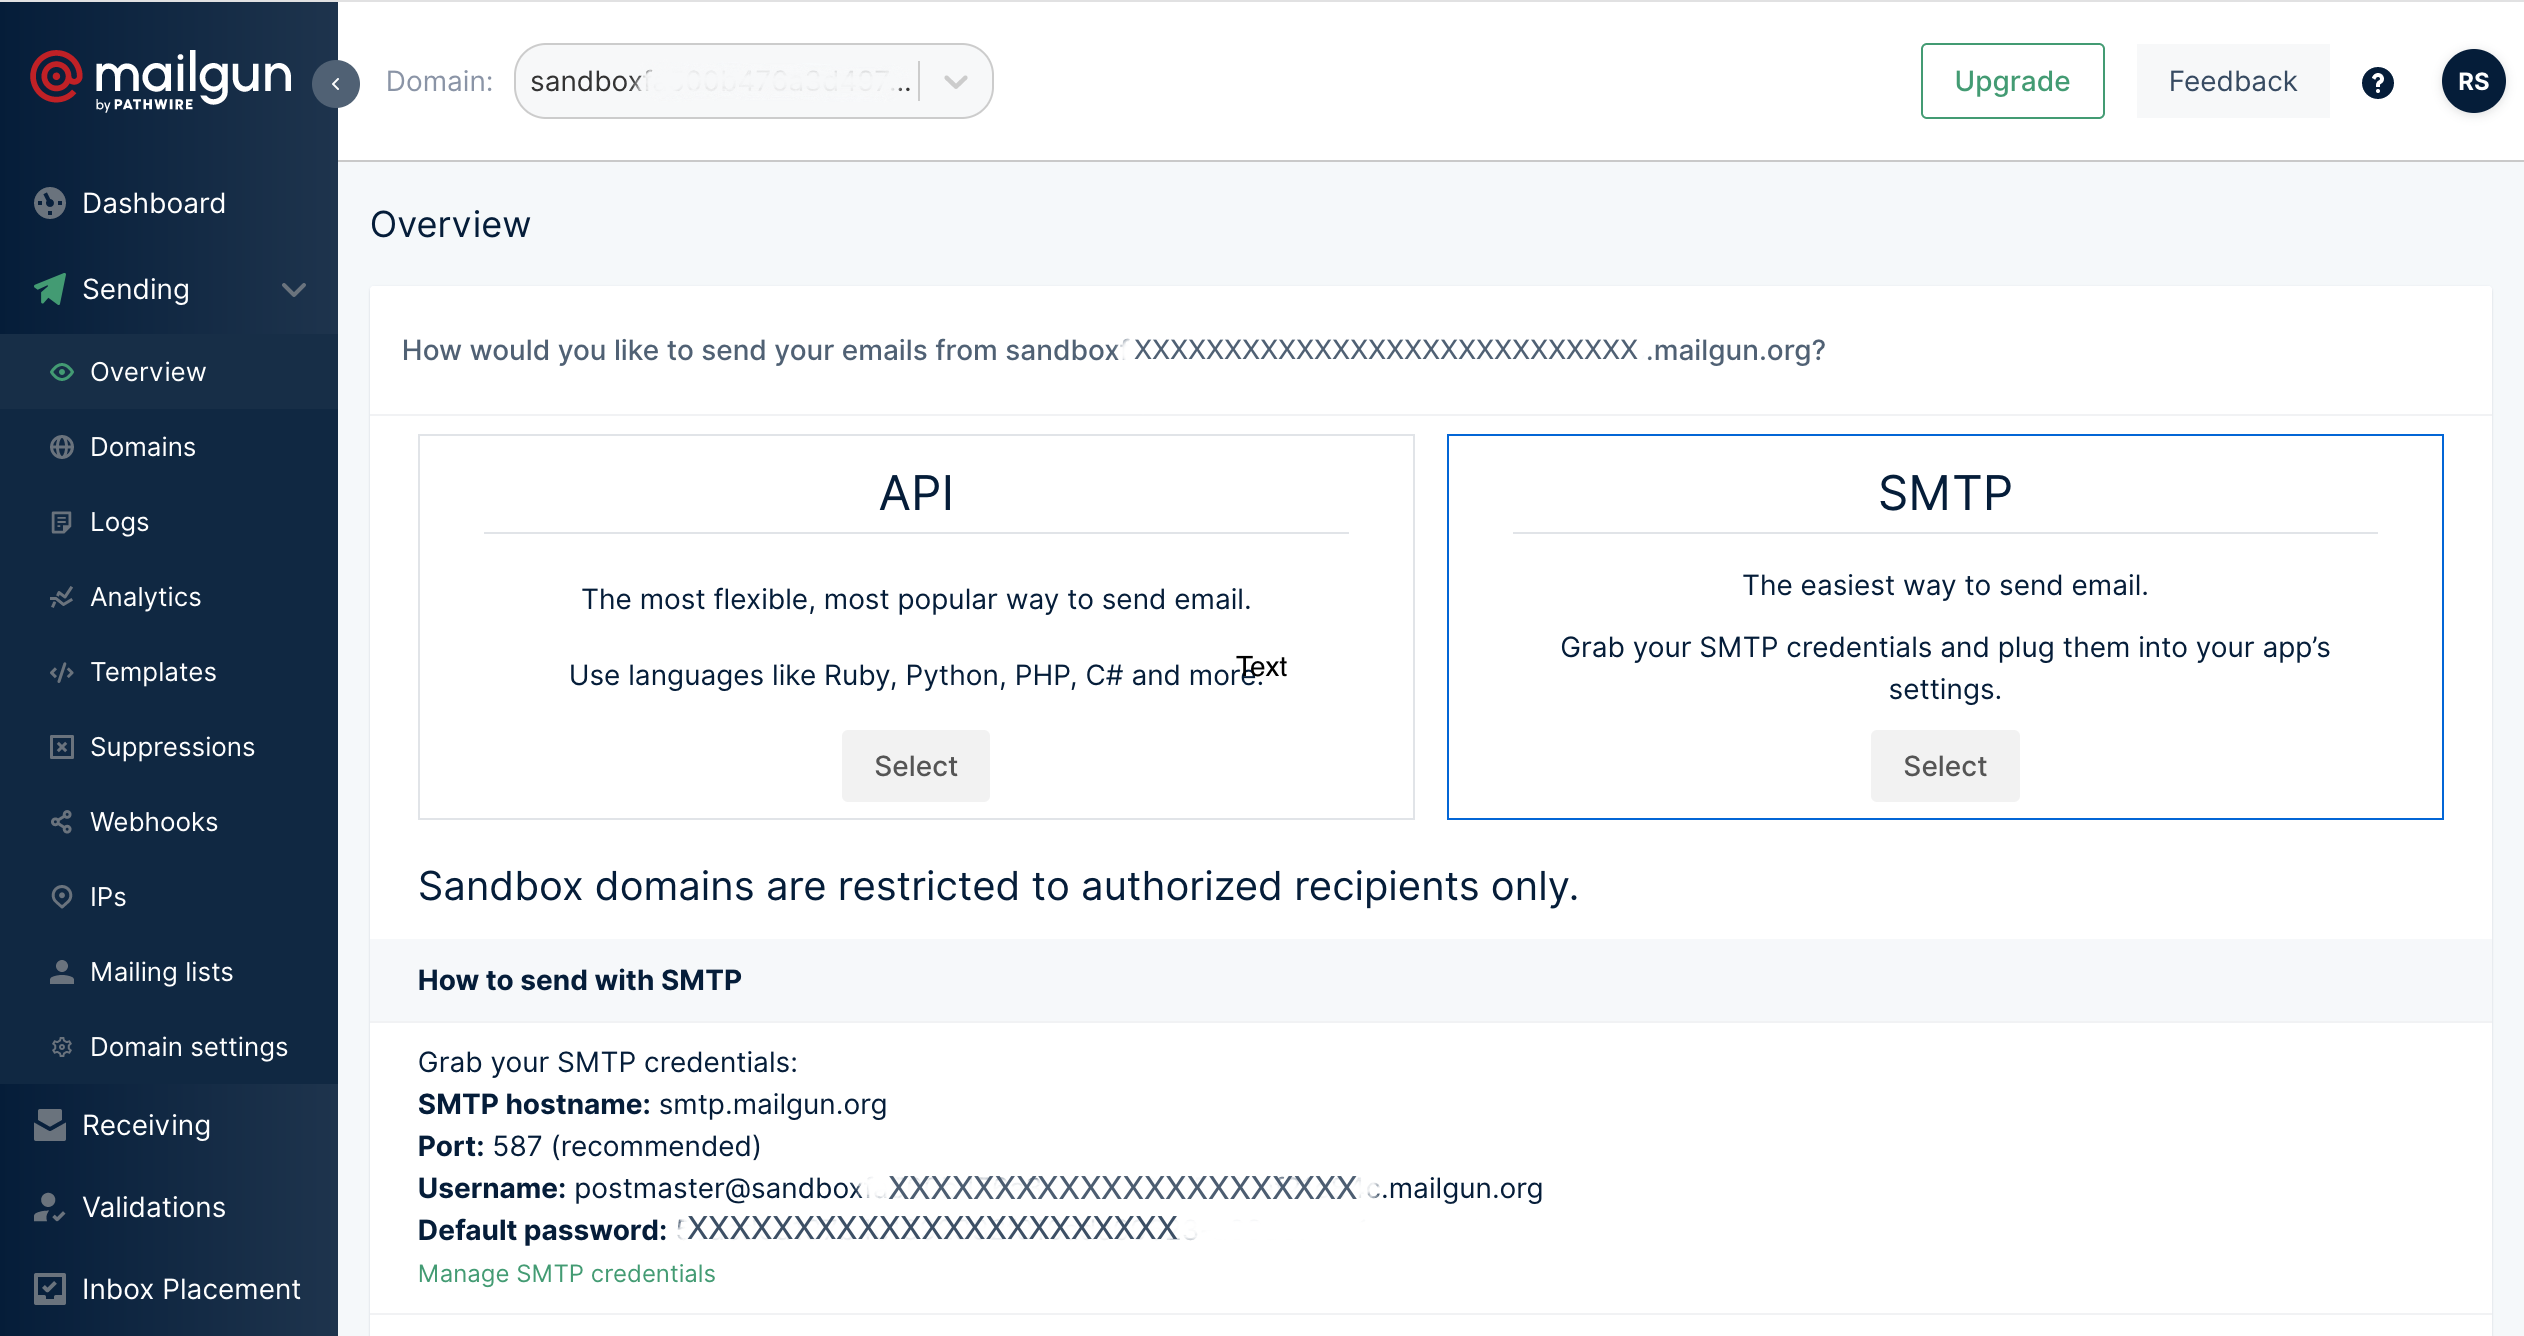
Go to your ‘Settings- Outgoing Email’ settings in your ExpressionEngine control panel and enter your Mailgun settings
| Setting | Value |
|---|---|
| Protocal | SMTP |
| Newline Character | \r\n |
| Server Address | smtp.mailgun.org |
| Server Port | 587 |
| Connection Type | STARTTLS |
Save your settings and send a few test emails from the Communicate page.
Adding a comment section to your articles and posts gives your reader a chance to add value to what you’ve written – or draw your attention to a necessary correction or update. If you’ve struggled with integrating comments to your site content, we’re here to help!
This tutorial assumes that you already have a basic site set up, with both single-entry article pages and some sort of index page that lists all of your articles. If you run into trouble with this tutorial, the Expression Engine documentation is likely a great resource.
The first thing you need to do is enable the Comments module; it’s not with the other add-ons where you think it might be.
Head to the Expression Engine system settings page, and click on Comment Settings, at the following URL:
/admin.php/cp/settings/comments
Flip the “Enable comment module?” toggle to on and hit save.
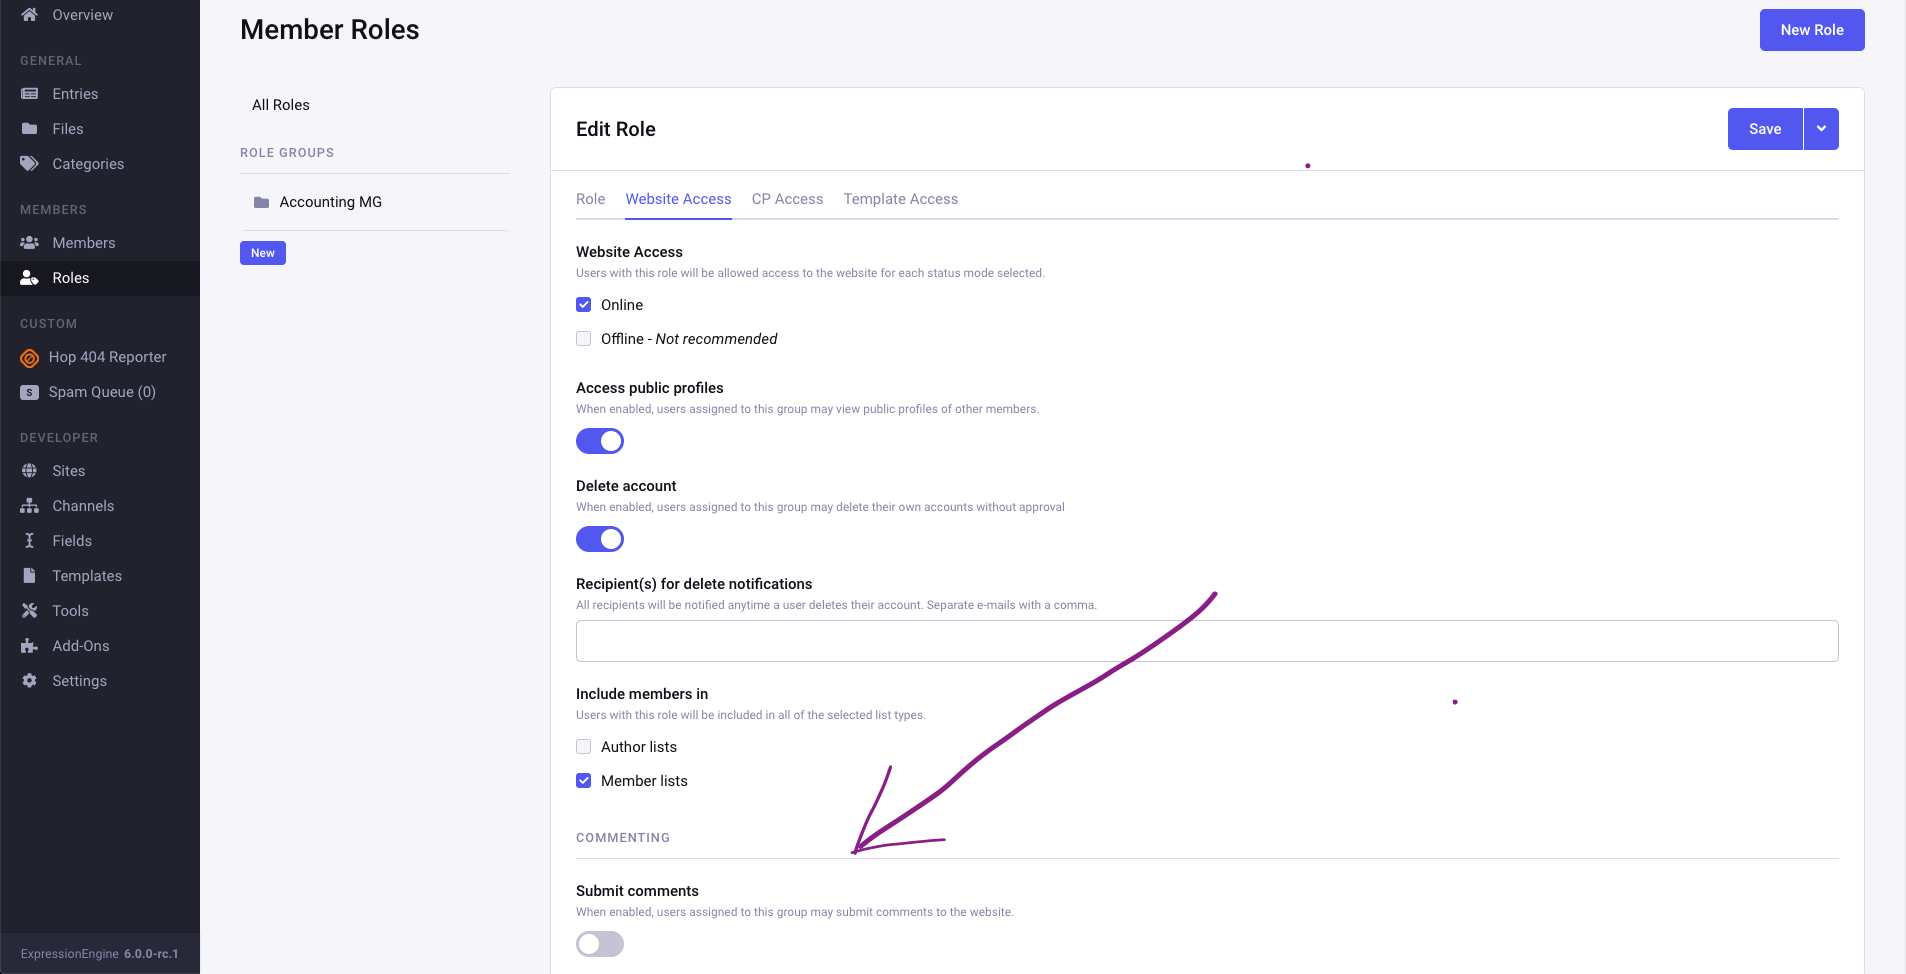
Next, you’ll need to enable commenting for the specific Channel you want to have comments on. Head to the Channel Manager (/admin.php?/cp/channels).
Inside the Channel Manager, click on the Settings tab for the Channel where you wish to allow commenting, and look for the Commenting section shown in the screenshot below. You’ll find it way down near the bottom of the page.
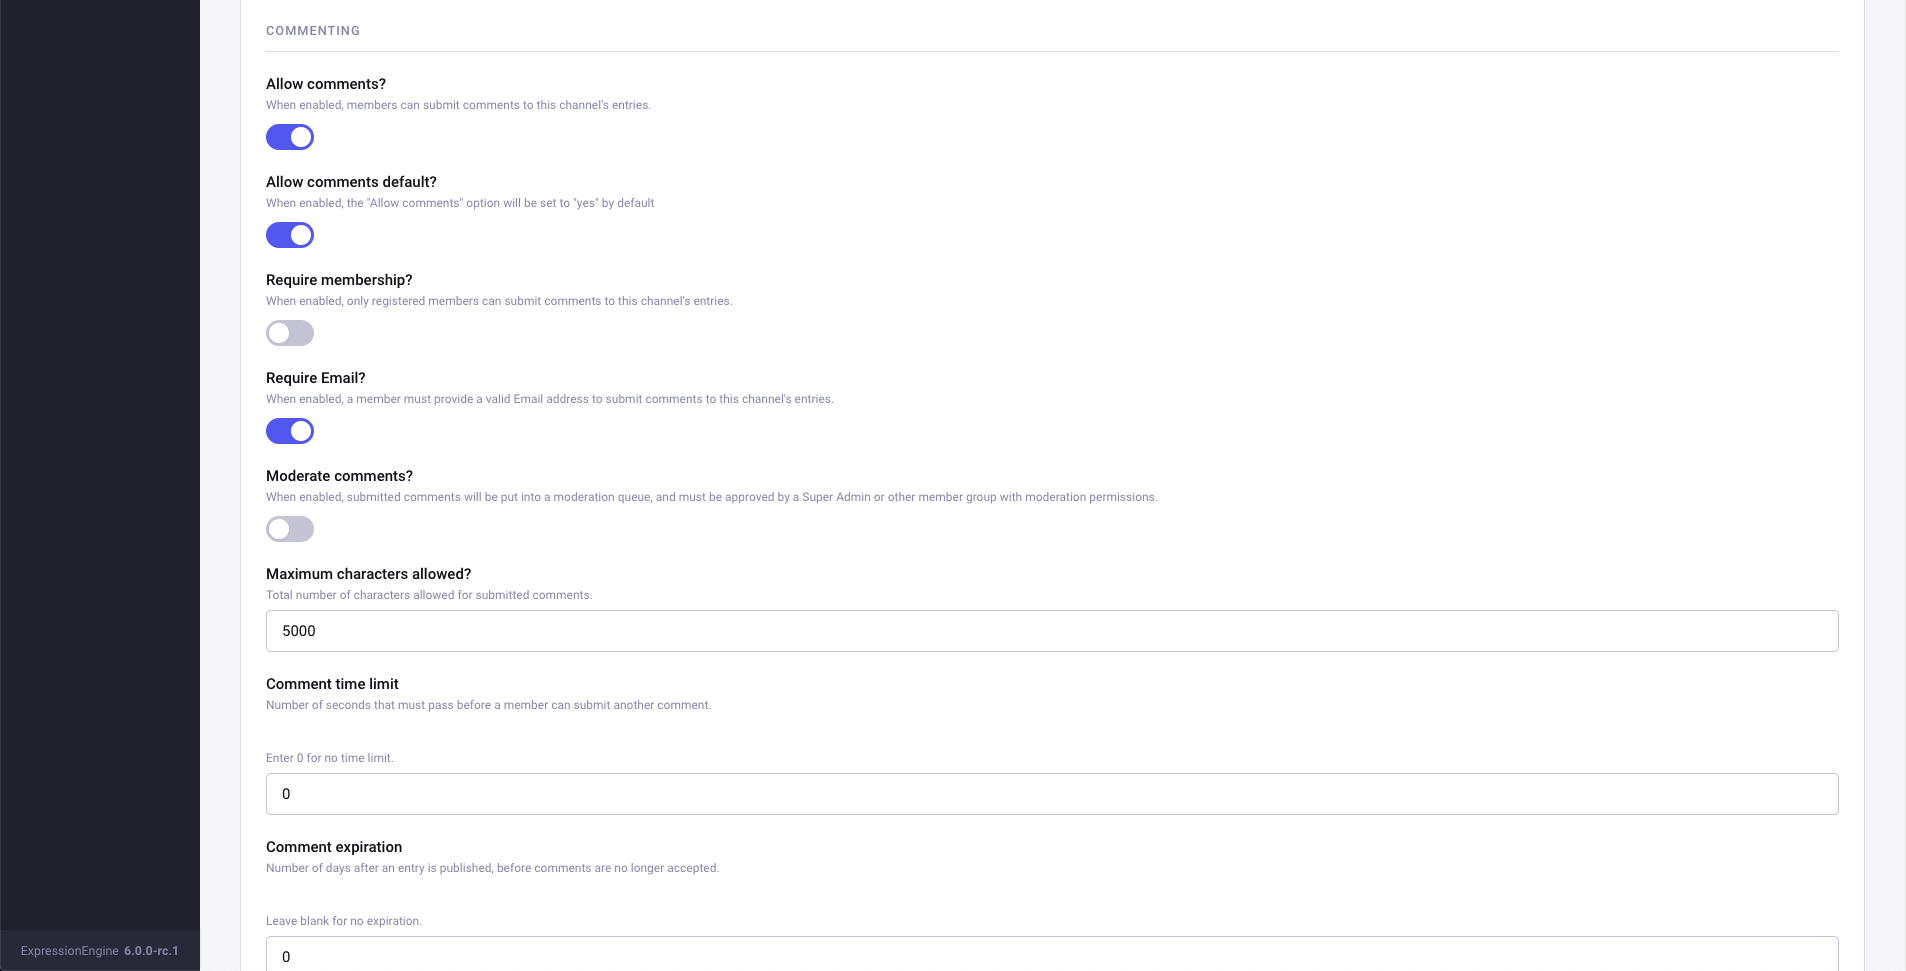
Flip “Allow Comments?” to the “On” position, and keep in mind that you’ll need to do this for every Channel for which you want comments enabled.
There are a few other helpful settings here which we’ll go over, but if you just want the basics you can skip to the next section.
Allow comments default - Each individual entry can have comments turned on or off. This option determines if new entries in this channel will have commenting turned on.
Require Email - This does what it sounds like. If enabled, anyone submitting a comment must be either logged in or provide an email address. Important note: If this is turned on, you must have an email field in your comment submission form!
Require Membership - A stricter version of Require Email. With this option, users must be registered members of the site to comment.
Render URLs and Email addresses as links? - When members submit comments with URLs or email addresses, this setting controls if those appear as clickable links. You may wish to disable this, depending on your particular usability requirements.
Next up, check to ensure you’ve given appropriate member roles permission to comment. Super Admins automatically have all permissions, so testing is sometimes confusing. It’s a good idea to create a test user for yourself in a standard Member or Editor role to verify your permissions are working correctly.
Member Roles can be found by clicking on the Members menu item and the Member Groups submenu, or at this URL:
/admin.php?/cp/members/roles.
If you’re following this guide for Expression Engine v5, you will follow essentially the same steps, but the permission is found under the Member Groups settings, rather than Member Roles.
The control panel URL you will want for EE5 is:
/admin.php?/cp/members/groups.
For each Member Role that you want commenting enabled, look for the Commenting section under the Website Access tab. Flip the toggle on for Submit Comments.
If you want Guests (users who are not logged in) to be able to comment, be sure to enable this for the Guest member role – that’s the default anyway.
If you have a special Member Role who should be immune to comment moderation, you can give them the “Bypass moderation” permission. This is also where you can allow specific Member Roles to edit or delete their own comments, or the comments of others if you wish.
Important note: Enabling the “Edit comments by others” setting doesn’t automatically make the interface to allow this appear on the front end – this is just granting permissions.
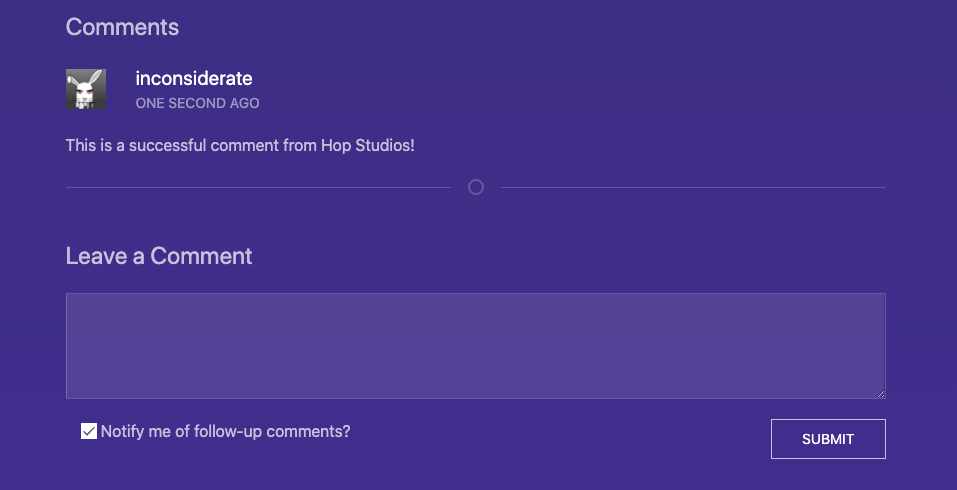
Another comment-related setting you can optionally enable is CAPTCHA, the test to try and make sure someone is a human and not a spambot.
The settings for CAPTCHA can be found on the System Settings page, under the CAPTCHA submenu at this URL:
/admin.php?/cp/settings/captcha.
Keep in mind that enabling CAPTCHA here will enable it for all front-end forms, not just for comments. I like to enable it, but then I disable “Require CAPTCHA while logged in.” We assume that registered members can be trusted at least at this level, and this way only Guests will face the CAPTCHA.
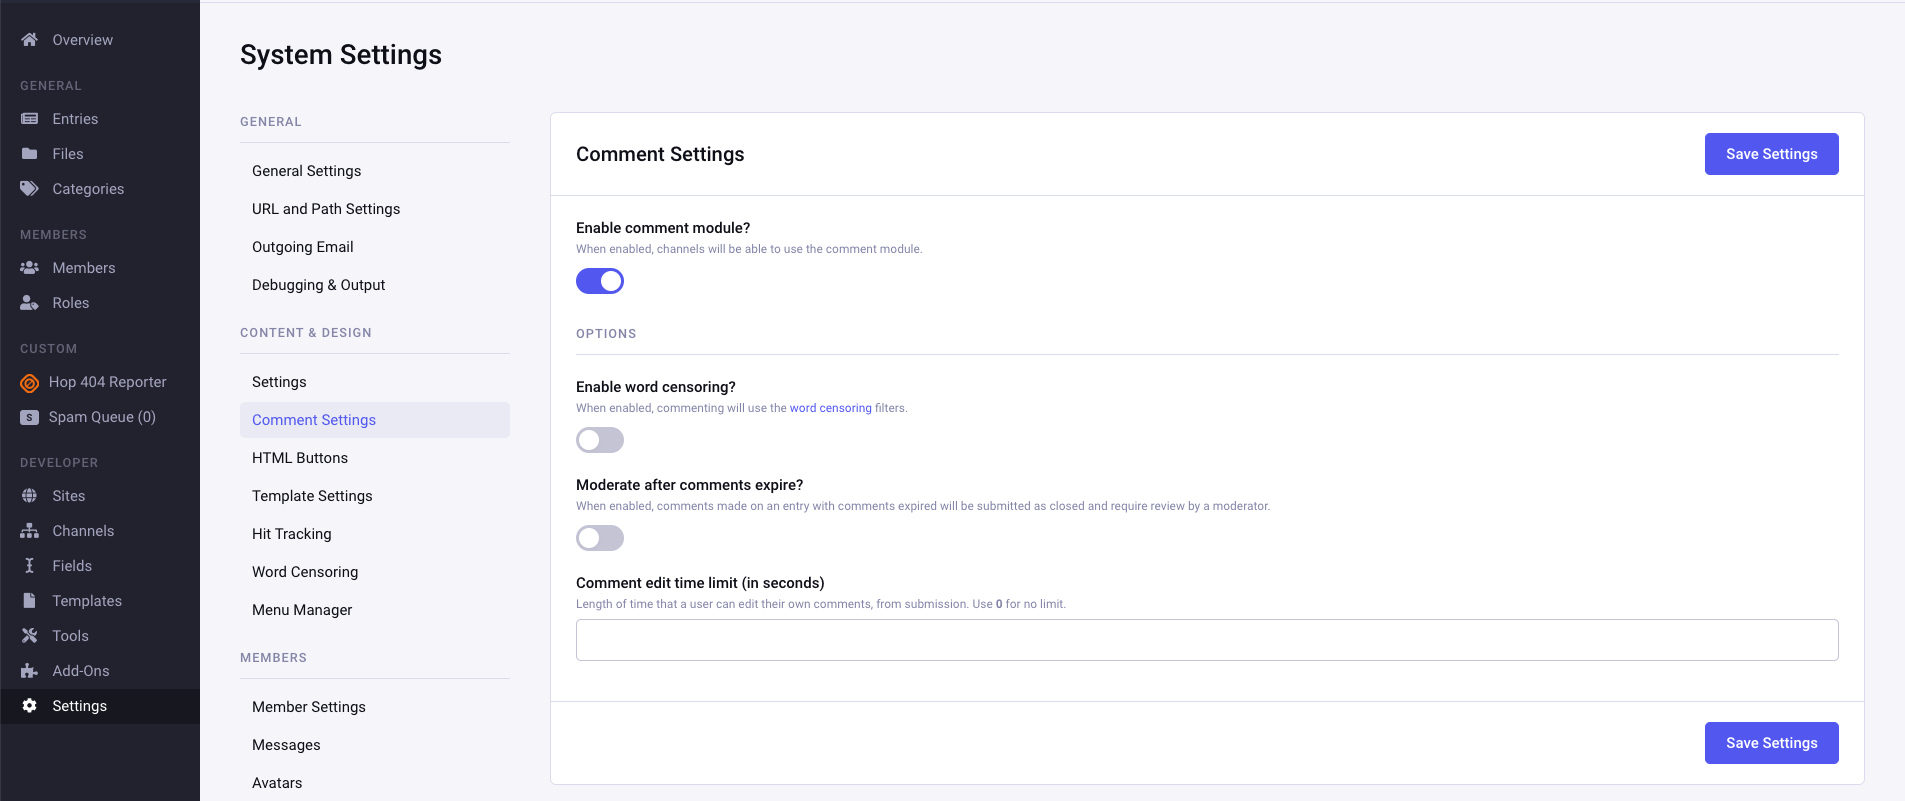
That’s it for the set up work! Stretch your fingers, grab a tea, and now we can move on to the template work!
In the template for your single-entry article page, you’ll need to enter template code to display comments. This tag pair is dynamic by nature, and by default will fetch the correct entry automatically based on the current URL.
Important note: This code must be placed OUTSIDE of any exp:channel:entries loop, because it uses some of the same variables, including {count}. If you do need to put it inside the loop, you must use an embed.
At its most basic, the comment entries loop looks like this:
{exp:comment:entries sort="asc" limit="20"}
{comment}
<p>By {author} on {comment_date format="%Y %m %d"}</p>
{/exp:comment:entries}
We won’t go into a full description of the ways you can output and format comments – it’s quite robust.
The most important piece of the puzzle is the submission form. After all, there’s no point in displaying comments if no one can submit them.
Place the following code directly beneath the comment:entries loop we posted above.
{exp:comment:form channel="news"}
{if logged_out}
<label for="name">Name:</label> <input type="text" name="name" value="{name}" size="50" /><br />
<label for="email">Email:</label> <input type="text" name="email" value="{email}" size="50" /><br />
{/if}
<label for="comment">Comment:</label><br />
<textarea name="comment" cols="70" rows="10">{comment}</textarea>
{if captcha}
<label for="captcha">Please enter the word you see in the image below:</label><br />
<p>{captcha}<br />
<input type="text" name="captcha" value="{captcha_word}" maxlength="20" /></p>
{/if}
<input type="submit" name="submit" value="Submit" />
{/exp:comment:form}
There are a few specific things to watch for in the comment submission code.
First, be sure to change the channel parameter to the name of your Channel.
Second, notice that we are asking for an Email address if the user is not logged in, but skipping it if they are. This is linked back to the earlier point about the “Require Email” and “Require Membership” options found under Channel Settings.
The third thing to notice here is the {if captcha} line. If CAPTCHA is turned on, and the user is not exempt from CAPTCHA, a standard CAPTCHA will appear in this area of the form. You can find out more about how to customize CAPTCHA in the Expression Engine documentation.
Once this is in place, you should see your comment form on the front end, and be able to submit new comments. Hurray!
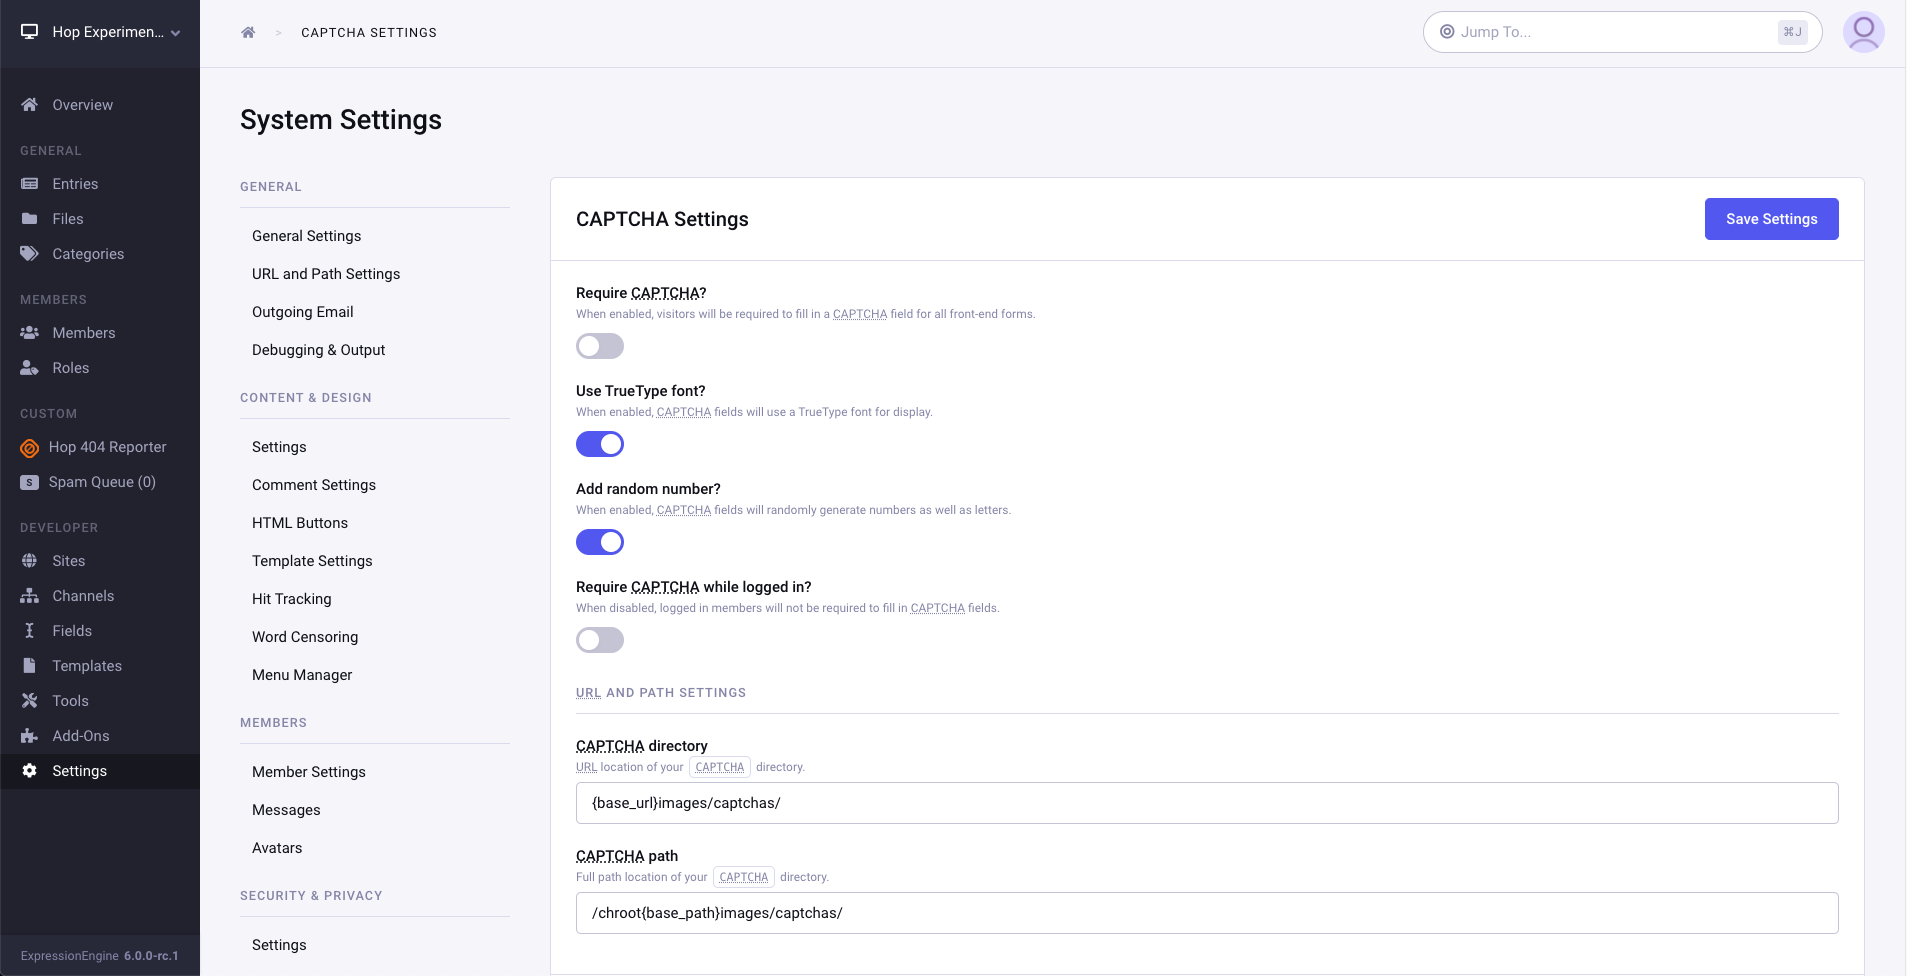
Lastly, if for any reason the person viewing the page does not have commenting permission (either because of member, entry, or channel settings), the form will simply not display. You can use {if comments_disabled} to display alternate instructions if there will be some entries in each status.
The display of existing comments is possible whether comments are enabled or not – once an entry has comments, disabling comments will only disable the form, not the comments you’ve already collected.
ExpressionEngine does a decent job of trying to let you edit existing comments via Javascript. We recommend following the instructions in the documentation. However, because each site is unique, it may require some tweaking to their JavaScript. The important thing to note is that before you spend too much time digging into the javascript and templates, save yourself some time and check to make sure your permissions are set properly.
Before we actually build anything, we first need to consider how ExpressionEngine thinks about content. Most of this section was originally written by Mike Boyink in tutorials that were available for ExpressionEngine 2 and is reused here verbatim and with permission - these fundamental concepts are absolutely still applicable. Thanks Mike for all your work laying the foundation and allowing us to reuse it! I have however, made some updates and additions to make sure it's all still pertinent to ExpressionEngine 6.
If you’ve worked with a CMS of any sort in the past, you might be perusing the ExpressionEngine Control Panel for a place to begin by building a sitemap or establishing navigation. Many CMS work this way - you essentially build a site from the top down by first creating hierarchy/navigation using some sort of tree-view widget, then you choose a page on the hierarchy, click a little icon, and enter content for that page. I would actually call a system like this more of a “Page Management System” - since it only thinks about and manages web content in units of Pages.
ExpressionEngine, however, is not a “page-based” CMS but rather a “Structured-Content Management System.” With ExpressionEngine, you build a site from the bottom up, first defining what type of content the site has and building structures to store it. In other words, websites have different types of content in them, and it’s not always just a “page.” Some examples include:
Notice that we are not talking about the presentation of content - just the structure of it. From an ExpressionEngine perspective, I’m not yet concerned with how these different content types will manifest themselves on the front-end of the website. I don’t care if the FAQ’s each get their own page or are all listed on one page. I don’t care if the Bios start with an alphabetized index of names linked to detail pages, or the index page has names & photos by default with some sort of JavaScript rollover effect that displays the rest of the content. I don’t even care where they appear in the navigation - Bios may be 3 levels down in the About section or a top-level navigation item. Doesn’t matter. Yet.
As it turns out, what we’re doing here has a nifty buzzword in the web industry: Content Modeling. A List Apart published an article on Content Modelling, describing a Content Model as documenting:
…all the different types of content you will have for a given project. It contains detailed definitions of each content type’s elements and their relationships to each other.
If you come from a database background, you will recognize this process as Database Normalization which Wikipedia defines as:
…the process of organizing the fields and tables of a relational database to minimize redundancy and dependency.
Assuming you are now “seeing past the page” when it comes to the content on your project site, the next logical question would be: “How does ExpressionEngine store content?” Let’s run through the content-modeling tools available in ExpressionEngine:
With the foundational understanding from this article, we’ll move to Part 3 and look more specifically at the content we want for this project and put together a Content Model for it. The Content Model will lay out the specific mix of Channels, Fields, Categories, and Statuses this website will need.
Planning is an important step in any process, including building in ExpressionEngine, so let's start working through our content model's plan for this site. In fact, we're even going to actually add content to the site before we ever even attempt to output it to templates. This might seem obvious when building a new site from scratch, but the same sequence applies even with adding features, Channels, or Fields to existing sites:
When looking at design templates to figure out a content model, learn to ask yourself - “Is the content native to this page or visiting?” In other words, does this content live here? If I wanted to link someone to this content, would this be the page that I link them to? Or is the content just “visiting” this page and it lives somewhere else?
Homepages are often a party of visiting content from the rest of the site where in many cases, the hero carousel images are really the only thing unique to the Homepage and the rest of the content is often pulled in from other places like news articles, blog posts, featured products, upcoming events, testimonials, etc. Our setup for this tutorial is similar - we'll have content visiting from the “Work” section.
Thinking about content as being native or visiting is important because it will help you figure out how to organize your Content Model. For our site, since we know the Work/Portfolio content is only visiting the homepage, the Content Model for the Homepage doesn’t need to accommodate any Work information.
Another template-evaluation question to ask yourself “Is this a multi-entry page or a single-entry page?” The easiest content type to picture here is the standard blog. Blog indexes are usually multi-entry - because they display a listing of your most recent posts. The entire post isn’t usually shown, but rather the title, post date, and a summary or portion of the entire blog post. When you want to read the entire post, you click the title or a read more link. The page you go to can be thought of as the single-entry for that blog post.
Why is this important for Content Modeling? Content Types often get split across multi-entry and single-entry templates. Look at that blog entry again. It could be that the summary on the multi-entry page doesn’t appear on the single-entry page. And the full text of the blog entry that shows on the single-entry doesn’t appear on the multi-entry. The Content Type is split across the views of the content, so you have to look in both places for the bits that make up a Blog Entry.
These next two concepts were also written originally by Mike Boyink and reused with permission.
With all of the above in mind, we can start to think about how we want our content structured. In this particular example, we don't have a particular design we're striving for, but in a real-world scenario, that's likely where you'll start to get a sense of the different types of content the site contains. Here's a reminder of our target sitemap for this tutorial:
The most obvious collection of content where we will have multiple entries is "Work," where each Project has its own set of information, but each one will follow a similar structure in terms of the data contained within them.
NOTE: A few more examples that we don't happen to have in this tutorial include things like Blog Posts, News Articles, Products, Events, Locations, Testimonials, Team Members, etc. All of these types of content are best suited to be in a dedicated Channel, and you would consider in the content modeling planning.
Looking to our sitemap, Services is unique in that it has sub-pages, whereas the other pages don't. The sub-pages may not change often, but because Services could likely be added over time, we will be using a single Channel to represent all the pages in that section, including the main Services landing page and the 3 sub-pages (and any future Service sub-pages that may be necessary).
The Home, About, and Contact pages are just single pages, so we'll have a Channel for each and limit those Channels to only hold 1 entry.
NOTE: Remember, there are multiple ways to build in EE, and this tutorial is intentionally only covering native EE methods. It's also possible to have one single Channel that would hold all of the 'single' pages mentioned above, but using separate Channels for each root-level menu item helps to learn the fundamental concepts and default template routing.
So at a high level, our final set of Channels will be:
Next, we need to consider carefully the information we want our channels to hold so we know what Fields to create. In a real-world scenario, this is where you look at the specifications of the project or an approved design or direction from the Project Manager, but for this example, we'll be assuming:
NOTE: A Fluid Field is a relatively new and unique fieldtype in ExpressionEngine that allows the content editors to add other Fields that are available to it in any order they want. As we build out this example, you'll understand just how flexible and useful this is.
It's worth pointing out at this stage that EE uses several default fields in every channel because often we can use those instead of having to create our own. Examples include:
You'll get a sense of all the different Fieldtypes I'm proposing as we go through the build, so don't worry too much if you don't know what they are at this stage. However, it is worth explaining Grid and File Grid fields.
Grid fields allow the content editor to add multiple rows of information, where each row can contain multiple columns of data. These are incredibly useful for things like image galleries, carousels, expanding accordion panels, tab groups, or even specific types of content that require multiple parts in a specific format like an address:
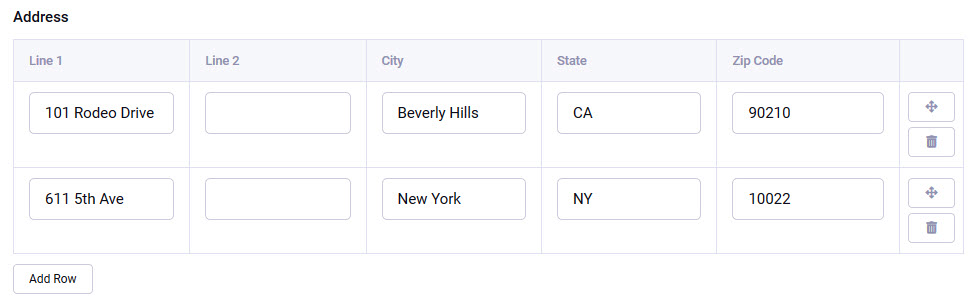
File Grid fields are the same concept, but differ in that the first column of each row is a required file (which could be an image or document) and offers a handy drag-and-drop interface where you can select multiple files from your computer and drop them all at once to populate the rows:
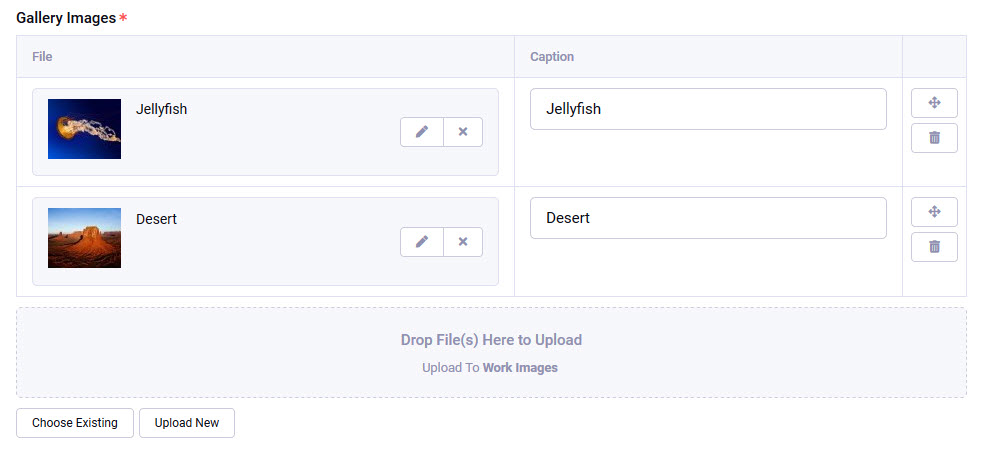
Getting back to our tutorial, breaking this down our high-level Channel structure into individual Fields, we'll need:
For the Homepage, we're also going to display the newest three Work entries, but notice we don't have an explicit field for that - remember the concept of 'visiting content'. So we will be pulling in this content automatically, and we deliberately don't want the content editor to be able to remove or edit those - their display will be based on dates to always show the latest three. We'll be doing this later when we start working on pulling content through in the templates.
This is a good starting point for a beginner tutorial that showcases a lot of what EE can do without going overboard.
We learned in the last installment that Field Groups allow you to group a selection of Fields and apply the whole group to a Channel at once, so looking at our Channel structure, it makes sense to utilize Field Groups in two places:
You don't necessarily have to use Field Groups at all - you could individually assign Fields to Channels and achieve the same thing. However, it's useful to understand, particularly because in earlier versions of ExpressionEngine, Fields couldn't be shared across Channels, and the Field Groups were exclusively used for assigning groups of Fields to Channels. So if you ever end up working on or upgrading an EE site from before Version 4 of ExpressionEngine, you'll certainly see these being used and want to understand how they work.
In Step 2 above, we identified one place we'll be using Categories (Work entries), several places we'll be using images (Homepage carousel, Work entries, and the Rich Text & Image field that will be available to our Page Builder Field), and one place we'll be linking to documents (the Document Downloads field available to our Page Builder Field). It's worth thinking about these things in the planning stage too.
With categories, it's often the case you need the client's input, so thinking about it now enables you at the very least to request the list from the client, even if you have to start building with incomplete or even dummy categories.
For this tutorial, we'll assume a fairly simple Category structure for the Work channel that matches the Service sub-pages:
For images and documents, it's more efficient to set up any necessary File Upload Directories before we start building our Fields. Any Field that links to a file can be set to explicitly utilize one specific File Directory rather than allowing the content editor to be able to select from 'all' directories, but only if they're already set up. If they're not set up when creating the Field, you'll have to save the Field with the ability to access 'all' directories, go back and create a new directory, then return and edit the Field - it's definitely doable, and you'll do this many times, but if you get in the habit of thinking about it in the planning and content modeling stages, you'll save yourself some time.
At this point, it's worth understanding Image Manipulations. ExpressionEngine can automatically create multiple different versions of uploaded images with different settings based on your needs.
This is the original way of using Image Manipulations in EE. Each Upload Directory can have pre-defined Manipulations configured where each one can either be cropped to a specific size or constrained to a maximum width and/or height (while keeping its original aspect ratio) and optionally can also have 'watermarks' applied to them that you can configure.
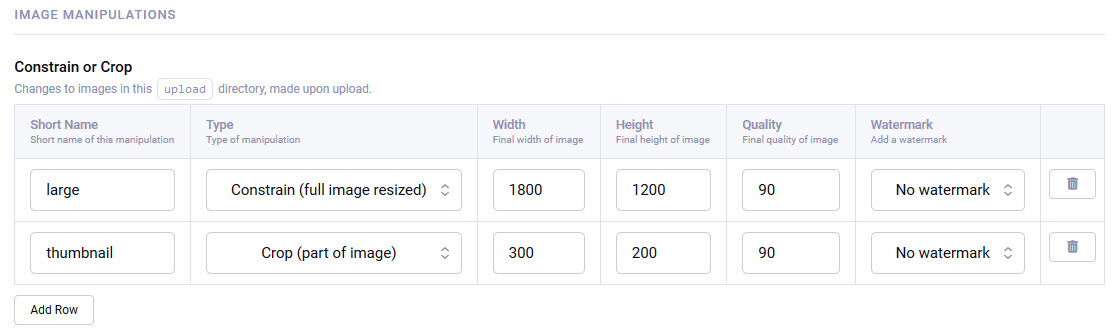
Using dedicated Upload Directories for images used in specific ways (e.g., Product Images vs News Images vs Gallery Images) allows you to create pre-defined Manipulations specific to how you'll be using images for each use case. For example, your Product Images might need one version to be cropped to 600x400px and another for the thumbnails at 100x150px, but your Gallery Images need a full size version constrained to a maximum of 1800px wide or 1200px tall and a different size cropped thumbnail at exactly 300x200px. So in scenarios where you know you'll be using several different sizes of the same image, using a dedicated Upload Directory with pre-set image manipulations is a good option.
On-the-fly image manipulations are new to EE6 and let us specify in the template what the manipulation should be rather than having to use pre-defined manipulations based on the Upload Directory. On-the-fly image manipulations are created the first time the template renders and stores the manipulated version of the image on the disk, so it's still efficient (i.e., it doesn't have to generate literally for every page-load), but isn't tied to a specific Upload Directory. This is really useful when you want to give the content editor the choice of what Upload Directory to use, but you still want to use specific sized images.
NOTE: Another amazing new addition to EE6 is the ability to convert images to WebP format in templates!
ExpressionEngine allows you to create multiple Upload Directories, and there are several reasons you might want to use several different directories:
Images Only or All Files, which is useful as most site content models need Fields to specifically hold images. Imagine a field that lets the user upload .pdf or .docx files in a place where the templates were creating an image gallery.So for our purposes in this tutorial, we'll plan to set up 4 separate Upload Directories:
So far, everything we’ve done is CMS-agnostic. We’ve looked at the end goal and broken it down into a generic Content Model. In the following chapters, we'll actually get to building in ExpressionEngine, which starts with installing the CMS in Part 4.
As mentioned in the Overview, I'm assuming you know how to set up a development environment and have PHP and MySQL/Percona available. This tutorial won't cover how to set up the environment, or even installing EE as this is well documented already and I'm deliberately not mentioning software versions or system requirements because those tend to change (shocking!) and are well documented already. If setting up an environment is a struggle, let us know and perhaps we'll do a separate tutorial or find one that exists already, and link to it - that part is completely CMS agnostic.
I'm not going to reinvent the wheel here but instead let EE's own guide on how to install EE walk you through this process. One thing to note though is that for this tutorial, you don't want to install the 'default theme' - to follow along, you'll want a totally blank installation:

NOTE: Feel free to set up another site where you do install the default theme at installation - it's worth reviewing how others build in EE too because, as I've said before, there are lots of different ways to do things in EE, so someone else's perspective might be just what you need. This seems like a good place to draw attention to the EE Slack Channel - there are lots of friendly people there (myself included) who are happy to answer questions and give suggestions.
For this tutorial, I've set up EE to run from the domain example.com, and I'm using my local 'hosts' file to force the DNS. Your setup can, of course, use whatever domain, subdomain, or IP you'd like, but throughout this tutorial, just remember I'm using example.com, so that's what I'll refer to. You can substitute for your setup as necessary.
Once installed, you should be able to load example.com (which will just be an empty page) and get the Control Panel login screen at example.com/admin.php. The Control Panel, or "CP," is the site's administration area that will be heavily used in building the site and heavily used by the content editors and website owners to manage the content going forward.
Read through EE's Post-Installation Best Practices page and implement all 3:
/system/ directory OR move it above the webrootadmin.php to something not guessable for an added layer of securityindex.php from your URLsFor referencing purposes throughout this tutorial, I'll still use "system" when referencing the /system/ folder. However, in your setup, it should either be renamed or above the webroot. To ease packaging up the code at various places along the way, I've opted to keep the system inside the webroot for this particular tutorial but have renamed it to "xyz_system".
admin.php (e.g. example.com/razzle.php) 
Settings button in the main menu, then set the name of your site and save the settings 
Settings section, noting there are several groups of settings in the left sub-navigation. 
NOTE: throughout the CMS, using both
{base_url}and{base_path}during development whenever settings request a URL or PATH makes transferring or launching the site to a different domain much easier. If these two variables are used consistently, all you have to do to move or launch the site is update two settings. Using config overrides makes this even easier as you can set these variables in the same place you update the database connection credentials.
Settings > Outgoing Email to an address that matches the domain of the site to help avoid spam filters (e.g., [email protected]) 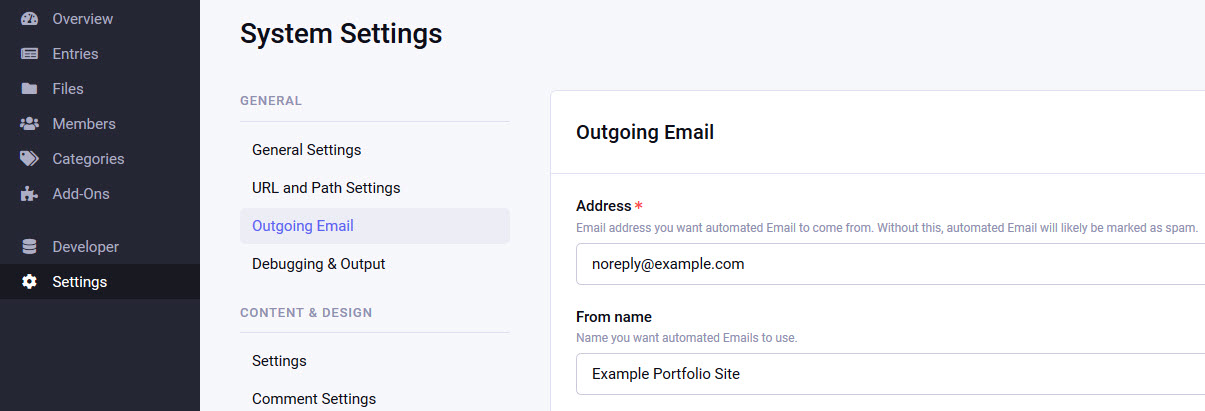
/system/user/config/config.php
This is where you can easily set or update various settings for the site directly from the file system - you'll get very familiar with updating this file as it's where the database connection credentials are stored and where you add system configuration overrides. Config overrides set in this main configuration file do just that - override whatever was set before in the Control Panel - so if you're trying to change a setting in the Control Panel, but it doesn't appear to be changing, check the /system/user/config/config.php file to see if an override is in place.
With ExpressionEngine installed, we're now ready to create our Content Model from Part 3 by building out or Channels, Field Groups, Fields, Category Groups, Categories, and Upload Directories where EE actually stores and content editors can create and update the content.
With ExpressionEngine installed and a clear idea of what we're going to build from our Content Model from Part 3, we can go ahead and start building out our Content Model in ExpressionEngine. This will be a pretty long but very practical installment to the tutorial that will walk you through step-by-step (and sub-steps!) how to create what we planned in Part 3. So let's get started!
As I mentioned before, it's way easier to set these up before creating the Fields where we want to force uploaded files to go to a certain place. Repeat the following steps 1-7 for each of our 4 directories we planned in Part 3.
REMINDER: In Part 3, the directories we planned were:
- Hero Banners used for images only with one Manipulation
- Work Images used for images only, but we'll setup two Manipulations
- Page Images used for images only, but no pre-defined Manipulations* (we'll do them on-the-fly in the templates)
- Documents, all file types to hold PDFs, etc
/images/uploads/work - this can be wherever you want, but any files uploaded this directory will be accessible from that physical location, e.g. example.com/images/uploads/work/sample.jpgFiles in the main menu, then click New next to the Upload Directories

{base_url} plus the directory name, eg {base_url}images/uploads/work

{base_path} plus the directory name eg {base_path}images/uploads/work


NOTE: Using Constrain and only supplying one value will only constrain the generated image against that value. Supplying both values will constrain against both, but in either case, the aspect ratio of the image will never change.
Tip: Upload Directories are ordered alphabetically whenever they're listed, so if you want them in a specific order (say to group image vs document directories), start the names with numbers, e.g., 1. Hero Images, 2. Work Images, etc.
NOTE: The original image the editor uploads is always maintained, so it's also possible to go back to a File Upload Directory's Manipulations and change the configuration later, then synchronize the whole directory to re-create the different generated version from the original file. You do this by going to
Files, editing an existing directory with the pencil icon that appears when you hover over a directory name, then using the 'refresh' icon button in the top-right.
You could do this simultaneously as creating the Channel itself, but given we've already planned for it, we'll go ahead and do this now, so it's ready to just assign when we come to create the Work Channel. It's useful to know because this is how you can manage Categories after launch too.
Categories from the main menu and click Add New to add a Category Group

Save
NOTE: You'll see the
Savebutton has a dropdown with additional ways to save something in EE but with additional actions:
The normal
Savebutton will save what you're working on but leave you on the edit page so you can make additional changes after you save.Save & Newwill save whatever you're editing and open the screen to create a new one (regardless of what that is - it could be an entry, category, category group, etc.). ThenSave & Closewill save what you're editing but close that screen and typically take you back up a step depending on what you're editing. In this case, if youSave & Closeinstead ofSave, it'll take you to the Categories main page, which because there's only one Category Group, will go ahead and select it for you.
New Category to add a category to the group, providing at least a category name, which will auto-generate the category's URL Title, which will be used in the URLs, e.g. example.com/work/category/graphic-design
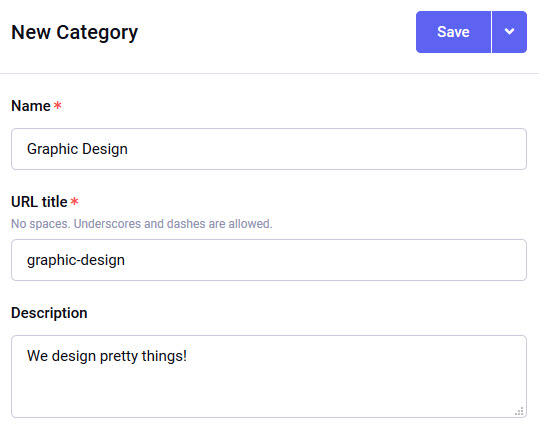
NOTE: You can re-order and nest categories by clicking and dragging the hamburger icon:
Particularly with new projects where you've done the planning and know what Fields you need, it's worth creating all the Fields before creating Channels, but of course, you can always create new Fields later and associate them with Field Groups or Channels directly later on. EE also allows you to create Fields and Field Groups on the fly as you're creating a Channel, and you may prefer to work this way, so for this tutorial, I'll use both methods. First, we'll create the majority of our Fields and Field Groups, but we'll deliberately skip the Homepage Fields so that in the next step, we can add those at the same time as creating the Homepage Channel. Similarly, with our two Field Groups (Work and Pages), we'll create Fields first for one and the group for the other. In both cases, which way you do it doesn't matter so long as everything is associated correctly.
Go to the Developer from the main menu, then go to Developer > Fields :
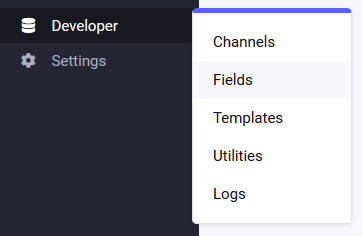
and note we have no Fields or Field Groups yet. So first, we'll create some stand-alone fields that aren't in any groups. For each one, the process is:
Developer > Fields, click the blue New Field button in the top-right

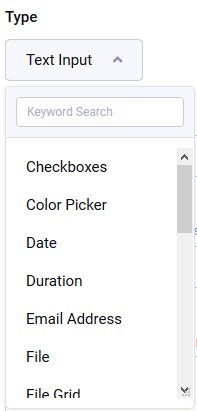
short_name is automatically generated - this is what we use in the templates to access that field
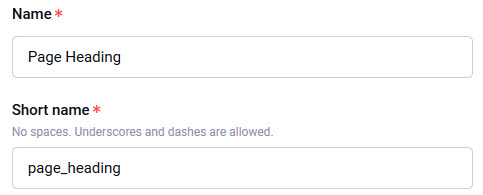
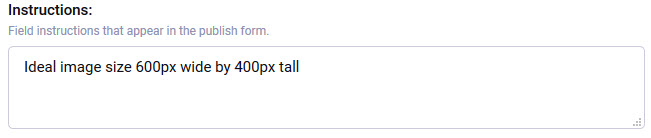
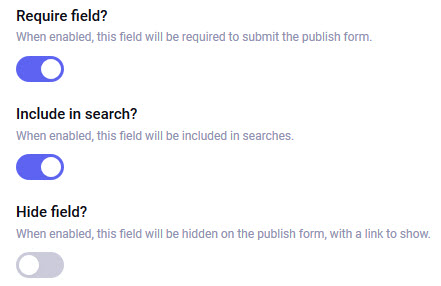
Save button at the bottom - remember, using the dropdown and choosing Save and New will save the current Field and create a new one allowing you to quickly add several Fields in a row.TIP: Even if the site you're building doesn't have a search function, pretend it does when building out the Fields and set the 'Include in search?' toggle accordingly right from the start - this way, when the client inevitably asks for a search function, you're already set. Make sure to set 'columns' inside Grid and File Grid fields to be searchable too.
For our specific example, use the same process above to create the following Fields. Unless otherwise specified, use the default settings/options. Remember, Grid and File Grid fields allow us to create sub-fields or 'columns,' so I've defined those below too:
Note: Each Grid field must have at least one 'grid field' (or sub-field). When creating a new Grid field, the first sub-field is there for you to populate, then use the
+button to add additional ones. You can also expand/collapse, reorder, duplicate and delete columns using the little icons:
NOTE: In this example, we've made some of the columns (or sub-fields) 'required,' but not the main Grid field itself. This means that content editors could omit adding an Address completely, but if they do 'add a row' to the Grid field, then the columns inside that row we've marked as required would indeed be required… but they could delete the whole row and be allowed to save.
While we're creating individual fields, we'll also go ahead and create the fields that will be accessible to our Page Builder Fluid Field. Remember that a Fluid Field can be assigned to a channel and give the editor the ability to add different fields in whatever order they'd like. So go ahead and repeat the process above for the following Fields, but manually update the short_name to start with "ff_" so we can identify fields intended to be used inside a Fluid Field:
Note: We're setting both the minimum and the maximum rows to 1 deliberately - because this field will be available as a Fluid Field, the user can add multiples in a row if they wish - we're just using the Grid to allow us to group a few different Fields as one.
NOTE: For basic layouts, I plan to use the Bootstrap framework, so for the Width options here, we're going to set the value based on the class that Bootstrap Grid uses within a 'row' and then add that value as a class directly in the template. You'll see this working when we get to building this out in the templates.
Set Value/Label Pairs to:
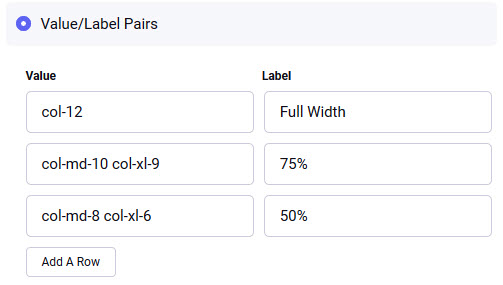
NOTE: Here, we'll use Radio Buttons just so you can see a different fieldtype, and we'll populate the items differently, too. Instead of using Value/Label Pairs, we'll populate the radio options manually and add classes in the template based on the setting. This is just another way to do it.
Select 'Populate the menu manually and add the following on separate lines:
White Black Grey
NOTE: This is just to showcase the Toggle field, which is a Boolean value that we can query in the templates.
NOTE: Because this is a File Grid, the first column is always a file. In this case, we'll be using an image, so we select 'Images Only' for the allowed file types, and we'll select the Page Images Upload Directory we created earlier.
NOTE: Relationship fields allow us to 'relate to' - and pull in - other entries. Our primary use case for this Field is to highlight specific Work entries on the Services sub-pages.
NOTE: This time, our File Grid will be holding documents, so we'll utilize our Documents Upload Directory we created earlier and allow 'All' filetypes.
Now that we have our Fields created, which we want accessible to the Page Builder, we can create the Page Builder field itself. Following the same steps as before:
Developer > Fields then click the blue New Field button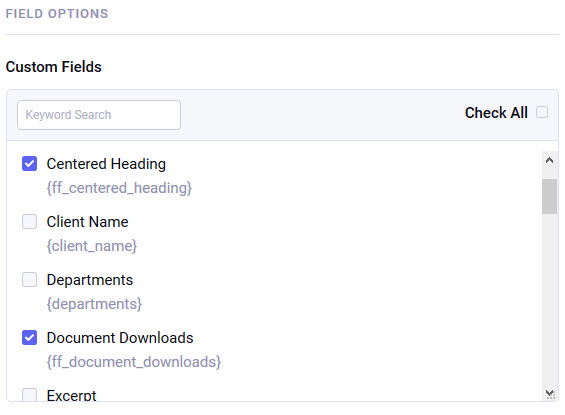
Save & Close by using the dropdown next to the Save buttonNOTE: A Fluid Field is just like any other field in that it must be assigned to a Channel (or a Field Group that is assigned to a Channel) before it can actually be used.
In our planning stage, we defined two Field Groups we would utilize, so we'll create those next. For our Pages Field Group, all the fields already exist, so it's just a matter of assigning all the fields while creating the group:
Developer > Fields, then under the "Field Groups" heading in the left sidebar, click the blue New button:
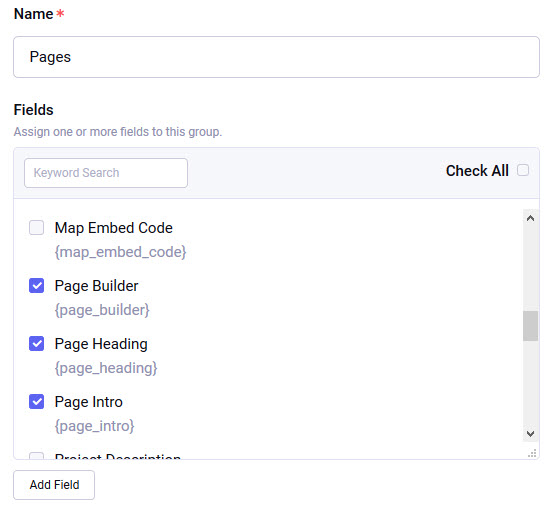
Save & Close - it's that simple!For the Work Field Group, we deliberately didn't create the fields individually earlier to show you how EE lets you do this on the fly:
Developer > Fields and again, under the "Field Groups" heading in the left sidebar, click the blue New buttonAdd Field button at the bottom of the list of existing fields:

Developer > Fields > New Field - adding a Field here automatically creates the Field and includes it in the group we're creating.Using this method, we'll go ahead and create all of our Work Channel Fields. Looking back at our Content Model plan though, we'll be using several of EE's Default Fields, so the Project Title, Entry Date, and Categories don't need to be created. Additionally, we will be re-using the Page Heading field we created earlier, so we only need to create the following:
NOTE: The reason we explicitly named this field Work Images is that we've limited it to only using the Work Images Upload Directory. If you needed another field for images that used a different directory, you'd need to create another separate field.
Remember we also want to re-use the Page Heading field we created earlier, so once you're done adding new fields to the Work Field Group, go back to Developer > Fields and in the left sidebar you can see the two Field Groups we created. Clicking on the name allows you to see (and search if you need to) the fields that are assigned to that group, but the little pencil icon button that appears when you hover over the name is where you can go to edit the field assignments:
So the final step here is to click the pencil icon next to the Work Field Group and make sure Page Heading is also checked in the list of Fields assigned to this group, then Save the Field Group changes:
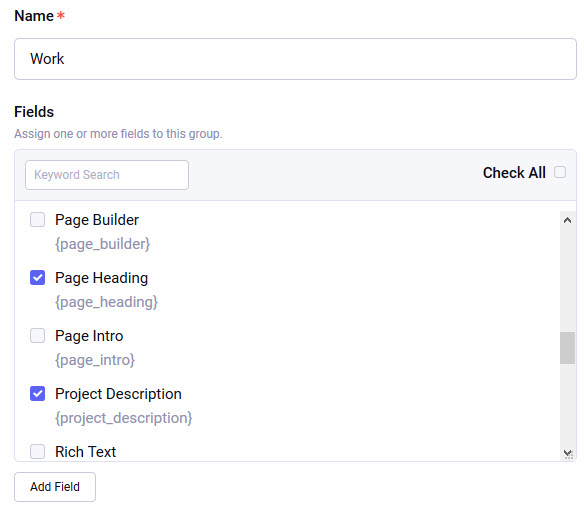
NOTE: Remember, I've deliberately not yet created the Field for the Homepage Hero Carousel simply so I can show you the alternative way of creating Fields while creating a Channel, which we'll do in the next chapter.
So now we have all of our Fields setup. In the next installment, we'll continue building our Content Model by setting up the Channels and actually adding content so we have something to output in our templates. We'll also take a look at "Publish Layouts," which are EE's way of letting you organize how the Fields in each Channel appear when editing an Entry.
In the last chapter, we created the bulk of our Content Model, but we can't add any content to those fields until we connect those Fields and Field Groups to Channels to create actual Entries. In this chapter, we'll tie everything together by creating the Channels so we can create content to pull through in the templates.
Because we've done all the groundwork, this step will go pretty quick. The general steps to creating a channel are:
Developer > Channels and click the blue New Channel button in the top-right to add one
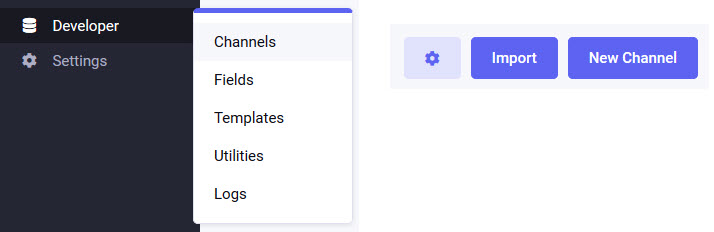


Following the steps above, go ahead and create all of our Channels:
 where we create our Hero Carousel File Grid Field on the fly:
 button
So now we have all our Channels set up and ready to start adding content! By now, you should be pretty familiar with the Fields, so let's go ahead and add some content.
The primary way to manage Entries in EE is through the Entries option in the main menu. When you hover over Entries, you'll get a flyout with options for each of our Channels where clicking on the name of each Channel takes you to the list of all Entries in that channel that you can edit and clicking the + button next to the name will create a new Entry in that Channel. If the Channel has reached its maximum number of Entries, you won't be able to add a new one, but of course, you can still view and edit existing Entries:
NOTE: You can also create new Entries when viewing a list of Entries in a specific Channel using the blue button in the top-right:
Entries in the main menu and click the + next to the Homepage Channel, and you'll see an empty Publish form button, delete rows using the
  button and add new rows by either dragging and dropping another image into the 'drop zone' or with either the
 Choose Existing or Upload New buttons:

Save button
NOTE: No changes will be made to the database unless you click the
Savebutton or one of the options under theSavedropdown!
Follow the same steps above to create several Work Entries, adding new Entries via Entries > Work. Things to note as you do this:
Save your Entry with a required field left blank, you'll see errors indicated by both the Tab the error is on and any fields where an error occurred turning redSave button or one of the options under the Save dropdownDon't spend too long on this - just use a bunch of dummy text as the content you add isn't important here - we're just filling up the content so we have something to output to the templates in the next chapter.
Go ahead and do the same thing to create all of our other pages:
Again, don't worry too much about the content itself; just get content in there to have something to output. When adding the About page, go ahead and add at least one of each of the individual fields to our Page Builder Fluid Field so that we have all of them present on one page, which we'll focus on when building out the templates for the Page Builder. Feel free to re-use individual fields like Rich Text and Rich Text & Image but with different options selected.
While adding content to the About and Service pages, you'll notice the Page Builder field is empty. Remember, a Fluid Field lets the content editor add content by adding individual fields in whatever order they want. Remember, we set up several individual fields that we made available to our Page Builder. To add content, use the Add dropdown, and when you click it, you'll see you can choose from the individual fields we set up to be accessible here. Here are some tips on using a Fluid Field:
Add dropdown at the very bottom of the Page Builder field - OR - at the right side of each field (next to the trash icon). If you use any of these Add dropdowns, the new field you select will be added underneath the field that contained the dropdown you usedYou may have also noticed that wherever we have File or File Grid fields, you have access to the File Manager, which is where you upload images and documents, but it's worth noting a few things:
Choose Existing button. When looking at existing files:
 and
and  buttons
show dropdownUpload New File at this point tooIf you ever try to upload a file (whether it be an image or document) to any directory where that exact filename already exists in that directory, you'll get a 'conflict,' and you'll have to resolve it using one of three options.
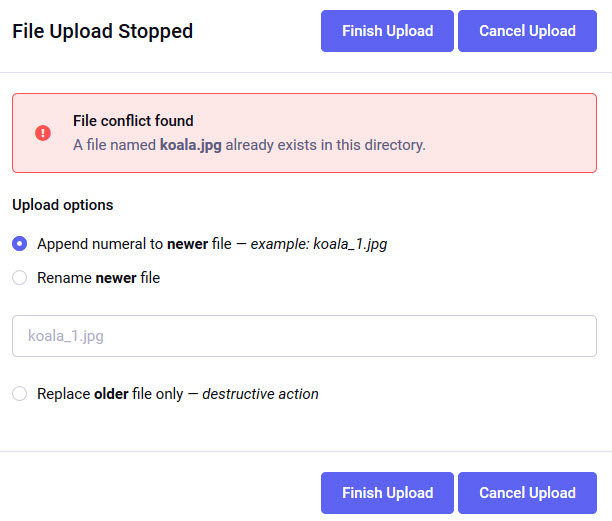
Let's say we were uploading the file koala.jpg, and it already exists in the directory we're trying to upload to. The options are:
koala_1.jpg (or koala_2.jpg if that already exists and so on)menu.pdf or replacing koala.jpg to update it anywhere it's already being used. In these scenarios, we don't want to have to go back through the site to update all the links, so replacing the file is ideal.If there's a conflict when dragging & dropping files into the 'drop zone' of a File or File Grid Field, you'll have to click the Resolve Conflict button to launch the popup where you can decide how to resolve it:
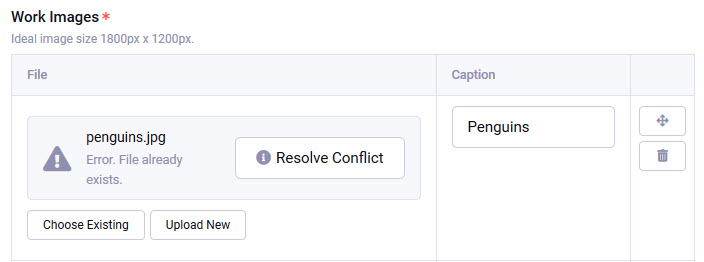
NOTE: Following on from above, it's good to consider your file names before you upload them, particularly for files that might ever need to be updated. For example,
Menu-July-2020.pdfis a bad choice because as soon as you have to update the file, you'll also have to go back through the site, update all the links to it, and search engines that had indexed it will be linking to an old file. It also does not indicate where it's from or what kind of menu it is. Instead, consider something likeRestaraunt-Name-Current-Dinner-Menu.pdf, which you can just replace as necessary but without ever changing the public URL.
In previous steps, we've created Fields and Field Groups and then assigned those to individual Channels to establish what Fields are available when adding or editing Entries. However, depending on how and when you created and assigned various Fields, you may have noticed that the Fields might not be ordered in a logical way for your content editors. Additionally, you will undoubtedly add fields over time, and new Fields are just added at the bottom of the list, which may not be ideal. Generally speaking, it makes sense to order the fields in a Channel in the same order they're utilized in the output on the page.
Publish Layouts let us optimize the editing experience by reordering Fields available to each Channel and grouping fields into tabs. By default, EE Channels have 4 tabs we touched on in the last step:
However, these can easily be customized on a per-Channel basis. How you do it is up to you, but your goal should be to give the best editing experience to your content editors.
To create or edit Publish Layouts:
Developer > Channels in the main menu, then use the  button towards the far-right of any Channel to view or edit the Publish Layouts for that Channel
New Layout button to create a new one, then name your Layout (which is for your reference only - editors don't see this) check the Super Admin role:

Make whatever changes you'd like, such as:
NOTE: You can't hide Fields that are Required
Add Tab button in the top-right - and delete Tabs you've added yourself with the trash can icon
NOTE: You can't hide or delete Tabs that have Required fields in them
Save and repeat for each of your ChannelsNOTE: You can also set up different Publish Layouts for different Member Roles if you have different types of CMS users. We aren't covering that in this tutorial, but it's worth being aware of.
At this point, we have our Content Model built out in ExpressionEngine and have created our Channels and Entries in those channels with actual content. The next step is to build out our Templates, which is how EE outputs the content to the browser when certain URLs are requested. Templating is where we actually start seeing things come together, so let's get started!
In this chapter, we’ll be laying the foundations for working with EE templates. Technically a ‘template’ is just a container that outputs information. You might be tempted to think each template is a single page, but as we go through this tutorial, you’ll see they’re so much more than that and can be used in several different ways. Take the time to read through EE’s Template Overview page, then come back and continue.
The key takeaway is this:
“Templates can be considered as a single page of your site, but they’re much more than that. In ExpressionEngine, a template can be any of the following:
- An entire webpage of your site.
- A sub-section of your site, like a header or footer.
- A page that can output various information types (RSS, CSS, HTML, XML, etc.) Because a Template is just a container that outputs information, you can create Templates for any type of data you need to present (RSS, CSS, HTML, XML, etc.). Templates can also be a smaller component of your page. Through the use of the Embed Tag you can insert a Template into another Template.”
site/index TemplateAssuming you actually did read the Docs, you’ll have also seen that EE templates are stored in Template Groups and use a default routing path like example.com/template_group/template, but there are a few things worth noting:
index.html from the group identified from the 1st segment will be loaded, e.g. example.com/work will load the work/index templateexample.com/work/example-project, but the second segment doesn’t have a correlating template, then EE will load the index.html template as a fallback - this is useful because we can use that second segment to identify individual entriesindex.html template from the default Template Group will be loadedexample.com/work/category/graphic-design would load the work/category template (if it exists), and inside that template, we would have access to {segment_3} which we can use to actually decide which category to show - more on this laterNOTE: EE references templates by group and template name without the group and template extensions, so in the future, I’ll refer to the
site.group/index.htmltemplate assite/index
So the first thing we’ll do is create our default Template Group and we’ll use the index.html template that’s generated when we create the group for our Homepage.
Developer > Templates from the main menu and note there are no Template Groups found. Use the blue New button to add our first Template Group: 
site as we'll use it for various global templates later on - use all lowercase for both template groups and template names. Then click Save Template Group to save.index.html template inside the group, and because it's the default group, this will be the template that loads for example.com. These groups and templates are found in the filesystem at /system/user/templates/default_site/site.group directory and edit the index.html template. Then just add "Hello world!" and save it.
NOTE: You can edit templates within the EE Control Panel if you wanted or were in a pinch by clicking the name of the template or the 'pencil' icon under the 'Manage' column:
Template changes will automatically sync regardless of where you edit them; however, working with a text editor is much more efficient, so recommended.
example.com (or whatever your setup is to get to the webroot) and note that our index.html template is now rendering - you should see your "Hello world!"
site/index TemplateNow that we can actually load a template and see the output, let’s expand on it so we have a workable framework. Remember, for this tutorial, we’re not going to get fancy with the frontend - once you have content output, you can always go back through and implement custom styles or integrate a pre-coded HTML ‘theme’ or however you typically work. In this tutorial, we will use the basic features of Bootstrap.
<head>, update the <title> and add your own stylesheet after Bootstrap’s styles - for simplicity, I’ve just put the styles.css file in the webrootSo far, you should have something like this:
<!doctype html>
<html lang="en">
<head>
<!-- Required meta tags -->
<meta charset="utf-8">
<meta name="viewport" content="width=device-width, initial-scale=1, shrink-to-fit=no">
<!-- Bootstrap CSS -->
<link rel="stylesheet" href="https://stackpath.bootstrapcdn.com/bootstrap/4.5.0/css/bootstrap.min.css" integrity="sha384-9aIt2nRpC12Uk9gS9baDl411NQApFmC26EwAOH8WgZl5MYYxFfc+NcPb1dKGj7Sk" crossorigin="anonymous">
<link rel="stylesheet" href="/styles.css">
<title>My Portfolio Site</title>
</head>
<body>
<header>
<div class="container">
<a class="logo" href="/"><img src="/images/example.png" alt="Example" /></a>
<ul class="nav">
<li><a href="/services">Services</a></li>
<li><a href="/work">Work</a></li>
<li><a href="/about">About</a></li>
<li><a href="/contact">Contact</a></li>
</ul>
</div>
</header>
<section class="container">
<h1>Welcome To My Portfolio Site</h1>
</section>
<footer>
<div class="container">
<a class="logo" href="/"><img src="/images/example.png" alt="Example" /></a>
<ul class="nav">
<li><a href="/services">Services</a></li>
<li><a href="/work">Work</a></li>
<li><a href="/about">About</a></li>
<li><a href="/contact">Contact</a></li>
</ul>
</div>
<div class="copyright">
<div class="container">
© 2020 Example Portfolio Site All rights reserved unless explicitly stated.
</div>
</div>
</footer>
<script src="https://code.jquery.com/jquery-3.5.1.slim.min.js" integrity="sha384-DfXdz2htPH0lsSSs5nCTpuj/zy4C+OGpamoFVy38MVBnE+IbbVYUew+OrCXaRkfj" crossorigin="anonymous"></script>
<script src="https://stackpath.bootstrapcdn.com/bootstrap/4.5.0/js/bootstrap.min.js" integrity="sha384-OgVRvuATP1z7JjHLkuOU7Xw704+h835Lr+6QL9UvYjZE3Ipu6Tp75j7Bh/kR0JKI" crossorigin="anonymous"></script>
</body>
</html>
To add some basic styles, add the following to styles.css in the webroot:
/* http://meyerweb.com/eric/tools/css/reset/ v2.0 | 20110126 License: none (public domain) */
html, body, div, span, applet, object, iframe, h1, h2, h3, h4, h5, h6, p, blockquote, pre, a, abbr, acronym, address, big, cite, code, del, dfn, em, img, ins, kbd, q, s, samp, small, strike, strong, sub, sup, tt, var, b, u, i, center, dl, dt, dd, ol, ul, li, fieldset, form, label, legend, table, caption, tbody, tfoot, thead, tr, th, td, article, aside, canvas, details, embed, figure, figcaption, footer, header, hgroup, menu, nav, output, ruby, section, summary, time, mark, audio, video { margin: 0; padding: 0; border: 0; font-size: 100%; font: inherit; vertical-align: baseline; }
article, aside, details, figcaption, figure, footer, header, hgroup, menu, nav, section { display: block; }
body { line-height: 1; }
ol, ul { list-style: none; }
blockquote, q { quotes: none; }
blockquote:before, blockquote:after,
q:before, q:after { content: ''; content: none; }
table { border-collapse: collapse; border-spacing: 0; }
/* Typograpy */
body { font-size: 18px; line-height: 1.3; }
h1, .h1 { font-size: 2em; margin-bottom: 20px; color: #0d86d6; }
h2 { font-size: 1.5em; margin-bottom: 15px; color: #0d86d6; }
h2 small { font-size: 0.7em; }
h3 { font-size: 1.2em; margin-bottom: 12px; }
img { max-width: 100%; height: initial; }
p { margin-bottom: 15px; }
em { font-style: italic; }
strong { font-weight: bold; }
a { color: #0d86d6; }
a:hover, a:focus { color: #0d86d6; text-decoration: underline; }
.button { background: #0d86d6; color: #FFF; padding: 5px 10px; }
.button:hover, .button:focus { background: #006cb9; color: #FFF; text-decoration: none; }
/* Example Photography Site styles */
header { background: #CCC; padding: 10px 0; margin-bottom: 30px; }
footer { background: #CCC; padding-top: 10px; margin-top: 30px; }
.copyright { background: #BBB; padding: 10px 0; margin-top: 10px; }
header .container, footer .container { display: flex; justify-content: space-between; align-items: center; }
.logo { display: inline-block; }
.nav { display: inline-flex; }
.nav a { padding: 10px; font-size: 1.1em; }
.nav a:hover, .nav a:focus { background: #0d86d6; color: #FFF; text-decoration: none; }
.carousel { margin: 45px 0; }
.carousel-caption { background: rgba(0,0,0,0.75); padding: 20px; }
.carousel-caption * { color: #FFF; }
iframe { width: 100%; max-width: 100%; }
.row { margin: 25px 0; }
.row > div.Black { background: #000; padding: 30px 30px 15px; color: #FFF; }
.row > div.Black *:not(a) { color: #FFF; }
.row > div.Grey { background: #CCC; padding: 30px 30px 15px; }
.gallery > div { margin-bottom: 15px; }
.gallery > a { display: block; margin: 15px 0; }
form input, form textarea { width: 100%; padding: 5px 10px; }
.paging a { display: inline-block; background: #F2F2F2; padding: 2px 8px; margin: 0 2px; }
.paging strong { display: inline-block; background: #0d86d6; color: #FFF; padding: 2px 8px; margin: 0 2px; }
Again, we’re not trying to get fancy with styling, and for simplicity, we’re just using plain ol’ CSS. You can, of course, build with whatever structure, workflow, compilers, etc. that you want, but we’re keeping it simple for this tutorial.
Now that we have global elements like the header and footer, we don’t ever want to have to duplicate that code, so we’ll implement Template Layouts right from the beginning.
Developer > Templates then used the New Template Group button to do this in the CP, but you can also add files to the filesystem, so try it that way this time:
layouts.group folder under /system/user/templates/default_site/_wrapper.html - the underscore is a convention indicating this template won’t be referenced by a URL. Instead, it’s a private template we’ll only be referencing from other templatessite/index template to move everything except what’s inside our ‘container’ section to our layouts/_wrapper templatelayouts/_wrapper, add the {layout:contents} variable where we want page contents to appear (i.e., inside our ‘container’ section)site/index template, specify what layout to use on the very first line with {layout="layouts/_wrapper"}NOTE: If you now go back to
Developer > Templates, you should see the new Template Group, and if you click into that, you should see the new_wrapperTemplate. You’ll also see the defaultindextemplate, which we won’t be using, but that’s ok.
So now you should have two templates that have content in them:
layouts/_wrapper that handles all the shared code - ie, everything except our <h1>:<!doctype html>
<html lang="en">
<head>
<!-- Required meta tags -->
<meta charset="utf-8">
<meta name="viewport" content="width=device-width, initial-scale=1, shrink-to-fit=no">
<!-- Bootstrap CSS -->
<link rel="stylesheet" href="https://stackpath.bootstrapcdn.com/bootstrap/4.5.0/css/bootstrap.min.css" integrity="sha384-9aIt2nRpC12Uk9gS9baDl411NQApFmC26EwAOH8WgZl5MYYxFfc+NcPb1dKGj7Sk" crossorigin="anonymous">
<link rel="stylesheet" href="/styles.css">
<title>My Portfolio Site</title>
</head>
<body>
<header>
<div class="container">
<a class="logo" href="/"><img src="/images/example.png" alt="Example" /></a>
<ul class="nav">
<li><a href="/services">Services</a></li>
<li><a href="/work">Work</a></li>
<li><a href="/about">About</a></li>
<li><a href="/contact">Contact</a></li>
</ul>
</div>
</header>
<section class="container">
{layout:contents}
</section>
<footer>
<div class="container">
<a class="logo" href="/"><img src="/images/example.png" alt="Example" /></a>
<ul class="nav">
<li><a href="/services">Services</a></li>
<li><a href="/work">Work</a></li>
<li><a href="/about">About</a></li>
<li><a href="/contact">Contact</a></li>
</ul>
</div>
<div class="copyright">
<div class="container">
© 2020 Example Portfolio Site All rights reserved unless explicitly stated.
</div>
</div>
</footer>
<script src="https://code.jquery.com/jquery-3.5.1.slim.min.js" integrity="sha384-DfXdz2htPH0lsSSs5nCTpuj/zy4C+OGpamoFVy38MVBnE+IbbVYUew+OrCXaRkfj" crossorigin="anonymous"></script>
<script src="https://stackpath.bootstrapcdn.com/bootstrap/4.5.0/js/bootstrap.min.js" integrity="sha384-OgVRvuATP1z7JjHLkuOU7Xw704+h835Lr+6QL9UvYjZE3Ipu6Tp75j7Bh/kR0JKI" crossorigin="anonymous"></script>
</body>
</html>
site/index which is effectively our Homepage template, and so far, it’s incredibly simple:{layout="layouts/_wrapper"}
<h1>Welcome To My Portfolio Site</h1>
Now when you visit example.com, EE loads our site/index template, which uses our layouts/_wrapper template and combines the two templates to give the result we want, but in a way, we can reuse the _wrapper for other pages and stay DRY. You should see exactly what you saw earlier. For a deeper look into Template Layouts, check out this video.
So now we’ve utilized Template Layouts to separate our overall page wrapper from individual template code, but we still have some duplicated content in our wrapper.
Notice the menu links are duplicated in the header and footer, so if those ever need to be updated, you’d have to do it in two places. This is the perfect place to use a Template Partial, which are “are small bits of reusable template or tag parts,” which is perfect for this kind of thing. To start with, we’re just going to have static HTML, but it’s worth noting that partials can contain dynamic content too. Anything that could go in a regular Template can also go in a Template Partial and be reused.
So to set this up for our scenario:
Developer > Templates, then toward the bottom of the left sidebar, go to Template Partials and click the blue Create New buttonpar_menu_links_list<ul> tag, then save the partiallayouts/_wrapper template, replace the duplicated <ul> code with our new partial variable: {par_menu_links_list}, eg: <header>
<div class="container">
<a class="logo" href="/"><img src="/images/example.png" alt="Example" /></a>
{par_menu_links_list}
</div>
</header>_partials - partials also get saved as files, so just like any other template, you can edit these with your text editor too. You can also create and use partials by adding .html files into this directory.Template Variables are similar to Template Partials in how they’re created and used within templates, but they’re designed to hold static information that we might want the content editors to be able to change. Take a look at the Template Variable documentation do understand the differences between variables and partials. For naming conventions here, I always start with var_, in our example, go ahead and:
Developer > Templates then in the left sidebar, click Template Variables and click the blue Create New buttonvar_copyright_text and paste into the Content: "All rights reserved unless explicitly stated." and savelayouts/_wrapper template, replace that text with {var_copyright_text}, eg:
<div class="copyright">
<div class="container">
© 2020 Example Portfolio Site {var_copyright_text}
</div>
</div>
ExpressionEngine also has several Global Variables we can use - it’s worth reviewing these , but specifically, in the code snippet above, we can use {site_name} to pull through the Site Name from the Settings and {current_time} with some Date Formatting to display the current year, with formatting it looks like this: {current_time format="%Y"}.
So pulling all of this together, our final layouts/_wrapper template looks like this:
<!doctype html>
<html lang="en">
<head>
<!-- Required meta tags -->
<meta charset="utf-8">
<meta name="viewport" content="width=device-width, initial-scale=1, shrink-to-fit=no">
<!-- Bootstrap CSS -->
<link rel="stylesheet" href="https://stackpath.bootstrapcdn.com/bootstrap/4.5.0/css/bootstrap.min.css" integrity="sha384-9aIt2nRpC12Uk9gS9baDl411NQApFmC26EwAOH8WgZl5MYYxFfc+NcPb1dKGj7Sk" crossorigin="anonymous">
<link rel="stylesheet" href="/styles.css">
<title>My Portfolio Site</title>
</head>
<body>
<header>
<div class="container">
<a class="logo" href="/"><img src="/images/example.png" alt="Example" /></a>
{par_menu_links_list}
</div>
</header>
<section class="container">
{layout:contents}
</section>
<footer>
<div class="container">
<a class="logo" href="/"><img src="/images/example.png" alt="Example" /></a>
{par_menu_links_list}
</div>
<div class="copyright">
<div class="container">
© {current_time format="%Y"} {site_name} {var_copyright_text}
</div>
</div>
</footer>
<script src="https://code.jquery.com/jquery-3.5.1.slim.min.js" integrity="sha384-DfXdz2htPH0lsSSs5nCTpuj/zy4C+OGpamoFVy38MVBnE+IbbVYUew+OrCXaRkfj" crossorigin="anonymous"></script>
<script src="https://stackpath.bootstrapcdn.com/bootstrap/4.5.0/js/bootstrap.min.js" integrity="sha384-OgVRvuATP1z7JjHLkuOU7Xw704+h835Lr+6QL9UvYjZE3Ipu6Tp75j7Bh/kR0JKI" crossorigin="anonymous"></script>
</body>
</html>
Now we have a functioning template, but we currently only have one page working, and there’s not even any of our content that we carefully built up and added to the site through the Control Panel. In the next chapter, we’ll continue working with our site/index template and build out our other ‘Single Entry’ templates too.
Remember back in our planning chapter when we touched on the difference between Single Entry and Multi-entry content types. Our Content Model has two Channels that hold multiple entries (Services that holds the main Services landing page plus several sub-pages and Work that holds all of our portfolio entries). Still, the Homepage, About page, and Contact page are all examples of Single Entry content, and this is a better place to start actually building.
Before we dive in, though, I highly suggest taking the time to read through EE’s own documentation on the Template Language and while you’re there, note that there is very extensive documentation on EE Templates - make sure to utilize the documentation as you’re learning.
We already have a working template for our Homepage, our site/index template, but so far the only
content is hard-coded, so we want to update that to pull in the fields we built out, assigned to the Homepage
Channel, and then populated in earlier chapters.
We retrieve content stored inside our Channels using EE’s most powerful tag: the Channel Entries Tag. At a high level, this tag can either output a single Entry or loop through multiple Entries in a Channel (or multiple Channels if needed) and outputs whatever content you want. The tag can accept certain parameters to further refine what Entries get included in the loop, but its most basic usage is very simple.
<h1> in site/index with the following, save, then
refresh your browser:
{exp:channel:entries}
<h1>{title}</h1>
{/exp:channel:entries}
The result is that the tag loops through literally all of our Entries (from all
Channels) and outputs everything between the opening and closing tags for each Entry in the
loop, so in this case, we get one <h1> tag populated with EE’s default
{title} ‘single
variable’ output to the page.
channel and limit parameters to the opening
exp:channel:entries tag:
{exp:channel:entries channel="homepage" limit="1"}
<h1>{title}</h1>
{/exp:channel:entries}
The result here is what we’re looking for - we just want to display one Entry from our Homepage Channel.
Technically we don’t need the limit here because our Homepage Channel is limited to 1 Entry,
but it’s a good habit to get into for Single Entry templates.
{page_intro} tag
right after our <h1>:
{exp:channel:entries channel="homepage" limit="1"}
<h1>{title}</h1>
{page_intro}
{/exp:channel:entries}
{if} tag:
{if condition} data to show if condition is met {/if}
which can also be used with {if:else} and {if:elseif}:
{if condition_1}
Condition 1 is true
{if:elseif condition_2}
Condition 1 is false, but Condition 2 is true
{if:else}
Neither condition is true
{/if}
So inside our <h1> tag, we will check to see if the Page Heading exists
and if so, display that, otherwise, output the default EE Title:
{exp:channel:entries channel="homepage" limit="1"}
<h1>
{if page_heading}
{page_heading}
{if:else}
{title}
{/if}
</h1>
{page_intro}
{/exp:channel:entries}
NOTE: We don’t need a conditional around our Page Intro field - because this field is Rich Text, we don’t need any surrounding HTML because the HTML is part of the field output based on what the user enters into the editor. If nothing is added to the Page Intro field, the
{page_intro}variable tag will just not display anything at all.
{exp:channel:entries} tag has an opening
and closing tag to loop through all the Entries, Grid and File Grid fields
have opening and closing tag and loop through all the rows of content.
NOTE: Again, like the
{exp:channel:entries}tag, opening tags for Grid and File Grid fields can also accept parameters to filter the output - it’s definitely worth keeping in mind the documentation for Fieldtypes as you’ll use this a lot.
The opening and closing tags use the ‘short name’ of the main field (in our case hero_carousel),
and then in each row, or iteration through the loop, we have access to the column (or sub-field) data via a
tag that combines the main field short name and the column short name like this:
{grid_field:column_field}.
Note: From now on, I’ll deliberately omit large chunks of code and only focus on the parts I’m discussing to limit the length of code in the tutorial.
Go ahead and add this to your template, above our <h1> but still inside the opening
exp:channel:entries tag, then save and refresh your browser:
<div class="carousel">
{hero_carousel}
<div div class="slide">
<h2>{hero_carousel:heading}</h2>
<p>{hero_carousel:text}</p>
<p>{hero_carousel:file}</p>
</div>
{/hero_carousel}
</div>
There are a few things to note in the output here:
{file} and
is always ‘required,’ but the other two columns (Heading and Text) are not required in
this case, so we want to add conditionals to handle thatexample.com/images/uploads/hero_banners/slide1.jpg).
But you can also use a variable pair and access certain info from the file separately - check out the documentation on the File
Fieldtype.{count} (i.e.,
which row we’re in) and {total_rows} (i.e., how many total rows are being
returned).So to clean this up and finish this off, try this instead of above:
{hero_carousel}
{if hero_carousel:count == 1}
<div class="carousel">
{/if}
<div class="slide">
{if hero_carousel:heading}<h2>{hero_carousel:heading}</h2>{/if}
{if hero_carousel:text}<p>{hero_carousel:text}</p>{/if}
<p>{hero_carousel:file wrap="image"}</p>
</div>
{if hero_carousel:count == hero_carousel:total_rows}
</div>
{/if}
{/hero_carousel}
Now we’re opening the ‘carousel’ <div> in the first row of the loop and closing
it on the last, but for all rows in the loop, we output the ‘slide’ <div>
and are checking if the Heading and Text is populated before we output it and we’ve used
the handy wrap parameter on the File field that outputs our image!
The last step is here is to actually get this looking like a carousel - to do this, we’ll be using the Bootstrap Carousel with
Captions. Just like before, we’ll still only output the starting HTML the first time through the loop and
the closing HTML in the final time through, so the only part that gets output for each row is the
‘carousel-item’ <div>.
A couple more things to note:
wrap parameter any more - instead,
we’ll update this to use the ‘variable pair’ so we can access the {url} and
{title} separately
{file_field:manipulation} or in this specific case
{hero_carousel:file:large}
{file_field}
<img src="{url:manipulation}" alt="{title}" width="{height:manipulation}" height="{height:manipulation}" />
{/file_field}
So to finish this off, putting all of this together and updating our Hero Carousel code, our final code in our template should be like this:
{hero_carousel}
{if hero_carousel:count == 1}
<div id="carouselExampleCaptions" class="carousel slide" data-ride="carousel">
<div class="carousel-inner">
{/if}
<div class="carousel-item {if hero_carousel:count == 1}active{/if}">
{hero_carousel:file}
<img src="{url:large}" class="d-block w-100" alt="{title}">
{/hero_carousel:file}
<div class="carousel-caption d-none d-md-block">
{if hero_carousel:heading}<h2>{hero_carousel:heading}</h2>{/if}
{if hero_carousel:text}<p>{hero_carousel:text}</p>{/if}
</div>
</div>
{if hero_carousel:count == hero_carousel:total_rows}
</div>
<a class="carousel-control-prev" href="#carouselExampleCaptions" role="button" data-slide="prev">
<span class="carousel-control-prev-icon" aria-hidden="true"></span>
<span class="sr-only">Previous</span>
</a>
<a class="carousel-control-next" href="#carouselExampleCaptions" role="button" data-slide="next">
<span class="carousel-control-next-icon" aria-hidden="true"></span>
<span class="sr-only">Next</span>
</a>
</div>
{/if}
{/hero_carousel}
NOTE: In this example, we’re using the variable pair for the ‘file’ column of our Hero Carousel and separately outputting the
{url:large}variable (which is the URL to the large image Manipulation) and for thealtparameter we’re using the{title}variable, but note this is not the same{title}from our Channel Entry, it’s just one of the Template Tags available to the File fieldtype and outputs the Title metadata assigned to the file when it was first uploaded.
I’ve added some basic styling to the stylesheet already, so this is looking good, and we can move on!
Our Homepage isn’t done yet though - we also want to showcase our latest 3 portfolio projects, so we need to set up
our Homepage template (site/index) to pull in this visiting content. To do this, we’ll use another
Channel Entries loop, just with different parameters set. In this case, to pull in ‘visiting’ content, we will:
channel="work" parameterlimit="3" parameterdynamic="no" parameter. By default, the EE Channel Entries tag sets some
parameters dynamically based on what’s in the URL, so specifying dynamic="no" tells the
Channel Entries Tag to completely ignore the URL, which we want to do in this case. (Read more about the
dynamic parameter here)example.com/work/sample-project where ‘sample-project’
is the URL Title of each Work Entry, so we will use EE’s Path
Variables to do this.<h2>Latest Projects</h2>
<div class="row">
{exp:channel:entries channel="work" limit="3" dynamic="no" orderby="date" sort="desc"}
<div class="col-4">
<h3><a href="{path='work/{url_title}'}">{title}</a></h3>
<p><em>{entry_date format="%F %d %Y"}</em></p>
{work_images limit="1"}
<img src="{work_images:file}" alt="{work_images:caption}" />
{/work_images}
{if client_name}
<h3>{client_name}</h3>
{/if}
<p>{excerpt}</p>
<p><a href="{path='work/{url_title}'}">Read More ></a></p>
</div>
{/exp:channel:entries}
</div>
There are a couple of things to note here too:
{/exp:channel:entries} tag we had before. If you ever needed to do that, you’d need to use
an Embedded Template - just be
careful doing this as loops inside loops could quickly get out of hand and adversely affect performance{entry_date format="%F %d %Y"}
- EE offers extensive Date Variable
Formatting options we can utilize to get the date output looking how we want itSo now we have our Homepage not only outputting the page-specific content we added but also looping through the first 3 Work entries and displaying limited info for each one with links to the full ‘detail’ page, which we’ll be building out later.
Now that we’ve run through an example of a Single Entry template using the Channel Entries Tag in detail
(excruciating detail?!), building out the next couple of templates won’t take anywhere near as long. Let’s start
with the Contact page. We want our Contact page to live at example.com/contact, so we need to set up
another Template Group, this time named "contact" and then the contact/index template for our
contact page:
Developer > Templates, then use the blue New button next to the
Template Groups heading in the left sidebar.
NOTE: Clicking
Create New Templatehere will add a new Template to our existingsitegroup, which is not what we want.
contact/index template and set the Template Layout we’re going
use with {layout="layouts/_wrapper"} on the very first line (just like we did for our
Homepage)site/index) with
the exception of the {hero_carousel} variable pair - because the Contact Channel doesn’t have
that field available to it. We also need to update the channel parameter to look for Entries in
the Contact Channel:
{exp:channel:entries channel="contact" limit="1"}
<h1>{if page_heading}{page_heading}{if:else}{title}{/if}</h1>
{page_intro}
{/exp:channel:entries}
example.com/contact in your browser
That wasn’t so bad! But we’re not quite done yet - the Contact Channel has a few new fields we haven’t worked with in Templates yet, so lets add those:
{address}
<h2>Address</h2>
<p>
{address:line_1}
{if address:line_2}<br />{address:line_2}{/if}
<br />{address:city}, {address:state} {address:zip_code}
</p>
{/address}
{departments}
{if departments:count == 1}<h2>Departments</h2>{/if}
<p>
<strong>{departments:name}</strong>
<a href="tel:+1-{departments:phone}">{departments:phone}</a>
<a href="mailto:{departments:email}">{departments:email}</a>
</p>
{/departments}
<iframe>. We could theoretically wrap it with HTML to make it responsive, in which case
we’d use a conditional to make sure it existed first, so if it didn’t, we wouldn’t have empty HTML tags, but
I’m not going to bother, and we can just slap {map_embed_code} into our
{exp:channel:entries} loop by itself.
So our final contact/index template should look like this:
{layout="layouts/_wrapper"}
{exp:channel:entries channel="contact" limit="1"}
<h1>{if page_heading}{page_heading}{if:else}{title}{/if}</h1>
{page_intro}
<div class="row align-items-center">
<div class="col-md-6">
{address}
<h2>Address</h2>
<p>
{address:line_1}
{if address:line_2}<br />{address:line_2}{/if}
<br />{address:city}, {address:state} {address:zip_code}
</p>
{/address}
{departments}
{if departments:count == 1}<h2>Departments</h2>{/if}
<p>
<strong>{departments:name}</strong>
<a href="tel:+1-{departments:phone}">{departments:phone}</a>
<a href="mailto:{departments:email}">{departments:email}</a>
</p>
{/departments}
</div>
<div class="col-md-6">
{map_embed_code}
</div>
</div>
{/exp:channel:entries}
Our last Single Entry template is our About page, and again, we’ll need a new Template Group so we can use the
about/index template to achieve our example.com/about URL:
Developer > Templates, then use the blue New button next to the
Template Groups heading in the left sidebarabout/index with your text editor, update the channel parameter to use
about and strip out the fields specific to the Contact channel (our Bootstrap
row with the Address, Departments and Map Embed Code):
{layout="layouts/_wrapper"}
{exp:channel:entries channel="about" limit="1"}
<h1>{if page_heading}{page_heading}{if:else}{title}{/if}</h1>
{page_intro}
{/exp:channel:entries}
Remember, a Fluid Field is a single field we can assign to a Channel that lets the content editor add multiple other fields to the page - in whatever order they want - and however many they want. In previous chapters, we planned out the fields available to our Page Builder and then set up those fields (and the Page Builder field itself) in the CP.
You can read up on the Template Tags for a Fluid Field here, but the syntax is kind of similar to a Grid field in that you have your main field variable pair, and inside that, you have your ‘sub-fields’ referenced with another variable pair with the concatenated field and sub-field short names, like this:
{fluid_field}
{fluid_field:sub_field}
...
{/fluid_field:sub_field}
{/fluid_field}
But the difference with a Fluid Field is that any content inside the sub-field is referenced
with the special {content} tag - which can be either a single variable
or a variable pair depending on the sub-field fieldtype. Any code inside this
inner {fluid_field:sub_field} variable pair will render each time
that sub-field is used within Fluid Field, regardless of whether the {content}
tag loops or not.
So in our example, the Centered Heading field is just a Text Input field, so would normally just need a single variable, so in our case, we can output the data within the Page Builder like this:
{page_builder}
{page_builder:ff_centered_heading}
{content}
{/page_builder:ff_centered_heading}
{/page_builder}
Of course, this just outputs the content with no styling, so we need to add HTML around it. Remember, all
code inside the {page_builder:ff_centered_heading} tag pair renders for each use. In
this case, we’ll just wrap a <h2> with a Bootstrap class to center it, and we’re done:
{page_builder}
{page_builder:ff_centered_heading}
<h2 class="text-center">{content}</h2>
{/page_builder:ff_centered_heading}
{/page_builder}
Our Rich Text field, however, is a Grid, which normally uses a variable pair to get
to the columns of the Grid, so our {content} tag needs to be used as yet
another variable pair and anything inside this pair is looped through for as many rows as there are
in the Grid:
{page_builder}
{page_builder:ff_rich_text}
{content}
...
{/content}
{/page_builder:ff_rich_text}
{/page_builder}
Then inside the {content} variable pair, you reference the individual fields with
{content:field_short_name}, so for our Rich Text field, try starting with this and
refresh to see how it looks:
{page_builder}
{page_builder:ff_rich_text}
{content}
{content:text}<br />
{content:width}<br />
{content:background}<br />
{content:center_content_container}
{/content}
{/page_builder:ff_rich_text}
{/page_builder}
Of course, this needs fleshing out - the Width, Background, and Center Content Container? fields aren’t intended to be displayed to the page but rather used in the HTML to adjust the display. Width is a Select Dropdown and Background is a Radio Button Group and in both cases, the content we have access to is the ‘value’ part of the Value/Label pairs we set up when creating these fields. We strategically set up both of those with actual class names. Center Content Container? is a Toggle field, which is a Boolean - either on (1) or off (0), so we can use a conditional to check that and add a class accordingly:
{page_builder}
{page_builder:ff_rich_text}
{content}
<div class="row {if content:center_content_container == 1}justify-content-center{/if}">
<div class="{content:width} {content:background}">
{content:text}
</div>
</div>
{/content}
{/page_builder:ff_rich_text}
{/page_builder}
So now we’ve seen two examples of how to build sub-field template code inside a Fluid Field,
but in both examples, I showed the main {page_builder} variable pair with just the individual
sub-field variable pair inside of it to make it easier to follow. To actually let the Page Builder
field render all of the sub-fields as the content editor mixes and matches them, we have to have all
sub-field variable pairs present inside one main {page_builder} pair. In other words, each of
the sub-fields available to our Fluid Field should have a corresponding variable pair
inside the main {page_builder} pair. So combining the two we’ve done so far, we get this:
{page_builder}
{page_builder:ff_centered_heading}
<h2 class="text-center">{content}</h2>
{/page_builder:ff_centered_heading}
{page_builder:ff_rich_text}
{content}
<div class="row {if content:center_content_container == 1}justify-content-center{/if}">
<div class="{content:width} {content:background}">
{content:text}
</div>
</div>
{/content}
{/page_builder:ff_rich_text}
{/page_builder}
And of course, this must be inside our About page template’s Channel Entries tag, so our
about/index template at this point should look like this
{layout="layouts/_wrapper"}
{exp:channel:entries channel="about" limit="1"}
<h1>{if page_heading}{page_heading}{if:else}{title}{/if}</h1>
{page_intro}
{page_builder}
{page_builder:ff_centered_heading}
<h2 class="text-center">{content}</h2>
{/page_builder:ff_centered_heading}
{page_builder:ff_rich_text}
{content}
<div class="row {if content:center_content_container == 1}justify-content-center{/if}">
<div class="{content:width} {content:background}">
{content:text}
</div>
</div>
{/content}
{/page_builder:ff_rich_text}
{/page_builder}
{/exp:channel:entries}
For the Document Downloads sub-field, this a File Grid, so it will look pretty similar to our last example, but this time, it could have multiple rows within the grid. I’ll also take the opportunity to showcase what we can do with a File field when using its variable pair (docs here).
NOTE: As we look to add the template code for more sub-fields available to our Page Builder, remember the code will also go inside the main
{page_builder}pair, but for the sake of space, I’ll just be showing the sub-field variable pair.
So for this sub-field, the template code to add to our {page_builder} field is:
{page_builder:ff_document_downloads}
<h2>Document Downloads</h2>
{content}
<p>
{content:file}
<a href="{url}" target="_blank">{content:title} ({extension}, {file_size:human})</a><br />
{/content:file}
{content:summary}
</p>
{/content}
{/page_builder:ff_document_downloads}
Things to note:
{content} variable pair only gets rendered once for
each use of the sub-field inside the Page Builder - so the <h2> will
only display once even if there are 30 files - unless the content editor adds the Document
Downloads filed to the Page Builder multiple times.
:human modifier per the docs.
This one will be pretty similar to our regular Rich Text sub-field - this time we used a
File Grid because each row contains an image. Remember we get access to the file
in a File Grid using the file short name, and just like in other Fluid
Field sub-fields, we reference that from within the {contact} variable pair and
using the two-part concatenated tag, i.e.: {content:file}.
We’re also going to check the content of our Image Position dropdown and add a Bootstrap class to flip the order if the users want the image on the right.
{page_builder:ff_rich_text_image}
{content}
<div class="row align-items-center {if content:image_position == 'right'}flex-md-row-reverse{/if}">
<div class="col-md-6">
<img src="{content:file:resize width='540'}" alt="{content:image_caption}" />
</div>
<div class="col-md-6">
{content:text}
</div>
</div>
{/content}
{/page_builder:ff_rich_text_image}
We’re almost there - this is the last sub-field! This sub-field uses a Relationship field
which allows the content editor to ‘relate to’ - or pull in - specific Entries from our
Work Channel. But remember, we’ve already built this functionality out in our Homepage
template, just there, we did it through a Channel Entries Tag. We can re-use that code and just adjust it so
that instead of looping through an {exp:channel:entries} loop, we loop through the selections
in the Relationship field. Here’s the documentation on
Relationships, but the syntax differs just a little big when referencing a
Relationship from inside a Fluid Field (see here).
So here we will re-use the second {exp:channel:entries} tag from our Homepage template
(site/index), but make the following changes:
{page_builder:ff_featured_work} sub-field variable
pair - remember anything inside this field gets rendered in each place the editor adds our
Featured Work sub-field to the Page Builder
{exp:channel:entries} tags to loop through the latest 3 entries.
This time, the entries included in the loop depend on the Relationship field, so
each selection is looped through in the {content} variable pair. So we just replace the
{exp:channel:entries} opening and closing tags with {content} and
{/content}
{content} variable pair, we have to reference them accordingly using
{content:field_name}, so we have to go through and add the content: part
to each of our individual fields before they’ll output
So here is our final code for this sub-field:
{page_builder:ff_featured_work}
<div class="row">
{content}
<div class="col-4">
<h2><a href="{path='work/{content:url_title}'}">{content:title}</a></h2>
<p><em>{content:entry_date format="%F %d %Y"}</em></p>
{content:work_images limit="1"}
<img src="{work_images:file}" alt="{work_images:caption}" />
{/content:work_images}
{if content:client_name}
<h3>{content:client_name}</h3>
{/if}
<p><a href="{path='work/{content:url_title}'}">Read More ></a></p>
</div>
{/content}
</div>
{/page_builder:ff_featured_work}
Remember, we must have each of the individual sub-field variable pairs inside our main
{page_builder} variable pair, so our final code for our Page Builder Fluid
Field looks like this:
{page_builder}
{page_builder:ff_centered_heading}
<h2 class="text-center">{content}</h2>
{/page_builder:ff_centered_heading}
{page_builder:ff_rich_text}
{content}
<div class="row {if content:center_content_container == 1}justify-content-center{/if}">
<div class="{content:width} {content:background}">
{content:text}
</div>
</div>
{/content}
{/page_builder:ff_rich_text}
{page_builder:ff_document_downloads}
<h2>Document Downloads</h2>
{content}
<p>
{content:file}
<a class="button" href="{url}" target="_blank">{content:title} ({extension}, {file_size:human})</a><br />
{/content:file}
{content:summary}
</p>
{/content}
{/page_builder:ff_document_downloads}
{page_builder:ff_rich_text_image}
{content}
<div class="row align-items-center {if content:image_position == 'right'}flex-md-row-reverse{/if}">
<div class="col-md-6">
<img src="{content:file}" alt="{content:image_caption}" />
</div>
<div class="col-md-6">
{content:text}
</div>
</div>
{/content}
{/page_builder:ff_rich_text_image}
{page_builder:ff_featured_work}
<div class="row">
{content}
<div class="col-4">
<h2><a href="{path='work/{content:url_title}'}">{content:title}</a></h2>
<p><em>{content:entry_date format="%F %d %Y"}</em></p>
{content:work_images limit="1"}
<img src="{work_images:file}" alt="{work_images:caption}" />
{/content:work_images}
{if content:client_name}
<h3>{content:client_name}</h3>
{/if}
<p><a href="{path='work/{content:url_title}'}">Read More ></a></p>
</div>
{/content}
</div>
{/page_builder:ff_featured_work}
{/page_builder}
about/index
template, but remember we’re also using the Page Builder in our Services Channel,
which will use a different template. So that we can easily re-use this whole field, let’s put the whole
thing (i.e., the code block above) into a Template Partial:
Developer > Templates then go to Template Partials in the left
sidebar
Create New then add the name par_page_builder_fluid_field and cut and
paste in the whole {page_builder} variable pair from our about/index
template, then save
about/index template with just our partial:
{par_page_builder_fluid_field}
Now our About page template looks much simpler, and we can re-use our Page_Builder field code. This
is our entire about/index template now:
<p>{layout="layouts/_wrapper"}</p>
<p>{exp:channel:entries channel="about" limit="1"}
<h1>{if page_heading}{page_heading}{if:else}{title}{/if}</h1>
{page_intro}
{par_page_builder_fluid_field}
{/exp:channel:entries}</p>
</pre>This was a long chapter, but we can re-use a lot of it in the next chapter. Now we have all of our Single Entry templates done, the next job to tackle is building out our Multi-entry templates - our Services section and our Work section.
We’re almost there! We finished off our Single Entry templates for our Homepage, Contact and About pages in the last installment, so let’s dive into our final two sections. So far, we’ve been using a dedicated template for each ‘page’ of our site where each template was only being used to display one single Entry. This makes sense when you have single-page top-level sections, but for our Services and Work sections, we have one main section with several sub-pages with the same fields available to each sub-page. EE Templating allows us to use a single template where we can use what’s in the URL to determine what to show. Let’s dive in!
The Services section is comprised of 4 pages: one main landing page (Services) and the 3x individual ‘service’ pages
(Graphic Design, Web Development, Digital Marketing). Each of these pages still has one single entry for each one -
we set up the content for these earlier, so we have 4 Entries in our Services Channel - but we’ll
use one template to handle displaying all of them (and any future Service Entries). WE WANT the URL
for the landing page to be example.com/services, so just like the About/Contact pages, we need a
‘services’ Template Group with an index.html template.
NOTE: We’ve created new Template Groups a couple of times already, each time using the main menu. This time around, I will introduce the new Jump Menu that’s new in EE6. The Jump Menu is in the top-right of the control panel and is a handy new way to navigate around the Control Panel. It uses fuzzy logic to search through various actions so you can find things really quickly, even if you don’t know where they are in the CP. Let’s use it going forward for all our actions.
CTRL or CMD, then press J on your keyboard to activate the Jump
Menu. Start typing and notice the shortcuts in the dropdown change as you type. Type "crea temp"
and notice the ‘Create Template Group’ is the first option in the dropdown and it’s highlighted. You can
move up and down the items in the dropdown with your arrow keys, but in this case, just hit
Enter to go to the ‘New Template Group’ screen:
services and again, we’ll duplicate an existing group just to get a head-start
on our index template - select to duplicate the about group and then saveservices/index template in your text editor and update the
channelparameter so channel="services", then head to your browser and go
to example.com/services
The fields available to the Services Channel are the same as the About Channel - and we’ve already build out the
Page Builder field template code (being utilized by our {par_page_builder_fluid_field}
partial) - so we don’t have to do anything at all within the {exp:channel:entries} tags here… but
notice we have a problem! The {exp:channel:entries} tag is set correctly to pull through just one Entry
from the Services Channel, but it’s pulling through the wrong one (assuming you created the
Services page first then created the sub-pages after like I did). In previous examples, we deliberately only had one
Entry in the Channels, but in this case, we have multiples, and by default, the Channel Entries Tag orders the
Entries it loops through by the Entry Date field and sorts them ‘descending’ (i.e., newest first). This is
really handy for things like news, blog, or portfolio items, but not here.
So we need a way to distinguish the landing page from the other sub-pages. We thought about this in our Content Model planning and when building out our Channels, we created a new Status for this very purpose called "Default Page." So we can use that to identify the landing page:
services/index template, update the opening Channel Entries Tag to:
{exp:channel:entries channel="services" limit="1" status="Default Page"}
then save and refresh example.com/services in your browser.
Great, so now our example.com/services page is loading the right Entry, and the page looks good!
Now we have our landing page working, but if you go in your browser to
example.com/services/graphic-design, you’ll see we still get our services/index template
loading (we can tell from the header/footer still displaying), but there’s no Channel content there - the
{exp:channel:entries} tag isn’t outputting anything.
NOTE: Thus far, we haven’t paid too much attention to URLs other than to explain the default template routing uses the first ‘segment’ of the URL to establish the Template Group and the second to establish the actual Template. But we’ll be looking at this closer in this section, so it’s important to know in the URL
example.com/services/graphic-design, the first segment isservices, the second isgraphic-design(and so on).
So why isn’t our Channel Entries Tag returning anything anymore? The short answer is because to cater for the landing
page above, we added the status parameter that is limiting the output of the tag to
only return Entries with the "Default Page" status. But the full answer is worth
understanding.
By default, the Channel Entries tag tries to use the information in the URL to establish the right Entry to display.
We touched on this earlier when discussing how the dynamic="no" parameter (docs) disables this. Now that
we have a second segment in the URL, the default EE template routing is first looking for a template with the name
of our second segment (i.e., services.group/graphic-design.html), but that template doesn’t exist…
and we don’t want it to exist because don’t want to have to create a totally new template every time we add a
Service sub-page. If there isn’t a specific individual template that matches the 2nd segment, then the rendering
engine’s next step is to load the index template for the group and use the 2nd segment to try and find
an Entry with that segment as the URL Title.
Remember that each Entry has a URL Title which is automatically generated when you enter the Title
(and can be overridden if desired)… the exact purpose for this is to be able to use this in URLs and therefore be
able to identify individual entries by a specific URL pattern - typically in the 2nd segment. So the resolution to
the problem is to only set the status="Default Page" parameter in our
{exp:channel:entries} opening tag if we don’t have a second segment - in other words, only if
we’re trying to load the Services landing page.
To do this, we can use ExpressionEngine’s URL Segment Variables -
these let us grab different segments from the URL and use them in our templates. The typical use for these is
exactly what we’re about to do - query it in some way in a conditional and do something based on the result. We can
access these with {segment_1}, {segment_2}, and so on in our templates. So to finish this
off:
services/index template, update the opening Channel Entries Tag to:
{exp:channel:entries channel="services" limit="1" {if !segment_2}status="Default Page"{/if}}
NOTE: When using any kind of variable in a conditional,
{if variable_name}and{if !variable_name}are the shortest ways to check if that variable exists or doesn’t exist, respectively.
And that’s it! So our completed services/index Multi-entry template looks like this:
{layout="layouts/_wrapper"}
{exp:channel:entries channel="services" limit="1" {if !segment_2}status="Default Page"{/if}}
<h1>{if page_heading}{page_heading}{if:else}{title}{/if}</h1>
{page_intro}
{par_page_builder_fluid_field}
{/exp:channel:entries}
and through this one template, we’re loading both our Services landing page at example.com/services and
all of the sub-pages such as example.com/services/graphic-design. The way we set this up means that any
future Entries added to the Services Channel will display using the URL pattern
example.com/services/xxxxxxxxxxx where xxxxxxxxxxx is the URL Title of the Entry.
We finally made it - this step is what this tutorial is all about! Believe it or not, we’ve already covered a lot of what we need to do, so a good chunk of what we need to do is just re-doing what we’ve already done elsewhere with maybe a few adjustments. So let’s get started.
Unlike the Services landing page, the Work landing page isn’t actually going to load a single Entry - and it won’t even be editable per se. It’s going to be dynamic in that we’ll be showcasing the Entries from the Work Channel, but it doesn’t have any editable content of its own - it’s just going to be a ‘listings’ page that shows all the portfolio items with links to each individual item’s ‘detail page.’
Note: If you wanted to offer basic editable information, such as an opening introduction paragraph on this page, one option would be to create a Template Variable to hold the text and use that within the otherwise un-editable template.
Back in Part 6, you should have added a bunch of Entries to the Work Channel, so if you haven’t done that yet, go ahead and go back and do that - aim for at least 10 total, have at least one Entry with several images and have at least 4 Entries assigned to one category.
To get started, we again need a new Template Group with an index template:
CTRL/CMD + J to activate the Jump Menu, start typing until you find the Create Template
Group shortcut, then hit Enterwork but don’t duplicate an existing group this timework/index template in your text editor, add the same Layout declaration we’ve been
using and add an <h1> for the page:
{layout="layouts/_wrapper"}
<h1>Our Portfolio</h1>
site/index template and copy the code where we pulled in our 3 latest
Work Entries - the concept is identical, we’re just going to adjust a few things.work/index template, but remove the
dynamic="no" parameter - we’ll cover why later.example.com/work in your browser.
Your work/index template should now look like this:
{layout="layouts/_wrapper"}
<h1>Our Portfolio</h1>
<div class="row">
{exp:channel:entries channel="work" limit="3" orderby="date" sort="desc"}
<div class="col-4">
<h3><a href="{path='work/{url_title}'}">{title}</a></h3>
<p><em>{entry_date format="%F %d %Y"}</em></p>
{work_images limit="1"}
<img src="{work_images:file}" alt="{work_images:caption}" />
{/work_images}
{if client_name}
<h3>{client_name}</h3>
{/if}
<p>{excerpt}</p>
<p><a href="{path='work/{url_title}'}">Read More ></a></p>
</div>
{/exp:channel:entries}
</div>
Notice we have our <h1> tag outside of the Channel Entries loop - this is because we’re using the loop not to output a single page, but to output multiple our Work Entries - just like on the homepage, we’re pulling in ‘visiting content’.
I’ve deliberately left the limit set to 3 for now - limiting the number of Entries returned can be
explicit (like how on the Homepage we only wanted 3 Entries to show) or can be used in conjunction with
pagination and limit how many are on each paginated ‘page.’ So I’ve left this example with
limit="3" so we can cover pagination, but obviously a more realistic limit here is more like
12 or 15 for this type of ‘listing page.’
NOTE: The default
limitin a Channel Entries Tag is 100, so if you don’t explicitly set alimit, it will only return up to 100 rows for performance.
I’ll assume you’re familiar with the concept of pagination, but if not, read up about it in the docs. Pagination will only display if:
paginate parameter.
NOTE: The options you’re most likely to use
top,bottomorbothbut note there is also aninlineandhiddenoption - check the docs for more info.
limit that is set
{paginate} variable pair
We have a couple options when it comes to adding the code for paging to our templates. Rather than duplicate what’s in the docs, just read this section here then come back. For simplicity, we’re going to use the first option, so:
work/index template, add paginate="both" as a parameter to
the {exp:channel:entries} opening tag{exp:channel:entries} tag, add the simple
{paginate} variable pair. We’ll go ahead and wrap the{pagination_links} single
variable with a <div> so you have a way to style it:
{paginate}
<div class="paging">{pagination_links}</div>
{/paginate}
example.com/work page in your browser and notice that our new ‘paging’ <div>
is added both at the top and the bottom but looks kind of weird because it’s inline with all the other
‘col-4’ divs. So the solution here is to not declare our opening and closing ‘row’ divs outside the Channel
Entries loop, but rather inside it and use conditionals to display the opening <div> at the top, but
only for the first row returned - and the closing <div> at the bottom, but only for the last.
Once we do that, our work/index template should look like this:
{layout="layouts/_wrapper"}
<h1>Our Portfolio</h1>
{exp:channel:entries channel="work" limit="3" paginate="both" orderby="date" sort="desc"}
{if count == 1}<div class="row">{/if}
<div class="col-4">
<h3><a href="{path='work/{url_title}'}">{title}</a></h3>
<p><em>{entry_date format="%F %d %Y"}</em></p>
{work_images limit="1"}
<img src="{work_images:file}" alt="{work_images:caption}" />
{/work_images}
{if client_name}
<h3>{client_name}</h3>
{/if}
<p>{excerpt}</p>
<p><a href="{path='work/{url_title}'}">Read More ></a></p>
</div>
{paginate}
<div class="paging">{pagination_links}</div>
{/paginate}
{if count == total_results}</div>{/if}
{/exp:channel:entries}
Our Work landing page is now displaying 3 Work entries per page and how many pages you see depend on
how many Entries you added. For now, I’m happy with the default output of the {paginate_links} single
variable, but like most tags in EE, there are parameters for this tag too that lets you customize how it works - it’s worth taking a look
at the docs.
NOTE: You can also set up paging to simply link to the next/previous pages using this code:
{paginate} {if previous_page} <a href="{auto_path}">Previous Page</a> {/if} {if next_page} <a href="{auto_path}">Next Page</a> {/if} {/paginate}and if you still want the individual page number links but need more granular control over the HTML output, you can do that too using the
{pagination_links}variable pair - check out the docs here.
Notice the pagination works - the URL of each of the ‘page’ links (i.e., for page 2, page 3, etc.) links to the same
URL as our main landing page, but with an added ‘pagination segment’ that always starts with a capital
P and then a number, where the number represents the number of items for the Channel Entries Tag to
‘offset.’ So in our example, page 2 links to the URL example.com/work/P3 which tells the
{exp:channel:entries} tag to skip the first 3 Entries in the loop and start from the 4th.
Now we have pagination working, and our Work landing page is still showing all of the Entries from the Work Channel (albeit only 3 per page). But we also want this landing page to give the user the ability to filter by category. With only a few Entries, it’s not that big of a deal, but imagine there were hundreds, and you can see how being able to filter would be useful.
To allow developers to build in such a way where the user to filter by a specific category when displaying Channel Entries, ExpressionEngine has a built-in method for doing this - the Category URL Segment. How it works is the rendering engine looks for a specific pair of additional segments and if present, recognizes those and knows to use them to filter the Channel Entries loop by a particular category.
NOTE: This only works if the Channel Entries Tag is being used ‘dynamically,’ which is why we had to remove
dynamic="no"when we copied this code from our Homepage.
By default, the Category URL Segment is category, but you can change this to whatever you want in
Settings > URL and Path Settings (or use the Jump Menu!) toward the bottom of the list.
By default, EE also expects the segment that follows the special category segment to be a category’s
ID, but because we want more descriptive URLs, we’re going to change that to use a category’s
title:
CMD/CTRL + J then type "url" and go to the URL and Path Settings page, then toward
the bottom of the list under ‘Category URL,’ change the radio button so "Titles" is selected and save
So just by doing this and removing the dynamic="no" parameter, our work/index
template now supports dynamic category filtering with the URL structure of
example.com/work/category/graphic-design - the category in segment 3 can, of course, change and will
accept any category’s Category URL Title. Furthermore, pagination still works when a category is selected,
and the links automatically are updated if a category is selected, e.g.:
example.com/work/category/web-development/P3
However, we’re not quite done as users have no way of knowing how to get to the category listing pages yet. We still want to:
To output the Category links, we use EE’s Categories Tag:
work/index template, let’s introduce a side-column using Bootstrap and move our
{exp:channel:entries} inside the larger column and add an <h3> in the smaller column
where our Category links will go:
<div class="row">
<div class="col-md-3">
<h3>Categories</h3>
...
</div>
<div class="col-md-9">
{exp:channel:entries channel="work" limit="3" paginate="both" orderby="date" sort="desc"}
{if count == 1}<div class="row">{/if}
<div class="col-4">
<h3><a href="{path='work/{url_title}'}">{title}</a></h3>
<p><em>{entry_date format="%F %d %Y"}</em></p>
{work_images limit="1"}
<img src="{work_images:file}" alt="{work_images:caption}" />
{/work_images}
{if client_name}
<h3>{client_name}</h3>
{/if}
<p>{excerpt}</p>
<p><a href="{path='work/{url_title}'}">Read More ></a></p>
</div>
{paginate}
<div class="paging">{pagination_links}</div>
{/paginate}
{if count == total_results}</div>{/if}
{/exp:channel:entries}
</div>
</div>
{path} variable to set our
links and we’ll use the show_empty="no" parameter to only show categories with active
entries:
<h3>Categories</h3>
{exp:channel:categories show_empty="no"}
<p><a href="{path='work/index'}">{category_name}</a></p>
{/exp:channel:categories}
NOTE: Because the
{path}variable is inside the{exp:channel:categories}tag, it’s automatically outputting the category links based on the value (i.e.work/index) and the two settings inSettings > URL and Path Settingswe looked at earlier, so the links generated are likeexample.com/work/category/graphic-design. Outside the Categories Tag, this same{path}variable would render the link asexample.com/work
By default, the {exp:channel:categories} tag outputs a <ul> with the contents of the tag wrapped
in an <li> element and automatically nests these lists based if you’re using nested categories. If this output
isn’t what you need, you can also use the style="linear" parameter (docs) to get more granular
control of the output, but for our use, an unordered list is perfect.
Now the user has the ability to filter the list of portfolio items based on category, we want to dynamically update our page’s heading if there is a category selected. To do this, we use EE’s Category Heading tag, but only in the scenario we’re trying to filter by a specific category - ie, if segment 2 is "category" and segment 3 is actually present:
{if segment_2 == "category" && segment_3}
{exp:channel:category_heading channel="work"}
<h1>Our Portfolio: {category_name}</h1>
{if category_description}
<p>{category_description}</p>
{/if}
{/exp:channel:category_heading}
{if:else}
<h1>Our Portfolio</h1>
{/if}
The Category Heading Tag also recognizes our special Category URL Segment pair and knows what category to output information for based on the third segment or the URL - so we can append the category name to our <h1> and output the category description if it’s been populated.
There we have it - our Work landing page is done and offers both category filtering and pagination. Notice that
pagination only shows if there’s more than 3 Entries and that honors the category selection. Again, in a real-world
scenario, your limit would be more like 12 or 15, but you can easy update that. So our final work/index
template looks like this:
{layout="layouts/_wrapper"}
{if segment_2 == "category" && segment_3}
{exp:channel:category_heading channel="work"}
<h1>Our Portfolio: {category_name}</h1>
{if category_description}
<p>{category_description}</p>
{/if}
{/exp:channel:category_heading}
{if:else}
<h1>Our Portfolio</h1>
{/if}
<div class="row">
<div class="col-md-3">
<h3>Categories</h3>
{exp:channel:categories show_empty="no"}
<a href="{path='work/index'}">{category_name}</a>
{/exp:channel:categories}
</div>
<div class="col-md-9">
{exp:channel:entries channel="work" limit="3" paginate="both" orderby="date" sort="desc"}
{if count == 1}<div class="row">{/if}
<div class="col-4">
<h3><a href="{path='work/{url_title}'}">{title}</a></h3>
<p><em>{entry_date format="%F %d %Y"}</em></p>
{work_images limit="1"}
<img src="{work_images:file}" alt="{work_images:caption}" />
{/work_images}
{if client_name}
<h3>{client_name}</h3>
{/if}
<p>{excerpt}</p>
<p><a href="{path='work/{url_title}'}">Read More ></a></p>
</div>
{paginate}
<div class="paging">{pagination_links}</div>
{/paginate}
{if count == total_results}</div>{/if}
{/exp:channel:entries}
</div>
</div>
We’re really close now! The only pages we have left to build out are the individual ‘portfolio detail’ pages where each item from our Work Channel will have its own unique URL and display all our info from our Content Model.
The first thing we need to do is decide our URL and template structure, and we have a couple of options here.
Remember the default template routing looks at the first two segments in the URL and uses those to load a specific
Template (i.e., segment 2) from a specific Template Group (i.e., segment 1). So if we wanted to, we could utilize a
URL structure that looked like example.com/work/entry/sample-project-name and create a new
entry.html template within our work.group Template Group to keep the code for our ‘detail’
page in a totally separate template from our ‘listing page’. This is absolutely a legitimate strategy, but I
personally prefer a shorter URL, and so I’m going to proceed with the other option which is to use a URL structure
like example.com/work/sample-project-name and just continue to use our work/index template
making the necessary adjustments for that one template to not only handle the listings but also handle the
individual detail pages too. We even already set up the links to the individual Work Entry detail pages for this URL
structure when we built out the Homepage (and re-used it above when building out the Work listings page), so we just
need to update our work/index template to handle this.
Looking at our Work landing page as it stands now, we’ll go ahead re-use the layout we set up so that each ‘detail’ page also includes the smaller sidebar column with the Category links, but we’ll update the page’s heading so the <h1> is specific to the Work Entry we’re displaying.
So to extend our work/index template to handle ‘detail’ pages, we need to recognize when an individual
detail page is being requested. Looking at the URL structure we chose, if the second segment exists, but is
neither our special Category URL segment (ie category)
nor our paging segment (eg, P3), then we’re trying to load an individual
Entry using that Entry’s URL Title. The opening conditional tag to use for this is:
{if segment_2 && segment_2 !="category" && !(segment_2 ~ "/^P\d+/")}
NOTE: In the opening conditional tag above, I’m using the
!and~comparison operators in conjunction with parentheses since there is no operator for ‘does not match.’ You can use parentheses in conditionals to group conditions, just like you would with most programming languages. E.g.:{if (condition_1 && !condition_2) || (condition_1 && condition_3)}
The first thing we’ll do is update our page heading so if we’re looking at an individual Work Entry
detail page, we won’t output an <h1>, but instead just a paragraph that’s styled like one. To do this, we’ll
just extend the first conditional in the work/index template to also include an
{if:elseif ...} tag. We know the first condition will fail because we won’t have category
as the second segment and we still want the template to render the <h1> if our new condition checking for a
‘detail’ page fails too, so:
{if segment_2 == "category" && segment_3}
{exp:channel:category_heading channel="work"}
<h1>Our Portfolio: {category_name}</h1>
{if category_description}
<p>{category_description}</p>
{/if}
{/exp:channel:category_heading}
{if:elseif segment_2 && segment_2 !="category" && !(segment_2 ~ "/^P\d+/")}
<p class="h1">Our Portfolio</p>
{if:else}
<h1>Our Portfolio</h1>
{/if}
work/index template, add the conditional inside our ‘col-md-9’ div and move the
entire {exp:channel:entries} tag to only execute if the condition is not true:
<div class="col-md-9">
{if segment_2 && segment_2 !="category" && !(segment_2 ~ "/^P\d+/")}
{!-- This is where our 'detail' page code will go! --}
{if:else}
{exp:channel:entries channel="work" limit="3" paginate="both" orderby="date" sort="desc"}
{!-- Code stripped for tutorial legibility. Don't change yours! --}
{/exp:channel:entries}
{/if}
</div>
NOTE: Comments in EE Templates are wrapped with
{!--and--}- anything between these will be completely ignored by the rendering engine.
{exp:channel:entries} tag that will be used to output the individual Entry details. This time,
we need to use the url_title parameter and use what’s in the second segment to identify the
individual Entry and for output, we’ll just add an <h1> with the Entry Title for now:
{if segment_2 && segment_2 !="category" && !(segment_2 ~ "/^P\d+/")}
{!-- Work Entry detail page --}
{exp:channel:entries channel="work" limit="1" url_title="{segment_2}"}
<h1>{title}</h1>
{/exp:channel:entries}
{if:else}
...
example.com/work/sample-project-name - you should see the same page layout as our Work landing
page, but instead of the multiple Entries being listed in the main column, you should see the Title
of your individual entry. And the text "Our Portfolio" should just be a <p> styled to look
like a heading 1.
From a templating point of view, that’s pretty much it - this one template now can handle all listings and category-specific listings (both with pagination) and now can also output individual Entry detail pages all by looking at what’s in the URL and acting accordingly!
We just need to finish building out our ‘detail’ page code by adding the rest of the Fields so we can output all our Work Entry data:
{exp:channel:entries} tag, just like we did for the
Homepage and Contact page, by systematically going through the Fields available to the Channel and building
out each one:
<h1>{if page_heading}{page_heading}{if:else}{title}{/if}</h1>
{if client_name}<h2>{client_name}</h2>{/if}
<h3>{entry_date format="%F %d %Y"}</h3>
{project_description}
{work_images}
{if work_images:count == 1}
<h2>Gallery <small>(click to enlarge)</small></h2>
<div class="row gallery">
{/if}
<a class="col-4" href="#" data-toggle="modal" data-target="#exampleModal">
<img src="{work_images:file:thumbnail}" alt="{work_images:caption}" />
</a>
<div class="modal fade" id="exampleModal" tabindex="-1" role="dialog" aria-labelledby="exampleModalLabel" aria-hidden="true">
<div class="modal-dialog modal-xl">
<div class="modal-content">
<div class="modal-header">
<button type="button" class="close" data-dismiss="modal" aria-label="Close">
<span aria-hidden="true">×</span>
</button>
</div>
<div class="modal-body text-center">
<img src="{work_images:file:large}" alt="{work_images:caption}" />
{if work_images:caption}<br /><caption>{work_images:caption}</caption>{/if}
</div>
</div>
</div>
</div>
{if work_images:count == work_images:total_rows}
</div>
{/if}
{/work_images}
{if link}<p><a class="button" href="{link}" target="_blank">View the Results</a></p>{/if}
{categories}
variable pair within the Channel Entries Tag:
<p>
<strong>Categories: </strong>
{categories backspace="2"}<a href="{path='work/index'}">{category_name}</a>, {/categories}
</p>
Notice the backspace="2" parameter here - this is a handy parameter available
to most EE tag pairs that removes a set number of characters (in this case, 2) from the end of the
code only during the last time through the loop. So here we’re adding a comma and space after each
category link except for the last one.
Putting all of this together, we have our final work/index template and we are done with our Work
section! Here’s our final code:
{layout="layouts/_wrapper"}
{if segment_2 == "category" && segment_3}
{exp:channel:category_heading channel="work"}
<h1>Our Portfolio: {category_name}</h1>
{if category_description}
<p>{category_description}</p>
{/if}
{/exp:channel:category_heading}
{if:elseif segment_2 && segment_2 !="category" && !(segment_2 ~ "/^P\d+/")}
<p class="h1">Our Portfolio</p>
{if:else}
<h1>Our Portfolio</h1>
{/if}
<div class="row">
<div class="col-md-3">
<h3>Categories</h3>
{exp:channel:categories show_empty="no"}
<a href="{path='work/index'}">{category_name}</a>
{/exp:channel:categories}
</div>
<div class="col-md-9">
{if segment_2 && segment_2 !="category" && !(segment_2 ~ "/^P\d+/")}
{!-- Work Entry detail page --}
{exp:channel:entries channel="work" limit="1" url_title="{segment_2}"}
<h1>{if page_heading}{page_heading}{if:else}{title}{/if}</h1>
{if client_name}<h2>{client_name}</h2>{/if}
<h3>{entry_date format="%F %d %Y"}</h3>
{project_description}
{work_images}
{if work_images:count == 1}
<h2>Gallery <small>(click to enlarge)</small></h2>
<div class="row gallery">
{/if}
<a class="col-4" href="#" data-toggle="modal" data-target="#exampleModal">
<img src="{work_images:file:thumbnail}" alt="{work_images:caption}" />
</a>
<div class="modal fade" id="exampleModal" tabindex="-1" role="dialog" aria-labelledby="exampleModalLabel" aria-hidden="true">
<div class="modal-dialog modal-xl">
<div class="modal-content">
<div class="modal-header">
<button type="button" class="close" data-dismiss="modal" aria-label="Close">
<span aria-hidden="true">×</span>
</button>
</div>
<div class="modal-body text-center">
<img src="{work_images:file:large}" alt="{work_images:caption}" />
{if work_images:caption}<br /><caption>{work_images:caption}</caption>{/if}
</div>
</div>
</div>
</div>
{if work_images:count == work_images:total_rows}
</div>
{/if}
{/work_images}
{if link}<p><a class="button" href="{link}" target="_blank">View the Results</a></p>{/if}
<p>
<strong>Categories: </strong>
{categories backspace="2"}<a href="{path='work/index'}">{category_name}</a>, {/categories}
</p>
{/exp:channel:entries}
{if:else}
{!-- Work landing/listing page --}
{exp:channel:entries channel="work" limit="3" paginate="both" orderby="date" sort="desc"}
{if count == 1}<div class="row">{/if}
<div class="col-4">
<h2><a href="{path='work/{url_title}'}">{title}</a></h2>
<p><em>{entry_date format="%F %d %Y"}</em></p>
{work_images limit="1"}
<img src="{work_images:file}" alt="{work_images:caption}" />
{/work_images}
{if client_name}
<h3>{client_name}</h3>
{/if}
<p>{excerpt}</p>
<p><a href="{path='work/{url_title}'}">Read More ></a></p>
</div>
{paginate}
<div class="paging">{pagination_links}</div>
{/paginate}
{if count == total_results}</div>{/if}
{/exp:channel:entries}
{/if}
</div>
</div>
Again, we’ve deliberately not spent much time on styling, but I trust this tutorial has given you the foundations you need to start building in ExpressionEngine.
We can still do a few more things to improve our code - things that you’d want to do for a production site, so stick with me for one more chapter.
What a journey it’s been! We’ve gone through the entire process of planning and building a Portfolio Website, but we’re not quite done - there are a few more things worth including in this introduction to building in ExpressionEngine. These are things you probably need in any production site, so let’s finish strong.
Our contact page at example.com/contact is nice, but it’s not very interactive. Let’s add an interactive
Contact form so users can send a message directly from the site rather than having to use their native email client.
For this, we’ll use the Email Contact Form
which is part of EE’s included Email
Add-on
Developer > Add-ons or use the Jump Menu and type "view add" to
get to the Add-ons screen, then scroll down in the list to find "Email" under the ‘Uninstalled’
heading and click Install:
contact/index template, and let’s rearrange what we had set up earlier.{map_embed} code underneath
the closing </div> that closes the ‘row,’ then copy & paste the example straight from the docs
inside our right column (i.e., the second "col-md-6" div).recipients parameter to your email for testing and anything else you’d like to update
- I’ve replaced the value parameters on the form fields with placeholders instead
and added a class to the button, so my updated contact/index template now looks like this:
{layout="layouts/_wrapper"}
{exp:channel:entries channel="contact" limit="1"}
<h1>{if page_heading}{page_heading}{if:else}{title}{/if}</h1>
{page_intro}
<div class="row align-items-center">
<div class="col-md-6">
{address}
<h2>Address</h2>
<p>
{address:line_1}
{if address:line_2}<br />{address:line_2}{/if}
<br />{address:city}, {address:state} {address:zip_code}
</p>
{/address}
{departments}
{if departments:count == 1}<h2>Departments</h2>{/if}
<p>
<strong>{departments:name}</strong>
<a href="tel:+1-{departments:phone}">{departments:phone}</a>
<a href="mailto:{departments:email}">{departments:email}</a>
</p>
{/departments}
</div>
<div class="col-md-6">
{exp:email:contact_form user_recipients="no" recipients="[email protected]" charset="utf-8"}
<h2>Send Us A Message</h2>
<p>
<label for="from">Your Email:</label><br />
<input type="text" id="from" name="from" size="40" maxlength="35" placeholder="Enter your email..." />
</p>
<p>
<label for="subject">Subject:</label><br />
<input type="text" id="subject" name="subject" size="40" placeholder="Enter a subject..." />
</p>
<p>
<label for="message">Message:</label><br />
<textarea id="message" name="message" rows="6" cols="40" placeholder="Enter your message..."></textarea>
</p>
<p>
<input class="button" name="submit" type='submit' value='Submit Form' />
</p>
{/exp:email:contact_form}
</div>
</div>
{map_embed_code}
{/exp:channel:entries}
NOTE: If you’re working locally, it’s unlikely emails will send directly from your test site without jumping through a whole bunch of hoops. In most hosted environments, though, this works just fine because the default setting is to use PHP mail as the sending protocol. If you’d prefer, you can use Sendmail or SMTP by changing the settings in
Settings > Outgoing Emailor using the Jump Menu to find ‘Outgoing Mail.’
Make sure to read through the documentation for Email Contact Forms, paying close attention to the multiple warnings there if you plan to use this in production. This is a very basic example, and you’ll probably want to build this out a little differently, add Captcha or perhaps even use a third-party Add-on such as Forms or Freeform.
Right now, all of our pages use the same <title> tag because that’s hard-coded in our
site/_wrapper template. This is awful for SEO, and we should update our code so at the very least, the
Entry’s Entry Title is used as the <title> tag. Even better, we can give content editors the ability
to overwrite the default to customize the SEO Page Title, and while we’re at it, we can let them update other
metadata like the SEO ‘description’, ‘keywords,’ etc. If you’re not sure what I mean by ‘metadata’, it’s worth
researching that, but for our purposes, I’ll be including two:
All of our Channels have content with unique URLs, so each one needs the same functionality. If you had any Channel-based content that didn’t have unique URLs (think maybe testimonials or team members that output all on one page), those Channels wouldn’t need these.
The high-level plan here is to create these two fields, get them assigned to each of our Channels, and then update the templates to utilize them. Remember that Fields can be shared across Channels and even assigned to a Field Group, which is perfect for this scenario.
Developer > Fields and use the blue button). Don’t assign any existing fields because we
need to create new ones.New Field button. Selecting the "SEO" group first means the new fields we add will
automatically be assigned to this group.Developer > Channels (or use the Jump Menu typing in "edit chan," then select
Edit Channel titled [channel] then choose a channel to edit) and for each
Channel:
Developer > Channels then click the ‘Layouts’ icon to the far-right of each
Channel name
b) Use the Jump Menu, type "view pub", select
View Publish Layouts for [channel], then select a channel
NOTE: When dragging fields to other tabs here, make sure you see the blue line under the new tab’s name before you let go:
site/index template where we area going to define Layout
Variables to pass up to our layouts/_wrapper template. Just inside the
‘homepage’ {exp:channel:entries} loop before our {hero_carousel} variable pair,
add these layout variables:
{layout:set name='seo_title'}{if seo_page_title}{seo_page_title}{if:else}{title}{/if}{/layout:set}
{layout:set name='seo_description'}{seo_meta_description}{/layout:set}
layouts/_wrapper template:
<title>{layout:seo_title}</title>
Or if you wanted to, you could have consistent, hard-coded appended text like:
<title>{layout:seo_title} | Example Company</title>
<meta name="description" content="{layout:seo_description}">
example.com to view the Homepage and note the <title> tag has
updated and is now dynamic, but note there’s no Meta Description if you look at the sourceEntries > Homepage, switch to the
SEO tab, add text to both fields, save the entry, and refresh your browser to see it’s updatedCTRL/CMD + J then in the Jump Menu type "part" then choose
View Template Partials and click the Create New button and add the name
"par_page_seo_variables"site/index template into the Content field
and save the Template Partialsite/index template, add our partial tag:
{par_page_seo_variables}{exp:channel:entries} opening tag:
about/index
contact/index
services/index
work/index - this time the partial would be added just inside the
{exp:channel:entries} tag that we’re using for the Work Entry detail pages, ie:
{!-- Work Entry detail page --}
{exp:channel:entries channel="work" limit="1" url_title="{segment_2}"}
{par_page_seo_variables}
...
NOTE: You can set Layout Variables from anywhere within a template - so in this case, we’re doing in here because our partial looks for fields that are only available from inside the
{exp:channel:entries}tag and are unique to each of our Work entries.
{excerpt} to be the description by default for
our Work Entries. Open up the _partials/par_page_seo_variables template and
update the seo_description Layout Variable to:
{layout:set name='seo_description'}{if seo_meta_description}{seo_meta_description}{if:elseif excerpt}{excerpt}{/if}{/layout:set}
For the work/index template, we’re able to use these SEO fields for the individual detail pages like we
just added above, but our main Work landing page, and the versions where Categories are selected, aren’t actually
editable… but we can still use Layout Variables to manually set these in the template - we just only want to do
that if it’s not an individual Entry detail page:
work/index template, find where we’re using the
Category Heading tag to dynamically set the page heading - we can set our Layout Variables there and use the
selected category’s name and description:
{exp:channel:category_heading channel="work"}
{layout:set name='seo_title'}{category_name} Portfolio{/layout:set}
{layout:set name='seo_description'}{category_description}{/layout:set}
<h1>Our Portfolio: {category_name}</h1>
...
It’s possible the Category Description might not exist - you could also use a conditional here, so if it didn’t exist, you added some kind of fallback. You could even set up that fallback as a Template Variable, so it was editable via the CP.
example.com/work, we’ll use the final section
of the first conditional in the template to set our Layout Variables because this part gets rendered if
there’s no second segment:
...
{if:else}
<h1>Our Portfolio</h1>
{layout:set name='seo_title'}Our Portfolio{/layout:set}
{layout:set name='seo_description'}Our amazing portfolio is sure to impress!{/layout:set}
{/if}
Again, you could set up a Template Variable to hold this Work landing page SEO Description if you wanted to.
That should take care of the SEO Metadata - every page on our site is now either editable via the SEO tab when editing the Entries - or set up in the templates - and wherever possible, we’re setting default values such as the Entry Title and the Work Channel Excerpt. Of course, you could extend this, add fields, use specific fields for specific Channels, etc. in a real project.
Everything we’ve covered so far has been looking at how to handle legitimate requests for URLs that actually exist, but it’s important to cater for ones that don’t and handle the errors appropriately. Similarly, we also want to consider the possibility that the content could change, so what once did return content no longer does and handle that too.
If a requested URL doesn’t exist or doesn’t have any content, we want to serve a 404 page, which tells the user (and search engines) that that URL doesn’t actually have any content. EE has a built-in way to handle this that uses a dedicated template, so we first need to create a 404 template, assign that as the 404 template, then go through our templates to utilize it:
404.html in the site.group directory. You
could also go to Developer > Templates or use the Jump Menu to get to
Create Template in [group] then choose the site group.site/404 template, add the following and save the template:
{layout="layouts/_wrapper"}
<h1 class="text-center">Page Not Found</h1>
<p class="text-center">Sorry, but the page you requeste cannot be found or has no content.</p>
<p class="text-center"><a href="{site_url}" class="button">Go to the Homepage</a></p>
Settings > Template Settings or use the Jump Menu to get to Template
Settings, then under 404 page, select the site/404 template and save. example.com/abcdefg and our 404 page is served
This works, but it only works automatically if there’s only one segment. Remember the way template routing works; if
only one segment is present, the rendering engine looks for a Template Group with that name, and if it can’t be
found, it loads the index template, and if it can’t be found, it throws an error. So by default, EE
handles an erroneous single segment so long as we’ve set up our 404 template.
However, if there are two segments and the first is an existing Template Group, but the second (or
any others beyond it) are erroneous, then it’s up to us to handle this because from the second segment on, there are
all kinds of things you could do with segments. For example, try going to example.com/work/abcdefg in
your browser - in this case, the template work/index template is correctly being loaded and has content
in it that’s legitimate, but our {exp:channel:entries} loop that’s looking for a specific Entry based
that matches the second segment just isn’t returning anything… because there’s no entry that matches.
EE gives us two powerful tools to handle this:
{if no_results}
conditional. We can use this inside any Channel Entries Tag to decide what happens if no results are
returned instead of just doing nothing. What you do will depend on the scenario, e.g., if you’re outputting a
list of events, you might just output a heading that says "No Upcoming Events" or some other content -
or - you might choose to redirect the user.{redirect}
Global Variable. This tag lets you redirect a user and can be really handy, but it’s important to be
careful you don’t end up creating an endless redirect loop. You can use this to setup redirects with various
status codes, but the most common use is the 404 redirect: {redirect="404"}Combining these two, we can show a 404 for content that doesn’t exist in our our templates:
work/index template, inside the Work Entry detail page {exp:channel:entries}
tag, add {if no_results}{redirect="404"}{/if} as the first line within the tag:
{!-- Work Entry detail page --}
{exp:channel:entries channel="work" limit="1" url_title="{segment_2}"}
{if no_results}{redirect="404"}{/if}
{par_page_seo_variables}
...
Now try example.com/work/abcdefg again
{exp:channel:entries} tags - i.e., wherever we
have the limit="1" parameter - in the rest of our templates:
about/indexcontact/indexservices/indexNOTE: We don’t need to do it in our
site/indextemplate because EE handles the error for a single segment not matching a Template Group automatically, but there’s no harm adding it there if you just want to get into the habit of doing this on any single-entry template.
This takes care of the single-segment URLs in the scenario that there’s nothing returned within the Channel Entries
Tag, but what about if we have extra segments? Try going to example.com/about/abcdefg in your
browser - notice we still get the About page loading. EE has a way to handle this too - the
require_entry="yes" parameter - but it only works in the typical 2-segment
template_group/template scenario because what it’s doing is telling the Channel Entries tag that a
valid Entry ID or URL Title must be found in the second segment. In the case of
example.com/about, we don’t want to use this because we deliberately don’t want a second segment. So we
only will add this if a second segment exists:
about/index template, add the require_entry="yes" parameter to the
Channel Entries Tag, but only if a second segment exists:
{exp:channel:entries channel="about" limit="1" {if segment_2}require_entry="yes"{/if}}
{if no_results}{redirect="404"}{/if}
...
contact/index and services/index templates as these
templates also are designed to output a single Entry.work/index template, we can add the same parameter to the Work Entry detail Channel
Entries Tag, but we don’t need the conditional because the whole thing is already only showing if we have
the second segment:
{if segment_2 && segment_2 !="category" && !(segment_2 ~ "/^P\d+/")}
{!-- Work Entry detail page --}
{exp:channel:entries channel="work" limit="1" url_title="{segment_2}" require_entry="yes"}
...
So now we’ve handled errors for 2-segment URLs where the 2nd segment is looking for a matching Entry but can’t find
one, but we also need to consider there could be 3-segment URLs where the first two segments do match a single
Entry, but where we have extra segments. In the Services and Work sections, for example, we do have
legitimate 2-segment pages, and above, we added dynamic Channel Entries tags that are requiring the 2nd segment to
be a valid entry… but try going to example.com/services/graphic-design/abcdefg and
example.com/work/a-real-work-entry-you-added-to-your-site/abcdefg - both examples will load, so it’s
possible to load the same content at multiple unique URLs. Our site structure only ever uses a third segment in the
Work section where we’re filtering by category (e.g., example.com/work/category/graphic-design), so
outside of that specific scenario, we want to force a 404 if there’s ever a third segment:
services/index template, add a 404 redirect if a third segment is present:
{layout="layouts/_wrapper"}
{if segment_3}{redirect="404"}{/if}
{exp:channel:entries channel="services" limit="1" {if segment_2}require_entry="yes"{/if} {if !segment_2}status="Default Page"{/if}}
...
work/index template, find the conditional where we’re checking if a second segment
exists, but it’s not "category" and do the same:
{if segment_2 && segment_2 !="category" && !(segment_2 ~ "/^P\d+/")}
{if segment_3}{redirect="404"}{/if}
...
The final place to consider using a 404 is in the Work landing page when using category filtering and either:
E.g., try example.com/work/category/graphic-design/abcdefg and also
example.com/work/category/abcdefg - both of these scenarios we want to redirect to a 404. Remember that
pagination also uses a segment, so if a category is selected and there’s pagination, we do need
that 4th segment to work, e.g.: example.com/work/category/web-development/P3, but we can cater for this
using the regular expression condition we used earlier, i.e. !(segment_4 ~ "/^P\d+/").
work/index template, add a 404 redirect at the very top of the template if there’s ever a
4th segment that doesn’t match the pagination regular expression:
{layout="layouts/_wrapper"}
{if segment_4 && !(segment_4 ~ "/^P\d+/")}{redirect="404"}{/if}
...
{if no_results} conditional:
{if segment_2 == "category" && segment_3}
{exp:channel:category_heading channel="work"}
{if no_results}{redirect="404"}{/if}
...
And that should take care of all of our 404 redirects!
Now that we’ve considered all the possible erroneous URL errors and handled them with the 404 page, we should also cater for the few places in our site where we’re pulling through content within a page in the scenario that no results are returned for whatever reason. The places we need to consider in this site are:
site/index), find where we’re outputting the ‘Latest Projects’. To
handle there being no results, you could either:
{if no_results} conditional inside the Channel Entries:
{exp:channel:entries channel="work" limit="3" dynamic="no" orderby="date" sort="desc"}
{if no_results}<p>There are no entries to display</p>{/if}
...
{count} and
{total_results} variables in conditionals to maintain their positions. This way, if no
entries are returned at all, that whole section doesn’t display:
{exp:channel:entries channel="work" limit="3" dynamic="no" orderby="date" sort="desc"}
{if count == 1}
<h2>Latest Projects</h2>
<div class="row">
{/if}
<div class="col-4">
...
</div>
{if count == total_results}
</div>
{/if}
{/exp:channel:entries}
{if no_results} conditional, but we can kill two
birds with one stone because the same Channel Entries Tag outputs the Entries regardless of if a category is
selected, but we’ll cater for that with a conditional inside our text:
{!-- Work landing/listing page --}
{exp:channel:entries channel="work" limit="3" paginate="both" orderby="date" sort="desc"}
{if no_results}<p>There are no Projects {if segment_2 == "category"}in this category{/if} to display at this time.</p>{/if}
...
You can (and should) do a few things right from the beginning when learning to build in EE to optimize performance. The ultimate goal is to get your site’s pages to load as quickly as possible for the end-user, and there are two parts to that: server-side and client-side. The server-side part happens first, and essentially is the time it takes for the CMS to build up and serve the final HTML page and send it to the browser. Then the client-side involves all the things that the browser does once it receives the HTML for the requested page - usually the majority of the time is spent loading assets (images, CSS, JavaScript files, etc.) and executing any of the client-side scripts. This section will focus exclusively on the server-side part - things we can do in EE to make serving the HTML files faster - and this isn’t intended to be an extensive performance workshop, but rather give you the basics you should start doing right from the start.
Before we dive into specific things to do to optimize performance, it’s worth knowing how to test it. EE comes with
built-in debugging, which you can enable at Settings > Debugging & Output > Enable Debugging.
Enabling this toggle adds additional information to the bottom of the template output, but only for SuperAdmin
members, with really useful information like ‘Memory usage’, ‘Database execution time’, and ‘Total execution time.’
There’s also a ‘Variables’ tab showing the values of various variables (most of them specific to the logged-in user)
and a way to view all of the individual database queries. For the most part, you can use the ‘Total execution time’
as a benchmark while testing and seeing how much of a difference implementing certain changes make, but it’s
definitely work knowing about this in case you find yourself needing to investigate a troublesome page.
Settings > Debugging & Output, enable Debugging, save, then go to
example.com, example.com/about, and example.com/work and compare the
debugging info between templates.NOTE: Your server environment, specifically the load at the exact moment you make a request, could well be playing a big part in this, so if you’re really digging into this, try refreshing the same page several times to try and identify any outliers.
We’ve only briefly mentioned this and haven’t actually used it in this tutorial, but it’s possible to ‘Embed’ templates within other templates. This can be really useful, particularly given you can pass ‘Embed Variables’ from one template to the one you’re embedding into it, and in some cases can be necessary to allow the rendering engine to access and render certain things in a certain order. The rendering order is a more advanced topic I deliberately am not covering - if you want to dive deeper or encounter a scenario where something’s not rendering where you want it, read up on the Rendering Order of the Template Engine.
But what I will do is point out you need to be very careful when embedding templates into other templates. Embeds aren’t that expensive from a performance perspective in their own right, but what you do with them absolutely can be! If at all possible, avoid embeds within any kind of loop, especially if the embed contains a Channel Entries Tag.
The Channel Entries Tag is one of the heaviest tags you’ll use in EE in terms of performance - it typically does the most work, so if you have an outer loop with 20 iterations where within that loop, you embed another template that has a Channel Entries Tag that has 20 iterations, your page runs the Channel Entries Tag 20 times and loads 400 entries! So be careful and do your best to build in the most efficient way possible.
Granted, it’s a pretty simple site, but all of our code in this tutorial is pretty efficient - we don’t have any loops within loops, nor are we embedding any templates anywhere.
We just mentioned the Channel Entries Tag is one of the heaviest tags you’ll use, but it has an important
parameter available to it that allows you to disable things you don’t need in order to speed things up. Think about
it in terms of database queries - the less information that needs to be included in the requests from the database,
the faster it’ll be. Including unused information in many cases doesn’t add that much extra time, but
remember this tag often loops through multiple results, so anything we can save is worthwhile. So always use the disable parameter
on Channel Entries Tags, disabling anything you’re not explicitly using within the tag. As with other parameters
that accept multiple values, use a | (pipe) character to add multiple values. Here is an example with
all of the available options - you can remove the ones you do
need before adding to the {exp:channel:entries} tag:
disable="categories|category_fields|custom_fields|member_data|pagination"
NOTE:
category_fieldsare custom category fields - you can still access the default fields of a category likecategory_name,category_url_title,category_descriptionandcategory_imagewith thedisable="category_fields"set. Also, disablingcategoriesautomatically also disablescategory_fields. Even if you need categories, chances are you want to still disablecategory_fieldsunless you need a specific custom category field in the tag output.
disable parameters to all of our Channel Entries Tags:
site/index -
disable="categories|member_data|pagination" for the Homepage Channel
Entries Tagdisable="categories|member_data|pagination" for the Work Channel Entries
Tagabout/index - disable="categories|member_data|pagination"
contact/index - `disable="categories|member_data|pagination"
services/index - `disable="categories|member_data|pagination"
work/index -
disable="category_fields|member_data|pagination" for the Work Entry
detail page Channel Entries Tag
disable="categories|member_data" for the Work landing page Channel
Entries Tag
NOTE: Disabling categories affects information returned for each item inside the loop, not filtering the loop itself - so even with
categoriesdisabled here,example.com/work/category/graphic-designstill renders what we want
It’s absolutely worth reading EE’s documentation on Data Caching & Performance for full details if you want to really optimize performance. The main takeaway is we can (and should) add caching to our EE builds for any template output that returns the same data for every visitor. Now, if you have data specific to the logged-in member, you have to start being careful with this, but in this tutorial, we can implement caching on pretty much everything.
The first type of caching is Tag Caching where we
can cache and {exp:xxxxx} tag for a set amount of time using cache and
refresh parameters, For example, on a Channel Entries Tag, you might add:
{exp:channel:entries ... cache="yes" refresh="60"}
The number here is the time in minutes, so the above would cache the output of the entire tag for 60 minutes.
The general consensus is if any {exp:xxxxx} tag you use is the same for each visitor, add
caching to it.
cache="yes" and refresh="60" parameters to every
{exp:xxxxx} tag in all of our templates, with the exception of the {exp:email:contact}
tag in contact/index - that one we don’t want to cache to avoid any possible crossed wires. Make
sure to include the {exp:channel:category_heading} and {exp:channel:categories} tags
in work/index though.To see how effective the disable, cache, and refresh parameters are, choose a
template and remove all these parameters, then load the page and note the ‘Total Execution Time’ in the debugging
info. Then put them back and refresh that same page again twice - the first time you reload after re-adding the
parameters is the rendering engine’s first time loading the entry where it actually creates the cache, so it won’t
be much different to the performance without the tags… but the second time, where the tags are loading from cache
should be a significant difference.
On my Homepage, I went from 0.1964 seconds to 0.0357 seconds!
The second type of caching is Template Caching, which literally caches the entire template, not just the tags inside of it. With this option, you can’t pick and choose which tags to cache, but it can save a little bit more time. You only want to use this where the entire template’s output would be the same for each visitor - in other words, if you’re caching all the individual tags inside the template, you should go ahead and enable this at the template level.
View Templates (or go to
Developer > Templates), then click the little ‘settings cog’ icon next to the
site/index template, then turn on the Enable Caching? toggle and set the
Refresh Interval to 60, then refresh your homepage a couple more times and note the ‘Total
Execution Time.’
This dropped my Homepage to 0.0304 seconds - it’s not a huge difference, but our goal is to the best we can, so this helps!
about/indexservices/indexwork/indexNOTE: We’re not doing this on
contact/indexbecause we don’t want to cache our{exp:email:contact_form}tag.
If you want to get more advanced with performance optimization, take a look at TJ Draper’s "Tuning For Performance" presentation from the EE Conference (both 2017 and 2018). You can watch the video here and follow along with the slides and resources here.
This tutorial is intended to be an introduction to building in ExpressionEngine (or just "EE") for those new to the platform. We'll cover the basics as we build a simple Portfolio style website using different methods, fieldtypes, etc. There are many ways to build sites in ExpressionEngine and many add-ons to help with this. However, in this tutorial, I'll only be using native EE functionality. If you are ready to extend your ExpressionEngine build, then there is a vibrant community that offers add-ons to extend functionality far beyond what we're going to cover here.
What we'll be building in this tutorial is a basic Portfolio site with a sitemap structured like this:
Where the Homepage looks like this:
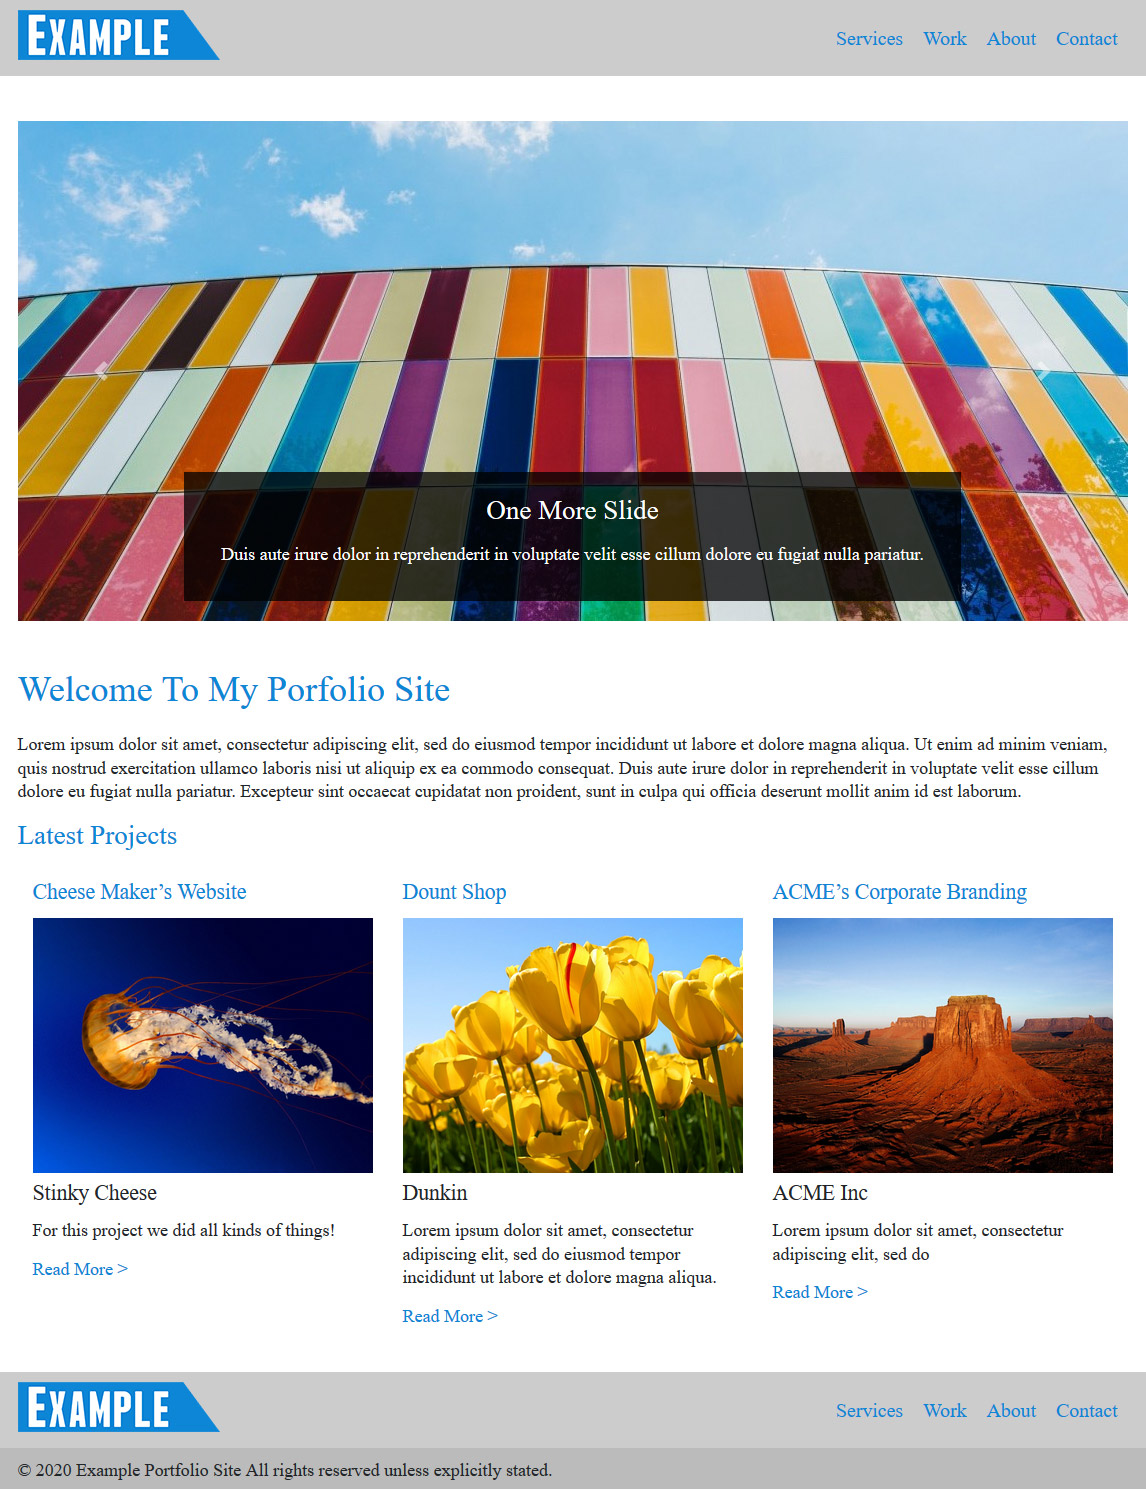
Again, we're focusing on getting the content output - the rest of the frontend work is up to you.
We'll set this up in such a way where the content editor will be able to add additional Service pages and Work entries and, of course, edit the content on the other pages as well.
With that all in mind, let's get started!
Before we start building anything, we need to consider the site's content so we know how to build out the content structure. But even before we do that, we need at least a high-level understanding of how content is structured in ExpressionEngine to plan the content model for this site. In Part 2, I'll give an overview of how ExpressionEngine thinks about content, which will help us in the following chapter where we plan our content model.
This course will walk through everything from installing ExpressionEngine to a complete site build. Great for beginners or anyone who needs a refresher.


In this video, we will walk through the initial steps of installing and configuring ExpressionEngine.
None in this lesson
In this video, we will walk through the creation of our first channel, Page, along with its fields and field groups.
None in this lesson
In this video, we will walk through creating our first template to view our new homepage.
url_title parameter{exp:channel:entries channel="page" url_title="homepage"}
<h1>{title}</h1>
<h2>{subtitle}</h2>
{page_content}
{/exp:channel:entries}
In this video, we will walk through setting up our blog channel and making use of the EE’s file field for our blog featured image.
None in this lesson
In this video, we will create our blog templates and use our file field in our loops.
url_title parameter{exp:channel:entries channel="blog" limit="3" dynamic="no" disable="categories"}
<h1>{title}</h1>
<h2>{featured_image}</h2>
{blog_content}
{/exp:channel:entries}
{exp:channel:entries channel="blog" url_title="{segment_3}"}
<h1>{title}</h1>
<h2>{featured_image}</h2>
{blog_content}
{/exp:channel:entries}
{!-- You can do it as one tag --}
<img src="{featured_image}" />
{!-- Or as a tag pair --}
{featured_image}
<img src="{url}" alt="{title}" />
{/featured_image}
In this video, we will convert our one file templates to make use of ExpressionEngine’s template layouts and partials
{!-- Our Layout--}
<!DOCTYPE html>
<html>
<head>
<title>My Site</title>
</head>
<body>
{layout:contents}
</body>
</html>
{!-- Our code --}
{layout="template_group/template"}
<p>Hello world!</p>
{!-- Our Layout--}
<!DOCTYPE html>
<html>
<head>
<title>{layout:title}</title>
</head>
<body>
{layout:contents}
</body>
</html>
{!-- Our code --}
{layout="template_group/template"}
{layout:set name="title"}This title will show up now!{/layout:set}
<p>Hello world!</p>